 For my first ever taste of ice cider, I picked up a bottle at the local wine shop during a typical all-day New England snowstorm on my way home from work. I was intrigued. I like icewine, and I like hard cider — so ice cider seemed like the best of both worlds. The label on the bottle instructed me to “serve well chilled,” so, like a typical Vermonter, I slid the tall, slim 375-mL bottle up to its neck in a snow bank outside my front door on my way into the house and let it cool down outside as I headed inside to make dinner.
After dinner, my roommate and I rescued the bottle from the blizzard, uncorked it and poured two small tastes. “It looks a lot lighter than I thought,” she remarked at the bright amber-gold color. “Smells like a cold apple orchard,” I responded. We took a sip. Tart but sweet, the chilly dessert wine burst with a complex apple cider flavor that permeated my mouth and lingered on my palate. “Yum,” my roommate said with a smile. “Yum, indeed,” I answered back with a few nods. And with that first sip, I had to know more about ice cider.
Originally from Québec, where it is known as cidre de glace, ice cider is made from sweet juice extracted from frozen cider, just as icewine is made from the juice from frozen winegrapes. Christian Barthomeuf, the owner of Clos Saragnat and the cidermaker at Domaine Pinnacle, both located in Frelighsburg, Québec, is credited with making the first ice cider in the early 1990s.
Unlike hard cider, which is simply fermented fresh-pressed apple cider, ice cider is fermented from the sugary solution of the fresh-pressed apple juice that has been separated from the water in the juice by freezing it. This can be done either naturally by leaving the fruit on the trees to freeze and then pressing the juice from the frozen fruit, or by freezing juice and separating the concentrate from the ice (known as cryoextraction).
The concentrate, because of its sugar content, has a higher freezing point than water. When the cider is frozen, the concentrated juice is separated from the ice crystals, inoculated with wine yeast and fermented. (Icewine-style wine can also be made by freezing fresh juice, but only on the amateur scale as commercial icewine is strictly regulated. For more information about making your own icewine at home, see “California Icewine” in the October-November 2009 issue of WineMaker.)
To figure out the process for making ice cider on a home winemaking scale, I contacted Eleanor Leger, co-owner and cider maker at Eden Ice Cider Company in West Charlestown, Vermont for some advice. My first question was, is making ice cider on a small scale possible? Of course! It turns out, Eden’s first ice cider trials were made using 5.0-gallon (19-L) polyethylene terephthalate (PET) carboys, which they filled with cider, left out in the Vermont winter to freeze, and flipped upside down to extract the concentrate. “I think I can handle this,” I thought.
Start with Cider
First and foremost, for home winemaking purposes, the easiest way to make small batches of ice cider is to freeze fresh-pressed cider since not many home winemakers are equipped to press apple cider, especially from frozen apples. In other words, the freezing process will occur after the juice has been been pressed from the apples, but before fermentation takes place. Eleanor explained that you can make ice cider from any kind of cider apples, but you don’t need to overthink the varieties.
“For hard cider aficionados, it is tempting to use lots of cider apples,” she explained, referring to some of the heirloom varieties that go into commercial artisan hard ciders, “but I would use those judiciously in ice cider as it would make it bitter, and that’s something you really want to avoid.” Whatever your local orchard is pressing into their sweet cider should work for your own ice cider. You can always experiment later with different varieties if you would like. One caveat — be sure that the cider you use is not pasteurized. Think of your cider like fresh pressed grape juice — you don’t want it to be heated — it will change the character and flavor of the juice.
A local orchard will very likely be willing to sell you fresh-pressed or UV-pasteurized cider if you contact them ahead of time. (UV pasteurizing is a heat-free process that exposes a thin film of juice to ultraviolet light that kills pathogenic microorganisms).
Equipment and Space
For every 5.0 gallons (19 L) of cider, you will get about 1.25 gallons (4.7 L) of cider concentrate, so plan your fresh cider processing and equipment accordingly. For example, if you want to make 5.0 gallons (19 L) of finished ice cider, you will need to start with 20 gallons (76 L) of fresh cider. Not everyone has that much space, enough carboys or the right equipment for that amount of raw product, so keep that in mind as you plan your first batch. Your home winery may be better suited to make smaller batches. In addition to PET carboys or plastic buckets for freezing the cider, you will need a primary fermenter with an airlock that can accommodate your concentrate with a minimal amount of headspace, depending on your batch size. (Do not freeze the cider in a glass carboy or jug as this can crack it.) You will also need a refractometer that can measure from 20 to 60 °Brix. This can be a challenge to find, but two refractometers that can cover that range will also work. You will also need a hydrometer, a racking cane and tubing, a means to test for sulfite and total acidity (TA), and a supply of 10% sulfite solution — just as you would for winemaking. (Directions for a suitable solution can be found in the recipe for making Grenache wine on page 24). You may also want some kind of inert gas, such as nitrogen or CO2, to keep your container topped off and prevent oxidation. Cleanliness and sanitation are also just as important here as in any winemaking effort.
Freezing the Cider
Space and equipment is also an issue for freezing the fresh cider. Probably the easiest way to freeze the cider is in a PET carboy, which will be the easiest to lift and handle so that you can turn it over and collect the extract in another container as it comes out of the neck. (Be sure to leave space for the juice to expand when it freezes. Somewhere around 4.5 to 4.75 gallons/17 to 18 L should be fine). Therefore, you will need a means to freeze at least one 5.0-gallon (19-L) carboy — or more if you plan to make a batch larger than 1.25 gallons (4.7 L). In cold climates, this is easy and the obvious reason why they make ice ciders and wines — you can put the carboys outside to freeze. If you aren’t in that kind of climate, you will need to find a way to freeze the cider solid, such as a chest freezer. According to Eleanor, a typical 5.0-gallon PET carboy filled with cider will freeze solid in a week at 25 °F (-4 °C), and a chest freezer will be much colder and faster. To be sure your cider is frozen, move or shake the carboy to see if there is any liquid movement. If there is no movement, the cider is frozen.
Extraction
Once the cider is frozen solid, you can begin to slowly melt the cider to separate the ice from the extract. This is easily achieved by inverting your carboy over a sanitized container to collect the extract. This is where you will need your refractometer, and you will also need to know your target Brix before you start melting. Eleanor explained that Eden follows Québec’s guidelines for making ice cider, which requires the pre-fermentation sugar concentration must be at least 30 °Brix. At home, shoot for a range between 30 and 40 °Brix, depending on what style of finished ice cider you would like to make. In Eden’s guide for making commercial ice cider (see page 58 for more info), Eleanor explains that, just like winemaking, “The higher the starting Brix level of the cider concentrate, the greater the residual sugar and alcohol potential of the final product.
Using the rule of thumb that 1% sugar by weight converts to 0.55% alcohol, 30 °Brix means that an ice cider with the minimum 13% residual sugar will have at most (30-13)*.55 = 9.35% alcohol. Starting with higher Brix means you can produce an ice cider with more residual sugar and/or more alcohol.”
Keep in mind, however, that even though you will measure a high potential alcohol, the yeast will start struggling and stop fermenting anywhere between 9 and 12% alcohol, depending on the initial sugar content. The high Brix content causes a lot of osmotic stress on the yeast. This is important because if you are considering shooting for something like 12%, you might not be able to achieve that. Usually anything over 36 °Brix is asking for trouble.
When the cider starts to melt, begin taking samples with your refractometer as it flows into the sanitized collection container. (A refractometer is the best tool for this test as it requires only small samples as opposed to a hydrometer). As the ice melts, the Brix levels will change, so shoot for that range of 30 to 40 °Brix. You can collect extract down to the high 20s in Brix as long as you have a sufficient amount collected in the 40s. Keep measuring the bulk of what you have collected with a hydrometer to be sure you are meeting your target.
You can also test for acidity at this point. Eleanor says that Eden shoots for a higher total acidity in their finished ciders than most — 1.2 to 1.4%, but because apples are high in acidity, they don’t have to add acid. Regular sweet cider from your local orchard will have a lower acidity than Eden’s because Eden uses a specific blend of higher-acid apple varieties, but you as the winemaker can decide what acid level you prefer based on taste.
Fermentation
Once you have your extract collected and tested, you are almost ready to ferment. Eleanor explains that you can use a variety of winemaking yeasts for ice cider — Eden uses a Riesling strain, and Champagne yeasts also work well. She cautions strongly, however, against using any strains of Saccharomyces bayanus yeast, which are commonly used for cidermaking. This is because, unlike making hard cider, in ice cider you are going to stop fermentation at a certain point to retain some residual sugar, whereas a hard cider is fermented to dryness. Bayanus strains, she says, are notoriously difficult to stop, and can even restart after you have purposely stopped fermentation. Also, be sure to allow your extract to warm up to pitching temperatures before adding your yeast. The extract is colder than freezing, and it is not unusual to measure extract temperatures at around 22 °F (-5 °C) when it is first collected. Let it warm up to just over 55 °F (13 °C) before adding any yeast, otherwise you risk inhibiting the yeast. If your extract is not already collected in a sanitized primary fermenter that will accommodate the liquid with a minimal amount of headspace, transfer it.
A note before pitching the yeast: fermenting ice cider is similar to making any sort of wine. However, apples don’t tend to have a lot of yeast available nutrient (YAN), so adding yeast nutrients is very important, even with wild yeasts. Eleanor recommends using Go-Ferm Protect from Lallemand. (Be sure not to confuse this with the similarly-named Go-Ferm. Go-Ferm Protect is specifically designed for difficult fermentations). Follow the manufacturer’s instructions. This is a rehydration nutrient, so it needs to be hydrated, then the yeast is added to it, then the mixture is pitched into the juice.
Some cidermakers add pectic enzyme to their cider at this point to prevent haze in the finished product. Eleanor says that she does not use pectic enzyme in Eden’s ice ciders because of the long, slow process of fermentation, followed by filtering, but you may choose to add pectic enzyme if you would like. There is no wrong decision.
Once the yeast is added to the cider extract, monitor the temperature of the fermentation to maintain a range of 55 to 60 °F (12 to 16 °C). It should take around three or four days to see signs of fermentation. If the temperature of the fermentation gets too warm — more than 62 °F (17 °C), cool it back down. If the fermentation gets too hot, the ice cider will ferment too quickly, which will not only change the flavor characteristics of the finished cider, it will also make it more difficult to stop the fermentation.
Take measurements from your fermentation every few days. Once the lag period is over and fermentation is underway, the cider should fall one to two density points per day — you don’t want the gravity to fall too far too fast. For example, if you read 35 °Brix (1.150 S.G.) one day, you want to see something in the range of 34 °Brix (1.148 S.G.) the next day. If it is falling faster than that, cool the fermentation down a few degrees.
It will take at least six to eight weeks to reach the point where you will want to stop fermentation, so you will need to find a place in your home winery where you can maintain a constant temperature (i.e., no ups and downs) for that amount of time. Be sure to prevent oxidation as the fermentation slows down by topping up with inert gas, and always use sanitized equipment to test.
Once your readings come into range for the amount of residual sugar (RS) you would like — Eden’s flagship ice cider is 14% RS, 11% ABV — it is time to stop the fermentation. Eleanor says, in her opinion, the best way to stop it at this point is to add some sulfites and make it cold again. When the ice cider is at this point, the environment is already fairly hostile for the yeast, so a cold temperature, around 25 °F (-4 °C), with a dose of sulfite to protect the wine (30 ppm free SO2) should stop the yeast within a day. The yeast will fall to the bottom and you can rack it off the lees. After that first racking, keep the ice cider in the cold temperatures for another two or three days, rack it off again and it should be fairly stable. You will also filter before bottling and aging (read on), which will further stabilize the cider. Again, be sure to prevent oxidation at this end stage.
Bottling and Aging
At this point, you are ready to filter your cider and bottle, or you can age in oak before bottling. Commercially, ice ciders are frequently sterile filtered before they are bottled to be sure they are stable, and you can filter at home, too. Otherwise you run the risk of refermenting in the bottle and yielding fizzy ice cider (or worse, exploding bottles). Most home winemakers are not equipped to sterile filter, but you can filter down to the lowest possible pad rating you are able to get for your home filter. You can filter at home either with the small plate filters, such as the Buon Vino models, or you can use a vacuum-style filter, which can also help degas the finished ice cider. It is not a bad idea to add sorbate before bottling. You may also choose to experiment with oak, which can add some spiciness and tannin. Just be sure to prevent oxidation by topping up with inert gas if you age in a small barrel or top up your carboy if you use an oak alternative. Once your cider is in the bottle, if you did a good job of preventing oxidation, your ice cider should be good for about five years, and will be best in the first two to three years.
Serving and Pairing
Ice cider, like ice wine, is an excellent dessert wine. In Québec they are also very commonly served with a cheese course, and pair very well with aged cheddars and blue-veined cheeses. Ice cider is excellent paired with apple-based desserts, crème brûlée or even savory dishes such as duck or pork terrine, and of course . . . foie gras. And don’t forget, serve your ice cider well chilled!

The first sparkling wine I ever made was a black cherry. It was supposed to be a semi-sweet still wine, so when I opened the first bottle at a social event, I was both surprised and disappointed by the profuse eruption of bubbles. My guests, however, were not disappointed, but suggested it would have been better served chilled. I suspect many sparkling wines have been made unintentionally, but here we will focus…
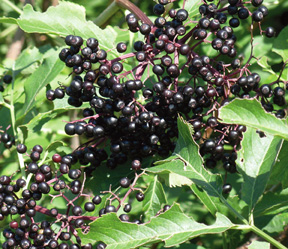
Sometimes referred to as the “Englishman’s grape,” the common elderberry has been used to make wine for hundreds — possibly thousands — of years. By themselves, elderberries make a rich, flavorful wine, but they have long been added to other fruit and berry wines, including grape, to add color, tannin and complexity. Indeed, over the years, several “scandals” occurred when commercial wineries were discovered to have adulterated their grape wines by adding…

