In the old days of winemaking, equipment came in many shapes and sizes. An old pickle crock here, a discarded water jug there and maybe some whiskey barrels that fell off the back of a truck — this was the equipment that homemade wine was made in.
Today, you don’t have to borrow Grandma’s pickle crock. With the advent of modern materials and advances in technology, an impressive range of choices is available for the home winemaker. And with these better choices comes better wine. But to make good wine, you need the right equipment.
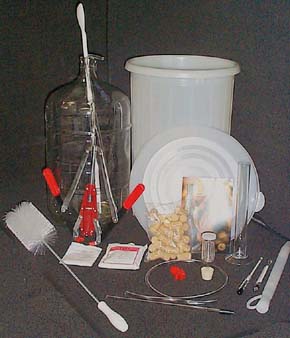
The simplest way to accumulate your gear is to buy a complete equipment kit. These kits contain most of the essentials for your first batch. Or you could collect your home winery piece by piece. Either way, the following equipment will get you started making wine from juice, concentrate or kits.
Primary Fermenter
The basic wine fermenter is a 7.5–12 gallon (30–46 L) food-grade plastic container. It should come with a cover that allows you to attach an air-lock. Even though the volume of wine made in your kit is only 6 gallons (23 L), you will need the extra fermenter volume to deal with foaming during primary fermentation. Trying to use a 6-gallon pail for primary fermentation, or a 6.5-gallon carboy, is a short route to disaster. If you make the kit to the full volume, it will foam over onto the floor. If the kit contains oak powder, elderflowers or other additives in suspension, you could have a scale-model volcano on your hands.
Don’t re-use other food containers as a wine fermenter. Some 7.5-gallon pails, commonly available used from food service companies, have held pickles or salad dressings. The aromas and flavors of the food will have sunk in the plastic and will contaminate your wine. If you already have a bucket from beer making, don’t use this for making wine either. Hops from the beer can sink into food-grade plastic, and nobody likes a crisp, hoppy Zinfandel.
Also, use only food-grade plastic containers. Garbage cans, and other plastic containers, have petrochemical or metal-based plasticizers and coloring agents. Your wine will leach these out. In addition to changing the flavor of the wine, these compounds could make you ill.
The best way to find the six-gallon mark is to take your six-gallon carboy (below), fill it with water right up to the neck and then dump it into your primary fermenter. Wait for the water to stop sloshing around, then mark the fermenter with a permanent marker.
Carboy
A carboy is a six-gallon (23 L) bottle-shaped container made of glass or food-grade plastic. This is where your wine goes after primary fermentation. As with choosing a primary fermenter, getting the right size carboy is crucial. Get a carboy that holds the entire volume of your wine with little or no space left over. You could scrimp by splitting the must between a 5-gallon carboy and a one-gallon jug, but this makes complying with the manufacturer’s instructions much more complex, as you would have to split up additions of acids and fining agents.
The 6.5-gallon carboys — widely available at homebrew shops — are unsuitable. They leave too much headspace above the wine, which leads to oxidation and spoilage.
Plastic or glass are equally appropriate materials for a fermenter. Glass is easier to clean because you can see where it’s dirty. It’s also more fun to watch. However, plastic is generally cheaper and lighter … and I’ve never, not even once, seen a dropped glass carboy bounce.
Airlock and Rubber Bung
A bung is a slightly-tapered rubber stopper with a hole in it. The airlock fits into it and helps to form a valve that seals the carboy. The airlock prevents oxygen and spoilage organisms from entering, while allowing fermentation gas to escape. For the most part, glass carboys take a #6.5 bung while plastic fermenters use a #11. Before purchasing a bung, check to make sure it will fit your fermenter.
The airlock must be half-filled with water and attached to the carboy. Some people fill the lock with sanitizing solution, and this works too.
Siphon Hose
A siphon hose is six feet (1.8 m) of food-grade tubing attached to a rigid acrylic rod, with a spacing tip on the end. The siphon hose is used for transferring wine from one container to another while leaving the sediment behind. The rigid rod prevents the tubing from collapsing when draped over the edge of the pail or carboy. The spacing tip on the end of the rod prevents the siphon action from sucking sediment up off the bottom of the pail or carboy. When the hose gets stained from repeated use, throw it away and get a new one. The soft vinyl is difficult to clean properly, and hoses are cheap to replace.
Siphon Filler
While it’s possible to fill bottles by pinching the end of the hose to stop the flow, a siphon filler makes this a much neater, faster operation. A siphon filler is an acrylic tube with a needle valve on one end; this slips over the end of the siphon hose. The wine will only flow when the valve is pressed against the bottom of the bottle. You can then withdraw the filler and spill only a few drops of wine before moving on to fill the next bottle.
Floating Thermometer
Good thermometers are essential for ensuring that your must is at the right temperature for fermentation. They’re also useful for checking the temperature of your fermentation room. The most convenient floating thermometers feature a plastic cap with a ring on top. This allows you to tie a string to them and drop them into the carboy to check the temperature of the fermenting must. The thermometer can then be hauled out by the string.
There are also stick-on liquid crystal thermometers, such as the Fermometer, that resemble a strip of plastic with temperature readings on it. Like that scourge of the 70s, the mood ring, the appropriate temperature number will change color to match the heat of the must. Simply stick these to the outside of your carboy and in minutes you’ll have an accurate reading of the must inside.
Winemaking thermometers don’t contain mercury, but they do contain volatile chemicals, like toluene. If you break one into your must, discard the batch immediately.
Probe-type metallic thermometers — like meat thermometers — don’t break easily, but the inexpensive ones tend to be less accurate. Check them against a good-quality glass thermometer before use.
Hydrometer
Looking much like a glass thermometer, a hydrometer measures specific gravity and is used to monitor the progress of fermentation. A hydrometer consists of a glass tube with some steel shot sealed in the base, and a strip of marked paper on the inside. Just as a human body floats higher in the ocean because of the salt dissolved in the water, a hydrometer floats higher in must because of the dissolved sugar. As the yeast eats the sugar and makes alcohol, the hydrometer will sink lower and lower. By measuring the progression of this sinking, you can accurately track your fermentation. The test jar is a clear, tall, footed tube. Fill it with a wine sample using the thief (described below), drop in your hydrometer, and you will be able to easily read the results.
Wine Thief
No, a wine thief is not your thirsty brother-in-law. A wine thief is a hollow glass or plastic tube with a hole in each end. Once sanitized, it is used for removing samples from the carboy. Poke the pointy end below the surface of the wine, and allow the tube to fill. Once it reaches the desired level, place your finger over the top and keep the thief upright as you move it to your sample container. (If you tilt it, it will dribble). Some people use a turkey baster, but the soft rubber of the squishy part is difficult to keep sanitary — remember, everything that comes into contact with your wine has to be sanitized — not to mention the potential for gravy contamination.
Spoon
Your winemaking spoon should be stainless steel or food-grade plastic, approximately 28 inches (70 cm) long so it can reach all the way to the bottom of the carboy and fermenter. The best ones are made of polycarbonate plastic, the same stuff in riot shields and motorcycle helmets. They won’t break even with vigorous stirring, and wine kits require lots of vigorous stirring. What if your spoon is too big to fit in the neck of your carboy? Turn it upside-down, sanitize the handle and stir with that.
Wooden spoons are useful for cookie batter and applying correction to bratty future winemakers (thanks, Mom), but they aren’t appropriate for winemaking as they tend to harbor bacteria and wild yeast.
Wine Bottles
You will need thirty 750 mL bottles to bottle six gallons (23 L) of wine. If you’re going to save bottles instead of buying them brand new, you’ll need to clean them rigorously.
A word on screw-cap bottles: The glass in the neck of these bottles is too thin to take the strain of an expanding cork and easily shatters under corking pressure. The screw caps themselves are not designed for re-use, and often won’t seal correctly.
Corks
You’ll need thirty corks, of the standard #9 die size, for your wine bottles. Make sure you get them fresh from a shop with good storage and good turnover. How long should your cork be? Which cork is right for you? Look realistically at how long you expect to store your wine before drinking, and figure out how much cork fits in your budget. The cheapest cork isn’t always the best deal, and if you do decide to keep some bottles for the future, you may find yourself having to re-cork them in a few years. Conversely, if you are making a wine kit you intend to drink within the next three months, a very long cork might be a waste of money.
Another thing that comes in to play when choosing a cork is the bevel. This is the tapered edge that some of the less expensive corks have around the top and bottom of the cork. This allows easier insertion with hand-held corkers, and prevents the edges of the corks from chipping during shipping and storage.
The thing to remember is that the bevel actually reduces the amount of surface area in contact with the neck of the bottle. This contact is what prevents the passage of wine past the cork. If you have a 1.5-inch long cork, but 1/4 inch is bevelled off of each end, it is effectively only 1 inch long.
If you wind up with some wacky flagon bottles, like Portuguese Mateus bottles, they require a #8 die-cut cork, not available everywhere. Save these bottles for sticking candles into to match your red-and-white tablecloths!
Corker
You may be able to borrow a corker from your local winemaking shop for a nominal charge. Some offer the use of it free with the purchase of a kit. The twin-handle, hand-operated units work tolerably well, but the larger floor corkers are head-and-shoulders above them. While more expensive, they use mechanical advantage and a set of interlocking jaws that “iris” shut to carefully compress the corks and insert them precisely into the bottles. They also hold the bottles steady in a spring-loaded base. They are a little difficult to describe, but are really worth the extra money.
Impact corkers and single-handle models crush corks so badly that they require soaking the corks to mush before they can be used. This is not conducive to a good cork seal.
Measuring Cup
A 500 mL (2 cup) measuring cup is useful for mixing and measuring, dissolving additives and similar tasks. A cup made from borosilicate glass, such as Pyrex, is useful if you need to dissolve anything in boiling water.
Brushes
Carboy and bottle brushes are good for scrubbing goo out of narrow-necked vessels. Sturdy brushes are essential for cleaning chores.
Optional Equipment
There are many pieces of equipment that, while not absolutely necessary, make winemaking much easier. A bottle sprayer is an attachment that screws onto your kitchen sink. It will blast water vigorously all the way to the bottom of your carboy, helping dislodge gunk and rinse away cleaners and sanitizers. A bottle tree will hold your bottles upside-down in a very compact space, useful for draining and storing them (when they’re upside-down, dirt and dust can’t settle inside). Finally, bottle labels can help you distinguish between different batches of wine and add a touch of class.
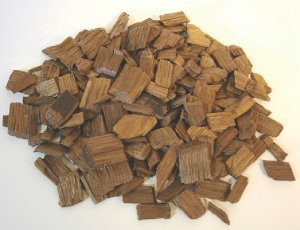
A song to the oak, the brave old oak, Who hath ruled in the greenwood long; Here’s health and renown to his broad green crown, And his fifty arms so strong. There’s fear in his frown when the Sun goes down, And the fire in the West fades out; And he showeth his might on a wild midnight, When the storms through his branches shout. — Henry Fothergill Chorley “The Brave Old…
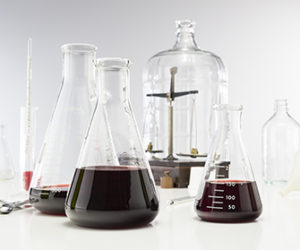
Whether it is just the basics (Brix, pH, etc.) or more advanced (free SO2, yeast assimilable nitrogen, etc.) all home winemakers should perform some tests to monitor their wines.

