
The first “wine kits” sold in North America were bricks of compressed grapes, shipped to eastern states from California during prohibition. Home winemaking was as illegal as any other alcohol producing activity under the 18th amendment, so these helpful raisin bricks came with stern instructions. “Do not add this to five gallons of warm water”, they stated, “and do not add ten pounds of sugar, and yeast, or it will become wine, which would be ILLEGAL!” It was a tough and funny time to be a home winemaker. Still after the repeal of the act, there was a void for winemakers looking for a convenient, foolproof way of making wine at home.
We’ve come a long way from the raisin bricks of the 1920s, tothe work of entrepreneurs like Stanley Anderson of Wine-Art. In the 1970s, Anderson invented the modern wine kit by assembling cans of concentrate and packets of acid, tannin, nutrient and yeast. Other industry pioneers include Doug and Ross Tocher of Brew King, who, in the late 1980s, began blending concentrate with fresh varietal juice to produce superior wine.
These days, wine kits are sourced from vineyard all over the world. Using high-quality juice and concentrate, you can make Chardonnay from California, Shiraz from Australia or Cabernet Sauvignon from France. Today’s top kits produce balanced wines with good character and varietal identity. Long-term contracts with excellent vineyards, “just-in-time” inventory management and close work with growers and brokers mean that the quality of the kits gets better every year.
Still many home winemakers wonder if they can improve their kits right at the carboy. Some books advocate additions and manipulations, others propose different ways of processing. But wine kits respond best to good winemaking practices, rather than quick fixes or manipulations. By treating your wine kit as you would fresh grape must, you can use all of the techniques that professional winemakers use. Along with these good practices, there are a few pitfalls you will need to avoid. Here are a dozen tips to help you make great wine from a box.
1) Keep Good Records
Like any hobby you tackle, you’ll be able to replicate your successes and avoid your failures by keeping records of both. Get a notebook for winemaking (a plastic cover is a good idea!) and track the type of kit, the code number, the date it was made, specific gravity, temperature, and any variations in your technique or measurements.
The code number is very important. Manufacturers put a production code on every kit, and while they may seem a meaningless jumble of numbers when you write it down, it’s the first thing your retailer will need to know if you have any problems with your kit. Most instruction sets have spaces set aside on them to record this information, so you may simply want to hole-punch the instruction sheet and keep it in a binder.
A good follow up is to write down your impressions of the wine as time passes: a few tasting notes can help judge how the wine develops in your cellaring situation, and will refresh your memory if you’re trying to decide whether or not to make this wine again.
2) Carpe Diem (Seize the Day!)
The instructions that come with the kits are designed to produce good wine in 4 to 6 weeks. With more time (and less effort) you can produce great wine. By relying on specific gravity readings to guide your racking from the primary fermenter to the carboy, or to a clean carboy, rather than simply following the recipe for a set period of ‘days’, you can make noticeable improvements in your wine. Of course, all the kit instructions ask you to do this anyway, but not many people follow through.
Instruction sets have a set period for each phase of winemaking usually something like 7–21–28 (7 days in the primary, 14 days secondary, add stabilizers and finings, and bottle 7 days later). A better sequence would go something like 5–20–40–90 schedule.
The 5-day primary fermentation period is arbitrary. Good winemaking techniques normally dictate transferring to the secondary once the danger of foaming through the airlock has subsided, so monitor the fermentation (the specific gravity should be less than 1.010 in most cases) and rack when the most vigorous bubbling is finished. As an alternative, if you have a 6.5-gallon (25-litre) carboy you may wish to conduct the primary fermentation there, under an airlock. Be wary, however, of oak powders or other additives that may foam up and clog the bung, possibly resulting in a messy spray. There are other schemes, such as using two five-gallon carboys, but however you do it, please ensure that the kit is rehydrated to the correct volume before pitching your yeast (more on this below).
Fifteen days after racking to the secondary test the gravity, rack, fine and stabilize, then leave the wine 20 days to finish settling. Test the gravity, rack again and leave a further 50 days before bottling or bulk aging. (Bulk aging is holding the wine in the carboy for an extended period. This replicates bottle age, with the side benefit that it gives a very long period for the wine to finish clearing on it’s own.)
Conscientious topping up and careful attention to sulfite levels will prevent oxidation in the carboy over this period. Once the 90 days has passed, you can go to a solid rubber or silicone bung instead of a bung and airlock, to further reduce the chances of oxidation. Most white kit wines will be ready to bottle after 90 days, but the heavier reds will improve for at least a further 90 days.
There comes a point of diminishing returns, however, and a bottle is a perfectly good place to age wine as well. If you’re stuck for fermenting and storage space, go ahead and bottle after the 90 day period, but remember to try and hold your wine for at least three months before sampling it. It will be worth the wait!
3) Whip It! Whip It Good!
The one thing you don’t want to change in the instructions is the mixing and stirring of the kits. To make a properly balanced wine, you need to stir the full 6-gallon (23-litre) volume (again, more on this below) vigorously, prior to pitching the yeast. This is crucial: the concentrates are so viscous that they don’t actually mix easily with the added water. Indeed, unless the must is well whipped, it will stratify, with the top layer being very dilute (often below specific gravity 1.050) and the bottom layer extremely concentrated (sometimes above specific gravity 1.100). Not only would this throw off any attempt at a specific gravity reading, but the top stratum will ferment readily, until the yeast is exhausted, while the bottom layer will not ferment successfully at all. This will leave a weak tasting wine, low in alcohol and high in residual sugarænot a desirable result.
4) Analyze for Quality
Taking accurate measurements will allow you to chart the progress of the fermentation, and to make reasoned additions of stabilizers and any other blending materials you would like. Also, whenever you do make an addition or adjustment to your kit always follow the procedure of test-add-test, to confirm that your adjustment has had the desired effect. Like the tailors say, ‘Measure twice, cut once.”
Unfortunately, space in this article doesn’t permit a full discussion of testing procedures and specifications. For a more in-depth discussion of these, consult a good winemaking handbook. In particular, Daniel Pambianchi’s ‘Techniques in Home Winemaking’ has an excellent chapter on analysis and testing.
Examples of measurements that are useful include
- Hydrometer readings for charting the progress of fermentation and calculating the alcohol content. Calibrate your hydrometer by putting it in distilled water at 60° F. It should read exactly 1.000. If it doesn’t, you either need to get a new hydrometer, or apply a correction to every reading (i.e., if your hydrometer reads 0.004 high at 60°F, add 0.04 to every subsequent reading taken at 60°F.)To calculate potential alcohol, take the original gravity of the must and subtract the gravity of the finished wine, and multiply that number by 131. This will give you the percent alcohol by volume. For example, if you started out with a gravity reading of 1.088 and had a finishing gravity of 0.998, the difference between the two would be 0.090. Multiply that by 131 and you get 11.79 or roughly 12% alcohol by volume.
- Post-fermentation acid testing
Typically the acid in white wine kits is between 5.5 and 7 grams per litre, and between 5 and 6.5 for reds. You may wish to increase the acidity if you are sweetening the wine post-fermentation, or if you prefer a ‘snappier’ flavor. Acid testing cannot be done in a pre-fermentation wine kit, as the acids are bound to the sugars in the must by the pasteurizing process, making the readings artificially low. If you are making an acid addition, one tablespoon (15 ml) of tartaric acid weighs approximately 4 grams when dry. It’s much better to use a gram scale when making these additions, however. - Measuring the level of sulfite in your wine
Kit additive packages generally contain 1.5 to 6 grams of sulfite, yielding somewhere between 15 and 60 PPM of free SO2 at bottling. Unless you have poor storage conditions, 60 PPM is on the high side, and even with good storage 15 PPM is on the low side. Rather than rely on the sulfite powder that comes with the kits you can measure your sulfite levels and make accurate additions based on your results (for further information, see ‘Solve the Sulfite Puzzle’, WineMaker, Winter 2000). This is especially important if you are changing the kit timeline, as above, adding extra rackings and increasing the aging time. Although pH testing can be done on post-fermentation wine kits, it isn’t necessary, as the kits are all adjusted below a pH of 3.5, and are strongly buffered against change. As with acid testing, pH tests on pre-fermentation kits will not be accurate, in this case due to the influence of the concentrating process.
5) Manipulating Specific Gravity for Fun and Profit
Many home wine kits start with a specific gravity of 1.080 or less. This leads to alcohol contents below 12%, and generally speaking, soft wines that age easily and drink well while young. This isn’t a bad thing, given that many people make wine kits intending them for early consumption, but if you wish to cellar the wine, you can increase the starting specific gravity to produce a higher potential alcohol, and a more balanced finished product. You will need to determine whether this is appropriate in all cases: a 15% Piesporter isn’t going to impress anyone, and will never be well balanced, but a Zinfandel with a potential alcohol of 11.8% could benefit from a modest increase.
A pound of sugar made up to one gallon with water will give a specific gravity of about 1.042. A pound of sugar dissolved into a 6-gallon batch will increase specific gravity by about 1.007. This will yield about a 1% increase in the alcohol percentage.
Two caveats to manipulating the specific gravity of your kit: first, don’t add more than two pounds of sugar in total, as this could lead to unbalanced, hot, alcoholic characters (sounds like the personae of an Irish novel!) and weakened fruit character. Of course, this depends heavily on the style of kit: if a 10% Piesporter doesn’t suit you, you’re better off making a more highly alcoholic style, such as Chardonnay, as opposed to increasing the alcohol content. Of course, always test-add-test to make sure you’ve accomplished your goal.
There is another way to increase the starting gravity of the kit without adding sugar, by making the volume up to 5 gallons (19 litres) instead of 6 gallons (23 litres). This would seem to be even more attractive when you consider that almost everyone has 5-gallon carboys, not six, and beer brewers use 5 gallons as their standard.
The problem with this sort of manipulation is that it makes rough, unbalanced wine, with plenty of power, but no finesse or elegance. The finished wine takes a very long time to age to drinkablity, and few people can manage more than a couple of glasses before the acidity and tannins catch up with them.
By deleting 20% of volume of the kit, you increase the acidity, tannin and total solids by 20%. Yes, this makes a stronger wine, but think of making frozen concentrated orange juice: does leaving out half the water make ‘better’ orange juice, or just thicker, sweeter, stronger juice?
There are other considerations as well: the wine will take longer to ferment, and may not clear well. Some high specific gravity kits (typically ones that emulate styles such as Amarone or ‘big’ Chardonnay) already start with a specific gravity in excess of 1.100. Failing to dilute them correctly will give them a starting specific gravity so high that they will quit fermenting with several percent residual sugar, resulting in hot, sweet wine — not everyone’s cup of tea!
People who are attracted to this technique would be better served by using a higher-quality kit instead. The juice/concentrate 6–week kits contain single-strength grape juice and very flavorful concentrates. Smaller kits make good wine, but tend to express a little less character. The big kits are more money, but when you factor in that you are getting nearly 25% more (by making the full 6 gallons you get twenty-nine or thirty bottles instead of 24 or 25 bottles from 5 gallons), the difference – particularly the difference per bottle – is very low.
6) Choose Your Yeast, Select Your Temperature
In years past high fermentation temperatures were recommended for wine kits, due to the nature of the yeast used. Given that viability rates were low in packaged yeast, higher temperatures assured full attenuation. Nowadays kits come with some variation of high quality monocultural dried yeast, which will successfully ferment the product in a range of 60–80°F. By lowering the temperature of the must to around 60°F once fermentation has started you can retain more of the fruity aromas of the kit, and minimize ester production in the yeast, giving a cleaner, fruitier wine. Note that the lower temperature will result in longer fermentation times, so keep checking your hydrometer.
Further, the yeast in your kit was probably chosen primarily because of fermentation characteristics (clean, rapid, thorough attenuation) rather than for its ability to express character or enhance bouquet. By choosing a style of yeast suited to the type of wine you wish to make, you can enhance the flavor of the kit. There is information available from yeast manufacturers describing the characteristics of the various strains (in particular, some of the new liquid cultures are very good), and “The Strain Game” in the Fall 2000 Winemaker has an excellent review of popular yeast strains.
7) Take Your Time
One aspect of wine kits that manufacturers despair over is the notion that because they can be ready to bottle in 4 or 6 weeks, consumers assume they are ready to drink in that time. Nothing could be further from the truth. This merely describes the minimum processing time necessary to produce clear wine ready for bottling. Even the most basic 4-week kit will improve immensely with 3 months of age, and an juice/concentrate kit could shock you with the huge improvements it will show over a few years.
8) Go Light With Fining Agents
The fining agents used in the kits are normally chosen for their ability to clear the wine completely within the span of 7 to 14 days. This is an admirable goal most of the time, where the expectation is that the wine will be ready in 4 to 6 weeks, but it doesn’t allow for the longer fermentation and settling times that a dedicated winemaker is able to use. By extending the winemaking timeframe, the amount and types of finings can be substantially reduced.
A good philosophy behind fining use is that one should do the absolute minimum necessary to clear the wine. The kit may contain 3 ounces of bentonite, along with gelatin and silicon dioxide, but after a year of aging it may only take a half-ounce of bentonite and one-quarter of the amount of gelatin, or even just a single low-level addition of Sparkalloid to achieve brilliant clarity. Many times, after a year of aging the kit will not require fining at all.
For white wines, however, even if they appear brilliant in the carboy, it’s best to do a protein check on them. Remove a single bottle as a sample, and chill it near freezing. If it shows cloudiness or haze when chilled, it needs to be fined, either with bentonite or another protein-stripping fining. For a more thorough discussion of fining, see “The Fine Art of Fining”, WineMaker, (Spring 2000).
Trials can be conducted on the wine to determine which fining agents will work best. There are as many fining schemes as there are wine kit manufacturers, and each regards its fining process as the only one that worksæhowever, your experience should be your guide when adding finings. If you normally see good results with nothing more than a small dose of gelatin, then you will probably continue to experience success with it in your kits.
9) Filtering things out
Should you filter your wine kit? Yes, if you want to. For the most part, however, kit wines clear to complete brilliance without filtration. To see if your kit is brilliantly clear, take a sample glass into a darkened room and shine a flashlight through it. Don’t look into the light however: instead, look at the glass from the side, to see if the beam is visible as it travels through the wine. It could look something like a sunbeam travelling through a dusty room. If you can see the beam, the material in suspension may drop out later in the bottle, or may change the appearance or aroma of the wine over time. In that case, you should filter.
There’s a lot of talk about whether filtering ‘strips’ flavor or character from wine. In reality, wine kit manufacturers and filter companies do not provide filters fine enough to do any real stripping of wine to users in the home market. When a wine tastes different or flat after filtration, it’s due to ‘filter shock’. Some of the aromatic compounds in wine go into hiding after the jostling and shearing they are subjected to inside a filter pump. With a month or two of rest in the bottle, they come right back. For a much more detailed discussion of filtering, see WineMaker’s Winter 2000 issue.
10) Add Additives Early
Kits can come with a variety of pre-fermentation additives, such as oak powder, chips, cubes, chunks and strips, elderflowers and elderberries, as well as post-fermentation sweet-reserves and flavor boosters. By understanding the manufacturer’s intent behind these products you can choose whether you want to include them in your kit.
- Oak
Oak derivatives have come a long way in the last ten years. They are made from top-quality European and American sources of air-dried, toasted oak, as opposed to what some people suspect (i.e., sawdust and floor sweepings). By including them in the primary fermentation the wine changes the oak biochemically, transforming the more aggressive aromas and flavors, making them softer and integrating them into the wine, much in the same way that barrel fermentation does. It also increases the amount of polysaccharides (long-chain unfermentable sugars) which contribute to length on the palate and mouthfeel. You can add extra oak, leave it out, or change the toast level, according to your desires. You may even choose to add the oak post-fermentation to achieve a more assertive character. Keep in mind that the manufacturer will have included what their trials show to be an appropriate amount of oak to style. If you leave the oak out of your Australian Chardonnay, don’t be surprised if it seems excessively fruity, as the oak is there to balance very ripe grape characters. Likewise, doubling the oak in your kit could result in a finished product that tastes like extract of plywood. Let caution be your guide. - Elderflowers
Elderflowers are the flowering buds of the Sambucus Niger plant, a bush found in Europe. They add a flowery aromatic quality; desirable in some soft German-style whites. Whether you think this is a positive addition or not is up to you: it certainly enhances the bouquet of a Piesporter style wine. - Elderberries
Elderberries are the dried fruit of the Sambucus Niger. They take the place of red-grape skin contact, providing colour, aromatics and tannin. While this does give the wine a darker colour, it is slightly unnatural, and the flavors tend to be broad and plummy. Still, some people enjoy the character elderberries give to otherwise undistinguished wines.
11) Add Additives Late
- Sorbate
Most kits contain potassium sorbate. Manufacturers use this preservative to guarantee the success of their kits in a variety of sanitary conditions. Sorbate prevents the growth of spoilage organisms, which could alter the flavor and aroma of the wine as time passes. As an advanced winemaker, your sanitation should be good enough to ensure that no spoilage organisms would invade your wine. So, you have the option of leaving it out. Sorbate has a subtle, although definite sweetish taste. By leaving the sorbate out of the kit, we can improve the varietal character and finish.Keep in mind, however, that if the wine kit contains a sweet reserve or a flavor booster (F-Pack) you will certainly need to add the recommended sorbate, lest you experience re-fermentation in the bottle. Also, if you’re not completely assured of your ability to exclude spoilage organisms, and to maintain a correct sulfite level, you should add the sorbate. - Sweeteners and F-Packs
Sweet-reserves or wine conditioner is usually invert sugar and sorbate, and is designed to give a residual sweetness of between 1 and 4%. As an educated winemaker you can benefit from tasting the wine and making smaller trials with a portion of the sweet reserve before adding the entire amount.If you wish to sweeten the wine before bottling, pay attention to the minimum and maximum amounts specified on your wine conditioner bottle. Because wine conditioner is a sugar solution, it contains sorbate to help prevent re-fermentation in the bottle. Adding the at least the minimum recommended amount will ensure that the wine gets a sufficient level of sorbate to prevent any re-fermentation, while staying below the recommended maximum will prevent a sorbate flavor in the wine.Flavor boosters, (F-packs) contain natural grape concentrate and essences, to give a natural sweet flavor to the finished wine. This replicates the German tradition of Süssereserve, grape juice held back from the fermentation to sweeten the wine before bottling. For the most part, the kits may be formulated specifically to use these packs, and could taste unbalanced without them.
12) Extras, Extras!
- Tannin
One complaint previously leveled at many red wine kits has been that they lacked tannin, and thus were unbalanced and soft. With advances in raw materials processing (see sidebar), most of these concerns have been addressed. Indeed, adding extra tannin to the kit may have unintended side effects. Some red kits have a grape skin extract added to them as a color enhancer. Tannins will bind to this additive, pulling it out of suspension, leaving the wine a light pink colour. As this has a cascade effect, even more tannin will be pulled from the wine, leaving it very soft and flabby. The best approach is to choose a 6-week juice/concentrate wine kit, which will have more naturally occurring tannin in the first place. - Concentrate
In the past, to achieve higher levels of apparent extract and flavor, people have topped up their kit with extra concentrate, and as mentioned above, have also reduced the volume of water added to increase the apparent extract. Rather than manipulate a kit you find bland or lacking, it would be a better approach to choose a higher-quality kit that provides a richly flavored final product without manipulation. You really can’t make a silk purse out of sows’ ear, so try starting with silk first! - Grape Skins or Grapes
Sometimes grape winemakers make ‘second run’ wines, using either sugar-water or kits to make a must with the skins pressed from a red grape fermentation. Looking at it another way, the addition of pressed red grape skins to a red wine kit will make a large impact on not only the tannin level of the finished wine, but also on the colour and aroma. Five or ten pounds of grape skins can be fermented along with your kit, and simply scooped out when it comes time to transfer to the secondary fermenter (you may wish to press the skins, or squeeze them in a straining bag).For whites, adding the skins from a white pressing or a few pounds of varietal grapes to a kit for a period of 2-24 hours can make a very aromatic white wine with little extra effort. Press off or strain the skins after the soaking period and proceed as normal for the kit. The author has done this with Muscat grapes and a Gewürztraminer kit with excellent results. The drawback to this technique is that grape skins are only available in season. However, if you have room in your freezer, you could use them at your leisure (the skins will need to be frozen immediately after pressing if you’re not going to use them at once: they spoil very quickly). - Malolactic Fermentation . . .?
The addition of a malolactic bacteria to wine kits should not be attempted. This is due to the fact that most juices are tartrate-stabilized prior to concentrating or blending, and thus contain a very high proportion of malic acid. Malolactic fermentation would convert this malic acid to lactic, leaving a kit with a pH above 3.8, and a flabby, soft character. It would also be susceptible to bacterial infections.Also, there are some situations where a very small amount of sorbate may be present in juices or concentrates. Malolactic fermentation in the presence of sorbate yields hexadienol, which produces the strong and disagreeable odor of rotting geraniums – an unfixable and highly undesirable outcome! - Barrels
A complete discussion of the use of barrels in winemaking is beyond the scope of this article, but all of the positive qualities that an oak barrel can contribute to a grape wine apply to kits as well. A caveat is to monitor your barrels carefully: as discussed above, a barrel contaminated with malolactic bacteria could render your wine undrinkable. If you are going to put your wine into a barrel, remember to exclude the oak powder or chips that came with it, or you may wind up with ‘Chateau Plywood’.
Thinking Outside the Box
By simple application of good winemaking techniques (and avoidance of futile ones!) we can not only make decent wine from kits, we can make very good wine from kits. As the technology for juice and concentrate processing advances better product will be available. While home winemakers will always regard fresh grapes as the best source for fine wine, we have a viable alternative for making high quality wine, quickly and conveniently.
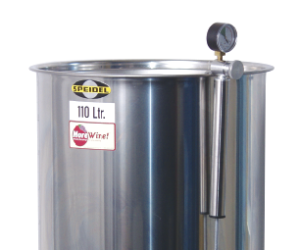
Variable-volume fermenters have a floating-lid that transforms these tanks into variable-capacity containers for fermentation as well as short- and long-term wine storage. Learn how to get the most of one in your home winery.

