Laboratory equipment for winemakers can be fiscally daunting, especially for beginning winemakers. That doesn’t mean that vital testing should be avoided. We asked two laboratory experts in wine lab services companies about ways to optimize your experience with submitting samples for analysis.
 Winemaker: Maureen Macdonald, Musto Wine Grape, Hartford, Connecticut
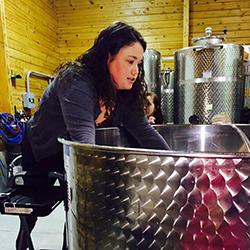 Winemaker: Maureen Macdonald, Musto Wine Grape, Hartford, Connecticut
Lab analysis of the wine, both pre- and post-fermentation, can be a key factor in elevating an average wine into a balanced and impressive wine. Having a detailed analysis of the acids, nutrients, and sugars of a must allows a winemaker to make the necessary adjustments in order to create the wine they seek and can save the winemaker more tedious work in the future.
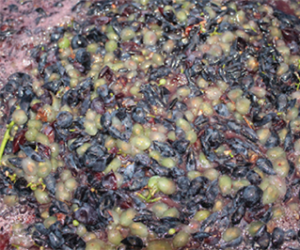
Musto Wine Grape offers grape must and wine analysis on pH, total acidity (TA), Brix, yeast assimilable nitrogen (YAN), free and total SO2, malolactic fermentation (MLF) chromatography, sensory analysis, tasting notes, and flaw diagnosis. The most important time to obtain lab analysis of the grape must is prior to fermentation. If you are creating your own must from grapes, allow 24-48 hours post-crush before obtaining a sample for analysis. This allows the sugars and acids to leach out of the crushed grapes and create a more homogenous product. Just be sure to always have the protection of 50 ppm of potassium metabisulfite and preferably temperatures about 40 °F (4 °C) for the must sample.
The basic must test package will provide the winemaker with precise pH, TA, and Brix content of the must or juice. Based on these numbers, the winemaker can choose to acidify or de-acidify the must and chaptalize or dilute the must to adjust the sugar content. A more advanced level of testing, the YAN test, can be added on to the basic must test package. Understanding each yeast strain’s individual nitrogen needs will allow the winemaker to make critical decisions on the different nutritional additives they may need for a healthy fermentation. While this test is not essential for the beginner home winemaker, YAN information is for the more advanced winemaker looking to set up a nutrition supplementation.
The second most important time for lab analysis is prior to bottling. Knowing the pH and the free and total SO2 within the finished wine allows the winemaker to understand the potential longevity and shelf life of their final product. There is a direct correlation to the level of acidity and the amount of potassium metabisulfite needed to adequately protect the wine against microbial spoilage and oxidation.
Another critical time for lab/sensory analysis is at any point where an unknown off aroma or flavor develops in the wine. Wine continues to develop new aromas and flavors during and after fermentation, sometimes not in a positive direction. A wine fault can emerge from a seemingly innocuous flaw that, if left unaddressed, can blossom into a more serious fault.
When sending in a sample, make sure that the container has an excellent seal and is clean. While each test may require a different sample size for analysis; an 8 oz. (237 mL) sample size is satisfactory to cover all tests. A small water bottle or jar is a good vessel for submitting a sample. Be sure to include as much information as possible to the lab, such as the addition of sulfites, enzymes, nutrients, etc. Label each sample very clearly with varietal type, test requested, and contact information.
Winemaker: Bob Peak, WineMaker Magazine Technical Editor, Sonoma County, California.
 Winemaker: Bob Peak, WineMaker Magazine Technical Editor, Sonoma County, California.
At The Beverage People, I was sometimes challenged by a customer who would say something like, “In the old country, my grandpa made wine without any testing.” I’m sure that was true, but grandpa also made (and drank) some bad wine from time to time! While wine can turn out well with no data, a winemaker can improve the odds of good—even excellent—wine with a few numbers on hand. Using a commercial or university laboratory is not the only way to get data, of course. A number of key parameters can be measured easily at home. For most, it takes some combination of home testing and outside laboratory testing to get the whole picture.
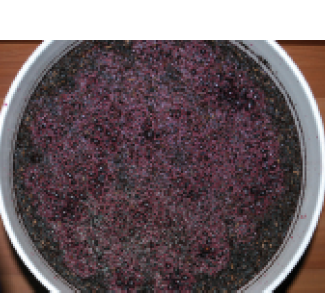
Two critical aspects govern the quality of results on any kind of laboratory analysis: Is the sample representative, and does it remain un-altered? Stir that must (or juice) and either take several small samples to make up one large one, or sample as near the center of the mixed vessel as you can. If you just sample the first juice that comes from the bin or vineyard of grapes, you may find dramatic differences later on. Keep juice samples cold and submit them promptly to avoid post-sampling changes. Wine samples for free sulfur dioxide need a bit more care. Since SO2 is a gas, leaving headspace in the container allows it to evolve and the air can oxidize some of it out. Fill the sample vial or bottle all the way to the top, and submit it promptly. I have had winemakers bring in a half-full bottle for sulfite testing and tell me it’s been in the truck for three days. Don’t waste your time and money!
When I managed laboratories, my standard advice to clients was, “If you won’t use the data, don’t run the test.” During aging, you may be tempted to analyze a wine in the cellar for TA again, or pH, or maybe for alcohol. That’s fine if you are considering further adjustments (or even just for your curiosity), but those aren’t critical tests that deserve top priority!
Blends are most often made from varietal wines prior to bottling, but field blending, where all of the varieties are harvested and fermented together, has its own benefits.
Lots of home winemakers concentrate their efforts in the harvest months using seasonally available just-picked wine grapes. But sometimes a home winemaker wants to do something else. Maybe you didn’t make enough wine in harvest season. Or maybe you just want an adult beverage that doesn’t line up with the local seasons. Whatever the motivation, there are several techniques for out-of-season wine.

