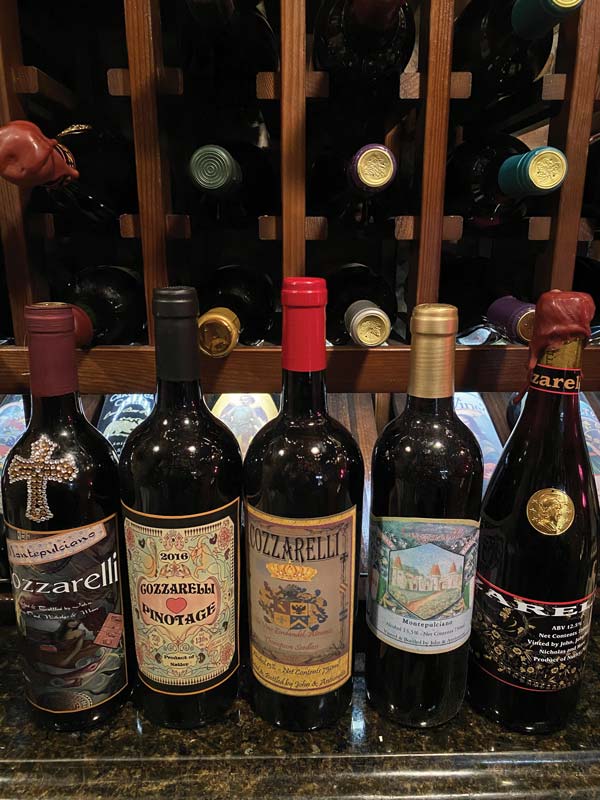
Bottling, Start to Finish
The sages of winemaking uniformly counsel patience. Yet what could be more frustrating than, after patiently stomping, crushing, adjusting, fermenting, and racking, to be told to wait? But many of wine’s great characteristics come after a wine has been properly bottled. While the methods and equipment for bottling at home may be more primitive than those used at state-of-the-art commercial wineries, there is no reason that the results can’t be as good — or better. After all, it is your wine, so it deserves to be treated carefully.
Mastering a few basic steps can make bottling a less intimidating and more satisfying experience. Best of all, the results will speak for themselves when you dazzle your friends as you stand proudly in your cellar, wearing your beret, telling them how you did it.
Is It Wine Yet?
The classic rubric of home winemaking texts has always been, “When the wine is clear and stable, it may be bottled.” This is still true. While you don’t need to be a biochemist to decide when to bottle, there are a few basic considerations. Simply put, if there are any problems, they need to be addressed before the wine is in the bottle and out of reach. Nothing is more frustrating than to bottle a wine and then invest in a professional cork remover to unbottle it all a few weeks later. Just ask anyone who has done this, including commercial winemakers!
Clarity is crucial. While a small amount of sediment will naturally appear in the bottle with time, murky wine is unattractive, requires decanting, and perhaps will develop off-flavors. Careful racking and the passage of time (three months is minimal, six better, nine to 12 excellent) will do the trick for nearly all red wines and most other kit wines. (There’s that patience thing again!) However, most white wines, some blushes, and fruit wines may stubbornly resist clarification without some encouragement by fining — especially heat fining, filtration, or both.

Suffice it to say that you must be satisfied with the wine’s condition before you begin bottling. While aging will change the qualities of the wine in terms of taste, problems put into the bottle remain problems permanently.
As you become more proficient in winemaking, it becomes both fun and desirable to become familiar with the various types of stability a wine should demonstrate. Heat stabilization involves the removal of protein hazes that, even if they are invisible during aging, can reappear when the wine rises above cellar temperature. Reds are heat stable. To make a white heat stable so it won’t form a haze when warmed or aged, add bentonite to the juice either right before or right after fermentation. It is cleaner and has more time to settle and causes less stripping of flavors when added after the wine has reached dryness. A general dose is four to six pounds per 1,000 gallons of wine (0.3 to 0.5 ounce per five-gallon barrel). Make a slurry of the bentonite by very slowly adding it to about a quart of hot water while stirring constantly. Let the slurry sit overnight so the bentonite can swell. When you add the slurry to your wine, get the wine swirling and dribble bentonite into it. Make sure it is mixed in well, because bentonite works on contact.
Let the wine sit undisturbed for a few weeks and the bentonite will fall to the bottom along with the protein that causes haze. Rack the clean wine off and toss out the sediment.
At the other end of the spectrum, cold stabilization refers to chilling the wine to precipitate excess tartaric acid (the main grape acid) before bottling.
In practice most reds will achieve heat and cold stabilization naturally, although a few tartrates may appear with bottle age. White wines, blushes, and fruit wines may be more problematic. However, ifyou are not transporting the wine much farther than out of the cellar and to your guests, you may forego the fining steps required at first — as long as the wine is clear. In all events these are more appearance-related concerns that commercial wineries must pay attention to; as an amateur you are free to choose your own comfort level, although clear wine, especially in a white, is desirable.

It is imperative, before bottling, to be sure that the wine is fully fermented to dryness, unless a sweet wine is desired. Also, you may want to sweeten a particular wine for stylistic reasons. In both cases the winemaker needs to take steps to stabilize the wine so that residual sugar does not referment in the bottle, causing explosions and mayhem in the cellar. It is imperative that home winemakers fully understand fining and filtration before attempting a sweet wine because re-fermentation is a common problem.
In general a hydrometer reading below minus 1° Balling or a Clinitest reading (the urinalysis kits used by diabetics) below 0.2 percent residual sugar means the wine will not need stabilizing. If the wine tests above these readings or is sweetened, the safest stabilization method is the addition of potassium sorbate at the time of bottling. Potassium sorbate can be used by some spoilage organisms as food, but it inhibits refermentation. One gram per gallon is usually sufficient.
When using sorbate it is important to make sure that sulfur dioxide levels in the wine are kept in a safe range of 30 to 50 parts per million. This will help inhibit any malolactic activity in the wine, which can produce a geranium aroma. Sorbate and SO2 should always be used together if the wine is sweetened or has residual sugar. On the other hand, dry wines do not need sorbate at all, although a safe sulfur level is a good insurance policy against oxidation or bacterial activity. A rule of thumb is one-fourth teaspoon of potassium metabisulfite crystals in five gallons of wine yields about 40 ppm of sulfur dioxide. Some supply stores also stock sodium bisulfite, but this is best reserved for cleaning equipment to avoid adding sodium to the wine.
If you want to avoid adding sorbate, make sure all of your equipment is sanitary and use high enough levels of SO2. Add SO2 in powder form or through a gas line to bottles before filling. Also make sure malo-lactic fermentation for appropriate wine is complete before bottling to avoid refermentation in the bottle. Sterile filtration is an option but involves equipment beyond the budget of most home winemakers.
Preparing to Bottle
The first step in getting ready to put the finished product to sleep is preparing the bottles. Clean, unchipped, delabeled, and recycled bottles are just fine. New bottles cost up to $12 a case at supply shops, so recycling is an economical solution.
Delabeling and cleaning can be accomplished by soaking in hot sal soda (washing soda) solution (about a half cup to a standard sink), brushing with a bottle brush, and rinsing. With new cold-stable glues you need to use one-half cup of ammonia per five gallons of warm water. To avoid glue residues it is best to delabel and wash in two separate steps: sterilize bottles with bleach and then a citric rinse. Then rinse the bottles again in a weak citric-acid bath to neutralize any remaining soda, rinse again with water, and store upside down until ready to use.
Choice of bottle shapes is traditional — or whimsical — depending on the winemaker. For example Cabernets are normally bottled in square-shouldered Bordeaux bottles, while Chardonnays are in slope-shouldered Burgundies. For the less fussy or larger-scale producer, these niceties can give way to using whatever bottles are at hand. Clear glass bottles are not recommended unless you can be sure the wine will not come into contact with direct sunlight, which can brown the bottle’s contents. Figure on 25 750-milliliter bottles for a five-gallon carboy of wine. This often allows a little extra, which can be a needed libation for the winemaker.
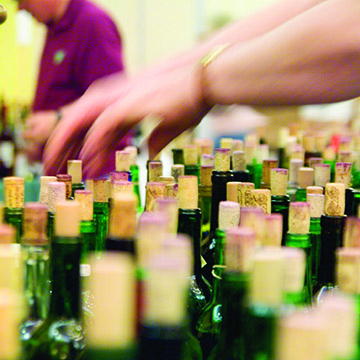
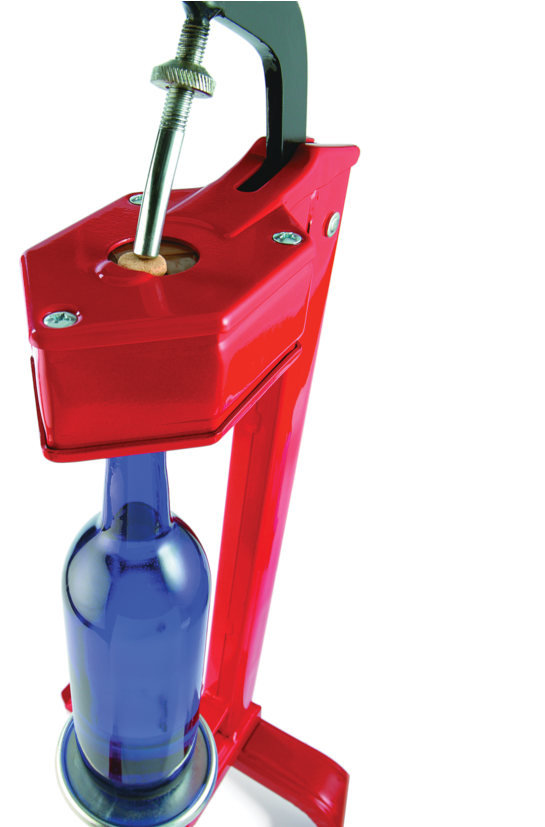
Closures for bottles range from the traditional cork to screw tops to new wave plastic “corks.” Use of classic cylindrical corks requires a corking tool to compress and insert the corks. These will cost from $20 for a basic hand-held model to a few hundred dollars for a floor corker for big batches.
T-corks (stoppers that are usually plastic and used for jug wine) and screw-top bottles, obviously, can be closed by hand, but the wine should be used within less than a year, because oxidation is inevitable, owing to the looser seal these closures provide. You can use crown caps if you are bottling wine that does not require transportation, but they do not allow wine to age the way cork does. The jury is still out on plastic corks, but they are gaining some acceptance in commercial wineries. Although more expensive than cork, plastic can prevent the very small risk of contaminated cork.
Bottle fillers, while not absolutely necessary, are a useful aid in quickly and evenly filling the bottles. A siphon valve that attaches to your racking hose can be purchased for less than $5. Even a simple hose clamp helps. The next step up is a more complex spring-loaded pistol grip valve, followed by reservoir-type fillers similar or identical to winery models.
The big issues here are quick and even filling of bottles and as little aeration of the wine as possible. If you make a few cases a year, the hose clamp will be great. The serious amateur will want to invest in something more substantial. Without going all the way to a winery model, you can buy an Italian vacuum filler for about $250, which can be set to fill bottles automatically to a specified level each time.
Bottling Day and Beyond
At last the wine is clear, stable, and ready to bottle. The bottles are thoroughly washed, the corks and corker are standing by, and you are prepared. All bottling equipment (fillers, siphon hoses) should be cleaned with a cleaning solution and then rinsed with citric acid and sulfur and drained before use. You must rinse with lots of water after each chemical sanitizing step, too. Assuming you have kept the wine’s sulfite level correct (or not, if you prefer not to use sulfites), the final rinse is with diluted sulfite solution (one teaspoon of potassium metabisulfite crystals and a pinch of citric acid in a quart of distilled water) to guard against any spoilage organisms that may be lurking in the bottles since they were washed.
Assuming the bottles have been stored upside down (in cases with a sheet of foil on the bottom of each case for a better seal) and were thoroughly washed, the alcohol in the wine will do the majority of protecting it as it ages. Nevertheless, it helps to rinse the bottles with a dilute sulfite solution. The citric acid volatilizes the sulfur into the gaseous (free) form, and thus almost none is absorbed by the wine. It is merely protected during filling.
Wines bottled using this system were tested before and after bottling and were found to have essentially no sulfur level change. Thus, the bottles are cleaned one last time, the wine is protected from the air a bit, and no excess sulfur ends up in the bottle.
The goal when filling, aside from the obvious, is to prevent oxidation. Bottles should be filled without splashing, to about one-fourth to one-half inch below the point where the bottom of the cork will be. Sink the bottle filler to the bottom of the bottle and let wine fill up the bottle with minimum aeration. Some air space is needed should cellar temperatures rise and the wine expand, and a minute amount of air is useful in aging.
Once the bottle is filled, it is best to cork it promptly (every two cases or so). Give the bottles a final water rinse on the outside to remove any drops of wine, clean up the hoses, fillers, and carboys, and you are done. Always be sure to save a glass or two of the wine for the bottler, as the laborer is worthy of his hire!
After filling, leave the bottles standing cork up for three to five days. This allows the inside pressure to equalize down to normal, so wine won’t push or leak when placed on its side. It also lets the corks dry from the pre-bottling soak and breathe off any residual sulfite. Then store the bottles on their sides or upside down in the coolness of your cellar. After 30 days (okay, we all stretch that a little!), try one bottle to assure yourself all went well. After that, it is up to you when you drink the wine. Almost all wines benefit from three to six months in bottle, some for much longer.
Remember that wine ages in two ways: aerobically, while it is fermenting, being pressed, racked, and prepared for bottling, and anaerobically after bottling, when the myriad subtle chemical changes occur away from the air (other than what is dissolved in the wine at bottling) and produce true bouquet and complexities of flavor. When the wine is best is up to the winemaker, but a little patience is well worthwhile.
If you can creatively bend the rules and develop a method you can live with, by all means do it. Cleanliness is next to Dionysusness!
The foregoing methods are scientifically based, but the application and adjustments (for example from parts per million to cups in a sink) are subject to the whim of the individual winemaker. Like winemaking in general, what makes bottling your own wine so rewarding is the juxtaposition of science and art to produce a beverage you can truly take pride in.