Fruit Cider

Cidermaking is a journey. Don’t be fooled by anyone who tells you it’s easy, as developing a delicious hard cider requires a lot more artistry than simply adding yeast to apple juice. Cidermaking requires you to develop, refine, and master many different skills. When you add the additional layer of fruit to your cider, it requires even more understanding of how these new flavors will fit with those from the apples. My hope is to provide some basic guidelines and inspire you to set off on a journey of becoming a cider artist. I view what I do these days as being a fermentation artist. The magic to making world-class wine, mead, or cider all require a mastery of fermentation.
I started making cider in the fall of 1995 as the Brew Free or Die and Boston Wort Processors homebrew clubs had an annual cider picnic. Paul Correnty, who went on to author The Art of Cider Making, was selecting the apples that were pressed into cider, and I was fortunate enough to start my cidermaking journey among such a dedicated group of enthusiasts.
Until recently, there used to be two typical forms of hard cider — sweet varieties and dry ciders. As has happened with craft brewers pushing the envelope of beer, exploring new styles and using unusual ingredients has also become the norm in cidermaking. It’s common when visiting a cidery to find various ciders with unique ingredients including fruits, spices, or hops, ciders fermented with different yeast strains, and ciders aged in oak barrels.
Just as varied as the styles of ciders, or the number of apple varieties and fruits that can be used to make fruited cider, so too are the methods to cider production. Before you jump into fruited cider, it’s important that you understand the basics of making hard cider, which I’ll cover here in addition to the nuances that come with making hard fruited ciders.

How You Like Them Apples?
It all starts with great apples and the farmers who grow them. I recommend going to the source and talking with the farmers. Appreciate what goes into farming and the growing of apples. Understand the yield, flavors, sweetness, and acidity of the apples as they differ year-to-year. Similar to grape growers in the wine industry, farmers are critical in cider production. The orchard needs to be protected from disease, frost, and wildlife. With many orchards in danger of becoming future development properties, go out and support the local apple growers, and at the same time soak up their knowledge about their apples. Hey, it also makes for a great fall day out with the family.
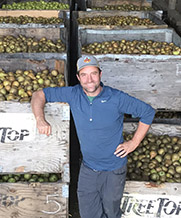
Most of the sweet apples that are abundant in grocery stores and farmer’s markets will work for making hard cider, but I like to get a pretty diverse blend of dessert apples and cidermaking apples (some of which are so tart you would never eat them on their own). At Moonlight Meadery
(of which I am the owner as well as Meadmaker and Cidermaker), we use
as many as 12 different varieties of apples, but that’s because we are try-ing to maintain some consistency to our batches of hard cider. The apples we have access to in late spring have been kept cold under nitrogen all winter, are usually a little sweeter, and have dehydrated a little. Apples you’ve heard of, like McIntosh, Cortland, Gala, Liberty, or Northern Spy often provide the principal flavors. Lesser-known heirloom apples contribute subtle layers of flavor, acidity, and tannins.
Fruit Options
When it comes to fruit selection to add to a hard cider, there are no wrong answers. However, some definitely pair with apples better than others. I have had good success with fruits like black currants, cranberries, boysenberries, and raspberries. What each of these fruits have is a fair amount of acidity that builds onto what the apples bring. I normally shoot for 10-20% of the sugars coming from the non-apple fruits. This way you still get plenty of apple character with a light fruit note. Adjust the amounts as you like, but just be forewarned fruits like black currants are very assertive.
With fruited ciders you can add the fruit either before fermentation or afterwards. The flavor and aroma will change based on when you make the additions. Fruit additions made prior to fermentation will lose some of the fresh fruit flavor and aroma, but still help create a tasty fruit cider.
When making fruited cider on a small scale, I would buy organic fruit juice from the grocery store and add it prior to fermentation. Where 2 to 4 quarts (or liters) would make up that 10 to 20% in a 5-gallon (19-L) batch, this is an easy way to make fruit cider by blending the fruit juice with your sweet (non-fermented) cider.

When making a fruited cider with the fruit added after fermentation to backsweeten a dry cider, I use much less juice and backsweeten to taste. Keep in mind, when going this route, stabilization will be needed to ensure refermentation doesn’t occur. This can be done with the addition of sorbate and sulfite. The best way to determine how much juice to add when backsweetening is to perform bench trials and then scale up your batch when you find a taste you like.
The form of the fruit you use is another question that you’ll have to answer, and there are a few good options including juice, puree, and fresh or frozen fruits. If going with juice, which is by far the easiest option and results in a great, clean flavor, just make sure it contains no preservatives, like sorbate, that might inhibit your yeast. Pasteurized or sterile juice is fine.
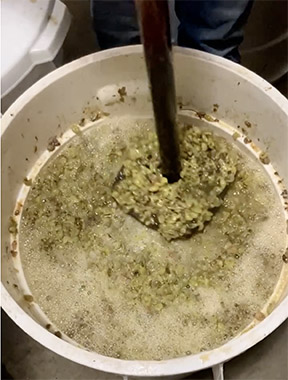
If you go with fresh fruit, I recommend pressing the juice from the fruit vs. the option of adding bagged, crushed fruit. Having access to a press will make it easy to press softer fruits to create juice that you can use when making your fruited cider. Hard fruits need to be ground up prior to pressing (similar to how you would prepare your apples). The fruits I listed in Chart 1 at the bottom of this page are all easily pressed without the need of grinding before pressing. Another option to make pressing easier is to freeze the fruit first (cutting it into chunks if using larger fruits), and
then thawing them. This freezing and then thawing of the fruit will break down cell walls, which helps release the juice and makes pressing easier. When using stone fruits (those with pits, such as peaches, plums, or cherries) you should slice and remove the pits prior to pressing.
Sanitation
Just like when making wine from fresh grapes, freshly pressed cider and fruit juice is going to be full of wild yeast, some of which can provide unwanted results. Treat the fruit similar to how you would treat grapes for making wine. Without the step of boiling in the cidermaking process, it’s extra important to sanitize all surfaces (remember you can’t sanitize something that isn’t clean) in your cidermaking area. Follow a strict protocol on cleaning and sanitation — it will only help you make better fermented beverages in the long run.
Sugar Content and Acidity
I highly recommend you record everything you do in the cidermaking process in order to allow you to adjust/improve your skills as a cidermaker. A hydrometer is used to measure the sugar content (density) of the must. This provides a means of knowing the quantity of sugar, and the potential alcohol strength. The measurement of pH is necessary only for the dose of sulfite to the must. In addition, the total acidity (TA) will help you understand the perceived sweetness of the finished cider and can be found using an acidity test kit.
Sulfite and Pectinase
As a winemaker reading this publication, it’s likely that you know all about sulfur dioxide, or SO2, and how it is used in the winemaking process to keep wines protected from the negative effects of oxygen exposure as well as spoilage micro-organisms. SO2 management is beyond the scope of this column, suffice to say it is also important to be aware of it in cidermaking. For more on the subject, please visit https://winemakermag.com/article/634-solving-the-sulfite-puzzle. This is a process that requires accurate pH level measurement.
For North American apples that are fairly sharp, you are looking for a dosage of 40 to 50 ppm of SO2 — this equates to adding 1.8 grams (just less than a 1⁄2 teaspoon) of potassium metabisulfite that is dissolved into some juice and mixed into the must 24 hours prior to pitching the yeast. If using Campden tablets, four in a 5-gallon (19-L) batch will provide 50 ppm of SO2. Please use caution and don’t consume or smell the freshly sulfited juice.
The usage of pectic enzyme or pectinase breaks down some of the pectin chains in the juice, which will help the cider clear once fermentation is completed. This is an optional step, and I made cider for 20+ years without it, but have now used it for the past four years as a commercial cidermaker. Think of this treatment as an insurance policy, it doesn’t hurt and provides increased odds that the cider will be perfectly clear when finished. For my operations, any pectin in the fermented ciders could damage our filtration system.
Fermentation Management
This is the most critical step, and applies to all fermented beverages. The yeast being kept in an ideal environment will only make for a better fermented beverage. Each yeast is different, from how much nutrients it requires, what temperature it likes to ferment at, how aggressive it is towards other microbes, and the other characteristics it creates.
We use Lalvin Narbonne 71B-1122 for all the cider that we make and follow the optimal yeast rehydration protocol from Lallemand. Ideally, you are looking to maintain a ratio of 1 part yeast to 1.25 parts yeast rehydration nutrient. For this strain, fermentation works best at 64–68 °F (18–20 °C).
Non-grape fruits are often low in nitrogen; the result is that the yeast creates hydrogen sulfide. Nutrients like Fermaid O can remedy this, and supply the yeast with the missing nitrogen. At about 1⁄3 of the way through fermentation, add 1 teaspoon of Fermaid O. Additionally, using the Tailored Organic Staggered Nutrient Addition (TOSNA) process like a lot of commercial meadmakers follow for their meads, would also work. The TOSNA process uses Fermaid O along with a Go-Ferm addition that is added when hydrating the yeast. Fermaid O is added in equal size increments at 24, 48, and 72 hours after pitching the yeast, and lastly at either one week or when the 2⁄3 sugar break is complete. The size of the Fermaid O addition is dependent on the nitrogen requirements of the yeast, original gravity of the must, and batch size. The formula to determine the total Fermaid O
addition is :
Initial Sugar (g/L) x Nutrient requirement x batch size (gal.) / 50 (ppm) = Total Fermaid O (grams)
For more on the TONSA-2 method, visit www.meadmaderight.com.
Fruit Cider Recipes
All three recipes have the same step by step instructions, below.
Boys N Berries
4 gallons (15 L) sweet apple cider
1 gallon (4 L) boysenberry puree
4 Campden tablets
1 packet Lalvin Narbonne 71B-1122 yeast
1.5 tsp. Go-Ferm
Crimes of Passion
4.5 gallons (17 L) sweet apple cider
0.5 gallon (2 L) black currant juice
4 Campden tablets
1 packet Lalvin Narbonne 71B-1122 yeast
1.5 tsp. Go-Ferm
Razz What She Said
3.5 gallons (13 L) sweet apple cider
1.5 gallons (6 L) raspberry juice
4 Campden tablets.
1 packet Lalvin Narbonne 71B-1122 yeast
1.5 tsp. Go-Ferm
Step by step
Add juices and Campden tablets to a sanitized fermenter. Place sanitized airlock onto fermenter and wait 24 hours. After the 24 hours, prepare yeast by adding the 1.5 tsp. of Go-Ferm to 1⁄2 cup of hot water and mix. Let the mixture cool to 104 °F (40 °C) and then add the active dried yeast. After 15 minutes (yeast should begin to foam), stir well to mix the yeast into a slurry. Pour the yeast slurry into the fermenter. Seal fermenter with a sanitized airlock and put fermenter in an area that is 65 °F (18 °C).
When fermentation stops and the specific gravity as measured by a hydrometer is stable (has not changed over the course of several days), it is ready to transfer the cider into a secondary fermenter. Sanitize your secondary fermenter and siphoning equipment. Carefully siphon the fruited cider into the secondary fermenter, leaving as much sediment as possible in the primary fermenter. Let the cider clarify in the secondary fermenter. You may wish to add a fining agent such as isinglass to facilitate clearing, and/or potassium sorbate to prevent further fermentation.
At this point in the process you’re going to want to taste your cider and see what final adjustments need to be made. This is where your skills really will shine as you need to balance the acidity and sweetness. Use sanitized siphoning equipment to pull a small amount of cider to sample, and if needed, then backsweeten to taste and stabilize. Options for backsweetening are limitless — you could use fruit juice, sugar, honey, etc. The challenge is not to ruin what you have worked so hard at. The fermentation process causes particular matter to drop, and when you rack off the sediment it results in your clear finished product. If you were to add juice to backsweeten, you should expect that this will leave some sediment in the fruited cider. However, you can get a rather amazing fruit note by adding juice to the finished fruited cider.
If you wish to bottle condition your stabilized cider, wait 24 hours and then add priming sugar. Use a bottle-conditioning calculator to get the right carbonation level. Bottle conditioning will produce a dry cider and cannot be used if sorbate has been added to stabilize a sweet cider.
You can keg your fruited cider or bottle it in beer bottles (it is carbonated, so don’t use a wine bottle and cork).Hard fruit ciders can be consumed after two weeks of bottling and aged for six months or more to achieve superior flavor.