Importing Juice vs. Fresh Grapes, Wild Fermentations, Sediment In The Bottle
Q
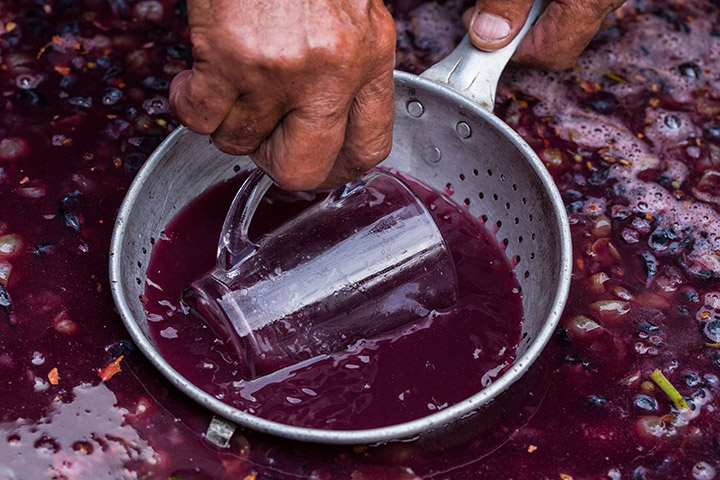
I have been making wine at an “urban vintner” in New Jersey for about 15 years. I have always ordered grapes and crushed/pressed them using their equipment. Last week I bought a barrel of Chilean Merlot and they advised me to buy juice rather than grapes. They said if you crush soon(er) after picking you get a better wine. What is your opinion?
Ralph Obernauf
Bridgewater, New Jersey
A
Well, it seems to me that Chile to New Jersey is an awfully long haul. I often, in my blog and in this column, advocate that the distance from vineyard to crushpad be as short as possible. Your friends are right; distance and, especially, time, can cause a degradation of quality. When a grape cluster is removed from the vine, no matter how carefully, there is some jostling and juicing that happens. Once juice is exposed to the air it begins to oxidize and begins to be degraded (read: eaten) by ambient yeast and bacteria. This all contributes to a possible increase of microbial and oxidative by-products including aldehyde production, bloom of unwanted bacteria species, and most commonly, volatile acidity (acetic acid) production. Though of course the cold storage shipping conditions help to slow these reactions down, they will still take place to some extent. When you unpack your grapes, smell critically for any off odors and see if there’s much juice in the bottom of the containers. If so, I would strongly recommend juice or concentrate.
All that being said, there are some “pros” of buying fresh grapes. Even though the grapes will have to suffer through a long journey, you should still be able to get a pretty good visual on the condition of the grapes, the color of the stems (brown stems are often a sign of ripeness) as well as the color of the seeds (likewise). You’ll be able to tell the thickness of the skins, the evenness of the berry sizes as well as average cluster sizes. If you are buying concentrate or juice, someone’s already pressed the grapes and removed all these little visual details. Now I’m not going to suggest you can tell everything about the vineyard and growing conditions just by looking at a grape seed, but all of these data points can help you form an aggregate opinion about the source of your fruit. If there are things you don’t like about the resulting wine, sometimes one of these visuals can help you diagnose future problems or at least let you know that you may not want to work with that vineyard source anymore.
In the case of varietals that “pink” quickly like Pinot Grigio, it’s probably worth it to buy clean juice or concentrate rather than press your own. Overall, however, I prefer to have as much information as I can about where my raw material is coming from, and being able to handle the actual grapes is one way to help you get there. If the grapes arrive clean and in good shape, you might want to continue doing what you’re doing.

Q
I tried to let a natural fermentation work on a 3-gallon (11-L) sample wine. At five days no discernible action was taking place and I added a cultured yeast. Should I have waited longer? When should a natural fermentation be expected to commence? What are the indicators?
Jack Kerr
Santa Fe, New Mexico
A
Well, I would’ve inoculated right off the bat if I didn’t see anything happening within 24 to 48 hours. Contrary to popular belief, yeast cells that can carry out a complete alcoholic fermentation rarely come in on the fruit from the vineyard. The species that do are typically those kinds that can only ferment to about 5% alcohol. Especially if you are using frozen juice, must, or concentrate, don’t expect to be able to rely on any indigenous microbes from the raw material to get your fermentation going. The freezing or concentration process will have significantly knocked down the percentage of viable native yeast cells.
The microbes that conduct so called “natural” or “feral” complete alcoholic fermentations usually come from the wineries themselves. This is why “well-seasoned” wineries, meaning those that have had a history of many successful fermentations over many harvests, are more able to have complete fermentations without having to inoculate. These yeast strains, ambient in the air and on equipment, are robust and have been selected over time as strains able to conduct a fermentation to dryness and often are related to or are a “domesticated” version of a commercial strain that was added to a fermentation at some time. This is why “new” facilities or even new home hobbyists often have a hard time starting up “feral” fermentations unless they’ve got a good naturally-present inocula.
My recommendation? If you don’t see any action after 24 hours, inoculate with a commercial yeast strain so you don’t have volatile acidity or ethyl acetate problems as bacteria and spoilage yeast take hold. After a few successful fermentations, you might have enough residual ambient yeast to conduct a “feral” fermentation without inoculating.
For much more information and another author’s take on fermenting wine with wild yeast, check out the story beginning on page 52 of this issue. The roundtable yeast story beginning on page 30 of this issue also addresses this topic.

Q
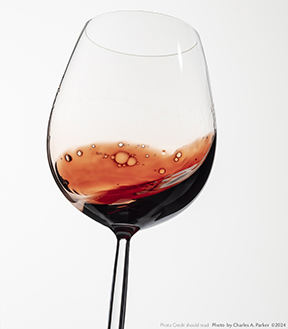
We have been making country wines for over a decade. We only bottle once they are sparkling clear. They are stored in wine racks in the basement with no heat. Earlier this year we noticed that previously clear wine now has sediment in it. Two different batches of plum, one batch of rhubarb, one batch of pear and one batch of grape. If left standing upright the wine on the top of the bottle is clear and smells and tastes as it should. But there is thick sediment on the bottom of the bottle. These batches were bottled over a two-year timespan. We would like to know what has caused this so we can make adjustments so it never happens again. We are thinking of putting each batch back into the secondary fermenter and using more finings to reclear the wine. Any information would be helpful.
Mary Joyce Fink
Fort Collins, Colorado
A
I definitely would re-think your pre-bottling aging and fining procedures. Many wines, especially those made with fruit other than grapes, are susceptible to flocculation (a fancy term for sediment) and visible fallout. Wine is a complex chemical soup and many reactions take place over time; wine isn’t always what it seems to be in early days and sometimes can surprise us. Fruit wines, especially, have additional pectin and other polysaccharides that are sometimes difficult to settle out.
This very tendency of all wines to do this to some extent is why the “bulk aging” stage is so important. All wines, no matter their type, need to be in barrel or carboy (i.e. not in the bottle) long enough so that these condensation and settling reactions occur to such an extent that they won’t happen in the bottle. Classic red wine aging times are 18 months in barrel while white wines like Chardonnays tend to need bulk aging anywhere from 9-12 months before bottling.
But what to do when you either want to bottle faster than this horizon, or are dealing with a fruit wine you suspect of potentially having additional settling or stability issues? This is when your choice of fining agent and settling timeline pre-bottle is really important. Anytime I’m making a fruit wine I use a pectinase enzyme (like Scott Laboratory’s Pec5L) post fermentation. This helps break up the gluey, gloppy pectin that can cause troublesome hazes and sediments later on (for more information about using pectic enzymes, read the “Beginner’s Block” in this issue, on page 14). For your grape wine, you most likely have a protein precipitate, in which case bentonite would be recommended.
However, anytime you’re using a fining agent it’s wise to do a “bench trial” first, that is a trial on only a small portion of the wine. In your case, as you are trying to figure out whether you un-bottle everything and treat it with a fining agent, why not just dose one bottle with a small amount and see if it helps before opening up all the bottles and scaling up? Usually most fining agents settle out within a few weeks. After good settling has occurred you can rack the clear wine off into clean containers. Hopefully the fining agent will have “eaten up” (bound with) the haze or sediment precursors and will preclude any further precipitation in the bottle.
That’s great that you store your wines in a cool basement. Heat and even UV light can both be culprits, which can trigger instabilities. With careful attention to fining beforehand you probably will have clearer wine over time. However, a basement without heat also brings up the possibility if you did not do a cold stabilization prior to bottling that your wines were not cold stable. Cold stabilization is done by allowing your wine to settle for a short time in the upper 20s °F to lower 30s °F (-2 to 2 °C) prior to bottling.
Q
I live in a country that doesn’t have access to brewing and winemaking ingredients such as yeast or yeast nutrient (it’s forbidden, so i would rather not say where I live) and I can’t buy winemaking ingredients online either. Can I make some of them at home and how? I have found some recipes to grow wine yeast on the Internet but I’m not sure if they work. Or am I better off using bread yeast?
Hamid
via email
A
I give you credit for being so dogged in your desire to try fermenting! The great news about yeast is that, as I’ve often said in these columns, yeast live everywhere around us. They are naturally present on the skins of many fruits and vegetables and even in the air you’re breathing right now. The trick is to trap and encourage the right kinds of yeast that will do the kind of work you want them to do.
Bread yeast will indeed turn sugar into alcohol but only to a point. They are bred (no pun intended) to ferment only to low (think well under 10%) alcohol levels and will naturally peter out due to alcohol toxicity at higher levels. Because of this, bread yeast aren’t very well suited to fruit winemaking, where an alcohol level of at least 11% is desired.
I checked out some of the online “grow your own yeast” tutorials and some of them seem to have the right idea — to the extent that it will work. Most tutorials seem to me to be like trying to create a kind of sourdough starter. Because I’ve never tried making my own yeast culture per se, I’m not sure I want to give a step-by-step here. However, what I have actually done in the cellar is something that many winemakers do the world over: Ferment wine with naturally occurring, or “feral” yeast. As I suggested in an earlier question, more information that will help you with this is detailed in the story beginning on page 52 of this issue.
You may have heard this term called “native” or “natural” fermentation. I bristle at the latter term because all fermentations are natural whether they are conducted by an introduced yeast strain or by a strain (or strains) that just happened to wander by.
Here’s how I set myself up to optimize results with a feral fermentation:
• Start with clean, ripe grapes around 23-24 °Brix. Because you’re going to be relying on ambient yeast you don’t want any other microbes competing with them so make sure they are free of rot or molds.
• Destem them (or at least leave only about 20% grapes with stems)
• Put the grapes into a clean container, preferably one in a place where the temperature will remain around 55 to 75 °F (13 to 24 °C). In my winery, I use a temperature-controlled stainless steel tank, but a food-grade bucket in a climate-controlled room can work too, because the volume (and heat produced by fermentation) will be so low in the case of the latter.
• Add around 20 ppm sulfur dioxide. If the country you live in doesn’t sell winemaking supplies this may be hard to find. But since potassium metabisulfite powder has uses other than winemaking (like preserving dried fruits) you may be able to buy some. This is an important step because the sulfur dioxide will repress the bacteria and yeast that you don’t want; wine yeast tend to do fine with sulfur dioxide levels this low and are therefore naturally selected.
• Cover loosely with a tarp or lid. Mix up or “punch down” the floating cap down into the juice about three times a day. With a little bit of luck, within a day or two, you should begin to smell
fermentation happening.
I recommend starting small — perhaps with a bucket of grapes — and try to see what kind of wild yeast you can capture and grow. If you are successful, and ferment a must to dryness (when all sugar is gone) you know that you’ve got the right stuff and can branch into bigger batches. Good luck!
Related Links:
• How to make wine anytime from grapes with must that has been frozen immediately after crushing.
• Understanding wine yeast chemistry will help you make better wine. Here is what the home winemaker should know about the inner workings of yeasts and how it affects the wine.