St. Croix
At the beginning of my winemaking career, I would occasionally be invited to industry events and attend American Wine Society meetings where I would sit quietly, excited to even have a seat at the table, and listen attentively to the “shop talk” occurring around me. I would listen to winery owners and local winemakers discuss potential harvest dates for their varieties as they go through veraison, issues with disease from that growing season, and any issues they had in the cellar from the previous vintage.
I’d often hear the same variety come up over and over again, with lively debates on harvest times, best yeast strains to use, and off-flavors derived from leaving it on the vine too long: St. Croix. It seemed that all of my mentors griped about it, yet everyone also planted it just the same. If this variety of grape was such a tricky one to grow, often generating inconsistent flavors contingent upon harvest time, then why did it have a place in everyone’s vineyard? Thus began my decade-long exploration into St. Croix, specifically trying to find an example of it that I enjoyed, finding a grower who was adept with it, and finding a place for it in my own winemaking portfolio.
St. Croix was developed by a private grape breeder in Wisconsin, Elmer Swenson, in 1981. It is an interspecific hybrid of Vitis labrusca and Vitis riparia grapes. He was seeking a much more cold-tolerant grape variety to withstand the Wisconsin winters and one that would give him more interesting winemaking characteristics.
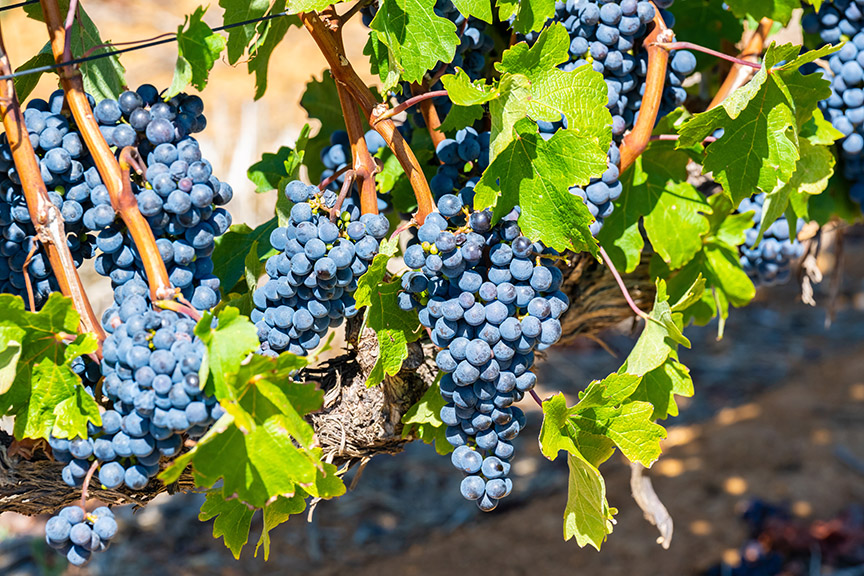
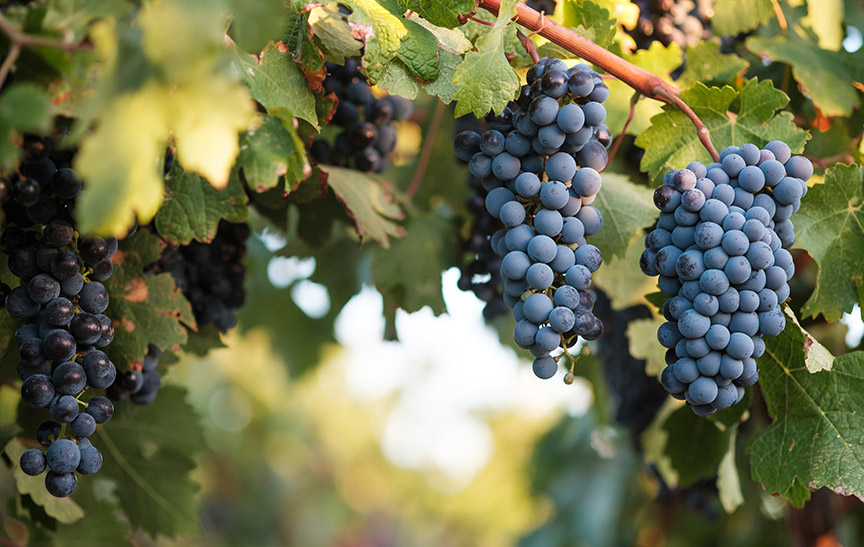
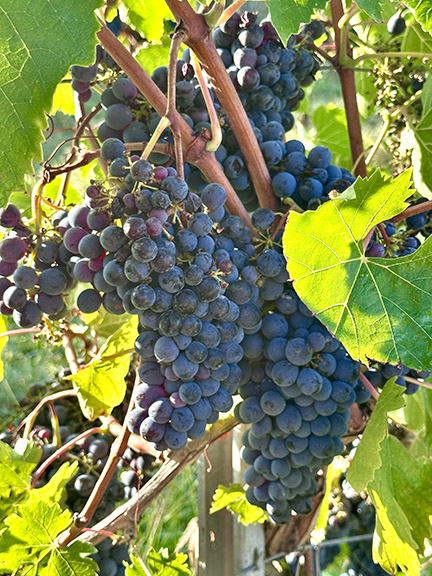
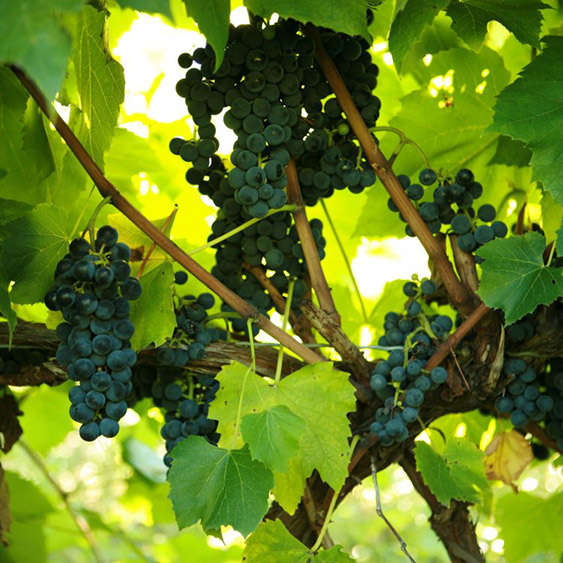
The variety has a thinner, dark blue skin with medium-sized, single-shouldered clusters. While the clusters maintain reasonable tensile strength, the thin skin of the berries can be easily punctured, making it susceptible to damage while picking — either from human pickers or hungry insects desiring the sweet juice. The pick bins at my winery are often sprinkled with deep magenta juice while harvesting, due to the delicate skins of the grape.

In the Vineyard
St. Croix can thrive in a variety of soil types, including sandy, loamy, and gravelly soils. It prefers soils with good drainage, typical of most hybrid vines, and does prefer moderate nutrition. I have found foliar applications of boron and magnesium throughout the season aid in flower development and pollination. I have witnessed St. Croix thrive on sites that were former dairy farms, with high organic matter content within the soils and the vegetative growth thrives prolifically. St. Croix often benefits from a highwire trellising system to support the weight of the canopy and aid in pruning efforts. St. Croix can also be grown on a VSP (vertical shoot positioning) trellis; however, due to the required hedging throughout the growing season, I find it easier to clip the vines at thigh level in a high wire system rather than reaching up high to clip the canes above my head when trellising in the VSP style.
It is a vigorous grower, with suggested vine spacing of 12-foot (3.7-m) intervals rather than the typical 8-foot (2.5-m) intervals of other hybrids. The vines are incredibly cold-tolerant, by Swenson’s design, with the ability to withstand temperatures as low as -25 °F (-32 °C). This makes them a sound investment for grape growers in northern climates, also explaining their popularity amongst the vineyards of my aforementioned mentors.
St. Croix has the unique feature of often having multiple bud breaks on nodes, requiring
shoot thinning later in the growing season. Without this important step, the plant will overcrop and under-ripen its bountiful clusters.
I interviewed one of Connecticut’s most experienced viticulturists, Ben Sterry, regarding his professional recommendations for St. Croix, and he was happy to offer this advice: “Managing the canopy is very important with St. Croix. This varietal seems to almost always push its secondary bud at bud break. So shoot thinning is necessary . . . It also puts a lot of lateral shoots, which need to be removed to increase airflow and sunlight exposure on the grapes. If not done well enough, sprays will have trouble penetrating the canopy and this increases the risk of diseases. It’s fairly disease-resistant, which is a major bonus for our area since we tend to have a decent amount of rain.”
As mentioned earlier, the ripening of St. Croix was often a hot topic of debate amongst my mentors. Warnings of berry loss due to weak pedicel strength, the development of cotton candy-like flavors above 22 °Brix, and the thin skins being susceptible to insect predators were all common complaints. It is a precarious tightrope walked by farmers of St. Croix, as the berries can struggle to move beyond 20–22 °Brix in the growing season and this must be balanced with the potential threats of off-flavors and grape damage. In my experience, I have found the predator susceptibility to be an issue, with the skins being easily pierced by yellowjackets and drosophila. I typically harvest my St. Croix in mid-September, allowing the Brix to hopefully approach 22 degrees. I do not see a significant decrease in the titratable acidity as they ripen, which has caused me to use the varietal for rosé production rather than a red wine in past vintages. I have conducted experiments making it in both red and rosé styles and find the acidity that the crop maintains (at least in my site) makes it a better candidate for the latter.

Rather than viewing St. Croix as being difficult to ripen, I embrace the acidity and tart red fruit flavors of the grape and prefer to think of it is as a versatile, cold-hardy red variety that favors rosé production as well as red. Grapes are generally left on the vine until the second or third week of September on my farm and then harvested before we begin to see them lose their pedicel strength. Even still, we find ourselves placing pick bins directly beneath the vines to collect any rogue berries as we snip the clusters.
In the Winery
When making St. Croix rosé, I prefer a lighter crush on this variety, only gently popping the berries, and set my crusher gears slightly farther apart. I find I can get too much color and tannin extraction in my soak when the berries are more severely crushed and skins greatly torn. If the grapes are
just gently popped and left mostly intact, I can allow the grapes to sit on the skins overnight and extract a nice salmon pink hue from them. I have had the instance of crushing more vigorously, tearing the skins a bit more, and overnight contact time was too much, creating too deep pigmentation for rosé.
For rosé production with St. Croix, I strive for a harvest pH over 3. This can be a struggle in some cooler years, and potassium bicarbonate is then needed in the winery. In good weather years, I will be thrilled with a Brix of 22 and pH of 3.0 or above. After crushing and pressing, I will adjust acidity to approximately 8 g/L and a pH of 3.2 or 3.3. I find that glutathione additions (Booster Blanc) have excellent results on the nose of the wine, helping to enhance subtle delicate florals and dominant notes of cranberry and tart raspberry.
For inoculation, yeast strains I turn to for rosé vary from 71B to help mitigate malic acid to Vin 13 to help promote florals and aromatics. Both have provided me with excellent results in the past.
While St. Croix can have a daunting pH, it is not prohibitive to red wine production with proper adjustment. Due to its thinner skins, I do find St. Croix grape skins will break down quite a bit throughout fermentation, especially in comparison to vinifera grapes. A lower dose of pectic enzyme is helpful to avoid over-maceration and breakdown of the skins. Additions of fermentation oak and tannins are helpful as hybrid grapes do contain higher levels of proteins that can bind with grape-derived tannins during the fermentation process and cause them to drop out in precipitate. This “sacrificial oak” will help to maintain the desirable grape skin tannins.
Yeast strains in a red wine example can vary depending on the vintner’s goal. 71B will help to metabolize the malic acid in low-pH musts. D254 can help to promote structure and mouthfeel along with red fruit notes. BM4x4 is excellent at promoting the varietal characters of black cherry, plum, and the tobacco nose that St. Croix is known for. If the vintner has space and resources to obtain multiple yeast strains, I would divide the batch and ferment with a different yeast strain in each to help promote varietal character as well as mouthfeel.
Malolactic fermentation as well as chemically reducing the acid content will most likely be a necessary step in cool-climate production of a red St. Croix. The pH must be brought above 3.2 at a minimum to ensure a successful yeast as well as bacterial fermentation. Without acid adjustments, the acids can steer the flavors towards unsweetened cranberry juice, which can be a bit too tart for most drinkers. After adjustment and with oak aging, St. Croix can produce a complex red wine with minimal foxy character for a hybrid. Rich aromas of tobacco, cranberry sauce, and raspberry jam unfold, complementing flavors of black cherry and mocha pulled from French oak aging.
Want to do something fun with extra St. Croix you may have next harvest? Its bright fruit character and natural acidity make it a good candidate for sweetening. I have created a mulled-style wine from this variety with the addition of fresh fruits and spices during the aging process, after appropriate steps of stabilization. The berry notes mix deliciously with cinnamon and nutmeg and a bit of sweetening, creating a lovely spiced wine for the winter months. Omitting the spices, an infusion of fresh fruits and a bit of sweetening could also turn this fruity, lighter-bodied red into a great sangria-styled wine for the summer.
St. Croix Red Wine Recipe (Yield 5 gallons/19 L)
Ingredients
125 lbs. (57 kg) St. Croix grapes
Sanitizing solution of potassium metabisulfite (KMBS)
KMBS powder and citric acid powder
5 g yeast (BM 4×4, D254, or 71B)
Liquid pectic enzyme (Scottzyme Color ProTM or Lallzyme EX)
Potassium bicarbonate
7.5 g Go-Ferm Sterol Flash
7.5 g Fermaid O
5 g Fermaid K
5 g Opti-Red (optional, but helps)
5 g Booster Rouge (optional, but helps)
5 g oak dust, French medium+ toast
1 packet MLF bacteria (Wyeast liquid cultures)
Distilled water
Table sugar (if Brix is low)
French medium oak chips, cubes, or spiral
Equipment
Crusher/destemmer
Wine press
15-gallon (57-L) fermenter
5-gallon (19-L) carboy
Airlock and bung
Auto-siphon and tubing
pH meter
Hydrometer
Thermometer (digital preferred)
Glass marbles (optional)
Step by step
1. Ensure all your equipment is clean and in proper working order. Make a fresh batch of KMBS sanitizing solution using 1 Tbsp. of KMBS powder and 1 Tbsp. of citric acid mixed into 1 gallon (3.8 L) of clean water. Fill a spray bottle with the KMBS/citric acid solution and spray down your processing equipment. Ensure there is no pooling of sanitizer in bins or press basins.
2. If using fresh grapes, crush and destem and transfer immediately into a sanitized 15-gallon (57-L) fermentation bucket.
3. Add 50 ppm of KMBS to kill off natural yeast. Utilize the sulfite calculator at www.winemakermag.com/sulfitecalculator to assist in your calculations. Throw a cover on the must bucket and allow to sit overnight in a cool area. This will kill off negative microbes and allow the must to come to a temperature of 60 °F (16 °C).
4. The next morning (12 hours after the addition of KMBS), add 5 drops of pectic enzyme per gallon (3.8 L) of must and stir well. Add the oak dust and stir well.
5. Take measurements of your juice, including volume, Brix, pH and TA (titratable acidity). Adjust the juice to have a starting Brix of at least 24, a pH of ~3.5, and TA of 6–7 g/L. Utilize potassium bicarbonate to reduce acidity. www.wineadds.com has helpful calculators for adjusting acidity in must. If you have trouble adjusting the TA and pH in relation to one another, use the pH as your main acidity value.
6. To prepare the yeast, warm 50 mL of distilled water to 60 °F (16 °C) and add to a mixing bowl along with the Go-Ferm Sterol Flash. Stir well. Then add five grams of yeast and stir well. Allow to sit for 15 minutes. Then mix in thoroughly to the juice with a sanitized stir paddle.
7. Place a lid on the fermentation pail loosely and wait 24 hours to observe yeast activity. Take Brix measurements twice daily via a hydrometer to ensure the start of fermentation. When obtaining samples for Brix measurements, strain the solids out of a sample of must, using a sanitized strainer, and pour only the liquid into your hydrometer jar or beaker. Using the thermometer, take temperature measurements daily. Try to keep the fermentation temperatures between 70–85 °F (21–29 °C) to help secure color but also avoid off-aromas. To do this, you may need to put the fermentation bin in a cool area of your basement, outdoor porch, or refrigerator, or in a larger bin (garbage pail) filled with ice water.
8. After a day or two of fermentation, check the Brix and if it has dropped by one or two degrees, it will be time to add some nutrients. Add 100 mL of distilled water to a mixing bowl and add 7.5 g Fermaid O and the Opti-Red and Booster Rouge, if using. Mix well to create a slurry and then stir into the fermenting juice with a sanitized stir paddle.
9. Continue to monitor Brix and temperatures daily (twice daily would be preferred). When the Brix has declined to between 15–11 °Brix, add the Fermaid K in the same way you added the Fermaid O.
10. When the temperature is between 75–80 °F (24–27 °C) and the alcoholic fermentation is well underway, wipe the Wyeast MLF packet of bacteria with a cloth wetted with sanitizing solution.
Pat to dry, and then tear off the top and pour it over the must. Stir to punch down the skins and incorporate the bacterial cultures.
11. Continue to ferment as close to 80 °F (27 °C) as possible until the wine has fermented to dryness (-1 to -2 °Brix). This should take 7–21 days.
12. When the wine has achieved dryness, press out the wine in a sanitized press and pour all of the wine into a 5- or 6-gallon (19- or 23-L) carboy to complete its MLF. Make sure to affix a bung and airlock to prevent oxidation and allow the MLF to off-gas.
13. After 5–7 days, rack off the lees into a clean, sanitized carboy. Affix bung and airlock and allow to sit for a month. If you have an air gap after racking, either top off with a complementary wine such as Pinot Noir or add sanitized glass marbles to displace the headspace.
14. Monitor the MLF via paper chromatography or measure the reduction of malic acid via a meter to track the progression of the fermentation. When the MLF is complete, rack the wine and add 50 ppm of KMBS.
15. One month after the initial racking and addition of KMBS, rack it again into a sanitized carboy and add another 50 ppm of KMBS. Consider degassing at this point, briskly stirring with a wine whip during a racking session. Always be careful when using this tool in a glass carboy. Consider racking it into a food-grade bucket and degassing in that. Never put a glass carboy under suction or negative pressure.
16. While the wine is aging, consider the addition of oak chips, cubes, or staves to add a bit of oak to enhance the wine. This variety is complemented by oak but be wary to not over oak it and overpower the robust fruit and tobacco notes that St. Croix is known for.
17. Allow the wine to sit and age, maintaining a free SO2 level appropriate for the pH. WineMaker’s sulfite calculator will help you determine the proper dosage given the parameters of pH and volume. You can filter the wine after 8 months of aging if you choose. At this point, it should have been racked four times and have completed its oak aging.
18. Consider cold stabilizing or acquiring a cold stabilizing product such as Zenith Color. This product may only be used if the wine is filtered down to 0.5 micron as turbidity will interfere with their effectiveness. If filtration is not available, try to cold stabilize via exposure to cold (put wine in a plastic container, do not cold stabilize in glass).
19. Once cold stability has been achieved, taste the wine and consider if it is ready to bottle. Fining agents such as Super Kleer or mouthfeel enhancers such as gum arabic may improve mouthfeel and clarity.
20. Bottle once you are content with the flavor and stability of the wine. Always add a small amount of sulfite before bottling — 10 ppm beyond the sulfite calculator’s recommended value — to account for oxygen uptake during the bottling process.