Editor’s Note: This is the fourth installment of a year-long series of the life of a homemade wine, from homegrown grapes in New York State.
In my last installment I discussed preparing my various musts as well as the importance of yeast selection for achieving a certain style and type of wine. In this installment, we’ll focus on the importance of shepherding a healthy fermentation. In its simplest definition, fermentation is when yeast converts sugar into ethanol and carbon dioxide. To make great wine, a winemaker must provide proper conditions for the yeast to do its job, with the least amount of stress possible. Yes, yeasts can get stressed, just like us. And just as it does in humans, stress can cause some real health related issues for yeast. This stress can result problems like incomplete fermentations and off-flavors and aromas.
White and Rosé
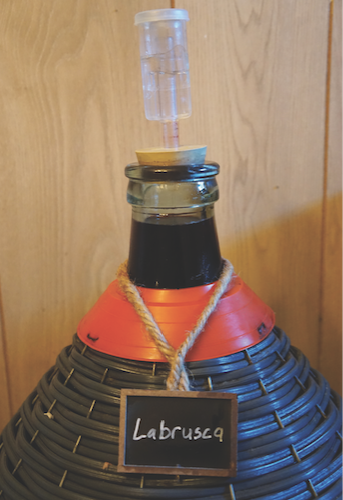
So let’s start with the fermentations of white and rosé wines, which I handle the same in the winery. The focus in these fermentations is to maintain the fruit characteristics of the resultant wines. The key to achieving this is not only picking the right yeast for the intended outcome, but providing the right environmental conditions for the yeast to do their work. For white and rosé wines, I find that the key is to go “low and slow.” I compare this to a cooking technique known as braising, which is done by cooking a meat at a low temperature for an extended period of time. This process results in a very tender and moist outcome. Similarly, white and rosé fermentations should be kept at lower temperatures, which slows the yeast down and extends the time it takes to ferment. During the winter months my basement temperatures are between 55 and 65 °F (13 and 18 °C). Since I don’t have any temperature-controlled tanks like many commercial wineries do, I take advantage of these cooler temperatures for my white and rosé wine fermentations. These fermentations can take between two weeks, and if you’re in the low end of the temperature range, well over a month and even several months to go to completion.

During this time I keep a close eye on the fermentation process in my wines. I watch for the activity of carbon dioxide formation by the yeast, which is easily seen through the clear carboys and watching the airlocks bubble. Once the bubbling has stopped and I can see a good deal of spent yeast at the bottom of the carboy, I test the fermentation for completion. I test my wines two ways: First I test the specific gravity with a hydrometer. I take a sample and check to see that the hydrometer reading is below 1.000. I then taste the wine. A palate test is very important — I am looking for residual sugar and any off-flavors and aromas. These two tests will tell me if the yeasts have done a good job and if I provided the right fermentation conditions.
If all is good according to my tests, I rack the wines off the lees, check and adjust SO2 and then add bentonite for fining. If you recall from earlier in this series, I added pectic enzymes right after the grapes were crushed and destemmed, and in the case of the white wines, after pressing. I did this to maximize juice extraction and to eliminate pectin haze in the resultant wine. Adding bentonite is the post-fermentation stage of clearing my white and rosé wines, known as “fining.” Bentonite is a clay made from volcanic ash. It has a negative charge and will attract and absorb proteins and other positively-charged colloidal matter in the wine, and settle out. This process stabilizes the wine against protein haze. Both pectin and protein hazes can be very stubborn to drop out of solution, and may not, in any reasonable amount of time, drop out at all. With this in mind, give the wine a minimum of three weeks to settle with this bentonite addition.
At this point I carry these carboys outside to take advantage of another one of mother nature’s “gifts” that is provided here in the Hudson Valley of New York in the winter months — it’s really cold! I place all my white and rosé on my deck, covered with a blanket to keep out the sun, and fill the airlocks with vodka to keep them from freezing. This is the beginning of the process known as cold stabilization and should always be done after fining. The sub-freezing temperatures act to bring tartrates out of solution, which will settle to the bottom (and sometimes stick to the sides) of the carboy. I leave the wines outside, depending on the weather conditions, typically for a month to allow this process to complete.
The Reds
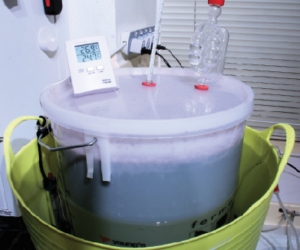
I handle my red wines very differently than the white and rosé wines at this point. First, the red wine musts include the grape skins as a lot of color, flavor, aroma, and tannins derive from the maceration and fermentation of these wines with their skins. Second, just like the white and rosé wines, temperature is very important for red wine fermentations. In the case of the red wines, however, warmer fermentation temperatures are desired. I target fermentation temperatures between 80 and 90 °F (27 and 32 °C), and the reason for these warmer temperatures has to do with extractions. Warmer temperatures allow for better extractions of color, tannins, and aromatics that are contained in the grape skins. As a good shepherd, however, I need to keep those temperatures from getting too high. Temperatures in excess of 90 °F (32 °C) can stress out the yeast (depending on the strain). This again, can lead to stuck fermentations and off-aromas and flavors. My garage is insulated, so I can maintain relatively consistent temperatures over a 24-hour period, and I check the temperature daily; if things get too warm I add sanitized sealed bags of ice to bring the temperatures back into the proper range.
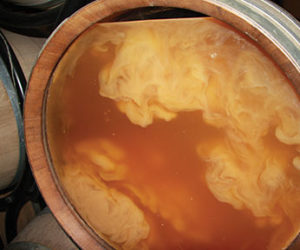
Another very important part of a red wine fermentation is performing punchdowns. This is the process of physically turning over the grape solids (skins, seeds, stems) that rise to the top of the fermentation, which is called the “cap.” I use a punchdown tool (see photo on page 27) to push down two to four times per day the cap that is formed. This process is very important for a number of reasons. First, it maximizes color and tannin extraction by regularly bringing the skins in contact with the wine. Second, it helps moderate and evenly distribute fermentation temperatures. The cap acts as a blanket and holds in heat from the exothermic reaction of fermentation. Punching down the cap breaks down this blanket and allows some of the heat to escape. Third, punchdowns introduce oxygen. Oxygen is important at this stage of a wine’s life. Yeast is an aerobic organism that requires oxygen to survive. Remember, as good shepherds we need to make sure that yeast isn’t stressed, so give it the oxygen it needs. Finally, punchdowns keep the cap fresh. The cap could grow bad bacteria (lots of fruit flies are around this time of year, which carry Acetobacter among other things). Keeping the cap punched down and wet with the developing wine reduces the potential for spoilage organisms forming. I keep repeating the punchdown process until primary fermentation is complete or until I decide to press the grape solids. The timeframe has to do with the level of extraction desired. In my case, this is usually about seven days. As I mentioned in my last installment of this series, I also have French oak chips in the mix during my red fermentations. This adds some initial complexity and tannins and also helps lock in and stabilize color, which will complement some American oak barrel aging that the wine will go through later in the process.

Once the primary fermentations are complete, I drain off the free-run wine from the fermentation tanks, which is the wine that is below the skin cap. I have taps at the base of each of my fermentation tanks for this purpose, which makes it easy (see a photo of this process on page 28). I drain as much wine as possible and transfer it into a clean, sanitized tank. I then transfer the rest of the must and grape solids to my basket press. After pressing, the press wine gets added to the free run wine.
Once pressing is complete, I allow the wines to settle overnight (see a photo of this on page 29). The next day, I rack off the settled wine and transfer them into to awaiting cleaned and sanitized Flextanks and variable-capacity stainless steel tanks. As my volumes can vary from year to year, (this is pretty typical for anyone growing their own grapes), I really like variable-capacity tanks. I first fill the fixed volume Flextanks and the rest of the wine goes to the variable-capacity tanks.
Once all of the wine is transferred, I get ready for the next stage of a development: Malolactic fermentation. More to come on this next stage in the next installment of this series about the a year in the life of a homemade wine.
Stay tuned!
Spring Pruning (sidebar)
Out in the vineyard this time of year, when winter is finally over and I start to see warmer days (above 50 °F/10 °C) here and there, it is time to start pruning. I try to delay this as long as possible in case of a late frost. If I prune too early, it can work against me by waking up the vines and starting budbreak. Once the buds have opened and the leaves are visible, they are susceptible to freeze damage. By waiting as long as possible, I can slow down bud-break. Is there any risk from waiting too long, though? Of course. As in most decisions when making wine, pruning decisions are a balancing act. If you wait too long and budbreak has started, or is just about to start, you run the risk of damaging some of the buds.
Once I make the decision to go for it, I prune my vines in the double Guyot method, where each vine has two canes and two spurs. Starting from the head of the vine I pick a cane from last year’s growth that is approximately the thickness of a pencil and has grown up near the top of the trellis, receiving a maximum amount of light exposure. These are the canes that will be most fruitful. I choose one to go to the left and one to go to the right, and try to pick canes coming from just below the fruiting wire. If you have two trunks, I try to have one coming from each trunk. This is because excessively cold winter temperatures can sometimes cause splitting, or can kill one of the trunks.
It’s always important to keep next year’s vintage in mind when pruning.
You need to leave a couple of renewal spurs for this. I try to have these closest to the head of the vine and the next cane to become this year’s fruiting wood.
The fruiting cane is pruned in length to match up with the fruiting cane coming from the adjacent vine. I wrap it and tie its end to the fruiting wire. Sometimes I leave an additional cane on each side to ensure there are enough viable buds after bud break. I do this in the case where my annual winter bud analysis is a bit questionable.
When you’re out in the vineyard doing your own vine pruning, remember that every vine is different and has a “mind” of its own. Pruning is both an art and a science. The artistic part is viewing and then shaping each vine to try to create the picture sought after. The science is providing the vine with what it needs to produce the best grapes. For more about pruning, check out Wes Hagen’s story in the February-March 2008 issue of WineMaker.

An introduction to sur lie aging and why you may want to consider it for your next batch.
Many hobby winemakers believe that fermentation temperature control is beyond their reach — but this isn’t so! Discover how to keep temperatures in the proper range.

