The Home Wine Laboratory
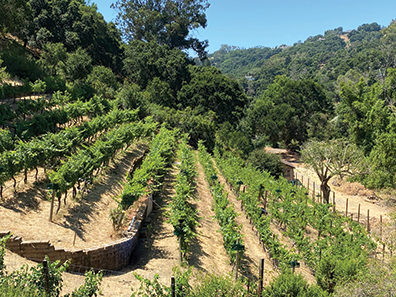
It is said that fine winemaking begins in the vineyard, but I’ve found that winemaking is an unending process, starting with the grapes and continuing to evolve once bottled. Wine is a complex chemical mixture that can go to ruin quickly if not managed properly. With all the technology available, and products galore to help you create a wine that would compete with many larger wineries, it is the winemaker’s responsibility to care for and nurture the biological soup that eventually becomes a beverage to be gifted, shared at a party or simply sipped with dinner.
The creation of a luscious wine demands time and effort. Often, we don’t take the time to monitor the wine aging in our cellars. In those cases, wine becomes a very different product than we originally intended. There are ways to prevent the damage that can occur, but it takes vigilance, topping and protecting the wine — and above all knowing what its status is through testing.
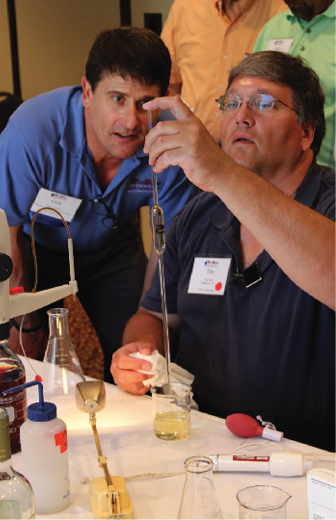
Wine analysis can be expensive, but it is worth it. It helps you to understand what you are doing during production, aids in the diagnosis of problem wines and improves your chances of not disposing of the wine in the end. There are commercial laboratories that will do any analysis you’d like, for a fee, but it takes time to get the results back. For home winemakers who want those numbers at their fingertips, one option is to set up a home wine lab.
A realistic approach to analysis
So what can you do at home? At minimum, you should have the capability to test for sugar, acid, pH, malolactic acid conversion and free and total sulfur.
A reasonably-equipped home wine lab — capable of doing all the analyses above — would have the following equipment: a refractometer for testing the sugar content in non-fermenting juice, a temperature-compensated hydrometer for testing the sugar content in fermenting must; Clinitest tablets for measuring residual sugar in dry wines; a pH meter, a burette and miscellaneous glassware for measuring titratable acidity (TA) and the equipment for measuring sulfur — whether by the aeration-oxidation or Ripper method. Another fun thing to do at home is a paper chromatography to test the completeness of your malolactic fermentation (MLF).
The TTB requires all bonded wineries to have the capability to test for alcohol, but home winemakers — of course — are not subject to this requirement; and, it is not common for home winemakers to test for alcohol in their wines. Instead, they estimate the alcohol content from the starting and finishing °Brix or specific gravity readings. Finally, used microscopes can be found at a reasonable price on the Internet. If you have the background in microbiology, knowing what kind of yeast and bacteria are in your wine can be very helpful. The methods for this are, however, well beyond the scope of this article and it is not common for home winemakers to identify contaminating bacteria or wild yeasts via microscopy.
You will have to consider that with any testing, you will need some labwear to support your procedures. These include pipettes, thermometers, flasks, water bottles, a stir plate, beakers and stirbars and burettes. In addition, the chemical solutions that you use must be “standardized.” This means that they meet certain specifications in order for the testing to be considered accurate. Accuracy is critical. Without having controls of any sort, you cannot know for sure if what you are doing is correct.
I would advise you to purchase a good book on wine analysis. Of particular help to me over the years are two volumes:
Techniques for Chemical Analysis and Stability Tests of Grape Juice and Wine, Patrick Iland, Andrew Ewart and John Sitters.
Wine Analysis and Production, Bruce Zoecklin, Kenneth Fugelsang, Barry Gump and Fred Nury.
Refractometry and Hydrometry
Wine quality depends on the degree to which the wine is satisfying and balanced and reflects the character of the grape. Maturity gauges include general fruit condition, a taste assessment of the grape flavor, the tannin maturity, aroma intensity, acid, color development and the ability to ripen further. One of the more important gauges of maturity is the sugar content in the grapes. A refractometer is the instrument of choice for measuring this.
Refractometers measure the extent a beam of light is bent when it passes through a solution on a prism. In a wine refractometer, the bending of that beam of light is then related to the °Brix scale. It only requires a drop of solution for testing, so it can be used for quick checks anywhere, from the crusher to the vineyard. However, the results can change drastically due to temperature fluctuation. When using it in the vineyard, a good suggestion is to keep the refractometer in a cool area. Alternately, you can keep the field samples you collect in a cooler with an ice pack and bring them back to the lab for testing. For accessories, refractometers require only a small plastic pipette, or similar dropper, for placing a drop of liquid on the prism.
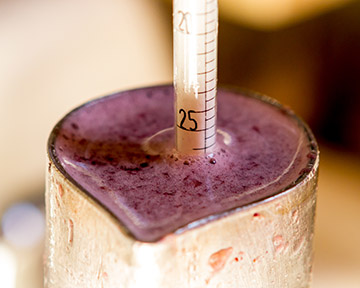
Alcohol will interfere with the sugar reading on refractometers. For fermenting musts and newly finished wines, hydrometers are therefore used to determine the remaining sugar level (in °Brix). There are several interferences to be aware of with any reading of fermenting must: CO2 will buoy the hydrometer up thus giving a false value for the °Brix; the hydrometer must also float freely in the liquid, so it’s important to have a large enough cylinder to reduce friction along the sides. (A test cylinder to float the hydrometer is the only piece of support equipment you will need for your hydrometer.) As with the refractometer, temperature is critical. Many hydrometers have built-in thermometers, and by measuring the temperature, you can adjust the °Brix reading quite simply. If your hydrometer isn’t temperature compensated, use a thermometer to determine the temperature of the must and adjust the Brix based on the following calculation: Add 0.06 °Brix for every degree Celsius above the temperature for which the hydrometer is calibrated. Subtract 0.06 °Brix for every degree Celsius below that temperature .
Another popular method for testing sugar is by using the RQflex® Reflectometer, which is a remission photometer for the evaluation of Reflectoquant® test strips. It uses a strip and calibration set, has memory for five methods and 50 measurement results (including the date, time, parameter and result), has a PC interface, lot-specific calibration with barcode technology, is battery-powered, and includes a detailed instruction manual or training disk. Currently there are test strips for malic, lactic, free sulfur, sugar, pH, titratable acidity, ammonia, and alcohol. EMD produces the RQflex, and though they are developing a volatile acid strip, it’s not being distributed in the US at this time. The Reflectoquant® is an all-in-one testing unit mainly used as a tracking tool.
For testing the level of residual sugar in a dry wine, you can use Clinitest tablets — tablets designed for testing blood glucose in diabetics. The tablets come with a small tube to hold your sample (in this case, wine) and a color chart to gauge the color change in your sample. (Daniel Pambianchi’s book, Techniques in Home Winemaking, gives a procedure for using Clinitest tablets.)
Acid Chemistry
pH plays a critical role in almost every aspect of the stability of the wine, including that of color, the incidence and extent of the malolactic conversion, the rates of formation and hydrolysis of esters, the ionization and rate of polymerization of anthocyanin pigments in red wine, the incidence of protein instabilities in white wine and microbial stability. Perhaps one of the most important roles it plays is the effect on the species of sulfur that is available to protect the wine from oxidation and microbial instability. The organic acids present in grapes and wine lend structure and balance, preserve fruitiness, and play major roles in stability. Titratable acidity (TA) gives you a good indication of how the wine will taste — too little acid makes the wine flat, and too much makes the wine sour and difficult to complete both primary fermentation and malolactic conversion.
For these reasons, having a pH meter to test for pH should be one of your utmost priorities. (A pH meter can also help you identify the endpoint in TA titrations.) Since there are many models of pH meters available on the market, here are some tips to help you with your decision to purchase:
• The pH meter should be precise to at least +/- 0.03 pH units. It should have buffer or calibration control, slope control and a digital display. Finally, temperature is critical, so automatic temperature correction is very helpful.
• Just buying a pH meter isn’t enough, though. pH electrodes must be taken care of properly, so you must purchase some buffer storage solution to store the electrode in. How many of you have purchased your pH meter, used it only during harvest, then stored everything away in a box until the following year? During that time, the electrode is sure to dry out and becomes an issue when you are trying to get it working again. You will need pH 4 and pH 7 buffer solutions for calibrating the meter and beakers (or similar containers) for each of your samples. It’s also good to have a beaker of distilled water handy to rinse your electrode between samples and some laboratory wipes — such as Kimwipes — to gently blot the electrode dry. Some tips for testing pH include using fresh pH buffers to calibrate your meter and degassing the sample because carbon dioxide is a major interfering substance.
• To measure titratable acidity (TA), you need a small amount of standard laboratory glassware. Most importantly, you will need a burette, preferably held in place with a burette clamp attached to a ring stand. You will also need a 250 mL graduated cylinder, volumetric pipetes and beakers to hold your samples. It is also helpful to have a magnetic stir plate and stir bars. Solutions of sodium hydroxide (used to titrate the organic acids in wine) should be fresh and standardized against a primary standard. NaOH may be prepared at 0. 0667N so that the reading from your burette directly correlates to the total acidity in the appropriate units. Thus, a total volume of 5.0 mL of NaOH = 5.0 g/L of acid in the sample.
The Importance of Sulfur
At various pH values, sulfur acts differently. At the acidic pH of wine, the major portion of free sulfur exists as sulfite and only a small portion as the active ingredient to control oxidation and microbial growth. Sulfur is very complex. It can help you extract color pigments in red wines at crush, but too much can inhibit your malolactic conversion later on. It can inhibit browning in white wines up front, but they may turn brown later on if your sulfur levels aren’t kept up. During aging of the wine, sulfur is added to keep oxidation and Acetobacter (one of the more insidious bacteria responsible for turning your wine to vinegar) at bay.
There are numerous methods for sulfur testing, and no sulfur addition should be made without knowing the pH of the wine. By knowing the pH, a molecular addition can be made to wine which will be far more effective than other numerous additions.
The more traditional and widely-used method of testing for sulfur is the Ripper method. The Ripper method involves a titration and uses basically the same set-up as the titratable acidity (TA) assay, except that you need to use stoppered Erlenmeyer flasks instead of beakers. (And wrap the flask with your iodine solution in aluminum foil, to protect it from light.)
Ripper has been used for many years, but is fraught with issues. It is less accurate due to many interferences (color, ascorbic acid) and it is difficult to see the endpoint in red wines. The normality of the iodine used in the titration must be determined, and standardized frequently. Ripper’s value is that it can be used for both total and free sulfur, but is better for totals because the use of strong sodium hydroxide to break the bonds of the bound sulfur will slightly bleach out the pigments.
Because Ripper is less accurate, the American Organization of Analytical Chemists developed a more accurate method called the Modified Monier-Williams. It is so labor intensive and expensive that an alternative was immediately created to replace it, called aeration-oxidation (A/O). A/O has all the advantages that Ripper doesn’t: a noticeable endpoint, less time consuming and fewer harsh chemicals. The test uses vacuum to sweep the sulfur out of an acidified sample into a hydrogen peroxide trap. There, the sulfur is collected as sulfurous acid, which can then be titrated with a base, sodium hydroxide. The endpoint is easily determined, as the solution turns from a dark purple color in the presence of sulfurous acid to bright green. Again, just make sure that your reagents are both fresh and standardized.
The aeration-oxidation method requires a specialized glassware set up and vacuum source. Most stores that sell wine lab equipment sell the glassware portion as a kit. There are some very good vacuum pumps on the market that cater to the small wine producer. One of the best is the Accuflow. It is a variable vacuum pump which controls the flow of vacuum through the sample for a specified time. It’s more expensive than a sink aspirator, but it doesn’t waste water, and is very quiet compared to a vacuum pump. The Accuflow costs about $350.00 and the cost of the required glassware is comparable. A suggestion would be to go in on an aeration-oxidation set up with your winemaking club or group to share the expense.
Monitoring Malolactic
Before you ever add the sulfur, you’ll need to make sure that both your primary fermentation and ML conversion are complete. An easy technique to use is paper chromatography. This technique separates out tartaric, citric, malic and lactic acids from a wine sample. Standards and samples are spotted at the bottom of a piece of chromatography paper, which is then placed in a jar with an eluting solvent. The solvent ascends the paper via capillary action. Each acid has a unique affinity for the paper and the solvent, and moves different distances from the starting point, thus separating out from the sample. An indicator reacts with the acids to give a yellow colored spot, which becomes evident when the paper is removed from the jar and allowed to dry. By viewing the presence or absence of the malic and lactic acid spots, one can then determine that the malolactic conversion is complete! This is a presence-absence test only, sold in kit form, and it’s a good idea to have an outside lab test the wine when you think the conversion is complete.
Troubleshooting
No lab would be complete without troubleshooting methods. While the wine is aging, and prior to bottling, it’s time to clean it up and look for problems such as protein (haze), tartrate (precipitate) instabilities, and the presence of sulfides. You should always have some copper solution on hand, as well as egg whites, gelatin, isinglass, bentonite and perhaps some tannins to make adjustments to the wine. There are numerous sources of information regarding how to set up fining trials on your wine, and you should use them. Many times, a small amount of remediation goes a long way.
You have only to make sure that the aging wine is monitored to keep it from becoming vinegar. A good way to do this is to keep your barrels topped and the sulfur levels up. Should you have barrels or containers that have leaked and you now have a lovely vinegar aroma wafting your way, look to see if there is a white film on the wine. If so, it would be a good idea to test the wine for volatile (acetic) acid. This is easily accomplished with a Cash still, but they tend to be expensive, and you need a sink and cold running water. Outsourcing your analysis is a good alternative once you have reached this stage.
Outsourcing
Regardless of whether you have time to do analysis or not, the point is that it must be done by someone. There are numerous labs available to help you with the analyses you cannot do. Be aware of what is going on in your wine. Monitor it at all stages of its life, and learn how to troubleshoot. If you think your wine’s primary fermentation is stuck in November, don’t wait until March to do something about it. Likewise, get your ML completed so that you can add sulfur to protect the wine. Finally, take classes to learn how to be more involved with testing and maintaining the quality of your wine.
Last, but first, Education
All the equipment in the world won’t help you if you can’t use it properly. If you have a background in chemistry, the books mentioned earlier should be sufficient to guide you through these methods. If not, a lab course from a local university with an enology department is advised. If this is not available in your area, taking a basic chemistry class would at least acquaint you with laboratory glassware and the types of procedures mentioned.

