Small Batch Wine Experiments
Making small batches of wine at home can be a real labor of love. If you primarily make wine by the barrel it might be easy to take this idea for granted, but making really small batches (less than six gallons let’s say) can take a lot of effort for little gain. For the many amateur winemakers who work frequently with these small volumes even smaller experimental batches are often precisely what is needed.
Bench trials might be familiar to some readers. An exercise in precise measuring and blending, bench trials are most often executed by winemakers determining a final blend. Bench trials do make a great deal of sense when thinking about the choices of how to finish or blend a wine, mead or even beer. As a metaphor it helps to understand the concept of small batches in the way I describe them in this article. My small batch experimentation is a form of bench trials on steroids, and could also be called recipe trials in some instances. I also think small batches are differentiated from bench trails based on whether you require “contact” time with an adjunct (oak cubes are an example for the home winemaker) as part of the expected outcome.
When might a small batch make sense? How would you test a process change or new technique without risking lots of product? I already mentioned oak adjuncts, but the question can be expanded. How do you trial tannins, enzymes or finishing agents side by side at home using the same base wine? Even more specifically, but no less practical for many, how do you use those small lots of grapes or fruit that come your way? For these questions the answer is the same: Make a small batch!

In this article we will explore the process of experimentation in small-scale home fermentation. I must mention the grounding of what I am calling experimentation, specifically that what I am about to describe isn’t scientific because most of my experiments are measured chiefly organoleptically, e.g. with the senses rather than with scientific instruments. I do use a hydrometer and pH meter to develop musts and monitor fermentation, I do measure when blending and finishing, but I am pretty low-tech procedurally. These experiments are engineered more for trying out new flavors, ingredients and techniques for those of us with small setups. While my personal process of experimentation isn’t rooted deeply in science, I do advocate always taking notes throughout the process (which you should do whenever you are making wine), using control samples for contrast and measuring and innovating your own process (if you are able to do so).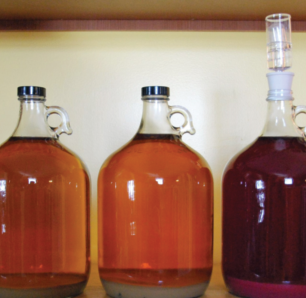
Setting Up
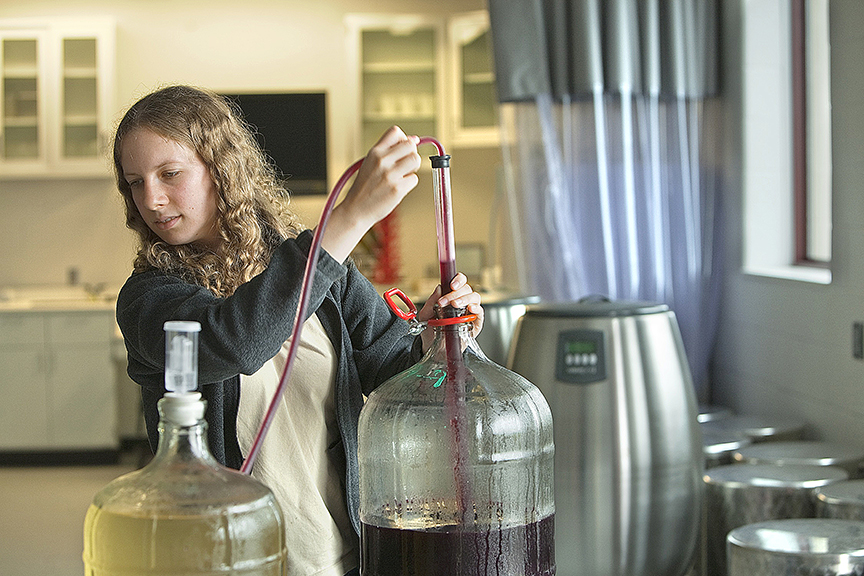
I’m not necessarily advocating making experimental batches with an initial volume of just one gallon (3.8 L), unless you only have enough ingredients for that. Rather, I am suggesting that you can use several smaller containers, both 1 and 3 gallons (3.8 and 11 L) in size, to split up your starting volumes for experimentation. One-gallon (3.8-L) glass carboys make a great vessel for small batch experiments and are also useful for a number of additional functions, including storage of overflow volumes, making yeast starters and for spirit infusions.
There are only a few equipment or process-related notes to consider with the types of small batches I am describing.
• The mouth on the one-gallon (3.8-L) glass carboys is narrow, and if you use an autosiphon for transfer you will need a mini version. For example, this one from Fermtech: http://www.fermtech.ca/siphon%20starter/MAutoSiph.html
• The diameter of the small carboy necks can also be a problem for bungs; some of the smaller universal sizes are not really a good fit. The silicon (both solid and airlock style) do often fit these carboys, and when not using them for fermentation the solid screw tops available for them are also nice to have.

• To keep the sampling and top-up volumes low I have taken to using 3-mL transfer pipettes to quickly retrieve a sample from an opened container. Quick and easy, but no double dipping allowed.
• Even though you are working with small containers, the amount of cleaning work you do stays pretty much the same as it would be for larger volumes or batches. I usually work with more than one small batch at a time to help offset the productivity drag.
Experimenting with Oak
The use of oak adjuncts during the bulk aging of red wine is a common practice for home and small batch winemakers. There are lots of options out there from chips, cubes and spirals, to powders and liquids, but what about their efficacy? How much is enough or too much, and is there a “right” product for your process and more importantly your palate?
I experimented to learn some of these answers first hand.
A few years ago I settled on using oak cubes after trying both powders and chips. Although I felt that cubes were providing me with the best overall results, I wondered how the types I typically had available to me (French/American/Hungarian) would create personal impressions. I also wondered exactly how much of them I should use, how different wines would take up the oak, and so on. Lots of questions arose, and in the end I couldn’t really answer some of them easily (or quickly). And furthermore I felt that I couldn’t answer any of my questions without doing some experimentation.
For an oak experiment I performed two different comparison trials. First, I split a 5-gallon (19-L) batch of stable, clarified Syrah into one 3-gallon (11-L) and two 1-gallon (3.8-L) carboys, ultimately using three different volume-adjusted amounts of French oak cubes in each. Second, I trialed nearly equal amounts of French oak versus American oak in two larger carboys of Malbec.
For the Syrah/French oak experiment I placed 1 ounce of medium toast French oak cubes in the 3-gallon (11-L) container and used it as my control. I selected this amount based on having used 2–3 ounces (57–85 g) of similar oak cubes based on manufacturer recommendations for several 6-gallon (23-L) batches the prior year. In one of the smaller carboys I placed 2⁄3-ounce (17 g) (double the volume-adjusted control dosage) of the same oak cubes. In the other 1-gallon (3.8-L) carboy I placed 1 ounce (28 g), or triple the control dosage of the oak. All three carboys were gently agitated, topped up and bunged.
For the two carboys of Malbec I started at the high end of my prior experiences, looking for more oak overall. I used 3.5 ounces (99 g) of heavy toast American and 4 ounces (113 g) of medium toast French oak chips in two different 6-gallon (23-L) carboys of Malbec from the same lot and ferment of Chilean grapes.
Once all the carboys were set up, I tasted each batch a couple of times over the next several months to see how the oak was developing. About a week before each of the two, three and five month samplings I gently stirred the carboys to agitate the wood and then let the lees settle back down.
Overall the experiments proved a couple of basic ideas that are consistent with the experiences I’ve had since then: that 3–4 months is the minimum contact time for oak cubes, and that the “recommended” amount after about only three months produces what I would call a subtle oakiness that was pleasant, but not big enough for me.
After four months I detected a better balance of oak and wine components in the 1-gallon (3.8-L) carboy of Syrah in which I had doubled the recommended amount. It was woody, gently spicy and overall the texture was smoother. At six months I still liked this version better. This ultimately led me to rack and add fresh oak cubes to the 3-gallon (11-L) carboy, which I had originally used as my “control” container. The other 1-gallon (3.8-L) carboy that had been given triple the dose developed a strong woodiness early on, and was a bit too much for me after six months. I didn’t feel like I ruined the wine, it was just woodier than I wanted. I ultimately blended all the wines together before bottling, which resulted in a wine with about double-the-recommended dose of oak, which tasted right to me early on and then held up in later samplings.
The Malbecs with the different oaks definitely took a slightly different path. The use of two different kinds of oak produced two different finished wines. The American oak version came off as hotter and a bit edgier to me. The French oak version was smoother, but less aromatic. The wine with the American oak was greener and more herbal to me than the French-oaked version, but in early drinking was just as enjoyable. As the wine has aged both are continuing to mellow, but
I feel that the French-oaked version has the edge.
One thing that occurred to me regarding oak cubes during that project was that in some ways the qualities they imbue in the wine can be manipulated — much like dry-hopping or late flavor additions in beer; they are strong in aroma/flavor initially but do fade and mellow with time, so multiple dosages can be applied to extract a desired amount of all the components oak adjuncts have the potential to add. Once or twice since these initial experiments I have racked a wine an additional time, adding more fresh oak ahead of a short “contact” window before bottling. In these cases I feel like I captured more of the youthful, and perhaps volatile and fragile, oak components that I wanted in the bottle. And while the oak in these wines mellowed and transformed over time like one would expect, there was more of what I wanted left behind in the ones with a second, or “late” addition.
Mead Experiments
My recent mead projects have been the most exciting and elaborate use of my collection of one-gallon (3.8-L) carboys.
At the time there were ten 1-gallon (3.8-L) carboys in my basement, all filled with different types of meads that had been infused with an array of adjuncts including herbs, spices, teas and hops. So how did I approach this experiment?
Initially I fermented several batches of mead with the full volume having been made from the same recipe. These batches included:
• 9 gallons (34 L) of orange blossom honey infused with dried orange peel and vanilla beans.
• 9 gallons (34 L) of wildflower mead, unflavored
• 2 gallons (7.6 L) of clover mead, unflavored
All the mead was started at relatively high gravity, 1.135–1.140 SG, and was fermented with Lalvin 71-B yeast, which from that gravity will leave some residual sugar, an attribute I specifically desired if I could get it. Final gravities ranged from 1.024 to 1.040 SG.
Once the mead was done with primary fermentation I racked it all into clean containers, added the stabilizers (potassium metabisulfite and sorbate) allowing the fermentation and out-gassing some time to complete.
While I waited for the meads to stabilize I set about determining the various rounds of flavoring experiments I would try. I used a number of resources on this project, and several are notable for anyone who might be interested in the range of possibilities, as well as some fundamentals about mead. My wildflower mead has been used in an awesome number of ways. I’ve steeped pineapple sage, traditional sage, lemon, ginger and a complex of brown spices including allspice and cinnamon in some of it. One of the earliest 1-gallon (3.8-L) batches that used it was a mead infused with three kinds of chili peppers (from my own garden) that was finished sweet. That mead went on to win a Best in Show at a regional brewing competition, besting more than 420 other entries! The most recent infusions were with two kinds of black tea, vanilla, and a blend with a blackberry wine made from blackberries harvested from my family’s property in Vermont.
The orange blossom honey that included the orange peel and vanilla was used to make three different versions of an orange/vanilla mead. The differentiation came late in the finishing process with how much of a sugar or honey syrup was used to back sweeten it, and how much secondary orange peel and vanilla was used to lock in the final flavors desired. I struggled with re-fermentation for that particular mead, so while I was able to complete the finishing process the resulting meads have diverged from each other making it hard to evaluate the finishing choices.
The clover mead was intended for a single experiment — a hopped mead. I chose the clover honey because my experience has taught me that the nose on finished clover honey mead is pretty neutral, something I hoped would allow the hops to be the prominent aromatic component. I had two 1-gallon (3.8-L) containers full of this mead over the course of several additions of hops. At bottling time the aromas from the Amarillo hops were wonderful.
Determining exactly how much of any ingredient, tincture or structural component (acid, tannin or sugar) should be blended in with the 1-gallon (3.8-L) of base mead needed is a sensory exercise for me. I start with a baseline amount, selected based on research or other peoples’ positive experiences. I usually start with 3⁄4 of gallon (2.9 L) of base mead in a clean 1-gallon (3.8-L) carboy. With an ingredient like vanilla I have used about one to three beans per gallon in the past, this time I used six. The additional beans definitely impart a considerable uptick of vanilla aroma and flavor. I also used wildflower honey for this mead. The floral components in both the honey and the vanilla combined to create a huge perfume to the finished mead’s nose. Getting the beans into the carboy is simple. Cut the beans in half lengthwise and scrape them to expose the interior material. Add all the scrapings and the bean husks to the carboy. Topping it up with additional unflavored mead to 1 gallon (3.8 L) will allow the vanilla to steep as long as needed. In the experiment I did, the sweetness level was solidly semi-sweet so I added 1⁄4 tsp. of winemaking acid blend to kick up the tartness a bit. I did agitate the carboy a couple times in the first day to help the bean material distribute. This mead showed well in competitions earlier this year, with several additional results yet to be announced at the time of this writing.
It is worth noting that few natural (or seasonal) ingredients you infuse or blend with will be fixed quantities so using personal taste and texture trials to get the right balance at each outing is necessary. With the addition of other sensory exercises, i.e. my oak trials earlier, experiments that change and enhance flavors mean that the rules to follow are your own to develop and adapt to. Another notable point about working with small batches is that scaling up to larger volumes won’t necessarily be cost or labor advantageous depending on the ingredients used.
Dreaming of Experiments
I come in contact with new aromas, flavors and textures almost every day. These experiences inspire me, and sometimes I need to experiment with them on a small scale to better understand what I like and what I don’t, as well as how I can use aromas, flavors and textures to craft my libations. Some of these experiences consume my imagination until I act on them, and most of the time I really don’t know exactly what is going to happen in the fermenter until I dig into an experiment and give it some time to unfold.
After all of this kind of experimentation I usually end up with lots of different beverages and lots of different styles to enjoy, some of which I might like enough to scale up to a larger batch in the future. And on the other hand, when I create beverages that I am not hugely enamored of I am always happy when I have only made a small amount. The more I learn during the experimentation process the better! In the end, much like building a scale model home, the lessons of what to do differently, or what not to do, from these small-batch experiments will undoubtedly help you decide how to execute and/or go big with an idea.