Traditional Meadmaking: Tips from the Pros
Want to try something new between grape harvest seasons? How about trying your hand at making mead, a wine made from honey. Meads come in many different forms — from dry to sweet, with added fruit (melomel), malt (braggot), spices (metheglin), and so on. But to get a good foundation for your meadmaking, start at the beginning with traditional mead. These pros will get you on the right track.
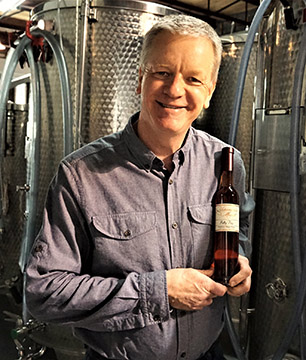
Meadmaker: Ken Schramm, Schramm’s Mead in Ferndale, MI
I like many different honeys for mead. The key element I look for is a really vibrant and attractive aromatic profile. There is a huge spectrum of floral aromatics — on the end I like are things like carnations, roses, and fruit blossoms. They are clear, pleasing, and smell like things you might want to put in your mouth. The spectrum gets less attractive as it goes through the less fruity, to vegetal, to earthy, and even to stuff like daisies that are nearly fecal. That’s the end of the spectrum we avoid.
Citrus blossom or orange blossom has been a consistent honey that we can get in the quantities we need when we need it. We also use some wildflower, but we evaluate the lots before we buy them. Wildflower is a catch-all descriptor, and great care is required.
When choosing your own, taste a lot of honey and decide what you like. For traditionals, especially, I like honeys that really bring it, so to speak, aromatically and on the palate. I like some honeys that some folks find too “over-the-top.” A good example is Tasmanian Leatherwood. The honey and the mead it makes smell like a florist’s shop. I don’t drink that mead eight ounces at a sitting. It’s like an Eau de Vie or a cool Scotch. You sniff and savor it. Some people don’t like some of the complexities. À chacun son goût. Another example is Heather honey. If you don’t like the honey, you’re not going to like the mead. One thing I’ve learned over the years, however, is just as not all delicious grapes will make delicious wine, not all delicious honey will make delicious mead.

Our municipal water in Detroit is very similar to the spring water we have access to, and the assay and the taste is right in the window we want, so we don’t have to do any treatment. With mead, there are no real historical examples of meads from specific water profiles that determine whether or not you are “to style,” as there are in beers.
I am not much of a fan of additional acids. If I am looking for acidic presence or an edge to balance sweetness, I like to get it from fruits or from spices. In my earlier days, I used the citric/malic/tartaric blend post fermentation (which I talk about in The Compleat Meadmaker).
As far as nutrients go, we currently prefer a combination of DAP (diammonium phosphate) and Fermaid O. We use it in four additions, one every 24 hours, starting at the end of lag phase. We actually divide the total amount of nutrient I will use into five equal parts, and start with two for the first addition and one hereafter. We like to shoot for 180-225 ppm of free amino nitrogen (FAN) for meads that will hit 12% alcohol. I did not know about nutrient additions when I got started, and that change (even without staggering) turned my meads around dramatically. I’d recommend reading the article I wrote called “Optimizing Honey Fermentation.” It is here: https://www.homebrewersassociation.org/attachments/0000/1256/NDzym05_MasterMead.pdf
Yeast choice is dependent on the honey; which characteristics I want to accentuate, and what I would like to see as a finishing alcohol level. It really helps if you think about those things before you get started. We like 71B, D-254, and the Chico strain (yes, we do use ale yeasts). We have also used and enjoyed Steinberger and other Riesling strains. We prefer to visualize a desired finishing profile and craft the recipe and the yeast selection to end up there. It is not as difficult as it sounds, once you become familiar with the performance of the different yeast strains.
We have key accounts that will not sell any product that contains potassium sorbate, and we do not use it. Home meadmakers do not have that restriction, though, and if you make a mead that comes out drier than you’d like, you can tinker all you want. Sorbate is only effective once fermentation has ceased, but you can add it according to package instructions at least 24 hours before bottling, and then add honey to sweeten the mead to taste. Using a 5-gallon (19-L) batch as an example, at bottling, I would pull off four cups of the mead into a sanitized eight cup Pyrex measuring cup, and add 1 pound (0.45 kg) of honey at a time, stir thoroughly, and mix that back into the whole batch, re-taste, and repeat until I got to the level I wanted.

The longer you can afford to age meads in bulk (up to say, two years, when I completely lose patience) is worth the wait. And once they are in bottles, you are battling your own impatience. I have had well-treated meads improve for 10 years or longer. I have had a couple go around the bend after 12–15 years, but they were bottled with way too much headspace.
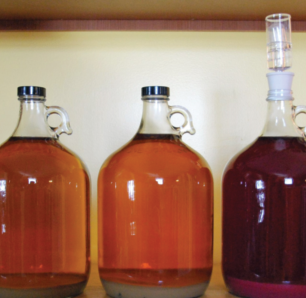
As far as times between rackings, I like to get off the initial fermentation lees in about 28 days. I’ll make a decision about whether to rack again once I see how much sediment is thrown in secondary. I have done some again in another month, and I have let some go a year or longer.
The investment in time and effort to actually make your mead can be much less than in all-grain brewing of beer, but you need to take that time and use it to find the best possible ingredients you can find — honey, fruit, spices, whatever. What our grandparents said is true: You can’t make a silk purse out of a sow’s ear. Quality in, quality out.
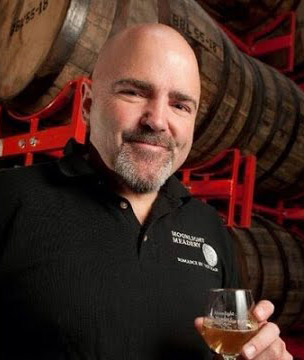
Meadmaker: Michael Fairbrother, Moonlight Meadery in Londonderry, NH
For my meads I prefer the lighter colored honeys like orange blossom and star thistle over darker colored honeys, which have a stronger flavor that can be a bit off putting. The key is to taste the honey and make sure it’s something you like. The fresher the honey the better.
The minimum requirements to make mead are a 6-gallon (23-L) food-grade fermenter, 15 lbs. (6.8 kg) of honey, water, nutrients, yeast, and sanitizer. (I have laid out a detailed procedure at the bottom.)
As with brewing, the yeast you use will make all the difference to the mead you make. I would avoid using Champagne yeast as it tends to dry out the mead too much. My go-to yeast for meadmaking is Lalvin Narbonne 71B‐1122 dry yeast, I use it commercially for everything we make. As a home meadmaker I have also had good success with Lalvin 47D dry yeast as well. You also have many good choices on mead yeast from WhiteLabs, and Wyeast.
When it comes to hitting the desired sweetness of a mead my preference is to make the mead bigger than the yeast can handle and fermenting to the desired sweetness level before stabilizing the mead. To do this I will have a mead that starts out with a gravity greater than 1.120 and then we stabilize after primary fermentation has completed.
For a 5-gallon (19-L) batch of mead, do the following: In a small drinking glass add about 1/2 cup of good-tasting water. Add 1/4 teaspoon of potassium metabisulfite and 3.75 teaspoons of potassium sorbate (also called Sorbistat-K) into that water; stir until fully dissolved. Both powders should dissolve into pure, clear liquid. Gently add this water/liquid into your 5 gallons (19 L) of mead and stir gently for about a minute. Re-seal the fermenter and let the mead sit undisturbed for 12 hours.
Excellent mead can be ready in a very little amount of time, and I mean weeks. I tend to age my meads a bit longer, with a minimal bulk storage time of 3 months; this is mostly to assist in the natural clarifying of the meads. I have had one of my meads that was bottle aged for 18 years . . . I wish I had more that old. Bottle aging works wonders as well.
The more mead you make the more you learn. Some of the most important lessons I’ve learned over the years is the effect of staging the nutrients and why it’s so helpful to making excellent meads. The other is that I wish the American Mead Makers Association were around when I first started — consider joining www.mead-makers.org. You also need to source high-quality honey. The National Honey Board, has created a website that is very beneficial to finding different varietals of honey at www.honeylocator.com.
Michael Fairbrother’s Traditional Mead Recipe
1. Sanitize the fermenting equipment – fermenter, lid or stopper, fermentation lock, funnel, etc., along with the yeast pack and a pair of scissors.
2. Fill a sink or cooler with hot tap water and soak honey container(s) to make the honey easier to pour. I don’t recommend using boiling water, be patient. If your honey is crystallized, don’t worry — all raw and natural honey crystallizes over time, with the exception of Tupelo blossom honey, especially in colder temperatures. Soaking the honey container in hot water will turn it back into liquid form.
3. Fill fermenter with 3 gallons (11.5 L) of room temperature water.
4. Pour honey into the fermenter along with the room temperature water.
5. Take 1/2 gallon (2 L) of warm water (110 °F/43 °C) and carefully pour a small amount into each empty honey container.
6. Replace covers and shake to dissolve remaining honey, save every drop of that honey, it takes a bee its entire life to make 1/12 of a teaspoon.
7. Place 1/2 cup of the warm water/honey mix in a measuring cup (and save for step 9), pour the remaining dissolved honey into the fermenter. Top up with additional water as needed to achieve a volume of 5 gallons (19 L), saving space for the yeast of course. The mixture is now called the must.
8. Stir the must until all honey is dissolved and well mixed. This may take 5 to 15 minutes, possibly longer.
9. Prepare yeast. Add 4.5 tsp. of Go-Ferm to the 1/2 cup of warm water/honey mix (step 7), mix. Let the mixture cool to 104 °F (40 °C) then add the active dried yeast. Let stand for 20 minutes. Slowly (over 5 minutes) add equal amounts of must (honey/water) to be fermented to the yeast slurry. Watch the temperature difference. Do not allow more than 18 °F (10 °C) difference between the must and the yeast slurry.
10. After 15 minutes (yeast should begin to foam), stir well to mix the yeast into a slurry. Pour the yeast slurry into the fermenter.
11. Seal fermenter with a sanitized airlock and locate fermenter in an area that is 65 °F (18 °C).
12. Fermentation should start within 24 hours.
Beyond Meadmaking Day (first one to two weeks)
13. Sanitize all equipment used to stir the must for each nutrient addition. Please note that adding nutrient and stirring may cause mead to foam over, extreme care must be taken to do this slowly, a slow stir before adding the nutrient will allow the release of residual CO2.
• Add ¾ teaspoon yeast energizer/nutrient mix 24 hours after fermentation begins.
• Add ¾ teaspoon yeast energizer/nutrient mix 48 hours after fermentation begins.
• Add ¾ teaspoon yeast energizer/nutrient mix 72 hours after fermentation begins.
Beyond Meadmaking Day (secondary fermentation)
1. When fermentation stops and the specific gravity as measured by a hydrometer is stable (has not changed over the course of several days), it is ready to transfer into a secondary fermenter. Sanitize your fermenter and siphoning equipment.
2. Carefully siphon the mead into the fermenter. Leave as much sediment as possible in the primary fermenter.
3. Let the mead clarify in the secondary fermenter for three months. You may wish to add a fining agent such as isinglass to facilitate clearing, and/or potassium sorbate to prevent further fermentation.