Make Hard Cider & Apple Wine
Hard cider making, like most other fermented beverages, is a simple process of adding appropriate yeast to apple juice and allowing the yeast to ferment the juice into alcohol. Because of this simplicity, hard cider is one of our oldest fermented beverages, with a large amount of historic references to cider. In this article we will focus on current alcoholic or “hard” cider making techniques, as well as making cider’s close relative, apple wine.
There are three primary methods to making fermented apple beverages. The first is the most traditional, and that is picking apples, crushing them, and then pressing the juice from the apples and fermenting. This is the most difficult of the methods, but potentially the most rewarding. Not all of the WineMaker magazine readers live in locations where you can grow apples, however, so for some of you this option is not very feasible.
The second method is buying apple juice or apple cider that has not yet been fermented. Typically this juice is intended for the non-alcoholic version of juice and cider, and is readily available at supermarkets and also farm stands.
A third method is using a modern “cider kit,” which are available from many home winemaking suppliers. These kits make excellent cider, and are a very easy way to get started on your cider making. For many cider makers, the time savings make this a great way to have a steady supply of cider on hand.

Cider Versus Apple Wine
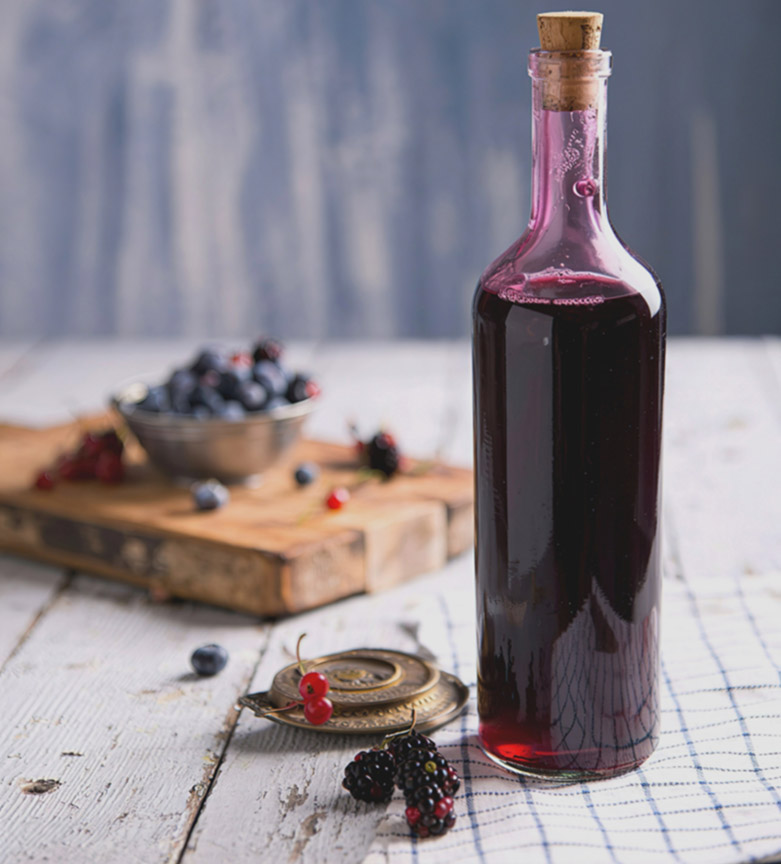
Is it hard cider, or apple wine? There are no “official” definitions of how you differentiate between hard cider and apple wine. But in general, I would define hard cider as “natural” strength in alcohol content when non-alcoholic apple juice (or cider) is fermented into alcohol, leaving you with approximately 4 to 7% alcohol from fermentation of the apple juice. Apple wine would have had a significant amount of sugar added to the apple juice to make an alcoholic beverage closer to 12% alcohol or higher. Both apple cider and apple wine can be either still or carbonated.
Making apple wine would require adding additional sugar to the apple juice to bring the alcohol content up to a minimum of about 10%, but more likely in the 12% to 14% level. This additional sugar will require a few more days of fermentation, and because of the higher alcohol level, a few more months for the apple wine to mature to give it adequate drinkability.
Starting with apples
If you decide to start your cider making or apple winemaking with fresh apples, you’re probably wondering, “Where do I start?” Gathering apples of course! (If you’re starting with juice, skip to the “Fermentation Process” section of this story). First, there are the basics of what apples to use. Apples come in three primary categories: Sweet, sharp, and a group called bittersweet, bittertart, or bittersharp. For the purpose of this article, I will reference this last style as bittersharp. When making apple wine, you can use a wide variety of apples to press juice or cider as you will ferment to dryness. However, cider makers pay close attention to the varieties of apples that they use — some even opting for single variety ciders. Very few apple varieties make good hard cider as a single variety, however, and typically the goal is to find a blend of apples to get a more complex flavor. Here is a general suggestion for what portion of cider should come from what type of apple.
Sweet – 40 to 60%
Sharp – 20 to 40%
Bittersharp – 15% to 35%
Sweet apples are typically not sweeter than other apple varieties, but they are low acid and low tannin, giving them a flavor perception of higher sweetness levels. These are also called “aromatic” apples. Common varieties are Red Delicious, Gala, Golden Delicious, Fuji, and Jonagold.

Tart apples also have a normal sugar level, but they have a higher acid level, giving them a more “tart” overall flavor. Common varieties in this category are Honeycrisp, Gravenstein, Granny Smith, McIntosh, Northern Spy, Winesap, Rome, Empire, Braeburn, and Liberty.
Bittersharp apples are high in tannins, which adds complex flavor to ciders, and medium to high acid levels, along with normal sugar levels. There are not many commercial varieties of bittersharp apples. Pink Lady and Crabapple are two examples. If you live in an area where apples are grown, try sourcing bittersharps from local orchards who grow heirloom cider varieties.
If you have apple trees on your property, you are on your way! If they are all the same variety of apple, you will need to determine which category they come from, and then supplement with purchased apples from the other categories.
When picking your own apples, you want to avoid any “windfall” apples that have dropped to the ground, as they can pick up lots of unwanted bacteria that you will not want in your cider. These unwanted bacteria will make your cider unpleasant at best, and make people who drink it sick at worst. Your apples do not need to be perfect; a few bruised apples are OK, but you do want to discard any moldy/rotten apples.
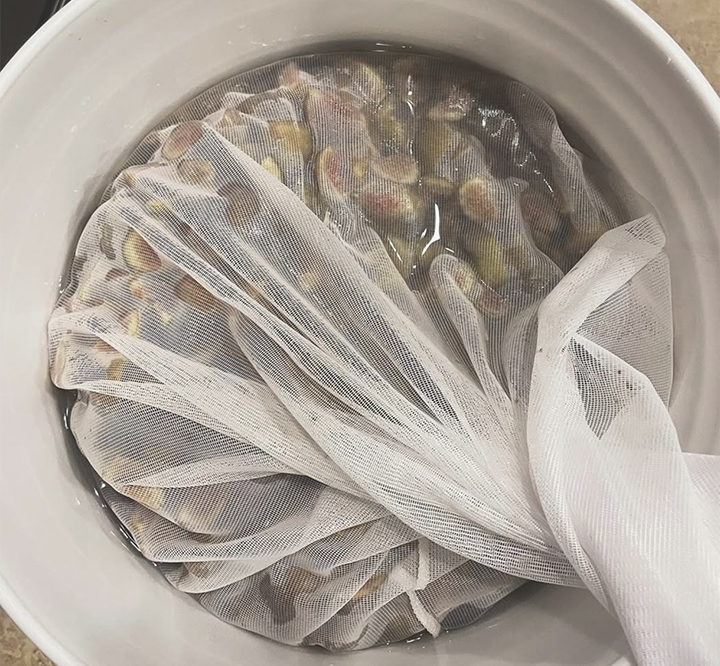
The next step is to prepare the apples to be crushed into an “applesauce” by an apple crusher of some sort. Your local home winemaking shop may have a manual “apple crusher” that is powered by a hand crank. This crusher is a set of rollers that have “teeth” on the rollers to help pull the apples through the rollers. Typically medium to large size apples need to be cut in half prior to putting them in the crusher, to allow the teeth of the crusher to grab them. There are other ways to crush the apples into applesauce consistency, however, so do what is easiest for you. After you have crushed the apples into applesauce, it’s a good idea to add pectic enzyme at the rate of 3⁄4 teaspoon per gallon (3.8 L) of applesauce, and mix it in completely. The addition of pectic enzyme breaks down the pectin in the apples, releasing more apple juice into your cider, and also helping to clarify your cider or wine after fermentation is complete. Give the pectic enzyme three to four hours to break down the applesauce, and then move on to pressing the apple juice. To prevent oxidation and a bit of browning in the juice, also add 1 Campden tablet per gallon (3.8 L) of juice, or 1⁄4 teaspoon of potassium metabisulfite for 5 gallons (19 L). You can choose not to add the sulfite if you desire, just be aware that there will be a bit of color browning of the juice (think of what happens to an apple when you take a bite and leave it out on a counter).
The volume of apples you are using will determine the easiest method for extracting the apple juice from the apples. If you have less than about 2 gallons (7.6 L) of juice, you can use a fairly strong nylon strainer bag and squeeze the juice out. You could also perhaps press the juice through a rice strainer.
If you have a volume larger than 2 gallons (7.6 L), then a cider press or wine press of some sort is a much better idea. If you know a cider maker, they may let you use their cider press. Also, many home winemaking shops will rent presses used for grape wine production, and these also work for apple cider. There are sizes starting with about a 2-gallon (7.6-L) capacity, going up to 18-gallon (68-L) sizes. With these presses, you fill the basket with your apple sauce, then slowly press the juice out. While many people think they want to put a straining bag in these presses, resist the urge and press without a bag. Some of the pulp will come through, but not enough to cause problems. If you do put a straining bag in the basket, the bag typically clogs quickly, and then you have to start over by emptying the basket, cleaning the bag to allow juice to flow through, and then refill the basket. A small amount of pulp in your fermenter will fall out of suspension and will not cause any clarity problems.
Now that you have your juice pressed, the hard work is over! There will be wild mold, bacteria, and yeast on the apples that you picked, and some will inevitably be in the raw juice, so you now want to pasteurize or sanitize the cider. You can use your typical winemaking technique of adding potassium metabisulfite to sanitize, waiting 24 hours, then adding the yeast to start fermentation. Dosage would be 1⁄4 teaspoon for 5 gallons (19 L).
If you want to avoid sulfites and you are working with a small volume, then you can pasteurize the cider by heating it to about 160 °F (71 °C), holding that temperature for 10 minutes, then cooling to fermentation temperature. This method becomes difficult in larger volumes, and many professional cider makers do not heat their juice before fermentation to avoid changing the flavor of the cider.
Fermentation Process
At this point, whether you are using your fresh juice or store-bought cider or juice, you need to take some measurements before adding yeast. A note if you are working with store-bought juice — avoid using products that have sorbate added (check the label) as sorbate will inhibit yeast growth. Next check the sugar level of the juice to determine if there are adequate sugar levels to create the alcohol content you desire. Typical apple cider sugar levels will give you about 4 to 5% alcohol, and apple wine is 12% alcohol or higher. So if you want a bit higher alcohol level, add corn sugar to the appropriate sugar level. A specific gravity of 1.038 will produce approximately 5% alcohol, and 1.055 will produce 7% alcohol. I recommend corn sugar if you are after a dry cider and cane sugar if you want a bit more of a sweetness perception in your cider.
Now it is time to do an acid titration and pH test to verify that the acid level is something that the yeast will be happy to ferment in. Most unfermented apple ciders will be at an adequate acid level naturally, but you may occasionally find the acid level too high to too low. If you are using an acid titration test kit, look for a titration level of 0.60% to 0.80%. The pH reading would be 3.3 to 3.8. Too low of an acid level, (which is a titration of less than 0.60% or a pH reading above 3.8) can stress the yeast, and cause fermentation problems, or cause spoilage problems down the road.
I would then add yeast nutrient at a rate of 1 teaspoon per gallon, and 1⁄2 teaspoon of pectic enzyme if you are using fresh apple cider juice that you did not crush and press.
Now it is time for fermentation! If you have added potassium metabisulfite (or Campden tablets), wait approximately 24 hours to add the yeast to your cider. Check the temperature of the cider, and adjust it accordingly. Ideal fermentation temperatures are from about 70 to 85 °F (24 to 29 °C).
Yeast
There are a variety of yeast choices for you to use when making hard cider and apple wine. Here are some of the most common choices:
Vintner’s Harvest MA33 – Acid reducing strain, good when you have too tart of a juice, produces fruity esters and fusel oils (a mixture of several alcohols) giving a fresh fruit character.
Vintner’s Harvest CY17 – Gives nice fruity aromas, enhances sweetness, excellent for a full, fruity, slightly sweet cider.
White Labs WLP775 (English Cider) – Classic cider yeast. Ferments dry, but retains flavor from apples.
White Labs WLP002 (English Ale) – Ferments with a bit of residual sweetness (does not ferment to dryness).
Mangrove Jack’s M02 Cider – Ferments high degree of esters, giving excellent flavor depth. Ferments dry and crisp.
Wyeast 4766 (Cider) – Crisp and dry fermenting yeast with big, fruity finish.
Red Star Côte des Blancs – Produces fruity aromas, slight sweetness.
Lalvin KIV-1116 – Produces fruity aromas, retains apple freshness, slight sweetness.
For making apple wine, you’ll need yeast that can ferment in a higher-alcohol environment, so you should choose from some of the more common strains of winemaking yeasts such as the last two in the cider making list (Côte des Blancs and KIV-1116), or try using a Champagne yeast strain.
Ferment in primary for about five to seven days, then rack into a secondary and ferment until specific gravity gets to 1.000 (0 °Brix), or a bit lower. Check the hydrometer reading to be sure fermentation is complete, and wait for the fermenter to clear — typically takes about two to three weeks for cider. If your cider does not clear, I would suggest adding about a 1⁄2 teaspoon additional pectic enzyme. For apple wine, after primary fermentation is complete, rack the wine off the lees to a secondary fermenter and let it age for 30 days, then rack again in another 30 to 60 days and age the wine up to a year. If you have clarity problems with your apple wine, you can also add additional pectic enzyme as you would with cider.
To Carbonate or not to Carbonate?
While many commercial alcoholic ciders are carbonated, you do not have to carbonate the cider you make at home. This decision will be up to you. If you choose not to carbonate, you can also “back sweeten” your cider with ease. Since you would not be trying to add carbonation and sweetness, you can use the winemakers’ trick of adding potassium sorbate and potassium metabisulfite and then sweeten your cider to taste. Use the standard amount of 1⁄2 teaspoon of potassium metabisulfite for a 5-gallon (19-L) batch to stabilize the cider, along with 3⁄4 teaspoon of potassium sorbate to prevent the residual yeast from fermenting the sugar you add to sweeten your cider.
If you want to use a secondary fermentation to to carbonate your cider (homebrewers call this “priming”), you do not add the potassium metabisulfite or the potassium sorbate, so that the yeast can ferment sugar you then add into the cider, creating the desired carbonation. Add bottling sugar to the cider, at a rate of 3⁄4 cup of dextrose (or corn sugar) to 5 gallons (19 L) of cider, bottle the cider in bottles that will hold pressure (either in flip-top bottles, or beer bottles with crown caps), and wait about two weeks for the cider to carbonate at 70 °F (21 °C). Note that there will be sediment in the bottom of your bottles left over from this process.
You could also use the various forms of carbonation drops sold for individual bottles, which are pre-measured doses of sugar that you add to individual bottles. Follow the directions of the carbonation drops to determine the correct quantity to add to each size bottle that you use.
Force carbonating using a CO2 injection system like a Corney keg is even easier, since you can carbonate in the keg with or without back sweetening. This is a common method among those who also make beer.
Cider Kits
Readers of WineMaker are familiar with the concept of wine kits, and the excellent wine that can be made from these kits. There are now also cider kits available from Mangrove Jack’s and Cider House Select that come in eight different flavors, and make 6 gallons (23 L) of cider per kit. These kits include all ingredients that you need to make the cider (except for about 2 pounds/0.9 kg of corn sugar) including yeast. These kits take three weeks from start to finish, so they are a great option when you need cider fast. They are also available year-round, so they allow you to make cider whenever you feel like it.
To make one of these kits, you sanitize a fermenter, add 3 quarts (2.8 L) of boiling water, the cider concentrate, 2 lbs. (0.9 kg) of corn sugar, stir to mix, then top up with cool water to the 6 gallon (23 L) level, and pitch the yeast. The juice in a cider kit is pasteurized, so no sulfites are needed prior to starting fermentation. Fermentation should take about a week. You can then transfer the cider to a keg or bottle it. Let it mature for two more weeks, and it should be ready to drink. If you want to produce a slightly sweet cider, you can back-sweeten with included non-fermentable sweetener, and if you do not want to create any carbonation, there is a package of potassium metabisulfite that you can add to the cider.
Go For It
Regardless of whether you use fresh or store-bought juice, or if you make hard cider or wine, take your time, run a clean fermentation, and enjoy!