Winter into early spring in the mature vineyard is a glorious time to rest, reflect, repair, and prepare. Vineyard vine cycles remind us that seasons matter. The cycle of vine growth and physiology represents an entire human life every year if you pay attention. Budbreak is birth — the vines struggle to climb and reach the wires, like growing children’s height being recorded in pencil on a door frame. Canopy management is like going to high school and college — it’s when we define ourselves with education, style, and even fashion. Summer is the core living of life, fall is maturity and gathering the worth of that we have achieved by our hard work, and then late fall and early winter is dormancy and the end of the life cycle for this vintage. But this article will deal with verdant youth: A nascent vintage — what happens between budbreak and early summer. This will also complete our seasonal three-article series concerning care of the mature, small-scale home vineyard (Refer back to the June-July 2024 and October-November 2024 issues for columns maintaining a mature vineyard care in summer and fall/winter, respectively).
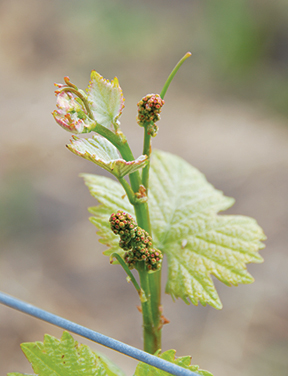
I would add this is the most critical time for setting up a successful wine grape vintage. Spring is the viticultural foundation for the success or failure for an entire year. When spring goes right, we can halve the later work in the vineyard. If it goes wrong, we have mildew, rot, pests, and disease to deal with, on top of all the other work we need to complete to get good fruit for winemaking. We only have one chance to raise these kids up right in the new growing season, and I’m going to work tirelessly in this article to give you the wealth of my decades of vineyard management insight.
First, we begin with a touch of revision/review. This is something you could read every week and still learn something from, and we need to make sure we’re on the same page before discussing specific spring cultural practices in the small-scale, home vineyard.
Managing a mature home vineyard gets a little easier because:
• Vines are better adapted to heat, cold, and even pests.
• Vines have deep root systems and manage their water and stress better.
• The vines have better stores of nutrients at budbreak than young vines.
• We have the benefit of years of management history to better understand our vines’ environmental, watering, and nutritional needs.
• We are less likely to make dumb, ‘snap’ decisions in the moment.
• We have a sense of what we need to spray, the dilution, and cadence, and the equipment. We sense the vines’ needs to stay clean and mildew/rot free.
Pruning the Vineyard for Spring Budbreak
In discussing pruning the vineyard, we want to focus on technique, timing, desired yield, and harnessing vigor. These bullet points should offer a good overview of how this is done:
Proper pruning removes about 90% of last year’s growth off the vine with bypass pruners or loppers, and focuses the vine’s energy on just 10% of remaining dormant buds that will produce shoots and fruit for the coming season. Limiting growth and crop on the vine increases concentration, color, and makes more expressive and quality wines than allowing a vine to grow rank and congested (minimal or non-pruned).
Check that your vines are pruned, no vines were missed, and all cordons or canes are firmly attached to the fruiting wires. Pruning mechanics are almost impossible to learn by reading. Most of you should have learned to properly prune your vineyards as they matured, but if you are still struggling to get your pruning perfect, I suggest you join/volunteer with a professional pruning crew, just watching for the first few hours, and maybe helping pull pruned canes and material off the trellis, and then when you feel you have the technique down, by pruning a vine while being observed. Other than working with pros, there are dozens of good pruning videos on YouTube that will help you learn much faster than by me trying to describe the process.
Spur pruning is almost always better for a backyard vineyard and I recommend it. My family’s vineyard used cane pruning for ten years before we switched over to spur/cordon training, and I wish we would have started with spur pruning. Establishing permanent “cordon arms” and giving those spurs a haircut back to two buds saves time, takes less expertise, spreads the crop over the whole fruiting zone, seems to produce more consistent crop load, and even looks tidier to those looking at your vineyard.
Cane pruning requires serious expertise to do right. Choosing the canes to retain requires the ability to imagine where the sun activated last year’s buds, and also care in leaving renewal spurs to grow canes (in sun) that will be used next year. Unless you have an amazing sense of how canes work, and have had success with cane pruning, I do not suggest it for small-scale, backyard vineyards.
Delay budbreak (and protect against spring frost) by pruning late or double pruning. The later you prune your vineyard, the later it will go through budbreak, the moment green tissue emerges. If you wait until you see the buds pushing at the end of last year’s canes, you can prune at push, but before budbreak to extend dormancy and protect against the coldest nights and frost potential. When we late prune, the vine has to heal the pruning wound and repressurize the xylem system to push the buds open for budbreak. Double pruning is “prepruning the vines” to short sticks, maybe half their length, letting them start to push, and then finish the pruning to delay budbreak. This process may steal a touch of nutrients the vines use to wake up, but I’ve never seen any negative consequences of late or double pruning. Again, the goal is push dormancy a few extra weeks so there is less chance of frost after budbreak.
What should be done with the pruned canes? Canes can be gathered and tossed as green waste, they can be shredded and composted, then integrated back into the vine rows, or they can be left in the vineyard to slowly break down. Vine cuttings last a long time, and I find them annoying to step over or through. Commercial vineyards in France often burn the cuttings in half barrels on wheels to give them portable heating on cold mornings, I prefer to leave them in the middle of the rows and run a cultivator over them, shredding them and integrating them into the soil. If you have rare varieties or clones, you may be able to cut your healthy canes into 18-inch (46-cm) “slips,” tie them in groups of 25 or so, and sell them to other vineyards or nurseries who want to use them for propagation. Hobbyists also like to come and collect them to make wreaths and other crafty art. They also can be cut into lengths of 4–6 inches (10–15 cm), bundled with twine, and used for fire starters after sun-drying.
Clean the vineyard floor after pruning. Regardless of what you do with your pruned canes, if your vineyard is in a frost-prone area, I strongly recommend you mow or cultivate your vine rows to bare-nakedness for spring. Frost moves like water — as long as there’s a place for it to run downhill, it won’t rise and burn your succulent and susceptible young shoots. Cutting down the grasses, weeds, and cover crop to bare soil will help your vineyard be in better state to resist frosts that are on the edge of disastrous. There will always be freak frosts where nothing can be done, and we just hope the vines will recover and put out secondary buds with a little fruit.
Addressing Early Mildew/Rot Pressure of Your Vineyard and Fungicide Application
Early season is the time to be a fungicide hero! Your first fungicide spray should occur between 3–6 inches (7–15 cm) of average new growth per shoot. If you had mildew/rot last year, spray earlier and repeat at the earliest suggested interval (e.g., if sulfur label says spray every 7–14 days, spray every 7.) If you had clean fruit and great control last year, use the same formula as last year, and you may be able to start spraying a week or two later and extend your intervals a day per season that you keep the fruit clean. A mildewed vineyard last year will seriously increase the incidence of mildew this year. Clean vineyards don’t have as many spores from last year to start the cycle anew. So a clean vineyard isn’t just great for this year, but for subsequent vintages as well.
This is where I see the greatest mistakes made in my small-vineyard consultations. It takes a plan and admirable follow-through to escape the scourge of mildew and rot in any vintage. Most home vintners can spray sulfur, copper, and mineral (stylet) oil, and in some places other options are available. The good news is that these three materials are organic and elemental, meaning the fungi in the vineyard cannot adapt to reduce their effectiveness. Sulfur and mineral oil are your go-tos, as copper toxicity can be a real threat, and I did see a vineyard last year show serious copper toxicity after the copper sulfate was applied at too high a rate. I like to see sulfur sprays early in the season, and then stylet oil after bloom/set up to bunch closure and veraison. Sulfur works by creating SO2 gas in the fruit zone, which retards fungal sporulation. It does not need to soak or coat the clusters, as it is not a contact material. On the other hand, stylet oil’s mode of action is to asphyxiate mildew — killing it by keeping the oxygen away — so the material must coat the clusters and leaves for efficacy.
Another prominent issue I see in small vineyards is under-powered spray rigs. You need to make sure your sprayer has the penetration necessary to get material spread all the way through the canopy. Spraying both sides of the vine can help. Another option is upgrading to a motor-powered spray rig on wheels.
Remember: Mildew and rot infections are mostly invisible. Once you can see them, you’ve already lost the battle. Visible mildew or Botrytis is an indication that the fungus is everywhere in the vineyard. Have a plan, stick to it, and adapt to make sure the vineyard stays clean this year, which will make next year and the next even easier! Early sprays are vital to achieve these ends.
Mildew and rot will begin affecting wine quality at less than 5% affected berries — so it’s vital they do not get into the fermenter or press. Mildew and rot are encouraged by humidity and heat and are much more likely to grow in crowded, shaded canopies. Mildew pressure is drastically reduced in open canopies with less than one leaf layer between the fruit and the sun and wind. Humid, warm temperatures between 75–85 °F (24–29 °C) are a perfect incubator for mildew and rot — so pay special attention to the weather and increase your spray frequency to the pressure. Both mildew and rot can perforate the skin of the grape and begin degrading freshness and flavor.
Begin the Process of Canopy Management While Growth is Limited
The goal of canopy management is improving wine quality. This is achieved by opening up the fruiting zone (between the fruiting wire and the first shoot positioning wire on most trellises) to air movement and sunlight — but not so much sun that will burn the fruit. Leaf plucking was discussed in the June-July 2024 column on summer maintenance — but that doesn’t mean there aren’t things we can do in the spring to lighten the load of summer canopy fine-tuning. This is the season in which it is easier to manipulate and remove young, tender shoots as they are small and succulent.
Suckering unwanted shoots. If there are shoots growing from the base, the trunk, or from “water buds” on various parts of the vine you didn’t intend, just scrape those young buds off with your thumbnail or the sharp side of a pruning shear. “Basal” shoots, suckers, and unfruitful shoots that are growing randomly from unwanted spots on the vine are nutrient sinks and won’t help grow better wine.
Knocking off double shoots. Once the vineyard is suckered, make a pass and look for double shoots coming out of a single bud. Knock off the less fruitful, less vigorous, least upright of the double shoot, and leave the single to do its job. Be careful with your thumbnail on this one — it’s easy to injure the young shoot you intend to keep.
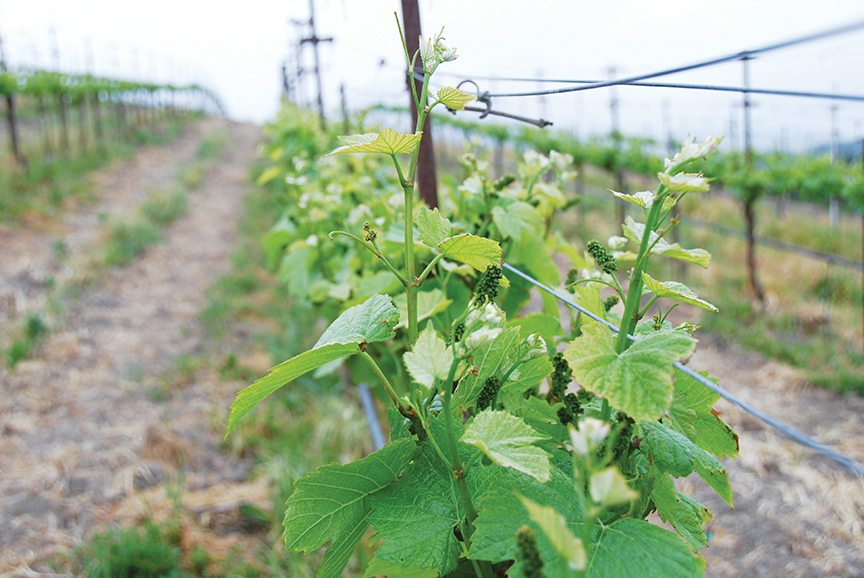
First pass for shoot positioning and lateral removal. Shoot positioning is meant to direct growing shoots vertically so the fruit zone can absorb more sun and wind movement, which minimizes mildew/rot and increases wine quality. Most shoot positioning will be done in summer, and is covered in the previous column. But if you have an extra Sunday afternoon to walk the vineyard, you may want to get ahead of the summer work by removing laterals — smaller, fruitless shoots that come off of primary shoots. Lateral shoots are generally unnecessary and shade the fruit zone. Laterals should only be kept if the main shoots do not provide ample leaf area for ripening — less than 12 leaves per cluster.
Don’t pull leaves until bloom/full canopy. The best time to open up the canopy to the full extent that the fruit will not burn in heat spikes is precisely the moment the vineyard is finishing bloom and the fruit is setting. The fresh new berries, slipped from their caps, need to be bathed in safe sunlight immediately to enhance their resistance to the flecking sunlight they need in order to improve their flavor.
Further Guidance
Water and fertilization were discussed in the June-July article, but are worth mentioning in passing. Supplemental water may be required after a dry winter or spring — but if the soil profile was soaked during winter rains or snow melt, we only need to water when the soil has dried out between 12–24 inches (30–35 cm) of soil depth. Weekly water needs run between 1–6 gallons (4–23 L) per vine from my experience. More water for hot spells and sandy soil, less water for cooler temperatures and soils with more clay. If the vine tendrils are reaching out in spring, and the leaves aren’t flagging/drooping, your water status is likely fine.
Spring reminds us that we get a brand new chance every year for growing better wine. I see every emerging shoot as a parcel of hope — hope that we can grow clean fruit, hope that the bugs will stay in check, hope that the sun will shine and do its job of turning little green dots to fully ripe grapes. Make sure your pruning is deliberate and balanced, spray early and on a tight schedule, sucker unneeded shoots and double shoots, and before you know it you will have a nice, full canopy with set grapes and you can go back to the summer article and start plucking leaves, positioning shoots, and eventually, getting ready for another harvest!

