Making wine from a kit is the perfect way for a craft winemaker to explore unique varietals from regions around the world that are not typically accessible. With kits, the science behind producing a great wine has been taken care of, while the art of making a great wine is in your hands.
Although wine kits are designed to be user friendly, new and even experienced winemakers can occasionally hit a few bumps along the way.
After more than a decade of answering questions and chatting with home winemakers from around the world, I have been asked plenty of questions and offered many tips. Here, in no particular order, are the most frequently asked questions about wine kits, along with simple solutions for making wines that you will be proud to have in your cellar and share with your friends.
1. How do I clean and sanitize my equipment?
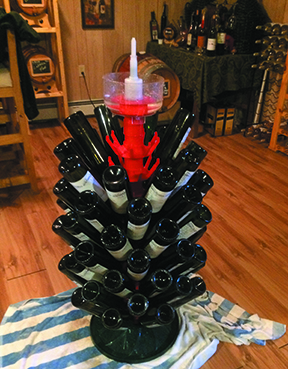
Keeping your equipment clean is the first rule for winemaking success! Cleaning and sanitizing is a 2-step process. First, clean your equipment by removing soil and stains. Use a wine equipment cleaner and follow the manufacturer’s instructions.
Next, sanitize your equipment with sanitizer solution or potassium or sodium metabisulfite (sulfite), a wine-friendly sanitizer that is inexpensive and easy to use. To make a sanitizer solution, mix 3 tablespoons of sulfite powder into 1 gallon (4 L) of cool water. Dip or spray each piece of equipment that will touch your wine and then rinse with cool water. Be sure to do this before each use. Leftover solution can be stored in a tightly sealed container for two months.
Proper preparation will pay off when you enjoy that first taste from your perfectly crafted wine.
2. How do I know when my wine is degassed?
It can be hard to know when your wine is sufficiently degassed. The best degassing method is to use a cordless drill equipped with a degassing wand. Drill on medium speed for 2–4 minutes while switching directions to agitate your carboy of wine. Make sure to keep the prongs of the wand well below the surface to discourage the introduction of oxygen into the wine.
Another option is to vigorously stir your wine by hand for 10 minutes with a winemaking spoon handle. Remember: Degassing wine is not gentle stirring. The purpose is to agitate the wine and knock the CO2bubbles out of solution.
Use the timer on your phone to make sure you do not over- or underdo it. Over-degassing can cause oxygen to be injected into your wine. Too little degassing and your wine might have difficulty clearing or have a spritzy feel on your tongue.
It is not recommended to allow kit wines to degas naturally. This method extends the time to an unpredictable length, which doesn’t work with the instructions and runs a risk of oxidizing your wine and exposing it to infection. Adding a few extra days here or there to the process will not make any difference, but lengthy, extended processing time is not recommended.
Here are a couple of ways to tell if your wine is sufficiently degassed:
• Thief out a sample of the degassed wine from the carboy, put it in the hydrometer test jar and give it a good shake with your hand over the top. If there is a noticeable “pop” sound when you remove your hand, your wine might need further degassing. If there is only a “pfft” sound, it should be sufficiently degassed.
• It is always a good idea to taste your wine before bottling. If it is spritzy on the tongue, a little more degassing might be needed. If extra degassing is needed, rack your wine off of any sediment before degassing and allow the wine to sit for 48 hours to settle before bottling.
3. Why is my specific gravity low on Day 1?
Check that the juice base and water mix is filled to the correct primary fermenter measurement. If your kit has a grape skin pack, make sure to add it after reaching the proper fill level. Stir, stir, then stir some more! You can even use your wine whip to mix the juice base and water. For an accurate reading, it is important to take the specific gravity reading right after stirring. Sugars are heavier than water and will naturally sink. This will not affect your fermentation but might skew your day 1 reading.
If your kit has grape skins, it is important to wait 5 to 6 hours after the grape skin addition before taking a reading. This allows time for the sugars in the skins to incorporate into the must. Again, make sure to stir very well before taking your reading. It is nearly impossible to stir too much on day 1.
Adding extra sugar is never recommended. As long as the fill level is correct, the sugars will be at the right level to reach the prescribed alcohol content. While adding extra sugar will bump the alcohol, this can lead to a stuck fermentation and an unbalanced wine that might not have the character and complexity you are expecting.
4. Are sulfite and sorbate really all that important?
It cannot be overstated how important these stabilizers are in the kit winemaking process. Sulfite is a winemaker*s best friend! It is used for equipment sanitizing, wine stabilizing, and protecting wines while they age in the bottle. Sulfite is an anti-oxidant that preserves the flavor, color, and character of wine and offers protection from microbial infection.
Sulfite is also a naturally occurring by-product of winemaking, which means that there is no such thing as ※sulfite-free” wine — it is scientifically impossible!
Sorbate works in tandem with sulfite to ensure that any rogue yeast cannot propagate and spoil your wine after being stabilized. Reducing or omitting sulfite and sorbate is never a good idea but, if the sulfite is omitted, then the sorbate must also be omitted. Otherwise, there is a real risk that your wine will be vulnerable to geranium fault caused by a type of bacteria that feeds on sorbate, which will ruin your wine and potentially contaminate other equipment and batches — not to mention that all of your hard work will go down the drain.
For wines that are backsweetened, like fruit wine and off-dry wine, reducing or eliminating sulfite and sorbate is an absolute no-no, even if you are drinking it quickly. Without the addition of stabilizers there is a risk that these wines will re-ferment in the bottle, pop corks, and cause
a mess!
5. Can I top up my carboy of wine with water?
Topping up is usually not necessary. As long as the wine reaches the “shoulders” of the carboy, the fill level will be fine during the clearing time as indicated in your instructions.
If your wine is going to remain in a carboy longer than the recommended clearing time in the instructions, it can be topped up into the neck of the carboy with a similar style of wine. Water is never recommended for this because the result can be a watery, weak, and unbalanced wine.
6. Why are tartrates in my bottle?
Tartrates, also known as wine diamonds, occur naturally over time. Tartrate crystals are seen by winemakers and sommeliers alike as a sign of quality and are not considered a fault.
The process is accelerated when wine is exposed to cold temperatures. Avoid temperatures below 55° F (13 °C) — do not leave bottled wine in a cold car, garage, or directly on a cement floor. Cold storage can affect the stability of the wine and allow wine diamonds to form. Decanting or using an aerator with a fine screen effectively keeps tartrates out of your glass of wine. Tartrates will never impart an unpleasant flavor or aroma, however they aren’t necessarily pleasant to have in the glass as it can feel like specks of sand in the mouth. Looking like little shards of glass, they can also cause concern for consumers who are unfamiliar with them.
Cold stabilizing is an easy and effective solution that encourages tartrates to drop from your wine before bottling. You will need refrigeration or a cold garage in the winter. Allow your carboy of finished wine to sit for 3 to 5 days at a temperature hovering around 32\﹉F (0 °C). The tartrates will drop and the wine can be bottled leaving tartrates behind. The warmer the area, the slower the process will be.
7. Can wine kits be made in double batches?
Yes, wine kits can be made in double batches. The primary fermenter must be large enough to comfortably accommodate the full contents of both juice bags.
There must also be enough space to add the required water and grape skins, if included, and to allow for foaming during primary fermentation.
The carboy must be large enough to allow all of the wine to be racked into it.
Be sure to add all of the additives included in both kits: Yeasts, clearing agents, oak, and flavor packs or reserves, which are included in fruit, dessert, and most off-dry wines, etc. All are to be added at the appropriate
time according to the instructions.
Combining different wine styles is not recommended, as the results can be unpredictable.
8. How come my wine isn’t fermenting?
“My airlock is not bubbling — help!”
This is probably the most common concern I hear from winemakers. Staring at the airlock is not an accurate way to monitor fermentation. Sometimes, fermentation is quiet and you will not see much action in the airlock or on the surface of the must, particularly if the fermentation area is cool. Other times, the CO2 may be escaping another way.
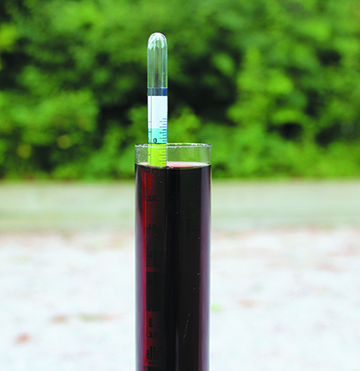
If you have concerns, monitor your fermentation using a hydrometer. The reading should be lower than it was on day 1 and should continue to drop as the fermentation progresses.
Depending on the temperature of the room and the must, it can take up to 48 hours for fermentation to become noticeable. Wine kits are already balanced with the correct dosage of energizer and nutrient to ensure a complete fermentation. Sometimes, cleaners and sanitizers can impede fermentation; so always make sure to rinse your equipment well after cleaning and sanitizing.
It is best to make your wine within a few months of purchasing your kit. Do not leave kits in your basement for a year or two, as the yeast and other components will expire. Age your wine, not your wine kit!
9. Why is fermentation still happening?
Once again, do not monitor your fermentation by solely looking at the airlock. Carbon dioxide is a by-product of fermentation and the wine will naturally off-gas through the airlock even after fermentation has completed.
Use your hydrometer. If the specific gravity has not changed after taking readings 48 hours apart, the fermentation is considered complete. Checking the specific gravity with a hydrometer is always the best way to determine what stage you are at in the winemaking process.
10. Why won’t my wine clear?
Be patient. A wine may occasionally need extra time to clear. Every fermentation is unique. Most wines will be ready to bottle within the instruction timeline, a batch can sometimes take an extra week or two to clear — this is nothing to worry about. Keep the winemaking area 68–77 °F
(20–25 °F) for the entire fermentation process and check your notes to confirm that the proper specific gravity was reached before stabilizing. Ensure that your wine was thoroughly degassed and that all of the additives were added according to the instructions.
If these steps have been completed, then all your wine needs is a little extra time to clear. And whatever you do, never filter or bottle cloudy wine. The sediment will pass through most filter pads and your wine will continue to clear in the bottle, resulting in sediment in the bottle and, ultimately, in your glass.
11. What kind of water should I use when making my kit?
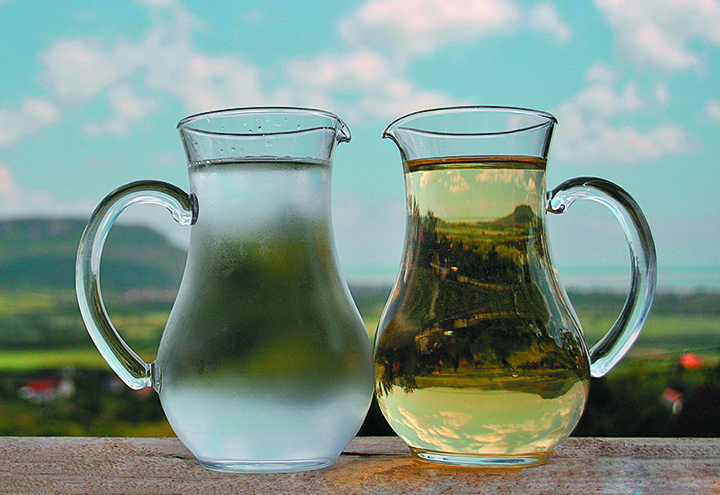
Excellent quality drinking water makes excellent quality wine. Good quality tap water works well, as long as it is not overly chlorinated. Well water can be great as it often has a natural minerality, which is helpful for a healthy fermentation and can add a subtle complexity to your wine, but there is always the concern of other microorganisms negatively impacting your wine. It is crucial that the water have no off-flavors or aromas. If you are unsure, bottled spring water is a good choice. Distilled and reverse osmosis water are not ideal for winemaking, as the lack of minerals does not offer a thriving environment for yeast propagation.
12. Can I add oak sticks or cubes? Does that change the timing of my kit?
Tinkering with wine kits is part of the fun of being your own winemaker. Kits come with everything you need to make great wine, including oak if appropriate for that wine style. Generally, kits are guaranteed only if the wine is made following instructions. If you choose to add more oak, it is best to do this during the clearing process and taste your wine every couple of days to ensure that it does not become too oaky or astringent. Oak is absorbed at a faster rate in alcohol than in must, so it is important to monitor for your desired flavor. Make sure to taste your wine before deciding on extra oak. You may prefer it just the way it is!
13. Can I add more yeast if the wine stops fermenting while still sweet?
If a kit doesn’t ferment within the instruction range it is a good idea to ensure that your hydrometer is reading correctly before taking any other action. Restarting fermentation can be tricky depending on how much sugar and alcohol are in the wine, both of which can interfere with yeast propagation. Fermentation is considered complete if, after 14 days, the specific gravity (SG) does not change when re-read in 48 hours. The closer the SG is to being in spec the more difficult it will be to re-start the fermentation, but there is no harm in trying. Use wine yeast that has a good alcohol- and temperature-tolerance. Rehydrate using the package directions. Stir a small amount of must into the hydrated yeast to help it acclimate. Pour the yeast into the fermenter in smaller drops so that it is evenly dispersed, stir well to inject lots of oxygen, and keep the room warm (mid 80s °F/29–31 °C). Fermentation should re-start within 72 hours.
If the fermentation doesn’t take, you can blend your sweeter wine with a dryer one. You will want to do bench trials to get the percentages right. You might just end up with an excellent limited release!
14. Can I age and clarify my wine in a plastic bucket?
There are two reasons why clearing wine in a bucket is not recommended. First, the opening is too big, which can cause the wine to oxidize. Second, you will not be able to monitor the clearing process to ensure it is on track. It is recommended to clear wine in a glass or clear plastic carboy.
15. Is my wine ruined if additives are added out of order?
It is very important to add the yeast on day 1. If yeast addition is forgotten or delayed, mold or bacterial infections can develop in the must.
Chitosan and kieselsol work best when added in the correct order, but should still be fine if added out of sequence. You might need to give your wine a few extra clearing days.
It is important that the sulfite/sorbate packet be added after fermentation is completed to ensure a dry, stable wine. If the sulfite/sorbate is added on day 1, yeast may struggle to propagate and cause a sluggish or incomplete fermentation.
Bentonite can be stirred in after the onset of fermentation with no issue. For most wines, if the flavor pack or reserve is added on day 1, the wine should still ferment successfully. Give the must a good stir and keep it warm. However, the alcohol will be higher and the wine will have a drier profile. The wine can be backsweetened to taste at clearing, if desired.
If oak chips or granules are forgotten, they can be added at clearing. It is a good idea to put them in a muslin bag to help the clearing process.


