 Commercial wineries spend tens of thousands of dollars on all kinds of fancy equipment. Can a home winemaker really expect to create the same type of high-quality wines the pros can without spending a bundle?
The answer is absolutely yes. All that fancy stainless steel and those pumps and motors are aimed at moving tons of grapes, creating kiloliters of must and, ultimately, thousands of cases of wine. If you know the function of each piece of professional equipment, you can get similar results from your home winemaking gear.
As long as you start with the same high-quality grapes that a commercial winemaker does, the sky is the limit.
Crushing
Crushing is a widely varied process in the home winemaking world. You can rent or purchase equipment similar to that used in a commercial winery. As an alternative you can use simple, easy-to-obtain equipment such as a baseball bat, hockey stick, or even your feet to crush the fruit. The important thing is that the juice is liberated from the berries during this process so that fermentation can begin.
Premium commercial wineries have been following a “minimum intervention” trend for a while when it comes to crushing. They try to crush the grapes just enough so that the juice is liberated and the fermentation can get under way, but not so much that the fruit, stems, and seeds are ground to a pulp. The concept is gentle, gentle, gentle.
Luckily, home winemakers are in a supreme position to be able to crush just as gently, if not more so, than commercial wineries that must deal with large volumes of grapes. By treading on the grapes with the feet, by squishing them with a baseball bat or any handy tool, you can exercise a level of control not available to commercial wineries.
Most commercial wineries employ a crusher that also acts as a destemmer (removes the grape stems from the must), and home winemakers can rent smaller versions of these as well. The unit used in commercial applications plucks the grape from the stem before it is crushed. The home winemaking equipment does not work quite as well as the commercial versions, so check for leftover stems.
Lacking a well-stocked home winemaking store to rent this equipment, you can do the job just as well by retrieving the stems by hand from the fermenters. Stems left in contact with fermenting must can lead to a green and stemmy flavor in the wine, so don’t overlook this step.
Fermenting
Fermentation is where the home winemaking and commercial processes begin to diverge. Commercially, fermentation is performed in containers similar to those used for home winemaking. The only major variation is size. How the fermenting must is treated in the container is where the variation often occurs.
For home winemaking, red must is fermented in an open-top fermenter. To maintain skin contact, the cap must be pushed down (“punched” down) either by hand or by some other means (that baseball bat used for crushing could come in handy at this point). The cap is made up of skins and seeds floated to the top by the carbon dioxide (CO2) produced during fermentation.
In commercial wineries, small open-top fermenters are sometimes used for small lots of grapes. In this case the same process, hand punch downs, is often used. More common in commercial wineries is the practice of pumping over. For this process a pump is attached to a valve at the bottom of the tank via a hose. The wine is then pumped over the cap in an even pattern. Both punching down and pumping over achieve the same goal — maintaining skin contact with the wine and preventing the cap from drying out.
Commercial wineries punch down two or three times a day, evenly spaced out during the work day (usually once in the morning, once in the evening) until dryness is reached and the fermentation is complete. This routine works well at home, too.
Contact Time
Another point at which commercial winemaking differs from home winemaking is the length of time the wine can be left in contact with the skins and seeds. Commercial wineries often leave the skins and seeds in contact with the wine for up to 30 days. The benefit of this extended maceration is that the process extracts more character from the skin. Only the most vigilant home winemaker can leave wine in contact with the solids after it is through fermenting. At this point the wine is very susceptible to contamination by acetobactor, thebacteria responsible for vinegar.
Commercial winemakers easily can pump in additional CO2 gas to limit the amount of oxygen in contact with the wine. If oxygen is allowed to be in contact with the wine, the acetobactor can turn the wine into vinegar.
If you want to leave the skins in contact with the wine even after active fermentation is complete (some pros like to leave this extended maceration going for a couple of days, even a couple of weeks!), it’s easy to do it the pro way if you can get your hands on a CO2 tank. These tanks are available from better-stocked homebrewing and home winemaking supply stores.
Simply dispense some of the CO2 into the airspace on top of the wine, cover the fermenter, and leave it alone. Because CO2 is heavier than air, you only need a thin layer to afford your wine adequate protection. To cover the surface of a one-ton plastic picking bin (a popular fermenter with both commercial wineries and home winemakers alike), about five feet square, it’s only necessary to dispense CO2 from the tank for about 10 seconds or so.
Even though the gas is heavier than air and will sink to the surface of the fermented must, thus covering it, it’s still important to cover the container with a lid. If you’re fermenting in a big garbage pail, use the fitted plastic lid or a bungee-corded tarp. The idea is to make sure the CO2 layer isn’t disturbed by any air currents that might displace or disrupt it. Similarly, it’s also important to re-gas the wine at least once every 48 hours, as the CO2 can still dissipate into the environment and leave the wine unprotected.
Lacking a CO2 tank, you can achieve an extended maceration by transferring the fermented must to a container that will have no headspace (such as a totally full barrel). This must be monitored constantly for development of acetic acid and is really not advised. It’s always hard to exclude all oxygen without a layer of inert gas.
Drying Out
If an extended maceration is not in your plans, press the wine off at dryness (once the yeast has consumed all of the sugar during fermentation). Dryness is generally achieved within seven to 10 days.
To test for dryness, the Dextrocheck “sugar pill” test is one of the quick and dirty analyses that both professional and home winemakers can use. You can purchase these kits in most drug stores, and they come with full directions. Basically, put one of the Dextrocheck tablets into a clear test tube, add about five milliliters of wine, and wait for a color change to take place. Then compare the resulting color to a pre-calibrated color table included in the kit. The color indicates the percentage of sugar left in the wine.
You should do this test once or twice a day once the fermentation activity has begun to wind down and the hydrometer reads around 2 percent to 0 percent or so. The margin of error in the sugar-pill test is as large as 1 percent, so keep your finished wine in fermentation-locked, topped-up carboys for a few weeks to make sure all fermentation has ceased.
Pressing
The most common method of pressing used in commercial winemaking is the bladder press. This press consists of a stainless steel cylinder that is perforated. Inside this perforated cylinder is a large vinyl bag that inflates to press the fruit. The skins and seeds are trapped within the cylinder, while the juice flows into a pan and is pumped into a tank.
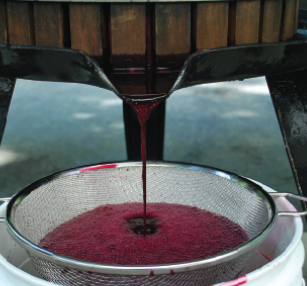
The most common method of pressing used in home winemaking is the basket press. Like the bladder press, the basket press consists of a cylinder, but this is where the similarities end. The cylinder of a basket press is generally made up of wooden slats set approximately 1/4-inch apart. The wine is poured into the vertical “basket,” and pressure is applied from the top to force the juice through the basket and out into a waiting bucket.
The basket press is not as efficient as most commercial presses. A commercial press can achieve yields of 180 to 190 gallons per ton of fermented grapes, while a basket press generally only yields approximately 160 to 170 gallons per ton. Also, the bladder press is a more gentle process, which means a lower tannin level in your wines.
You can’t force more gallons per ton from the basket press. You can, however, attempt to compensate for the higher tannin levels in basket-pressed wine. Do this by isolating the final pressings — those highest in tannin — in separate containers, then blend them to the desired taste after several rackings.
The basket-pressing process begins with what is referred to as “free run.” This is the wine that runs from the press without the winemaker having to exert any pressure on it. You can expect 3.75 gallons to five gallons of free run for reds depending on the variety and less for whites. This free run is the lowest in tannin of all the wine collected during this pressing process. After the free-run, the must is pressed to extract more wine. The wine that runs first from the press is always lower in tannin than the last pressings, because less pressure is exerted early on.
Aging
At this point in the winemaking process, commercial and home winemakers follow many of the same procedures. The wine has been fermented and pressed, and it now ages in a container that excludes oxygen. Commercial wineries often use stainless steel tanks, barrels, and some large wooden tanks (a small number of commercial wineries use cement tanks lined with epoxy). The home winemaker generally uses five-gallon, glass demi-johns or carboys. Some home winemakers produce enough wine to fill a five-gallon oak barrels, although 60 gallons is ideal. You can also use stainless steel in the form of beer or soda kegs. Barrel aging provides softening and mellowing from the wood, but stainless steel prevents loss of wine from evaporation and lessens the likelihood of spoilage organisms.
The two most important factors in aging are oxygen exclusion and temperature control.
Like the pros, you can exclude oxygen by using CO2 canisters. But the easiest and most expensive way to eliminate oxygen is by minimizing head space. Pay strict attention to keeping all containers of wine full and completely topped up, barrels and carboys alike. This practice is routine in commercial wineries. Many small, full containers are better than one large container that is half full.
Oxygen exclusion is a simple matter, but temperature control can be tricky.
Commercial wineries control temperature through elaborate refrigeration systems. Unless you have a cellar or similar area that remains relatively cool (below 65° F) during the year, you have to improvise. This is where an old refrigerator comes in handy. If you can store your wine (especially white wine) in a fridge that maintains a constant 55° F, that’s great. Even storing your carboys in an old chest-style freezer that doesn’t work provides great insulation and a constant temperature, even though it may be just room temperature.
For aging at home, it’s more important to protect your wines from great swings in temperature than it is to keep your wines cold. Store wine in a closet or pantry that doesn’t give onto an outside wall. Or keep them in an area that isn’t affected by the air-conditioning system or heater turning on and off — a closet that isn’t opened very often or a guest room that’s never used and that has closed vents.
Bottling
Commercial wineries usually use automated bottling lines. The average home winemaker will not make enough wine in 20 years to warrant the use of such an automated system. Thus, the home winemaker’s bottling process is not comparable to commercial processes.
The common goal, whenever wine is bottled, is the exclusion of harmful microorganisms such as acetic acid bacteria, which imparts vinegar aromas. Pros exclude microorganisms by sanitization (usually using sulfites) and filtration. You can do the same. Clean and sanitize equipment thoroughly with hot water, trisodium phosphate cleaner, and a strong (50 parts per million) sulfite solution, then sterile filter using a nice home-scale filtration system. This is the exact process commercial wineries use. They just do it on a bigger scale and with a lot more workers!
Just Like the Joneses
Any home winemaker can produce a quality product with methods and equipment available for small-scale production. Many of the techniques, such as those used in aging, are similar to commercial winemaking. Other processes for the home winemaker emulate those used on a commercial level and produce similar, if not identical, results, as in the crushing, fermenting, and pressing.
The point is, you do not need a bladder press and a bottling line to make high-quality wines. On the other hand, the more you learn about commercial processes and the outcome sought by commercial winemakers, the more you will understand your own wines and how to make them better.


