Méthode “Home-penoise”

“I am drinking the stars.” — Dom Pérignon (attributed)
If you’re ready to take your home winemaking hobby to a higher level, then sparkling some of it may be the solution. Sparkling a wine adds visible bubbles and a tingly, spritzy mouthfeel to it, setting it aside from still wines. In some cases, sparkling may cover, or at least distract from, some minor flaws in wine. (Of course, sparkling cannot save a badly flawed wine.)
Have you ever enjoyed a commercial sparkling wine and saved a pour or two for the next day? If so, you were probably disappointed in the difference in flavor. Once the bubbles are gone, so is some of the taste.
What a difference bubbles can make. The monk Dom Pérignon, often regarded as the father of Champagne, knew this. “I am drinking the stars,” he is reported to have said in the 1600s when he first tasted sparkling wine. Of course, we now know this quote was attributed to him after his death, but the sentiment is one echoed by all sparkling wine enthusiasts.

One story about the discovery of sparkling wine goes like this: When some wine suppliers in the Champagne region of France rushed to fill an order for England, they shipped some wine too early. During the voyage by wagon and ship to England, the wine continued to ferment. When the British opened the wine and found the carbonation, they loved it. They sent a message back to France, ordering more of that wonderful wine with the bubbles. The French didn’t know what they were talking about and had to send people to England to see what all the fuss was about. The bubbling wine was so popular that they just had to attempt to duplicate the product.
Although some people credit Dom Pérignon with “inventing” Champagne (sparkling wine), what he really did was refine the process to make it. Pérignon pioneered the use of blending, thicker bottles and stronger corks that hold the pressure in the bottles. Considering the lack of technology some 400 years ago, they really did a remarkable job making their wines with a second fermentation (which results in the bubbles). Dom Pérignon and his winemakers didn’t have stainless steel, uniform bottles, crown caps, bidules and other items and materials that we consider necessary today.
As a side-note, the word “Champagne” should only be used for sparkling wines from that little area in France east of Paris called Champagne (for which their sparkling wine is named). Sparkling wine is made all over the world. Until recently, winemakers in the U.S. had widely used the word “Cham-pagne” on their sparkling wine labels.
Now the U.S. is following the rest of the world’s lead — especially Europe where the common market has rules — and not using the word Champagne on its sparkling bottles. Each country has its own term for sparkling wines. In Spain, it’s called Cava, in Italy Spumante. In Germany, a sparkling wines is called Sekt and in the Alsace region of France, it is called Crémant. That’s why this article will refer to sparkling wine, not Champagne (unless, of course, we’re referencing true Champagne).
There are Four Basic Methods of Making a Sparkling Wine:
1. Artificial Carbonation
You can occasionally find an inexpensive sparkling wine out of California with a label indicating it has been artificially carbonated. This method can be used by a home winemaker; but that is not the topic of this piece. (See the Techniques column on page 64 for how to use this method at home.)
2. The Charmat Bulk Process
Mr. Charmat came up with a process to do a natural second fermentation in a big (and I’m sure very strong) tank. After this second fermentation is complete, the carbonated wine is then pumped, filtered and bottled under pressure with high tech equipment. This is not a practical process for home winemakers.
3. The Transfer Method
In the first step of the transfer method, the wine is naturally re-fermented in the bottle. In the second step, the wine is removed from the bottle, filtered and rebottled. Because this method also calls for high tech equipment, this is not a viable process for home winemakers.
4. The Traditional Method
This true sparkling method, developed in Champagne and the subject of this article. As you will see, it is adaptable to home winemaking, although it is more involved than still winemaking and certain safety precautions are required.
There are Five Steps in the Traditional Method:
1. Make one or more still wines
Most readers of this article will already be familiar with how still wine is made. (If not, the WineMaker Beginner’s Guide contains all the introductory information you need to get started.)
2. Create the cuvée
The cuvée is the base wine to be sparkled. It may consist of a single wine or be a blend of two or more wines. To the cuvée, we add sugar and yeast (and usually also some yeast nutrient and a riddling aid).
3. Allow for secondary fermentation in bottle
Once the sugar has been added to the cuvée, the wine is bottled and capped (not corked). Now the winemaker must be patient and wait until the second fermentation has taken place.
4. Riddling
The yeast sediment in the bottle is slowly moved to the neck of the bottle until it is all pressed up against the crown cap, ready to be removed.
5. Finishing the sparkling wine
Using a process called disgorging, the bottle is uncapped and the yeast sediment is expelled. The bottle is topped up with still cuvée — to replace any losses — and resealed, this time with a cork and wire cage. The wine may also be sweetened at this stage, if desired.
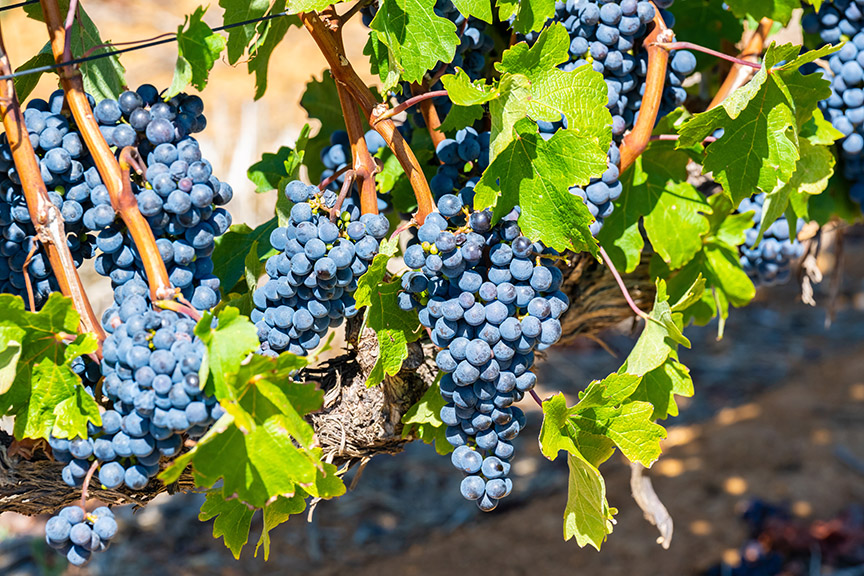
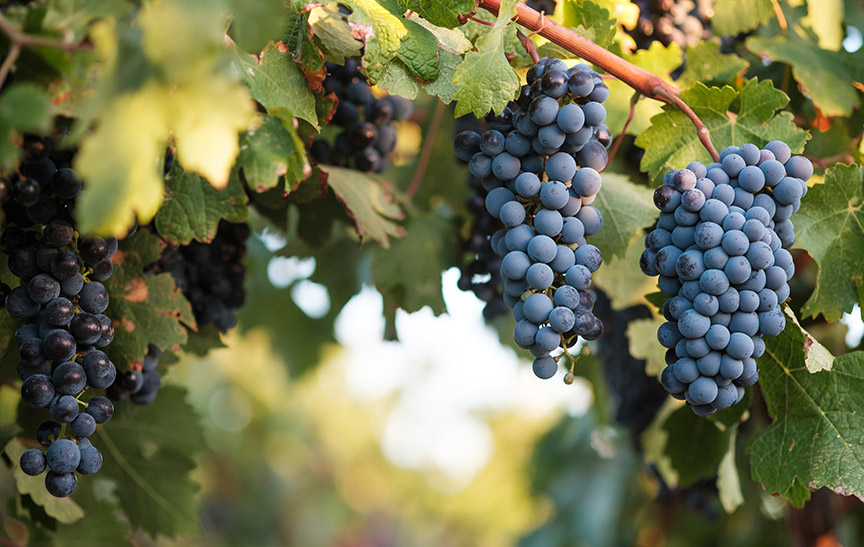
According to French law, Champagne can only be made from three grapes, or a blend of wines made from these grapes: Chardonnay, Pinot Noir and Pinot Meunier. In many other parts of the world, there are no such restrictions and numerous other grapes are used in sparkling wines.
So what wines should an amateur winemaker sparkle? Actually, anything you make as a still wine can be sparkled and this includes vinifera, French hybrid or labrusca grapes (or blends of these). You can also sparkle wines made from fruits, flowers or other ingredients.
I’ve sparkled locust blossom wine and maple syrup wine (just to see what would happen), and usually the sparkling version is better than the still wine.
Méthode “Home-penoise”
In Champagne, France, the method outlined above is called the méthode Champenoise. Outside that region, it is more properly termed the méthode traditionelle. This method can be adapted to the méthode [your winery here]. Let’s walk through the process I use in my home winery.
Base wine(s)
First you make a still wine (or two or more still wines). The process is no different from making still wines except that you will want to shoot for alcohol levels in the range of 10–12% (by volume). Acidity is usually on the high side, between 0.8–1.1%.
Later, the secondary fermentation in the bottle will bring the alcohol up about another percent or so. The higher acid will contribute “crispness” to the finished sparkling wine. Wines higher in alcohol can be re-fermented; but the success rate goes down as the alcohol content goes up.
I’ve experimented with sparkling higher alcohol wines; and at 16% ABV, I couldn’t get the wine to sparkle. The first way to make a wine that is lower in alcohol and higher in acid is by harvesting the grapes a little early so the sugar is lower and the acid is higher.
Since we often can’t control the harvest as amateurs, there are two other ways to get the reduced alcohol. One is to adjust the must or juice prior to primary fermentation so it contains less sugar. A specific gravity (SG) of about 1.075 to 1.085 (about 19–20 °Brix) will do this.
Alternately, if you are starting with a finished wine, and the alcohol is already higher, the second way to reduce the alcohol is by adding in the correct amount of (distilled) water. A vinometer does a good job of measuring alcohol in the (bone dry) finished wine.
However, the addition of water will also bring down both the acid and the flavor, which could be good or bad. If the acid is then too low, an acid blend can bring it back up. For wine destined to be sparkling wine, I also go light on the sulfites at each racking after the initial fermentation.
Creating the Cuvée
You can really have fun with your sparkling hobby by blending. Dom Pérignon was famous for being able to take a cellar full of barrels of wine from various years and vineyards, taste them all and blend the ultimate tasting wine from the barrels — not just once, but year after year.
By all means, make some straight Chardonnay, Pinot Gris, Vidal, Niagara or whatever you have. And then have some fun with blending. Some great blending grapes are Muscat, Gewürztraminer, Viognier, Traminette, Niagara and Concord because they have “fruity” aromas and flavors that add a lot to many sparkling wines.
It doesn’t often take much. Even 10% can make a nice change. Adding a little red wine to a white can make a nice sparkling blush.
A helpful hint when mixing up the cuvée is to take a bucket and mark it in “bottles.” That way when you are mixing it up, you can always make it come out to a whole bottle (when filling the sparkling bottles) by adding a little more wine or water to bring it up to the next bottle mark. Although any number of bottles can be made at one time, my favorite number is 13 for a batch.
If I have a 5-gallon (19-L) carboy, I can bottle one case (twelve bottles) as still wine and have about 13 left. That gives me an even case (twelve bottles) to ferment and store as sparkling wine and one bottle left over as a “test bottle.”
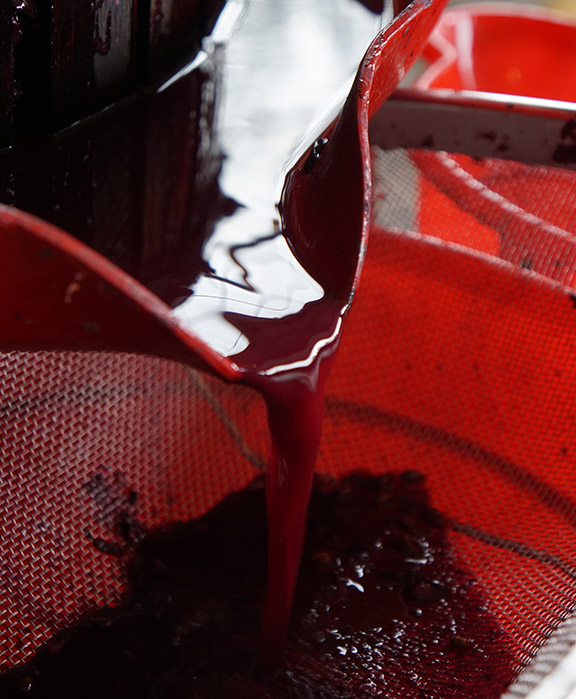
The bubbles in the sparkling wine will be created during the secondary fermentation when the carbon dioxide is trapped inside the bottle. To prepare the wine for this step, rack the finished wine into a holding vessel (your marked bucket) or empty out bottles if the wine is already bottled. Here it should get a little splashing to give it some oxygen. The yeast needs this for the re-fermentation. The wine needs to be completely finished and clear.
No Campden tablets, metabisulfite powder or other sterilizer should have been used at the last racking. Note: Potassium sorbate must not have been added to the wine at any time! If it ferments at all, it will have off-flavors. Remember that we add potassium sorbate to prevent re-fermentation. If necessary, adjust the alcohol and acid at this time.
Dosing the Cuvée
Four things will be added to this batch of wine for the re-fermentation — sugar, yeast, yeast nutrient and a riddling agent.
The measurements used below are in US gallons. This works out conveniently because a US gallon is only a little larger, by about 35 mL, than five 750-mL wine bottles. If you’re working in metric measurements, use five bottles as the “unit of volume” in the following directions.
1. Sugar I use 1/4 cup (about 60 mL) per 5 bottles. I find this works fine to produce 3–5 atmospheres of pressure (44–70 PSI or 3.0–5.0 kg/cm2). I use pure cane sugar for this addition. More sugar is not necessarily better (although you can go a bit higher — commercial sparkling wines average around 6 atmospheres). More sugar can result in too much internal bottle pressure. If this happens, the wine can “blow all over” when opened and bottles can explode. The 1/4 cup of sugar assumes that the starting wine is “bone dry” at an SG of 0.990 as is most finished dry (table) wine.
If there is still sugar remaining in your cuvée, bring it up to an SG of 0.996 with your sugar addition. This is the level of sugar a 1/4 cup would bring a wine starting at 0.990. If the wine already is sweeter than 0.996, you probably shouldn’t be trying to re-ferment that wine.
2. Yeast I use 1/4 teaspoon (4 mL) per each five-bottle volume. Red Star Pasteur Champagne, Prise de Mousse or EC-1118 have worked for me. You should hydrate the yeast in about 3/4 cup (180 mL) of warm water (100 °F/38 °C) for about 10 minutes before adding it. Follow the yeast manufacturer’s instructions if they differ from this recommendation.
3. Yeast nutrient Use at about half the rate of what you use for a regular fermentation. I use 1/8 teaspoon (2 mL) of Fermaid per gallon.
4. A riddling agent When making a “normal” wine, you would call this a fining agent. Although not required, a riddling agent really seems to help clearing in the riddling phase. There are various commercial products, but I simply use 1/32 teaspoon (0.5 mL) of bentonite.
This is really hard to measure, so I take 2/3 cup of hot water (32 teaspoons) and add and dissolve one teaspoon of bentonite (15 mL of bentonite in 450 mL of water). Let the bentonite sit and dissolve overnight in the water, shaking the slurry occasionally. After it has dissolved, I add one teaspoon (15 mL) of the mixture per gallon.
Bottling the cuvée
Stir well to be sure all the sugar is dissolved and everything is well mixed. You now have your cuvée, which is ready to be bottled.
Although I usually bottle the cuvée immediately, you can cover it and wait a few days. The reason to wait is to see if re-fermentation will begin. If, after a day or so, you see the little bubbles begin to form on the surface, that is probably a good indication that fermentation is beginning again and the cuvée (wine) is, indeed, ready to bottle.
Use clean and sanitary sparkling bottles. If you rinsed them with sulfite solution to clean them, be sure they are well rinsed with water to get all the sulfite out. Here you must decide if you are going to use American or European sparkling bottles. They are not interchangeable.
The American bottles take the standard US soda/beer bottle crown cap (26 mm). The European bottles have a larger size top (29 mm). In the U.S., the U.S.-size bottles, bidules and crown caps are usually easier to find and less expensive. The European-sized ones are harder to find and more expensive.
Be sure to check that you have the right bottles, bidules and crown caps before you begin bottling. Nothing is more frustrating than having your wine in the bottles ready to cap and finding out your caps or bidules don’t fit.
A few years ago, I heard it stated that sparkling wine bottles should never be reused because the pressure could have weakened the glass. I had never heard this before. I have been making sparkling wine for almost 30 years, I have reused bottles many times and have not had a problem with exploding bottles. If this is a concern for you, you can always use new bottles.
Rack or pour the wine into the sparkling bottles leaving about 2 to 3 inches (5.1–7.6 cm) of air space at the top. If doing a case or more at one time, it may be good to periodically stir the mixture in the bucket to keep it from settling out. Add a bidule (open end toward the bottle) to each bottle and cap it with a crown cap. The bidule is not absolutely required, but is a real help at the disgorging phase as described below. Label each bottle with a temporary label to identify the batch.
The next step is waiting for the wine to re-ferment. Store the bottles on their sides for six to eight months at about 65–75 °F (18–24 °C) while it re-ferments. Some of the “great” sparklers are left on their sides for years to gain subtle flavors from the yeast breakdown.
My testing has shown that some can re-ferment completely in a month or so, where others can take well more than six months. These bottles can be stored on shelves, on the floor or in corrugated wine cases. The latter makes them easy to handle, store and stack. Alternating the bottles “head to toe” gives the cases more stability if you stack them.
One suggestion I would make is to date one bottle and stand it upright on your shelf as a test bottle. Plan to sample this test bottle in about six months. When the time arrives, chill, open and decant the test bottle to see if it has re-fermented properly and how it tastes. Sometimes you can pour off several glasses and it will be clear all the way to the bottom.
Other times, the yeast will churn back up into the wine and some or all of the pours will be cloudy and taste yeasty. If the re-fermentation has completed, the wine will be crisp and (very) dry with lots of bubbles.
Riddling
The next step is preparing the bottles so the yeast and other sediment can be removed. This is called riddling. The wine in the bottles that have been stored on their sides will be clear except for the dark strip of yeast along the bottom side.
You’re now ready to pick up the bottles, shake and swirl them until all the yeast has come off the side of the bottle and is back into the wine. Put the bottle at about a 60-degree angle with the bottom up. Commercial wineries use boards with holes in them if doing this manually.
Many commercial wineries now have computer-controlled riddling machines that “turn and shake” big boxes that hold hundreds of bottles. You can devise your own riddling system by using a wine case with bricks or boards underneath. It helps to mark the bottom of the bottle with a strip of paint to designate which ones have been turned.
Now comes the tedious part. Once or twice each day, pick up each bottle, shake it a little, turn it a quarter turn, and drop it back down into the case. This can go on for weeks or months. As the sediment slowly falls down into the neck, the bottle can be moved more toward the vertical.
Eventually, you will have all the bottles vertical, with all the sediment moved down next to the cap. The wine above the sediment will be clear.
Disgorging
The next step is disgorging the wine. In order to safely perform the following procedures, you need to be wearing adequate protective gear. You must wear a face shield (not just safety goggles) and an apron thick enough to protect you from flying glass.
Wearing a heavy shirt is also recommended. You are working with sealed glass containers under pressure. Dress as if you expect one to rupture while handling it.
Disgorging is the process of getting the sediment out of the bottle. First you need to get the bottles “very cold” to reduce the internal pressure. At or below 32 °F (0 °C) is recommended.
The alcohol in the wine will prevent it from freezing at the same temperature that water freezes at; but be sure to monitor the bottles if they are stored below 32 °F (0 °C), as they could begin to freeze.
There are two methods to get the yeast sediment out. The first is to just pick up the chilled bottle, slowly turn it toward the horizontal and pop the cap just as the air bubble reaches the sediment. I’ve seen this done in commercial wineries. This takes a lot of practice. Even after getting good at it, you can have a high loss rate. If you lose too much wine from the first bottle, top it up with the second one, etc.
The key to disgorging this way is the bidule added at bottling. This little plastic shotgun-shell-like item is the greatest invention to come along in several hundred years (at least when you’re sparkling wine). During riddling, the bidule collects the sediment. When the cap is removed, the pressure blows out the bidule and the sediment.
The bidule permits it all to move as one “unit.” Without the bidule in the bottle, no matter how quick you are with the opener, as the crown cap is removed, the pressure begins to blow out at the first crack between the bottle and the cap.
The pressure hits the moving crown cap and some of it bounces back into the bottle, forcing some of the sediment ahead of it and you’ll end up with some yeast sediment in the bottle. I don’t think this “non-freezing” method can be done successfully without a bidule in the bottle.
The tried and true method to remove the original sediment from the secondary fermentation is to freeze an ice plug in the neck of the bottle. This process was used for centuries before bidules were even invented. It is still used today, even while using bidules, because this method results in less wine loss and less remaining sediment. The ice plug (and bidule) contains all the sediment.
Once the ice plug is formed, the cap can be removed. The pressure cleanly blows out all the sediment with the bidule and ice plug.
If your freezer has a “fast freeze” shelf, you can usually get an ice plug to form in about two hours (going from room temperature), or in about 10 minutes if the bottles are pre-chilled below freezing. You can also freeze the ice plug by putting the neck of the cold bottles in an ice and salt mixture.
Commercial wineries often use a chilled brine solution or dry ice. You want to have an ice plug that is at least higher than the sediment — around an inch (2.5 cm) or so. This can be achieved in about five minutes with the proper ice and salt mixture on a pre-chilled bottle.
When the ice plug is formed, pick up the bottle, swirl the neck in some warm water to wash off the salt, turn the bottle over to about a 45-degree angle (tilted away from you) and quickly pop the cap with a long-handled bottle opener or better yet, a disgorging key — a tool made especially for this task.
The pressure will blow out the bidule and the ice plug. Once it’s out, place your thumb over the bottle to prevent excessive loss of wine or pressure. You will want to do this in a washtub, or outside in a garbage can. It can be very messy. If you find that the cold blowout is too cold on your hands, rubber gloves may help. If you have a “well behaved” bottle, you will lose practically no wine.
Sometimes, however, it foams or blows and you lose much of the wine. If this happens, you will have to use one cold bottle to top up the next one. If there happens to be a little yeast left in the neck of the bottle, use a finger or a Q-tip to remove it.
Occasionally you will remove the crown cap and the bidule will not immediately blow out. There can be two reasons for this. There may have been incomplete or no fermentation in that batch or bottle, resulting in a low (or no) internal pressure.
(This is a good reason to check the test bottle before doing the disgorging.) If this happens, set it upright in the refrigerator for a week or so, the yeast will settle out and you can decant the wine and drink it still. You may also have a stuck bidule with very high pressure behind it.
Do not look directly at it. To free the bidule, warm the neck of the bottle in some tepid (not hot) water.
Sweetening
The final step is “finishing” the wine. This is where the commercial sparkling houses determine the final level of sweetness of the finished wine. If you like your sparkling wine bone dry (au naturel), no sugar needs to be added at this point.
The sweetener, also called dosage, is made by dissolving sugar in wine or brandy. You can generally dissolve an equal amount of sugar in an equal volume of wine (i.e. a cup of sugar in a cup of wine) by stirring it occasionally for about a half-hour or so. I’ll also add 1/32 tsp of sulfite powder to each pint (0.5 mL to 500 mL) of this dosage to add some SO2 to the finished sparkling wine.
Chill this sugar mixture, so it is as cold as the wine, before adding it as the dosage to the disgorged sparkling wine. Adding up to about 1/3 to 1/2 an ounce (10–15 mL) of the dosage will sweeten the wine to the “brut” category. Adding dosage in the 1/2 to 4/5 an ounce (15–25 mL) range will make it “extra dry.” After adding the dosage, you must cap the bottle. You have probably noted that most good commercial sparkling wines have a special type of “Champagne” cork stopper.
Since this stopper takes an expensive piece of equipment to insert, home winemakers usually use plastic stoppers. Put the plastic sparkling stoppers in a bowl of hot water. This makes them a little softer and easier to insert into the bottle.
Sometimes adding dosage will make the sparkling wine begin to foam. When this happens, you have about two seconds to get the cap in from the time the dosage is added until it begins to foam over. I’ll have the stopper in my left hand, add the dosage with a syringe in the right hand, then drop the syringe and insert the stopper as quickly as possible.
It takes a little practice to make it a familiar routine. Finally, add a sparkling wire hood to hold the sparkling stopper on the bottle. A wire twister is a handy wine making tool to complete this operation. Of course, you can also put a crown cap on the bottle, rather than a plastic stopper.
Make a note of the amount of dosage used and the date. Later when drinking the wine from this bottle, you can determine if that amount of dosage tastes right to you. It is best to store the finished bottles upright. Then, if any yeast was left in, it will settle to the bottom and the sparkling wine can be gently decanted when opened.
When using plastic stoppers, the wine will have a one- to two-year shelf life. The sparkling wine can be kept under the crown cap for “years,” but plastic breathes. Even with several atmospheres of pressure in the bottle, the wine can slowly oxidize through the plastic stopper.
So there it is — the “traditional method” for making bubbling wine. It’s a little extra work, but the results can be sparkling.