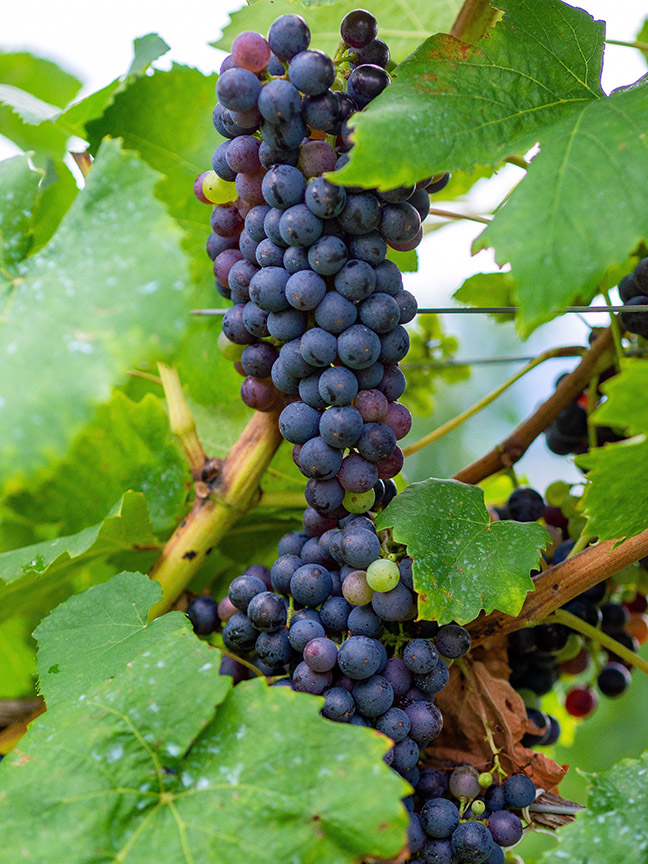
Aglianico
A tannic and rich Italian variety
As I ponder the variety for this issue, I reflect back on over 20 years of winemaking experience and how my mentors Ben Zeitman and Katie Quinn of Amador Foothill Winery in the Shenandoah Valley of California influenced me. Ben and Katie always told me that, “If we were not going to make good wine, then why bother?”
They were also aficionados of Italian wines and always strived to do justice to their varieties grown here in California. They brought in some of the best consultants from Italy to look at their site and advise on what varieties would do well. Sangiovese was a no-brainer; easily recognized in the marketplace, but challenging to grow in California without overcropping. The consulting group helped a lot with that.
But there was another variety they recommended as we contemplated pulling out an older portion of the Sauvignon Blanc vineyard. Ben and Katie were just coming off a trip to Italy and reflecting on their notes and some bottles of wines they brought back. During their reflection, they decided they were going to plant Aglianico. My response was, “What’s that?”
It was early in my career; I did not have a lot of “varietal knowledge” and in their explanation of its characteristics, I was grasping for a comparison that I could relate to. Ben, of course, started extolling on the wonderful qualities of Aglianico —where it was from, its firm and balanced wines, and its general richness.

But something I couldn’t grasp was what do we make that I can relate to? Ben’s response was, “think Syrah, but only a Syrah that the Italians can make.” As bizarre a response as that was I got my moment of comparison, and now all the pieces of the puzzle were starting to come together . . . without a single plant in the ground. And typical of my curiosity curve, I started to seek out Aglianico wines in local bottle shops.
Aglianico’s Background
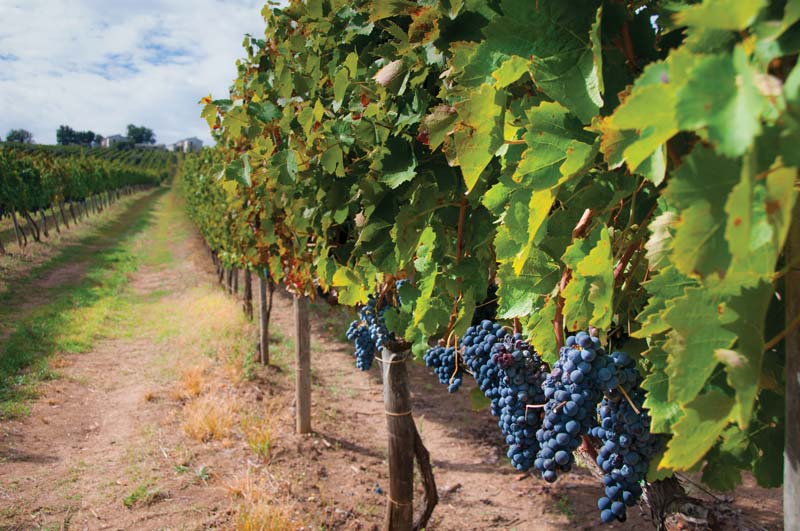
Aglianico thrives in southern Italy, where it is described as the most widespread black variety in the provinces of Avellino and Benevento in the Campania. It also grows very well in the cool but dry sunny mountain conditions of Potenza and Matera in Basilicata. These areas have soils of volcanic origins that result in dark and concentrated wines that are quite age-worthy.
Given the current level of information, Aglianico is likely one of the most ancient varieties of grapes grown in Italy.
It was once thought that Aglianico was introduced to Italy from Greece, but the DNA folks have shown it is not related to any modern Greek variety. It is closely related to many varieties cultivated in Campania and Basilicata, in particular to Aglianicone. Scientific evidence suggests it could be one of its parents, although nicknamed Aglianico Bastardo as it is known to be inferior to its parent in wine production. Given the current level of information, Aglianico is likely one of the most ancient varieties of grapes grown in Italy.
So what to do with a grape with such a storied past? The real challenge, at least in my winemaking experience with this particular variety, is that you really need to focus on tannin management. Some varieties are just plain loaded with tannins and others are not. As a winemaker, you are tasked with trying to find the right balance. Those with lower tannin levels, you seek to express them, and others, like Aglianico, and for the purpose of comparison Syrah, are higher and your job is that of the tannin tamer.

Viticultural Tips
As mentioned, Aglianico is a historically Italian red grape variety. You can find plantings in several warmer, sunnier microclimates in California. As a varietal, it can be described as a high-quality, age-worthy wine that can be tannic. In the vineyard, it is early budding and very late ripening, sometimes as late as November.
Yields need to be controlled to prevent overcropping. It has good resistance to powdery mildew but given its long growing season, is quite susceptible to Botrytis bunch rot. But the reality of it is, the long growing seasons are necessary to adequately ripen the rich tannins.
In the vineyard is the first time a winemaker can help tame the excessive tannin load that can come with these grapes. Tannins take time to mature. Indirect exposure to sunlight and adequate time spent on the vine through the growing season can go a long way. But sometimes nature plays with the winemaker and taming these grapes can’t all happen in the vineyard.
Aglianico in the Winery
As the fruit comes into the cellar, your next opportunity as tannin tamer is at the destemmer/crusher. As a home winemaker, sometimes you do not have good options here, but in general, physical removal of the berries from the stems is recommended to not damage the stems and possibly extract green tannins.
Crushers without destemmers are generally the more affordable versions of this piece of equipment, but spending a little more for one that will destem and have the ability to adjust the crushing rollers will pay off in the long run. I like to set my rollers as wide as possible. That setting allows the crusher to damage the bigger berries somewhat while the small berries drop right through. When pressed, these smaller berries express themselves as “alcoholic fruit-bombs” that add a different dimension to the wine (think carbonic maceration). I like to pick through the pomace when pressing and find these. I affectionately call these berries “adult candy.”
The maceration process is another approach to tannin management with Aglianico. If a little is good, then a lot is better some folks would say. Not the case here. A standard practice I like to use with all of my red wine fermentations is once I get the color I want, I move the wine to press. Very rarely do I take a wine past seven days on the skins. I move the wine to the press, collect the free run juice and then press the remainder, keeping that separate, at least for now. My philosophy is to keep the free run and press fraction separate. You can always add them back together, but I do not want to be tasked with removing tannin through fining if I do not need to.
The other option available to the home winemaker is barrel aging, which promotes micro-oxygenation, or MOX as it is collectively known in the winemaking world. Regular topping of the barrels to replace the evaporative losses introduce small amounts of oxygen into the wine that aid in polymerizing the shorter tannins, thus softening the wine.
This is hard to do, especially with small-batch winemaking, so if you are working with a quantity less than a barrel focusing on a kinder, gentler fruit processing and limited maceration time goes a long way to keeping your tannins tamed. If you do have the ability to barrel age your Aglianico wines, taste them over time and be patient. They will come around. Small-batch winemaking could also benefit from some limited racking from carboy to carboy and the use of oak chips that impart a bit of sweetness.
Circling back to my days with Ben and Katie . . . after I moved on to another job, Ben called me one day and asked if I would come up and oversee the planting of the new vineyard. It was a wonderful experience that I thought helped me bring to full circle those early discussions and steep learning curve. In the end, I never had the opportunity to make the Aglianico that Ben and Katie planted.
As I moved on to the university, we had some test blocks where it was grown and we brought the fruit in to see how it would do in the UC-Davis climate. I think our biggest challenge was the tannins. The advice I give here is based on experience. In the end, I never made the perfect batch, but that is what I love about winemaking. There is always next time, as long as in the meantime you have something to ponder and enjoy in your glass. Life, like wine, generally gets better with age.
Aglianico recipe
Yield 5 gallons (19 L)
Ingredients
- 125 lbs. (57 kg) fresh Aglianico fruit
- Distilled water
- 10% potassium metabisulfite (KMBS) solution (Weigh 10 grams of KMBS, dissolve into about 50 mL of distilled water. When completely dissolved, make up to 100 mL total with distilled water.
- 5 g Lallemand Syrah yeast
- 5 g Diammonium phosphate (DAP)
- 5 g Go-Ferm
- 5 g Fermaid K (or equivalent yeast nutrient)
- Malolactic fermentation starter culture (CHR Hansen or Equivalent)
Equipment
- 15-gallon (57-L) food-grade plastic bucket for fermentation
- 5-gallon (19-L) carboy
- (1–2) one-gallon (3.8-L) jugs
- Racking hoses
- Destemmer/crusher
- Wine press
- Inert gas (nitrogen, argon, or carbon dioxide)
- Ability to maintain a fermentation temperature of 81–86 °F (27–30 °C)
- Thermometer capable of measuring between 40–110 °F (4–43 °C) in one degree increments
- Pipettes with the ability to add in increments of 1 mL
- Tartaric acid – addition rate is based on acid testing results
Step by step
- Clean and sanitize all your winemaking tools, supplies, and equipment.
- Crush and de-stem the grapes. Transfer the must to your fermenter. During the transfer, add 15 mL of 10% KMBS solution (This addition is the equivalent of 50 ppm SO2). Mix well.
- Take a sample to test for Brix, acidity, and pH. Keep the results handy.
- Layer the headspace with inert gas and keep covered. Keep in a cool place overnight.
- The next day sprinkle the Fermaid K directly to the must and mix well.
- Go back to those lab results you took yesterday. Typical Brix for this style is 24–25 °Brix. Typical pre-fermentation acid levels will be 5–7 g/L. Adjust as necessary using tartaric acid to pre-fermentation level of 7.5–8.0 g/L. Don’t worry here; the malolactic conversion will drop the acid levels.
- Prepare yeast: Heat about 50 mL distilled water to 108 °F (42 °C). Mix the Go-Ferm into the water to make a suspension. Take the temperature. Pitch the yeast when the suspension is 104 °F (40 °C). Sprinkle the yeast on the surface and gently mix so that no clumps exist. Let sit for 15 minutes undisturbed. Measure the temperature of the yeast suspension. Measure the temperature of the must. You do not want to add the yeast to your cool juice if the temperature of the yeast and the must temperature difference exceeds 15 °F (8 °C). To avoid temperature shock, you should acclimate your yeast by taking about 10 mL of the must juice and adding it to the yeast suspension. Wait 15 minutes and measure the temperature again. Do this until you are within the specified temperature range. Do not let the yeast sit in the original water suspension for longer than 20 minutes. When the yeast is ready, add it to the fermenter and mix.
- You should see signs of fermentation within about one to two days. This will appear as some foaming on the must surface and it will appear that the berries are rising out of the medium. This is referred to as the “cap rise.” You need have on hand the ability to push the grapes back into the juice to promote color, and tannin extraction. This is called “punching down” and this should be done three times per day. Use a clean and sanitized utensil or your hand to mix.
- Monitor Brix and temperature twice daily during peak fermentation (10–21 °Brix). Morning and evening is best and fermentation temperature maintained between 81–86 °F (27–30 °C).
- At about 19 °Brix, sprinkle in the DAP and punchdown.
- When the Brix reaches 0 (about 5–7 days), transfer the must to your press and press the cake dry. Keep the free run wine separate from the press portion for now.
- Transfer the wine to your carboys or one-gallon (4-L) jugs. Your press fraction may only be a gallon or two (4–8 L). Make sure you do not have any headspace. Place an airlock on the vessel(s).
- Inoculate with your malolactic (ML) bacteria. Check the manufacturer’s instruction on how to prepare and inoculate.
- Monitor the ML fermentation using a paper chromatography assay available from most home winemaking supply stores. Follow the instructions included in the kit.
- When the ML is complete, measure the residual sugar through tasting or by sending a sample to the lab.
- Add 2 mL of fresh KMBS (10%) solution per gallon (3.8 L) of wine. This is the equivalent to ~40 ppm addition.
- Measure the pH and titratable acidity. Most importantly you want a finished TA of about 6.5 g/L. The pH is secondary but should be around 3.7. Consider adding acid to adjust the TA prior to settling, but taste the wine first to make sure it is not too tart. Do not add any more acid if the wine is too tart. Place the wine in a cool place to settle.
- After two weeks, test for SO2, adjust the SO2 as necessary to attain 0.5 ppm molecular SO2. (There is a simple SO2 calculator at winemakermag.com/sulfitecalculator). Check the SO2 in another two weeks and adjust. Once the free SO2 is adjusted, maintain at this level. You’ll just need to check every two months or so and before racking.
- Rack the wine clean twice over 6-8 months to clarify. Consider using some oak chips to add some oak flavors, but don’t expose the wine too long to the oak. 1–2 weeks is sufficient for this volume. Fining and/or filtration are generally not needed if SO2 is maintained and there are no surface films or indications of subsequent fermentations.
- Once the wine is cleared, it is time to move it to the bottle, roughly eight months after fermentation completion.
- Make the project fun by having a blending party to integrate the press fraction back into the free run. You may not need it all, use your judgment.
- Maintain sanitary conditions while bottling. Once bottled, you’ll need to periodically check your work by opening a bottle to enjoy with friends. Have fun!