Eat Your (Fermented) Veggies

When the average wine drinker first sees a production-scale winery, their eyes often go wide at the apparent complexity of the process. All those rows of tanks and barrels make it all seem mind-bogglingly complex. Home winemakers, however, soon learn that they can make the hobby as simple or as complicated as they’re ready for. If you’re ready to move beyond the realm of wine, nothing illustrates the pure simplicity of fermentation like fermented veggies.
Fermenting veggies at home can be extremely simple — as simple as dropping some farm-fresh beets into a jar, pouring a little salt over them, and filling the jar with water. The microbes do all the work, and since veggie ferments utilize wild fermentation, the veggies themselves, plus some salt and a jar, are all you really need to get started.
Many of the instincts that home winemakers develop while making wine at home apply to fermented foods as well. When producing wine, the greatest threats are usually oxygen and infections. A winemaker’s chief instinct, therefore, mainly revolves around keeping their wine protected from the open air as much as possible after fermentation is complete and keeping things clean. When making fermented foods, however, sanitation is actually less of a concern, since most veggie ferments utilize the microbes already present on their exterior. Vegetables, in other words, come with a built-in yeast pitch, and since all veggie ferments employ commonly occurring bacteria in the first place, sanitizing your jars isn’t strictly necessary. Your fermentation vessel should be clean, of course, but the veggies themselves are already crawling with the right kinds of microbes. Once fermentation has commenced, lactic acid-producing bacteria quickly create an environment that is hostile to any unwanted competition. These bacteria produce both lactic acid and CO2, and the resulting low-pH environment ensures that the veggies will remain stable, flavorful, and free of harmful microbes.
The real trick, for most veggie ferments, is making sure that all the bits and pieces stay submerged beneath that vital, protective layer of brine. Similar to why we punch down the cap a couple times a day during a red wine fermentation, a solid layer of liquid brine above your veggies prevents mold and aerobic spoilage bacteria from getting a foothold. Many people are suspicious regarding the safety concerns of preserved foods, worrying excessively that they might do something wrong and accidentally give themselves botulism. Yet dangers like botulism are primarily an issue with canned foods, and generally do not apply to fermented vegetables (unless those vegetables are themselves can-pasteurized at some stage). The high salinity, low-pH environment of fermentation deters the growth of harmful pathogens, while the sterilizing effects of canning paradoxically open the door to botulism. Botulism spores are incredibly hardy, and can thus sneak through the canning process and thereafter propagate in an environment where no other competition is left alive. Obviously, it is quite important to get things right. You don’t want to blindly dig in to a botched jar of sauerkraut, even if the worst thing likely to happen is a bit of mold. As with wine, the “smell test” is often all that you need. Does the ferment look and smell fine? Is there anything noticeably horrid and rotten going on when you give it a whiff? If it doesn’t pass the smell test, you shouldn’t taste it either. Be on the lookout (or smellout, as it were) for anything with the odor of rot, which, fortunately, tends to be fairly obvious. When in doubt, throw it out! But if your sauerkraut smells like sauerkraut or your fermented hot sauce smells like tangy, funky hot sauce, chances are, everything is perfectly fine and you’re in for a delicious treat.

Basic Vegetable Fermentation Setup
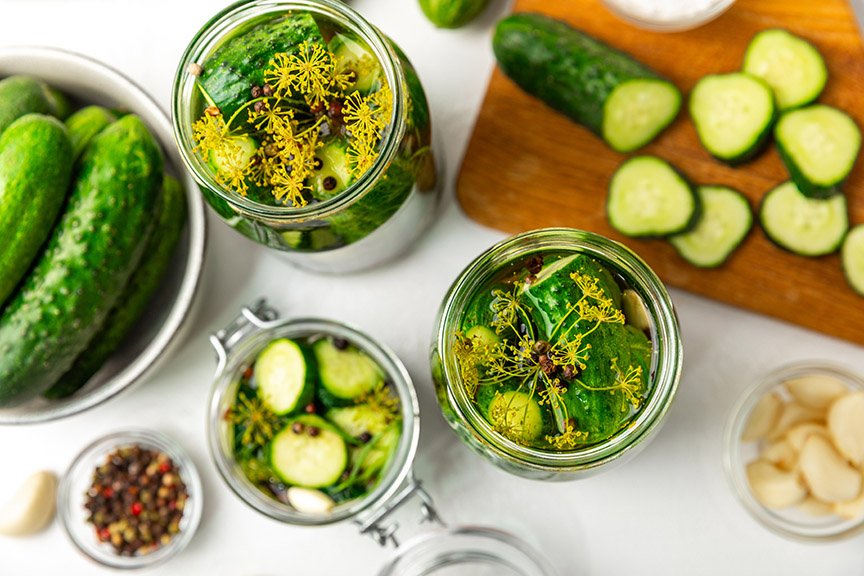
Veggie fermentation can be carried out in a high-end Fido jar with a clampable lid, a standard glass jar with a modified screw-top lid and airlock system, or even just a basic mason jar. While fancier setups with airlocks can be convenient for winemakers who are likely to already have many of the pieces already on hand, fermented veggies are very forgiving. While as a winemaker I had to learn to resist the impulse to open up my carboys and pull samples on a regular basis, opening up the container to check in on things is a fine habit to get into when it comes to fermented veggies. When you do, check to see if any veggies have floated up above the brine. If they have, simply use a clean fork or spoon to push them back under. In my opinion, this simple method of regular checkups and “nudges back under the brine” is the easiest, most reliable way to ensure a successful fermentation when on a budget. Airlocks and crocks are nice, but certainly not required.
Whatever container you use should, of course, be food-safe. Reusing a container like an old pickle or pasta sauce jar is a good place to start, and mason jars are always an excellent choice. Fermented foods are usually heavily salted, so the container must be non-reactive to both salt and acid. Glass and ceramics all fit these criteria, and are easy to clean as well. Avoid fermenting veggies in a metal container, which can corrode when exposed to high levels of acid and salt.
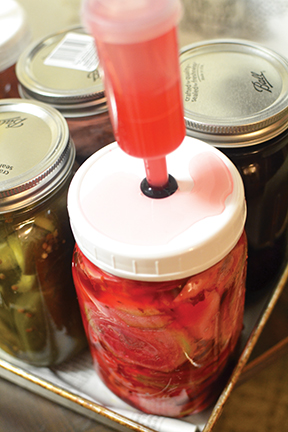
Placing your jar of fermenting veggies in a tray or pan is usually a good idea as fermentations can sometimes cause a lot of foaming and push out of airlocks or loose seals. Depending what sort of vessel you decide to use, spillovers are common during the first week of fermentation and can create a mess that you might not even notice for several days.
As with winemaking, there are many additional small tools one can acquire to aid in their fermenting journey, but most are not strictly necessary. Measuring cups and spoons are helpful for measuring salt additions, though a gram scale can also be used. Chances are good, however, that you’ll be able to carry out a few starter ferments using nothing more than what you already have around the house.

Salt, Brine, and Starter Culture
Salt is a crucial ingredient in fermented veggies for its preservative powers, and a little bit also goes a long way to spice up the flavor of the ferment. With the addition of salt and proper management of the brine level, the beneficial microbes present on your veggies will have everything they need in order to beat back the competition and create a healthy, stable product. As mentioned before, the vegetables will need to be submerged below the level of the brine throughout fermentation in order to prevent mold from gaining a foothold — though in some cases, as with sauerkraut and kimchi, small air pockets may remain throughout your jar. (When properly packed down, these pockets will be doused with CO2 once fermentation has begun). In most cases, therefore, the amount of brine needed is simply whatever amount is necessary to submerge the vegetables completely. The best fermentation results are achieved with a 2–2.5% salt brine, based on total weight. In other words, if the total weight of your veggies and liquid comes in at 1,000 g, you’ll need to add 20–25 g salt for a proper ferment. For those without a gram scale, this works out, loosely, to about a teaspoon of salt per cup of water. Always use sea salt or pickling salt with no added chemicals. Table salt should not be used for fermentation because the iodine added to most table salts hinders bacterial growth and will not taste good.

Filtered water is essential. Many towns and cities add chloramines and fluoride for the specific purpose of inhibiting microbes. Significant levels of chlorine and fluoride will hinder fermentation from starting, as they can kill the fledgling communities of microbes resident on your veggies. Spring water from the store will work, but a water purifier with a fluoride filter means you’ll have a regular, waste-free source of filtered water for drinking as well as for fermentation.
Fermentation
Fermented vegetables are far more forgiving when it comes to temperature than most fermented beverages, giving winemakers a chance to relax even if your home sees regular temperature swings. The same basic principles apply here as apply to wine, however: At warmer temperatures, fermentation will proceed much quicker, and therefore may favor a funkier, more lactic profile. Colder temperatures make for a slower fermentation. If temperatures are too low (below 65 °F/18 °C) — Lactobacillus bacteria growth may occur more slowly, and other microbes are given an opportunity to make their presence known. Anecdotally, I have noticed that brine-based ferments like beet tonic are more susceptible to Pediococcus (leading to thick, snotty liquid) below this temperature range. Fortunately, most households generally keep their thermostat set to a temperature that is fairly ideal for veggie fermentation. If you live in a region that sees extremely elevated summer temperatures and your home is not temperature maintained, you should still be able to manage by fermenting in a cool cupboard or basement, or by simply avoiding the hottest weeks of the year.
Fermented veggies don’t mind a little bit of indirect sunlight, though direct sunlight can inhibit bacterial growth. Fermentation time will depend on a number of factors, including temperature, the quantity of salt, and the texture and density of the veggies themselves. Most ferments will do well with about two to three weeks of fermentation time, but this is only a general rule, and there are significant exceptions. Some ferments are not meant to go full-on funky, and really only need a few days of brining, while others enjoy aging and mellowing as long as any wine. A fermented hot sauce, for example, can safely condition for years. For most, you can simply go by taste. Try the veggies after a week and see if they’ve hit a level of flavor and acidity that is enjoyable to you. If you think they could use more time, give them another five to seven days and try them again. The finished product will keep for months in the fridge. For more tips on fermenting foods, plus examples, check out three unique recipes below.
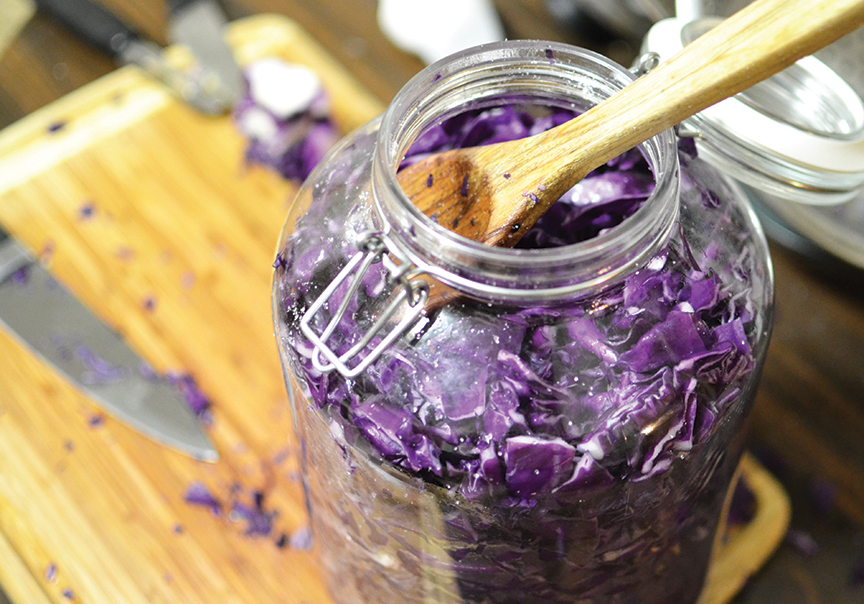
Sauerkraut
1 medium cabbage (about 21⁄2 lbs./1.1 kg)
1.5–2 tsp. sea salt per lb. (0.45 kg) of cabbage
As with any ferment, the better the ingredients, the better the end result will be. Sauerkraut, however, is a little more forgiving than some others. Sauerkraut (and other similar cabbage ferments), are one of the most common fermented foods on the planet for a variety of reasons. Cabbage is cheap, ubiquitous, and hardy. Sauerkraut is versatile and can be adapted to utilize a variety of ingredients that you may have on hand and wish to use up. It’s also more forgiving, since even winter cabbage from the grocery store can still be transformed into a respectable sauerkraut. Just about any variety of cabbage can make for a good kraut — red cabbage kraut is especially tasty. Small amounts of other veggies, like carrots or jalapeños, make for a nice twist, as do spices such as caraway or rosemary.
While kraut is more forgiving once fermentation is underway, the preparation stage demands a bit more grunt work than other ferments. Like other veggie ferments, sauerkraut needs an anaerobic environment. But kraut is generally made without adding brine, as cabbage itself already contains plenty of water. During the preparation stage you’ll have to get rough with it. A good kraut requires aggression, and you’ll need to really work to pack it all into the jar. The harder you pack, the more liquid will be released, and you’ll have to compel the cabbage to release enough of its water to form a brine that covers the top of the veggies.
First, remove the outer leaves of your cabbage as well as any that are damaged. Cut the cabbage into quarters and remove the solid core. Rinse the cabbage well with cold water, allowing the water to flow between the cabbage leaves. This will remove any dirt and bugs that may be along for the ride, but will not affect the microbes that you’ll need for fermentation. Set one broad, thicker outer leaf to the side. Shred the remaining cabbage with a knife or food processor. The chopped bits have to be fine enough that the whole jar of kraut can be packed down relatively densely, but before you transfer to a jar, place the cabbage in a large bowl. Sprinkle the calculated amount of salt over the cabbage, then toss well. Allow the cabbage and salt mixture to rest up to 30 minutes so the salt can be absorbed.
After about half an hour, the cabbage should have released a good bit of its moisture. After this, pack the cabbage into a clean glass quart jar. Pour any liquid left in the bowl into the jar — although this likely won’t be enough to cover the cabbage just yet. Keep packing the cabbage down until enough juice has been released to submerge the vegetables almost all the way. You should be able to get close, though some may struggle to get all the way to complete submersion. If needed, top off with a 2% solution of salt water (1 teaspoon salt per cup of water). If using a weight system to keep the veggies under the brine, take the reserved cabbage leaf and cut or fold it so that it covers the rest of the cabbage at the top of the jar. This extra leaf can be held under a weight to create an additional buffer between the veggies and any attacking mold.
Allow the sauerkraut to ferment for 1–4 weeks until it reaches the sourness you desire, and then store cold.
Fermented Hot Sauce
3.2 oz. (90 g) chili peppers
1⁄2 Tbsp. sea salt
1⁄2 Tbsp. honey
Splash of apple cider vinegar
While most hot sauces sitting on grocery store shelves these days are vinegar-based, fermented hot sauces are actually a lot more common than you may think. Fermented condiments in general have been around for a very long time, probably as long as any fermented food. Even today, a few popular brands like Tabasco and styles like sriracha are still made using fermentation, rather than vinegar. While vinegar hot sauces can be bright and punchy, fermented hot sauces unsurprisingly tend to play up the funk and complexity.
Fermented hot sauce may be my favorite ferment to make at home, simply because of how versatile and forgiving it is. Both managing fermentation and winging a recipe on the fly are simple tasks, and the resulting flavors can be unlike anything you’ll find in the average store. Even better, fermented hot sauce lasts a long, long time — I’ve had half-empty bottles in the fridge that stayed vibrant and flavorful for years.
The recipe given here is bare bones, because as with most fermented foods, you can modify the recipe to push it in just about any direction you want. For a first attempt, however, I recommend a mix of habanero and serrano peppers. Not only are these readily available in most grocery stores, they’re easy to find fresh at farmers markets, and make for a hot sauce with good flavor and a moderate but manageable heat level. With any hot sauce, the heat can always be dialed down by blending in a bit of bell pepper (use whatever type of bell pepper best matches the color of the rest of your peppers). Peppers are a lot of fun to mix and match, and testing out an obscure rare pepper variety on its own in a hot sauce can really give you a sense of the pepper’s flavor.
As for the process, I like to keep things simple. Blend the peppers, salt, and honey until they are the consistency of salsa, then pour into your fermentation vessel. Top off with a splash of apple cider vinegar so that the liquid level is above the solid veggies. Allow two weeks to ferment, then blend again, to create a finer, more sauce-like consistency. Additional vinegar or salt brine can be added if the hot sauce is still too thick. A dash of extra salt can also ensure that the hot sauce keeps for a long time. At this point, you can pour the sauce back into the same vessel, or you can even transfer to hot sauce bottles at this stage. While the hot sauce should now be ready to consume, I usually prefer to age my hot sauces at room temperature for several months before I begin to use them. The flavor will continue to develop, and the heat mellows and integrates with the flavor of the sauce over time. For the first month of aging, however, be sure not to tighten the lid of the jar or bottles all the way. More CO2 will be released as the ferment continues to condition.
Fermented French Fries

2 medium / large potatoes
Sea salt (2% brine)
While fermenting potatoes and then later cooking them as French fries might seem like a slightly paradoxical way to enjoy a fermented food, I’ve always enjoyed the concept of this recipe as much for what it conveys as well as for how it tastes. Fermentation is useful for preservation, of course. But less frequently discussed is the fact that fermentation also breaks down complex sugars and starches and generally makes foods easier for our bodies to process. Probiotics get all the mainstream buzz, but fermentation also makes foods healthier by unlocking nutrients that our own bodies wouldn’t have access to on their own. Many such foods, like beans and starchy vegetables, don’t require a
full fermentation. Usually a day or two of brining is sufficient to begin the breakdown.
French fries made from fermented potatoes are not only easier to digest, but more flavorful as well. Fermentation adds a tangy dimension that really complements the saltiness of French fries, creating a flavor dynamic similar to salt and vinegar chips. The longer you ferment the funkier the fries will be, of course, but I usually prefer to toss these in the oven after two or three days of fermentation.
The process is quite simple: Wash the potatoes with cold water to remove any dirt, then cut them up into French fry-style wedges. How thick you cut the wedges is entirely up to you. Pack the potato wedges into a jar and fill with a 2% salt water brine (1 teaspoon salt per cup of water). Allow to ferment for two or three days, then remove the potatoes from the brine and give them an hour or so to air dry. After this, you can bake or fry them as you would any other French fry, though they may need less time cooking than normal fries. Keep in mind that fermented French fries have already been salted, so you will likely want to hold off on adding any more salt until after you’ve cooked and tasted them. Additional spices can be added either during the fermentation process, or upon serving.
And, as pictured above, this same recipe works great for sweet potato fries as well!