Go Big at Home
Firstly let me define what I mean by “big batch” for this discussion. Let’s say a big batch is anything larger than a 6-gallon (23-L) carboy of wine. Many home winemakers begin their journey in the winemaking hobby by trying their hand at 6-gallon (23-L) and sometimes even 1-gallon (4-L) batches. Some winemakers find these relatively smaller sizes perfect for them, but others start considering larger batches after achieving some success with these sizes. This is often driven by a variation of the concept of supply and demand.
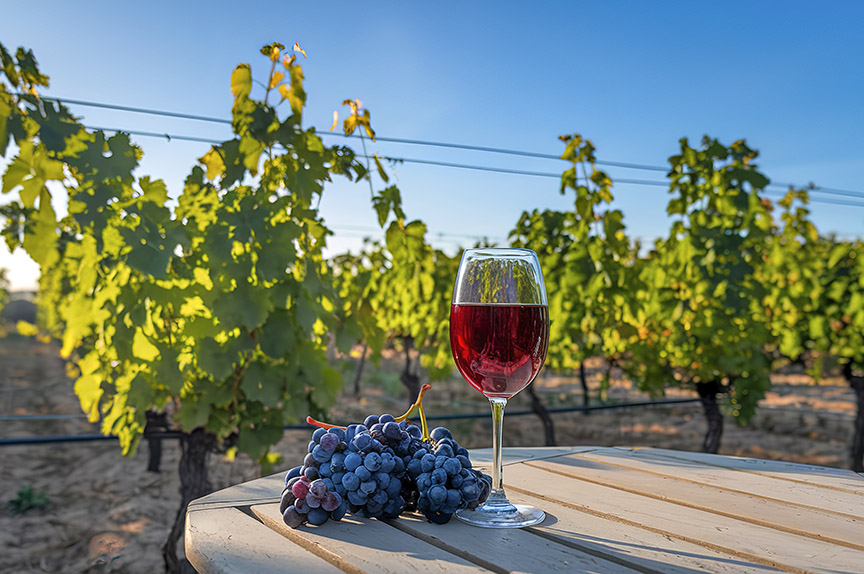
A 6-gallon (23-L) batch of wine equates to 30 bottles (750 mL). Let’s say it is a Cabernet Sauvignon that you and your friends and family are enamored with. You have a party at your home (after the pandemic is over) and you quickly go through nearly a case. Some of those party guests loved it so much that they ask if you might share a bottle for them to take home. By the end of this event you may be left with just a case. This wonderful wine that you spent a number of months (hopefully much longer, a very different topic) shepherding is now nearly gone. You have also heard and been told by other winemakers that you may want to put some bottles aside to let them age, as wine evolves and can dramatically improve with age. You were planning to do that, but now you have nearly nothing left to enjoy in the short term. Time to make another batch. At this point you may start considering making multiple batches or maybe even looking at making a much larger one.
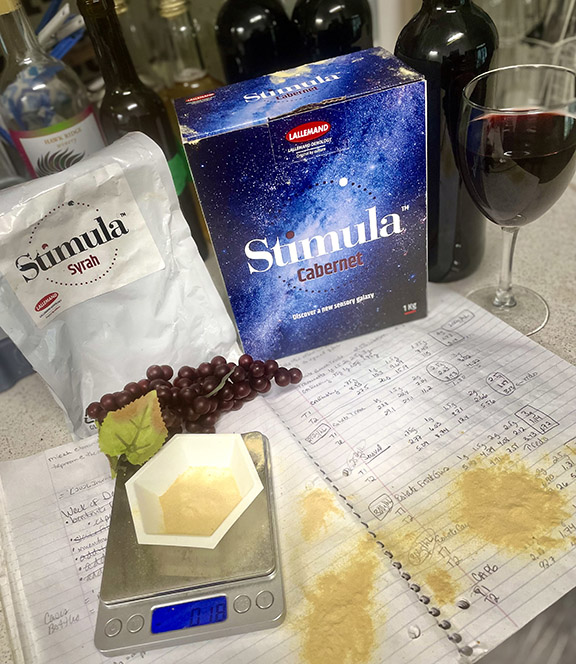
I don’t suggest new winemakers jump right in to large batches. In fact, I highly recommend kits to start. Winemaking embodies a good level of biology and chemistry that is necessary to understand in order to consistently make a quality wine that you and your friends and family would enjoy to drink. By starting off with a kit, the chemistry balance of the wine has already been worked out for the winemaker. The step-by-step instructions are provided, along with most of the necessary components, to start on the right track to making a great wine at home. The only additional components necessary would be a basic winemaking equipment kit. After successfully fermenting a couple of wines from kits, along with some study on the basics of winemaking, the home winemaker can gain confidence to then delve into winemaking that takes a bit more intervention to ensure a successful outcome. This is the case when you consider making wine from fresh juice or fresh grapes.
My first experience with winemaking is quite different. A number of years ago I received an impromptu call from my father-in-law who asked if I could help him harvest grapes from a local home grower. To be honest, at that time I had no real interest in winemaking and only had an occasional glass of wine for a special occasion. To help him out, I went along and harvested many buckets of Concord and Niagara grapes. In the end, my father-in-law overestimated how many buckets of grapes he needed to fill the one wine barrel he was intending to fill. He ended up with about 30 gallons (114 L) of extra juice, which he offered to me. I felt bad to let it go to waste and I agreed to take it. Luckily there happened to be a home winemaking shop in town and I ran over there and came home with a couple of 15-gallon (57-L) demijohns. I had no idea what I was doing, so I ended up calling the gentleman who we purchased the grapes from (as I liked the taste of his wine that he shared with us while we were harvesting) and asked him his process in making wine. Well, I followed his instructions blindly and luckily after a few weeks I ended up with a somewhat palatable wine; albeit very sweet.

From this point my interest in winemaking blossomed. I starting reading everything I could find on the topic of winemaking. I was hooked. After a few more years of making batches of Concord wine from the local gentleman’s vineyard, I then developed an interest in growing my own grapes. My home vineyard has grown to over 200 vines. In a good year, my vineyard can produce upwards of a ton of quality grapes; lending itself to big batch winemaking.
Benefits of Bigger Batches
In addition to the fact that you will have more wine from a single batch, as outlined in the example in the beginning of this article, there are other benefits of making wine in larger batch sizes. One of the most significant for many is workload. Believe it or not, there can be much less work associated with larger batches than a number of 6-gallon (23-L) batches. Each of those 6-gallon (23-L) batches is its own micro-environment that needs to be monitored and shepherded to a final product. Each will need individualized testing and potentially different treatment to achieve what you are after as a winemaker.
Additionally, wine stability increases with the size of the batch. What does that mean? Well the larger the volume is the more it will take, both environmentally and through winemaker intervention, to impart a change in that wine. How many times have you heard the story of a home winemaker adding something in their winemaking process that they mistakenly over calculated and ruined their small batch of wine? In a larger batch, you’d be more apt to double check yourself and say “wow that sounds like too much.”
Now we’ve touched on a bit why you may want to consider making larger batches of wine. How do you do that? Well, you could buy multiple kits and make a single batch out of them. Nothing wrong with that approach. Other options are to buy fresh juice and/or grapes in season. Remember, these will take more understanding and interaction by the winemaker. This additional interaction is, however, what can make a wine truly yours and a representation of the specific style you may be after. It becomes a true artisan crafted beverage. Hopefully one that you can be proud of.
Differences in Equipment
Let’s touch on some of the general differences in equipment that may be necessary to move to big batch winemaking. There are many choices and options for the home winemaker today when looking to increase their batch sizes. These options will vary based on your individual plans, on the types and styles of wines you are planning to make, and what “raw material” you plan on starting with. For example, if you just plan on making larger batches from multiple kits or fresh juice then your equipment needs will be somewhat different than if your plan is to make wine from fresh grapes. Once you have made the decision to make wine from fresh fruit, we start to see the need for equipment like crusher/destemmers, large fermentation tanks, and presses. These pieces of equipment are not typically needed when starting with juice. Keep this in mind as you start ramping up production.

Crusher/Destemmer
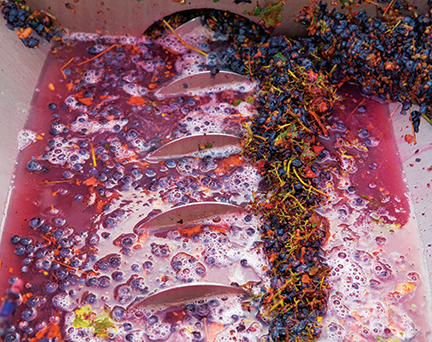
Fresh grapes will need to be processed upon receipt. Most times (this will vary by the winemaker’s technique and style of wine they are after) the grape should be removed from the stems and crushed. Stems can add excess bitter tannins and herbaceous notes to a wine during fermentation, especially if the stems are still somewhat green and not lignified. Lignification is part of the process of maturation of this year’s grapevine. You will notice that the flexible green stems of the grapes will start to turn brown and woody. You will also notice this change on the grape shoots as well. These shoots are from where next year’s harvest has already been predetermined. Lignification is also known as hardening and is very important for the grapevine’s winter dormancy, as it builds stores of carbohydrates. By crushing the grapes the juice is more easily released and the skin is more easily accessible to the yeast during fermentation. For red wines, this can aide extraction of color, flavor, aromas, and tannins in the wine. For white grapes, along with the same concerns with the stems, crushing can enhance juice yield during pressing. It’s just easier to press a grape that has already been broken than one that is still solid. We’ll touch on presses in a bit.
Crusher/destemmers are readily available to the home winemaker in a number of options. For those that don’t plan on processing more than 1,000 pounds (450 kg) of grapes a season, hand crank models are available. Just make sure to have plenty of last year’s wine available as a thank you to whoever gets the job of turning that crank! When you start processing over 1,000 pounds (450 kg) of grapes in a season, you may want to consider an upgrade to a motorized version.
These units are also available in either a powder-coated painted finish, stainless steel, or a combination of the two. Stainless steel has the potential of a much longer longevity than the painted options. I will say, however, like any other piece of equipment, it is all about how that equipment is used and maintained. I have a painted unit that I have had for many years and has processed lots of grapes. To date, not a single paint chip has occurred.
Fermentation Tanks
When processing grapes, fermentation tanks are typically large, open-topped food-grade plastic vats. Do not fill these more than 75% prior to the onset of fermentation so there is room for the cap and expansion due to carbon dioxide production during fermentation. This also allows for ease in punch downs of the grape skin cap, minimizing splashing out of the vat and onto the winemaker. Been there, done that!
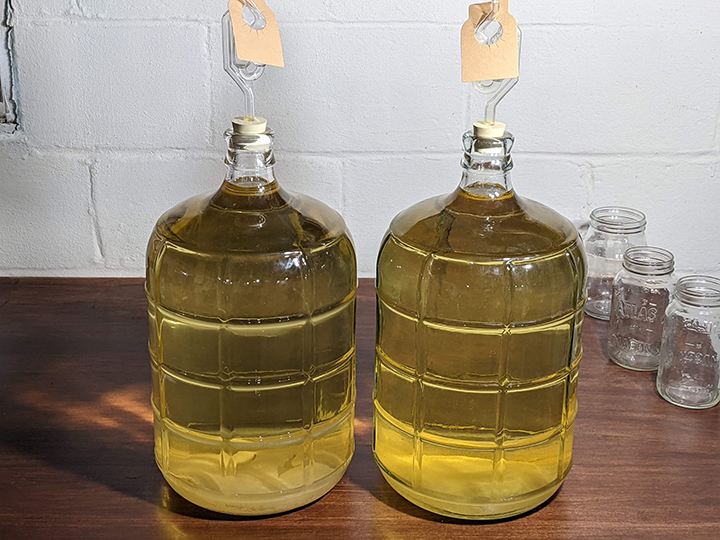
If starting with juice, depending on wine and style, you could ferment in stainless steel variable capacity or fixed capacity tanks, food-grade plastic tanks, or barrels. For these fermentations the tanks should be closed to minimize air contact and an airlock added. These tanks should also not be filled completely to allow for expansion and foaming based on carbon dioxide production during fermentation.
Presses
Presses come in a couple of forms for the home winemaker. One type is the ratchet/basket press. This type provides a slotted oak wood basket that comes in varying sizes depending on how many grapes you may typically process. The basket is filled with the grapes (prior to or after fermentation; again based on grape variety and style of wine being made). Wood blocks are added above the grapes and then pressure is applied via a ratcheted screw or hydraulic press (manual or electric) compressing the wood blocks on the grapes. The pressed juice/wine seeps between the wooden slats and is collected in a bucket where it can be transferred to the next stage of the process.
The size basket press to be used should be based on your typical batch size. If you are normally pressing fermented or even just crushed grapes to make batches of 6–12 gallons (23–46 L) then a size 30 press should give plenty of flexibility. If your batches are more of a 30–60 gallons (114–227 L) wine volume then a size 45 or even a 55 may be more appropriate. I should note that you can process smaller batches in a larger press but you will lose some efficiency and you may have to add additional wood blocks to reach your pressings.
The second type of press is a bladder press. In this type of press there is typically a stainless steel basket (although there are oak basket versions of these) with small perforations in it that is again filled with the grapes as well as a rubber bladder inside the basket. Once the press is filled with grapes a cover is bolted down to seal the basket. A garden hose is attached to the unit and water fills the bladder to apply pressure outwardly against the grapes towards the basket wall.
The size bladder press to be used, just like the basket press, should be based on your typical batch size. A 40-L press should give plenty of flexibility if you are making batches of 6–12 gallons (23–46 L) if you are typically pressing fermented or crushed grapes. Batches of 30–60 gallons (114–227 L) will make a 90-liter or even a 120-liter bladder press more appropriate. You can process smaller batches in a larger bladder press but you will need to estimate and prefill the bladder with water to ensure the height of the press is filled with must to ensure even pressing.
The process is very similar with both press options. The bladder press, due to the more evenly distributed pressure, is, however, more efficient. It is also a bit less work as you are allowing water pressure to do the work versus your own muscles, in the case of a ratchet press.
Pumps
In my home winery I have tried to make use of gravity as much as possible. By setting tankage at higher elevations, when it comes time for racking, tank transfers, and even bottling it can make things so much easier. What I came to find, however, was that utilizing a pump became a major time and back saver as my batch sizes increased
There are different types of pumps available for the winemaker, depending on what you are trying to move from one place to another. Must pumps are centrifugal impeller pumps that are designed to pass solids like grape must. So if, for instance, you are coming off your crusher/destemmer and you desire to pump that to your fermentation tank, a must pump is the way to go. These pumps, however, can be quite expensive and may be a bit cost-prohibitive for the home winemaker.
If you are just trying to move relatively clean wine and or juice, this can be readily accomplished with a diaphragm pump, flexible impeller pump, or even a vacuum system, based on your setup. I personally utilize a diaphragm pump, which is very well suited for wine transfer. These units are self-priming, which saves time and imparts very little oxygen to the wine during the pumping procedure.
As with any of your winemaking equipment, sanitation is always paramount. Make sure to sanitize all tubing and internal workings of whatever pumping system you use prior to putting your wine through it. I like to use a sanitizing solution of potassium metabisulfite and tartaric acid in all my sanitizing operations, but there are many sanitation products available to home winemakers.
Aging Considerations
There are a number of bulk aging options available to the home winemaker depending on style of wine you are trying to achieve. Bulk aging is a very important facet of winemaking in general. Wines should never be rushed to the bottle. It is always tempting to look at and taste a wine and say that it is ready, looking clear and tasting great, to bottle it to find that in a relatively short period of time the wine has dropped sediment or gone hazy in the bottle. Bulk aging gives wine the ability to evolve and stabilize so that when it is finally time to bottle your wine the likelihood of it staying as pristine as when it went into the bottle is greatly increased.
Bulk aging is done in a tank that provides the ability to minimize and/or exclude air completely. Air entering your tank at an uncontrolled and excessive rate can lead to an oxidized and spoiled wine. Acetobacter can quickly grab hold in an oxygen-rich environment and lead to excessive levels of volatile acidity and turn your wonderful wine to vinegar.
One of the most versatile bulk aging big batch tanks in any home winery is the stainless steel variable capacity tank. Stainless steel is easy to clean and sanitize. Its floating lid assembly provides for great flexibility with varied batch sizes. If the lid, with its gasket, are properly installed and maintained these tanks provide for an airtight environment for your wine to evolve. They are also available in many base sizes so finding one to fit your needs should be easy. In my home winery I have a 26-gallon (100-L) and a 53-gallon (200-L) tank. Since I grow my own grapes and crop levels can vary, I find them indispensable.
Food-grade plastic tanks are another option. These also come in many shapes and sizes to accommodate your winemaking needs. Most of these tanks available on the market are designed to completely exclude air, much like the stainless steel tanks just described. One manufacturer, FlexTank, has fabricated a food-grade plastic tank that is designed to allow a minute amount of air through the tank walls into your wine. Why would anyone want this? While you want to avoid large and uncontrolled air intrusion of your wine at this stage, minute and controlled air application (micro-oxygenation) can actually improve red wines. This is one of the major benefits of barrel aging wine, and the FlexTank is designed to emulate the workings of a 2-year-old barrel. I have two 15-gallon (57-L) ECO fixed volume FlexTanks as well as two 50-gallon (189-L) variable capacity FlexTanks of my own design. I find these also to be indispensable in my big batch winemaking.
The oak barrel, by far, has the longest history and use in bulk aging and storage of wines. This is predominantly true for red wines, but is used for some whites too, most notably Chardonnay. Oak barrels are available in a myriad of sizes and oak types. Be it French, American, or Hungarian oak, along with a number of toasting options, the flavor and aroma profiles that can be achieved are numerous, to say the least. Along with oak flavors and aromas, benefits from oak aging include added tannins that assist in locking in color and can enhance the mouthfeel of your wine. The other “magic” component that barrels bring to wine during the bulk aging process is known as micro-oxygenation. A minute amount of oxygen is allowed to enter the wine controlled through the stave pores. This oxygen helps the wine to slowly evolve and mellow by allowing long chain tannins to develop.
I have and continue to use barrels in my home winemaking operations. Personally, I find them more novel than indispensable. Along with sanitation concerns, one of the biggest concerns I have with barrels for long-term storage is the regular loss of wine that is know as the “angel’s share,” which comes from the evaporation of wine through the staves to the atmosphere. This will vary based on the humidity level of where the barrel is stored. In order to minimize oxidation and potential spoilage, that wine must be replaced regularly in the barrel through a process know as topping up. If aging your wine for a year or two in barrel, this can add up to quite a bit of topping wine. The topping wine is hopefully wine that you reserved from the same batch for this purpose. Topping with a similar wine would be the next best option. The topping wine can greatly influence the final wine you end up with.
Filtration
Filtration is a great tool to have in the winery whether or not you are making big batches. However, when investing in the costs associated with bigger batches, it makes the need for filtration larger. In the world of food and drink, we taste with our eyes first. To many wine drinkers, a glass of cloudy wine illustrates that there may be a problem with the wine and/or that the winemaker didn’t take the time or have the knowledge to produce a quality product.
Filtration can be provided in two forms. There is nominal and absolute filtration. Nominal filtration is when a filter is rated for an approximate level of removal but some small amount of larger particles than what it is rated for can pass through the filter. Absolute filtration, on the other hand, is a filter that 100% of any particle that the filter is rated for or larger will be removed. Absolute filtration is regularly used in commercial winemaking operations to ensure the stability of a wine prior to bottling and release to the market. Due to its very high cost, absolute filtration is not readily available to the home winemaker.
Canister and plate and frame filter types are commonly used by home winemakers. Each works very well and it comes down to preference and setup that you might employ. I personally have used plate and frame style filters for many vintages. I find them versatile and relatively inexpensive to use. Filter pads at varied nominal filtration sizes are available to tune in what you are trying to achieve. The key is to always start with the clearest and most stable wine you can achieve prior to filtration. This can be done with fining agents and/or time. Always start with a slightly more coarse pad first. Then filter again with the finer pad. This will greatly reduce leaking and potential frustration. You will be amazed at the level of brilliance that can be achieved in your wine through filtering.
Bottling
Once you get to the point of creating larger batches of wine a bottling wand becomes a tool of the past. It is time to think about other types of bottling systems that are designed to handle larger volumes of wine more efficiently. In my home winery I have installed a three-spout gravity bottle filler station. I utilize the pump that is provided on my Buon Vino SuperJet to not only filter my wine but to transfer it to the head tank that feeds the gravity filler. Once you get everything set up, I have found this to be a quick and efficient method of bottling large batches of wine.
Other common options are the Enolmatic vacuum bottle filler on up to the XpressFill bottling units. Although I don’t have any experience with either, I know a number of home winemakers that find them very efficient and easy to use.
Part of the bottling process is corking the bottles. There are handheld, tabletop, and floor based models readily available for the home winemaker. When you start making big batches, I’d highly recommend investing in a quality floor corker. These make the process nearly effortless and provide more flexibility in what cork type you plan to use.
A Note on Testing
In all winemaking, whether making small or large batches, testing is paramount in order to regularly achieve quality wines. As I mentioned earlier on in our discussion, big batches versus many smaller ones, does help in reducing the workload associated with testing. Of course, depending on what winemaker you talk to you will get different opinions on what testing is necessary. So here goes my opinion.
No matter how much wine you make, invest in a quality pH meter. This one measurement can tell you so much about your wine and its needs. It can give you an indication about initial adjustments that are needed for your must, what level of sulfites are needed to maintain the stability of your wine and prevent spoilage, and can give an indication of the progress of the malolactic fermentation process; just to name a few. Beyond that, parameters like titratable acidity, free sulfur dioxide, total sulfur dioxide, Brix, and dissolved oxygen are all important to truly understand your wine. Granted, the equipment necessary to test and monitor these parameters can be expensive. You should look at it as a long-term investment in achieving the best quality wines you can, but again, if you are making large batches of wine it is even more important to ensure that nothing goes wrong because you didn’t measure.
The one thing I would caution against is relying on color-based test strips. Although relatively inexpensive, the results from these are difficult to assess (based on slight differences in color shades) and, in my experience, suspect. If a test is not going to provide accurate and reproducible results then that test can actually do more harm than good in your winemaking decisions.
I’d also warn against over-intervening. Wine is constantly changing. It is either evolving or devolving. We all have experienced when we taste a wine today and then taste the same batch of wine a week, month, or year later how different it tastes. Use testing to track the progress of your wine and only make adjustments to protect that wine from getting too far off course. Wine, especially in large batches, has a great propensity for getting itself back to a “happy place.”
Welcome to the world of big batch winemaking! You know what, it really isn’t much different than making smaller batches. The reality is it can just embody more and larger equipment that are really designed to save you time and effort. Larger batches in the end will be easier to work with, due to their inherent stability, and reduce your overall workload in the winery. Big batch winemaking will also provide you with more of your wonderful craft to share with friends and family, drink yourself, and allow to bottle age and continue to develop over time.