How to Build a Barrel
The idea to build a barrel at home stemmed from my desire to be self-sufficient in all things wine. I didn’t have the money post-recession to spend the hundreds upon hundreds of dollars required to buy a freshly coopered barrel. Out of necessity, I studied the basic theoretical concepts of barrel making and created life-size plans detailing barrel geometry. I didn’t have access to hand split green oak or many of the tools required; like a shave horse, so I purchased a set of antique croze and howell planes online and built a series of jigs to complement modern power tools including: a table saw, jointer, planer, and router.
The answer to the age-old question of “how will I do it?” when building a barrel is simply finding a way to make the materials and tools match my specifications. I work best when I’m pushing the envelope, and along the way I’ve determined: Slightly-less-than-perfect is perfect enough, with a few tricks up my sleeve. I’ve managed to omit much of the monotonous hand tool work associated with barrel making, such as stave sculpting, while preserving the things that really matter, like trussing casks over an open flame and incorporating bands made of cold-formed steel.
The Oak
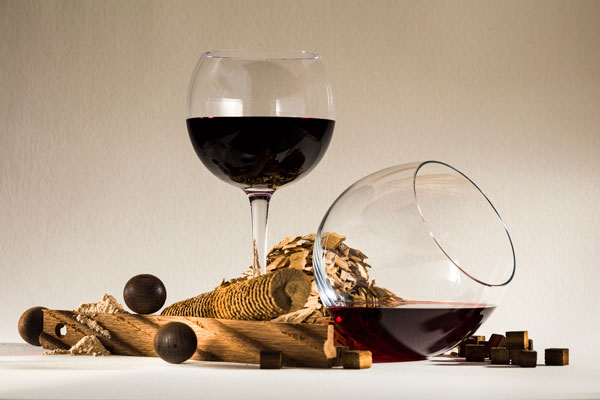
I used American oak for my barrels. American oak, unlike French oak, does not have to be hand split to remain water-tight. This is because of natural barricades known as tylose, which are abundant within the vessel walls of heart wood. [1] Opinions vary with regard to oak species, curing, and flavors but several facts seem to hold true about kiln-dried, quarter-sawn, American, white-oak. Quercus alba has strong aromas and flavors that seem to be tamed well with first year barrel fermentation. Sawn wood is more challenging to bend than riven wood because the grain has been interpreted along the length of the rays. And flavors of vanilla, coconut, and caramel seem to be the common identifiers.

In western Washington, where I live, hand-split, quartered, white oak isn’t available; but quarter-sawn white oak is available through special order from local lumber stores. It’s kiln-dried, and costs around $5.50 a board foot; a half barrel’s worth of oak totals $150. Hand riven oak is easier to bend than sawn wood because the splitting action runs uninterrupted along the wood fibers. Water-tight barrels are almost always made of quartered white oak because it’s hard, non-porous, strong, bends, and adds wonderful aromas and flavors we’ve become accustomed over the last couple thousand years.
Barrel Sizes
My preferred barrel size for building are Rundlets, which are 16-gallon (~61-L) half barrels and are common for many home winemakers. Traditional barrels held 31 gallons (117 L) of liquid, which was ideal for transport up and down the gangplanks of ships. This made the smaller 31-gallon (117-L) “true” barrels more practical prior to the advent of forklifts and cranes. The giant 63-gallon (238-L) hogsheads of today weigh close to 700 pounds (318 kg) when full, making them challenging to move around by hand.
Design
Traditionally coopers would have begun building a barrel with the stave building process, by hewing logs into quarters with wedges and froes. The wood would have been air dried for 1-3 years before being formed into staves. Air-dried wood requires 1 year per inch of thickness for drying. They would have listed the edges of each stave with tapers and bevels using a side axe and finished on a cooper’s plane, with the stave listing angle done entirely by eye. Backing would have taken place on a shave horse with a drawknife to match the barrel’s radius. They would have finished off each stave by hollowing out the insides to match the barrel’s interior radii. The barrel design is strongest at the bilge, the belly, which protects the staves like a giant egg. The curving and sloping angles all come together to form a one-way support system. When held perfectly together, the barrel is strengthened with inward facing angles preventing the pieces from going in past a certain point. This design also helps with maneuvering and turning.
When I build a barrel at home, eighteen stave blanks are required for each of my half barrels designed to hold 16 gallons (~61-L). I also make an extra stave, if nothing else for good luck. Being self-taught, it was difficult to predict the sloping curves I would need to impart on a flat stave, which would result in a tight fit amongst multiple bent ones. To overcome this obstacle I invented a wooden jig to hold the stave blanks as I made the curves and bends with my flush trim router. The staves are cut to 24.25 inches long X 3.5 inches wide X 1 inch thick (61.5 cm X 8.9 cm X 2.5 cm). The stave blanks are fed sideways through a table saw in subsequent passes using a homemade coving jig (which I will explain in a bit). The resulting cove cuts “hollow out” the insides of the staves, making them easier to bend while forming. I then clamp a shim on my power jointer table and gradually plane the outsides of the staves to an even 3⁄4-inch thickness across the stave’s curve, moving the shim a bit with each angled pass. The staves of hogsheads are typically 1 inch (2.5 cm) thick and 3 feet (91 cm) long. Since my wood is quarter sawn and bent over a much shorter, 2-foot (61 cm) distance, a stave thickness of 3⁄4 inch (1.9 cm) is ideal for bending.
Hoops
It takes three pieces of sheet metal, sheared to 1-3⁄4 in. X 10 ft.-0-in. (4.4 cm X 3 m-O-cm.) to make six barrel bands. Sheet metal is available in 4 ft. X 10 ft. (1.2 m X 3 m) lengths, which is efficient because the bilge hoops require a 5-foot (1.5 m) band when accounting for a 5-inch (12.7 cm) rivet lap. To make staves for my homemade barrels, I purchase the metal and have it sheared at a local fabrication shop for $20. The bands are cold formed into a banana shape on a 50-pound anvil, which is done by smacking one edge along the bands entire length over and over with a ball peen hammer. The process known as peening is a form of cold forming and it “realigns” the steels molecules by flattening the steel and stretching it. The steel also goes through a form of plastic deformation, which hardens it and makes it stronger. The ideal thickness for banding material is 3⁄32 inch (0.24 cm). Materials thinner than this can tear during installation, and anything thicker is hard to form.

I’ve always underestimated fitting the bands. Through trial and error, I’ve found that it takes a full six hours to complete this task. I could buy a 10-foot (3-m) sheet of 13-gauge galvanized sheet metal, have the bands burned out on a plasma pantograph machine and cut my time in half; but the barrels would lose authenticity. It’s hard to beat the hammered patina of cold-formed bands. I estimate I spend about 30 minutes of anvil time cold forming per band, followed by another 30 minutes to fit. Someday, when I’m tired of swinging a ball peen hammer 9,000 times, I’ll sub this work out to heavy equipment. The rivets cost $5 per barrel. Four solid steel hammered rivets are required for each band to achieve the greatest amount of strength.
Assembly and Toast
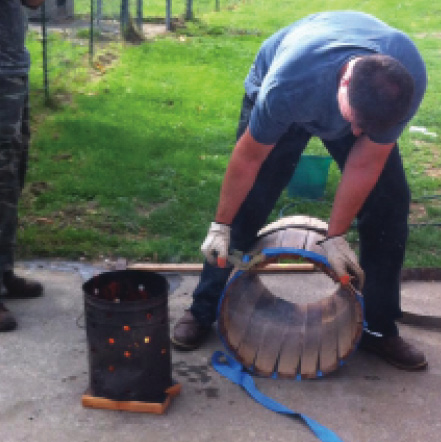
It’s difficult to get a barrel put together once you have all the parts created. I have to simultaneously grab eighteen staves and rise them up within an elevated chime hoop (see photo on top of previous page). All it takes is one wrong move to end up with the house of cards effect, where everything comes crashing to the ground. This has frustrated me many times, so I created a small block jig with a small slit in it, which helps me hold the staves as I place them within the inner-circumference of the chime. The jig (above) is the heart of the project. The staves must be hollowed and backed prior to placing them within the jig where the jig holds the wood while the stave’s edges are tapered and beveled with a flush trim router. After an edge is made the staves are flipped and held in place by inserting wedges in back of the jig where the material was removed. The wedges act as a depth stoppers and keep the listed staves from rocking within the jig. With each router pass, I install two short screws in the ends of each stave to hold it in place to keep the material from climbing while I router the edges. When the procedure’s done correctly, it forms a trussed teepee with a single chime hoop secured at one end.
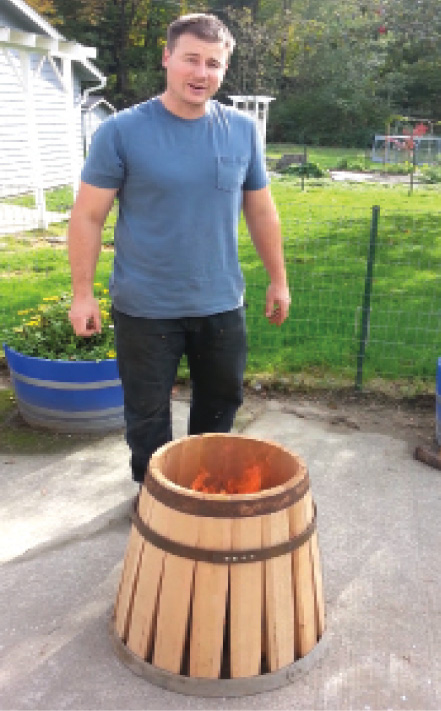
After the barrel is assembled, it’s time to toast (see photo on previous page). I heat for 20 minutes, until the staves approach 340 °F (171 °C), which is good for a heavy toast. At these temperatures the outside of the barrel is hot to the touch with leather gloves on, making it easier to bend and form. The fire and heat relaxes the white oak’s lignin while trussing. Oak is made up of a handful of varying constituents. Typical average compound concentrations in raw oak wood are 38–50% cellulose, 23–32% hemicellulose, 15–25% lignins, 10% ellagitannins, and the remaining 5% comprising other non-volatile compounds, volatile compounds, lipids (unsaturated fats and triglycerides), mineral elements (e.g., calcium, potassium and magnesium), and other trace elements and compounds. The lignin undergoes extensive changes as it is dried, bent, and toasted, which allows the wood to be formed. During the toast, the familiar volatile smell, a phenolic aldehyde byproduct known as vanillin, predominately mixes and fills the air. Vanilla, caramel, and burnt arm hair, yes burnt arm hair, will rise up with the occasional snap and pop from the cresset’s flame. I also listen for a distinguishing bellowing crack and boom, which warns of excessive barrel movement under the extreme heat. After 20 minutes of preheating and the lignins have relaxed, it’s time to hoop drive.
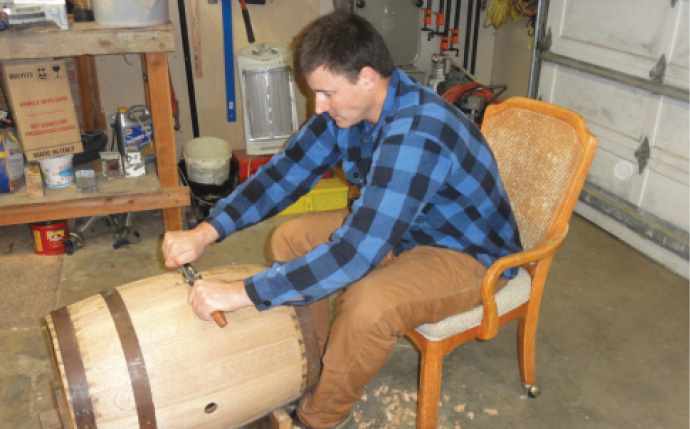
Hoop Driving
Placing bands over and around the staves requires quick, repetitive, pounding while wielding a four pound blacksmith hammer and slamming it against a hoop driver — it takes some quickstepping. This action forces the hoops down around the barrel. An experienced cooper keeps an array of different sized carbon steel bands available for forming. The cocking hoop, just larger than the overall circumference of the barrel’s bilge, is intended to be driven past the belly of the barrel, clear to the ground. The barrel is then flipped, where the hoop is “cocked” to facilitate installation of the bilge hoop from the opposite end. All hoops: Chime, quarter, and bilge, are placed on in a graduated sequence.
After the cask is formed and when it’s still hot, the chime bevel is cut in ends of the barrel using a router and coving bit. Coopers would have accomplished the same task with an adze.
The chime bevel is important because it protects the barrel’s head joints by removing the weak excess wood around the head joint and re-directs the weight of the barrel to the staves’ perimeters where the wood rays run uninterrupted. A sun plane is used to flatten the ends of each barrel and remove stave irregularities. A howell is a large half-moon shaped plane with a scalloped blade that is used to eliminate stave irregularities within the cask. The croze joint is the square or “V” bottomed groove that receives the barrel’s head. Because the joint fits the head, it must be perfect in order to create a good seal. The howell paves a path for the croze by making a smooth landing for the croze’s blade to cut. The croze plane is a large half-moon shaped plane used by coopers for rabbeting head joints. It’s the cooper’s most recognized tool and to my knowledge there’s nothing in my shop that’s able to take its place. A croze joint is strongest when it is cut to a maximum of 1⁄3 stave thickness.
Barrel Heads
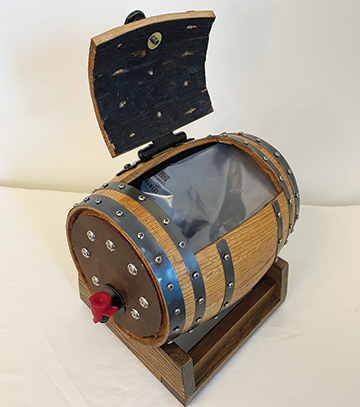
Barrel heads need to be exact, and fitting them is a challenge. I made a homemade bar gauge so I could measure the cask cross-sectionally from within the croze. The previously fired cask is never perfectly round, so a series of measurements are taken and averaged before the heads are cut out. The heads are 11⁄2 times the thickness of the staves and made of 5⁄4 lumber, which is 11⁄4 inches (3.1 cm) thick. It usually takes two or three pieces of lumber to make up a head. The pieces are loosely held together with wooden dowels. I’ve used everything from dried cattail reed to paper car gaskets in-between the doweled joints of the heads and have found the brown paper gasket material works best. The croze/head joint doesn’t get a gasket, the seal is created when liquid swells up and seals off the joint. I use a homemade bumper to set the heads in place. The bumper is a made from a piece of curved pipe and is useful for reaching inside the barrel and offering a helping hand while setting the heads. I finish off my barrels by spoke shaving and sanding them (see photo on this page). The barrels are left unfinished because they need to breathe to facilitate micro-oxygenation.
Handmade Difference
My first barrel was filled with cool season eastern Washington Chardonnay. The signature oak finish was clearly present and it made a bold statement of whose barrel it came from and just how original homemade wines can be.
References
[1]Stanley, Mark Creating World Class Red Wine. San Bernardino, CA: Ascension Press, 2014. Print.
[2]Zoecklein, Bruce W. Wine Analysis and Production. New York: Chapman & Hall Inc., 1995. Print.