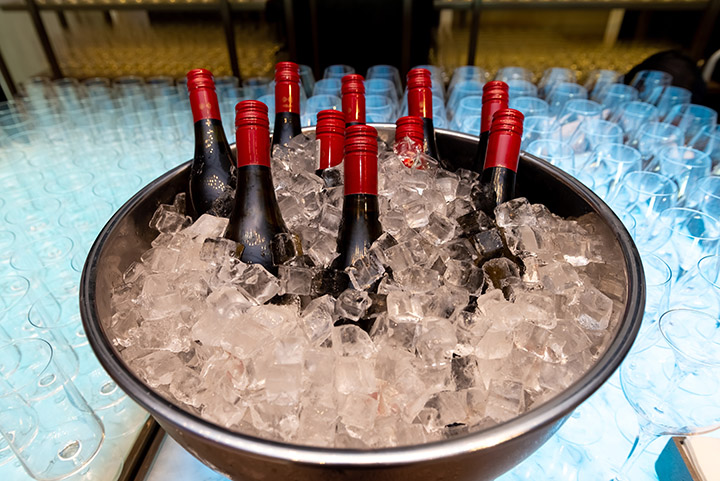
Keys to Successful Fermentations
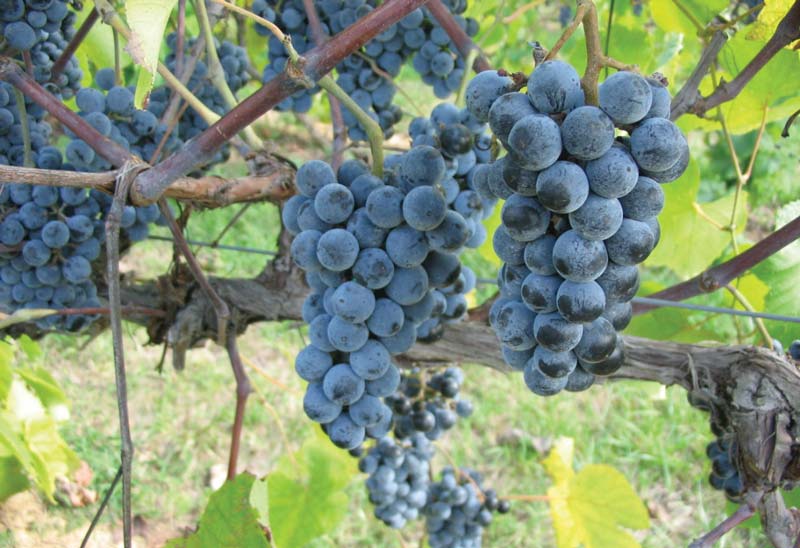
The quality of wine first starts in the vineyard with the health and ripeness of the grapes. The next important step in the quality of the wine is fermentation, which is the sole responsibility of the winemaker. Fermentation is hard to visualize due to the fact that yeast are only 0.8 to 1.0 micron in size and performing complicated and critical pathways within the yeast cell. We must rely on knowledge gained through research, each fermentation experience, and most importantly, our senses. With each fermentation I learn something new to bring to my next fermentation; no two are alike. Whether you are new to winemaking or have years of experience, fermentation is a complicated process, but so important to the consistency and quality of the wine. At the beginning it can feel like you are learning more of what not to do than what to do — don’t let that discourage you, the important thing to remember is that you are gaining experience and knowledge with each fermentation.
There are so many decisions and variables to make with regards to fermentation — the yeast are in control and you are doing your best to point them in the right direction. By learning the specific needs of the yeast, how to keep them happy and avoid stress, we keep them on track toward turning our juice into wonderful wine. When yeast are stressed they will excrete hydrogen sulfide that is produced within the cell as part of the amino acid synthesis pathway. This hydrogen sulfide is then excreted from the cell into the wine. This is the yeast’s way to tell us they are not happy. Unfortunately, they can’t tell us why they are not happy or what is causing the stress. Stress on yeast can also affect whether the fermentation completes, converting all the sugar to alcohol and reaching dryness.
There are two approaches we can take with fermentation; we can be reactionary or proactive. As a home winemaker we start by being reactionary to our ferment, checking the Brix levels, temperature, and performing sensory analysis. As we increase our experience, knowledge, and technology we can become more of a proactive winemaker, calculating exact numbers, and dialing in our ferments. Being proactive is important for the consistency and quality needed to make great wines.
Planning for Success
For all winemakers, but especially those new to winemaking and fermentation, I suggest recording this information: Brix, smell/taste, temperature, and date. Write it on a log that allows you to track and evaluate your ferment at a single glance. You can use this as a reference during fermentation or post-fermentation for analysis and reflection. The Brix level lets you know where you are in the life cycle of the yeast and the rate the Brix is dropping daily. Smelling, tasting, and observation gives you clues of where you are in the life cycle and the first sign of stress to the yeast. Start building up your sensory library by tracking daily as this will help you recognize when something changes or doesn’t seem to follow the usual fermentation pattern.

Planning or mapping out each fermentation will help you stay on track and help you become more proactive. When your supplies arrive, read directions and develop your protocols for rates, temperature range, rehydration temperature, calculations, and additions. This will be a nice reference sheet as we need to react as soon as possible during fermentation — having this information available when you need it will help solve problems when they arise. There is not much time during harvest for researching — you might have multiple batches fermenting at one time and need a quick reference sheet that was made when there was time to think and plan each individual wine based on the style. I am a big proponent of writing everything down during harvest, then when things calm down going back through and making notes for the next harvest. I have datasheets on every wine I have made since 1994 — it is a great database. If you were to ask any of my students (over many years as a viticulture and enology professor) an important aspect of winemaking, they would all answer in unison “write it down!”
Reminder before we dive into the deep end on fermentation to make sure to clean all equipment after use and sanitize prior to use. Not only can grapes come in with hundreds of species of microbes, but the area you are using for winemaking can have its own flora. We don’t want spoilage microbes as part of that flora. These microbes can be competition to your commercial yeast, taking over the fermentation and converting sugar into other things like acetic acid or spoiling the wine. Microbe competition is something you have control over by keeping your space and equipment clean and sanitized.
When we stress our yeast, we run the chance of a sluggish or stuck fermentation, or production of hydrogen sulfide. Any hydrogen sulfide problem should be corrected as soon as possible; problem solving when we can still do something about it is better than realizing after fermentation that you have a problem. Any hydrogen sulfide production will mask the fruit, decrease quality, and can progress to unpleasant aromatics like rotten eggs, cabbage, garlic, onions, and rubber, rendering the wine undrinkable. When we produce hydrogen sulfide, this can further react with other wine materials forming mercaptans, and possibly oxidizing into disulfides.
Life Cycle of Yeast
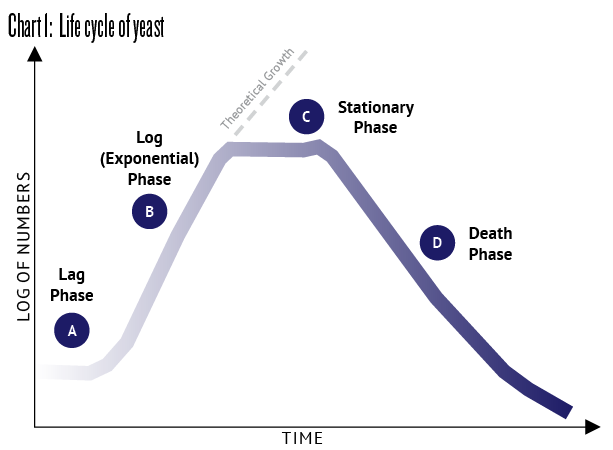
Yeast go through four phases in their life cycle: Lag phase, log phase, stationary phase, and death phase (illustrated in Chart 1). The lag phase consists of the yeast getting used to their environment, this can last 24-48 hours with a commercial yeast or almost a week for a natural fermentation. If you add nitrogen at the same time you inoculate your yeast, you could be feeding other microbes that came in on the grapes, giving them the food they need to build in population. During the lag phase, there is no production of carbon dioxide, but you will smell a fresh baked bread component.
As we move into the log phase, we will see a small amount of carbon dioxide produced, the temperature will start to rise, and we will see a 2–4 °Brix drop. It is at this time that we could add nitrogen if we believe we are deficient, as nitrogen is important for building healthy new cells. The log phase is where we have exponential growth of the yeast, the yeast is used to their environment and start to multiply, building new yeast cells. The yeast will multiply 3–4 times during an alcohol fermentation, and we need those fourth-generation yeast to carry out the fermentation. Temperature becomes much harder to control during this phase because of the exponential growth. The baked bread component is gone, and you will smell the fruit of your starting ingredient come through.

We reach the end of the log phase and enter the stationary phase one-third of the way through fermentation. The growth and death of yeast are equal, and the primary function moves from growth of new cells to metabolizing the sugar to alcohol. The beginning of the stationary phase is another time to add nitrogen as most of the nitrogen is gone from the log phase and the yeast need food to finish converting all sugar to alcohol. It is recommended to not add any nitrogen past 8 °Brix remaining because yeast have stored nitrogen internally and can no longer bring the nitrogen into the cell. Carbon dioxide is still present, temperature is not as hard to control, and we start to smell more of the fermentation bouquet coming through.
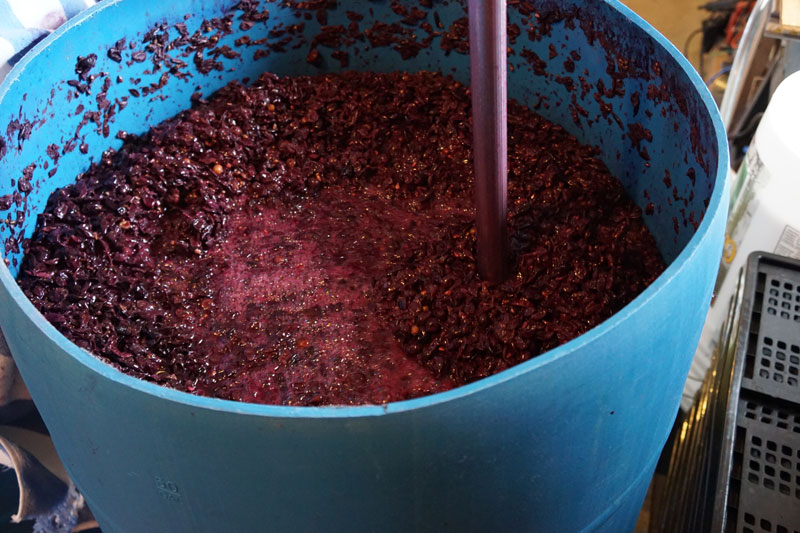
Fermentation will finish in the death phase, which begins around 5 °Brix. The drop in Brix slows down drastically. We can allow the temperature to rise to eliminate that as a stress and stir the sediment at the bottom. Due to the alcohol percentage increasing we see more yeast death due to toxicity and as they precipitate they will take live yeast with them trapping them in the sediment. By stirring your vessel you can redistribute the live yeast back up to keep converting sugar to alcohol. This process will release some carbon dioxide, or you can add inert gas into the headspace as protection. Your wine is very susceptible to oxidation at this stage because of the lack of carbon dioxide being produced so take measures to not allow oxygen to sneak into the wine. It’s always better to start stirring when you see sediment collecting in the bottom or when you see Brix really slow down. If you wait for it to stop and then try to get it going again, it’s usually too late.
I realize this is a lot of information; as you’re tracking your fermentations you will start to see the different phases and it will start to make more sense. Perhaps all your ferments have gone through successfully thus far, it’s when something happens that we need to problem solve. Each harvest I usually had one or two lots that had issues either during fermentation or post-fermentation — remember we are not the ones in the driver seat. Knowledge and experience become tools in our tool belt for solving issues.
Next, let’s look at four components that can influence the quality of the wine or can cause a sluggish or stuck fermentation — yeast cell density, temperature, high alcohol, and nitrogen deficiency. A sluggish or stuck fermentation opens the door to oxidation, spoilage, and leaves residual sugar that can be used by other microbes.
Yeast Cell Density
Each manufacturer has different parameters that are best for the proper use of their yeast. Most of these strains are in a dried state and rehydration is necessary prior to inoculating. Read the instructions for calculating the rate and the critical temperature that should be used for rehydration. In general, the higher our starting Brix the higher rate we will use to calculate the amount of yeast needed. Higher sugar levels cause more osmotic pressure in the yeast cell, which can be toxic to the cell and death can occur; we use a higher rate taking this into consideration. Manufacturer rates give us the recommended cell density of yeast that we need for a successful fermentation. A low cell density at the beginning of fermentation or improper rehydration can affect whether you will complete fermentation. Follow directions exactly for proper rehydration guaranteeing that you start with a strong yeast cell density. The overwhelming majority of stuck fermentations are caused by not following the directions for rehydration.
Temperature
Each yeast strain has an optimal temperature range for use during fermentation. If your ferment goes out of that range this can be very stressful to the yeast and hydrogen sulfide may be released from the yeast cell and into the wine as a result. We will risk the yeast going into a hibernation state if fermentation gets too cold. If it gets too warm we risk blowing off all the fruit character, giving the wine a hot or high-alcohol sensation. In general, the larger the fermenter the more difficult it becomes to control the temperature. Fermentation produces alcohol, carbon dioxide, and heat — the larger the mass the more heat produced. A benefit to being in a commercial winery is the ability to have temperature control on tanks, however, these are not fool-proof, and things break down so even pros must keep a close eye on temperature. With small-scale winemaking I have used heating blankets and/or heaters to warm up fermentations and I have placed carboys in garbage cans then used ice to chill down fermentations. Keep in mind, when your volume is small you can have big fluctuations in temperature. Make small changes and monitor them closely, we don’t want to stress the yeast.
High Alcohol
Saccharomyces cerevisiae is the most alcohol-tolerant of yeast species, which is why we use it for winemaking. However, alcohol is still toxic to the yeast and if your ferment exceeds the tolerance of the yeast strain you have chosen it will cause death to the yeast and the fermentation will not complete. If you’re wanting to get more bang for your buck with a high alcohol percentage then make sure to use a strain of yeast that is tolerant to your estimated alcohol level. In general, we can multiply the Brix by 0.6 for an estimated alcohol percentage. The actual range is 0.58–0.62, with some variability due to vessel style and size, along with the yeast strain used. I have found that most small-scale wines are less complex than commercial wines and can be overpowered by a high alcohol percentage, giving it a hot finish and lowering the quality of the wine by dominating the mouthfeel. It’s always best to make any adjustments pre-fermentation — if your Brix is too high, dilute slightly with chlorine-free water. A quick rule of thumb is for every one °Brix drop, multiply the liquid juice volume (not the must volume) by 4.7 percent and this will give you the amount of water to add to bring down the Brix (this works out almost exactly if you start at 22 °Brix, but skews slightly the further the Brix is from 22).
Nitrogen Deficiency
Nitrogen is an important nutrient that is needed by the yeast for growing healthy cells and an integral part of essential pathways. A minimum of 150 mg/L is needed for a successful fermentation. This number can change with the starting Brix; the higher the Brix, the more nitrogen is required. Each strain of yeast will fall into one of three categories: Low, medium, or high nitrogen requirement. If your juice or must has low levels of nitrogen it will be a stress to the yeast producing hydrogen sulfide. As a home winemaker you may not know the level of nitrogen you have at the beginning, so you need to be checking your ferment daily. If you get a hint of hydrogen sulfide (rotten egg smell) feed your yeast some di-ammonium phosphate or a proprietary nutrient blend, which will take the stress from the yeast and the hydrogen sulfide smell will go away, if nitrogen deficiency was the cause of the stress. Remember we want to do this upon the first signs to ensure the yeast are able to utilize the nitrogen — if we are below 8 °Brix the yeast will not uptake the nitrogen and the hydrogen sulfide will remain in the wine, possibly becoming mercaptans or disulfides. Nitrogen levels can vary widely based on grape variety and growing conditions. Honey does not have nitrogen and different types of fruit will vary also.
Research has shown using a rehydration nutrient like Go-Ferm (Scott Labs) or Superstart (Laffort) when rehydrating yeast will fundamentally change the yeast and help ensure a strong start to fermentation. Rehydration nutrient is full of sterols that are necessary for building up healthy yeast cells, making them stronger and capable of finishing the fermentation.
As a winemaker we want to encourage the healthy growth of the yeast and avoid stresses for both a successful fermentation and to keep the quality high. We want to really pay attention to our ferments daily. If you are unable to check your nitrogen levels, then keeping an eye and nose on your ferments is even more important. If you are looking to be as proactive as possible do check these levels yourself or send off a sample pre-fermentation for analysis. You can also refer to the Scott Labs and/or Laffort websites for help calculating nitrogen.