 White wine Case Study
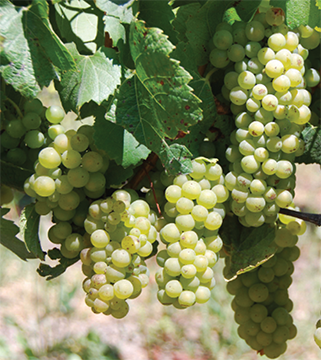
Chardonnay is one of the world’s most popular wine grapes, as evidenced by widespread plantings in France, Australia, South Africa, South America and the United States. The grape is thought to have originated in France, and DNA evidence supports that idea. Having been around for so long, it is not surprising that there are many clones — The Foundation Plant Services (FPS) at UC-Davis lists 63 clones, and that is just for material that they have cleaned up and certified to be virus free!
In France, you will find Chardonnay in the white wines of Burgundy, hence they are referred to as white Burgundy. It is the predominant grape in the Chablis and Côte de Beaune sub-regions, but as you move south through Burgundy it tends to be blended into more value-priced wines with the Aligoté and Pinot Blanc grapes. Outside of Burgundy, it is one of the three main varieties in the Champagne region. This grape accounts for about 60% of the total area planted in the Burgundy and Champagne regions. It is found in the Loire and other regions and the rules regarding its use vary. The Languedoc was the first region to begin marketing Chardonnay wines as a specific varietal, which was a move away from the traditional French Appellation d’origine contrôlée (AOC) dominated rules on growing and blending wines by region.
Beyond France, Chardonnay is planted throughout the world and is generally marketed as a single varietal. Cooler climate grapes tend to be higher in acid and warmer regions lower acid. Given the extent of plantings around the world, you will also find a wide range of soil types and rootstocks in use. In California, largely due to a planting boom in the late 1990s, it is the single most planted white wine grape. In 2007, there were 91,348 acres planted. This amounts to 54% of the total acreage in white wine grapes, and one fifth of the total acreage of all the wine grapes grown in the state.
Chardonnay is often made as a sparkling wine, or dry white; the former as 100% Chardonnay, blanc de blanc, or blended with Pinot Noir and Pinot Meunier in various styles. The dry white styles vary by country and region produced. In warmer regions, the fruit generally has higher Brix and higher alcohol and augmented with large amounts of oak and allowed to develop malolactic fermentation byproducts.
In my opinion, the best Chardonnay wines are from grapes grown in the cooler regions. These are wines with crisp acidity and pair best with foods. Good quality grapes when ripe present flavors of apple, pear, melon and tropical fruits. In the wine, the resulting fermentation bouquet takes on citrus and cream overtones. Subtle uses of oak and, in some rare cases, (for me at least), a partial malolactic fermentation may be suitable. Malolactic fermentation can add some mouthfeel to a sometimes thin wine. The disadvantage of the malolactic fermentation is if allowed to go to completion, the wine can be overpowered by malolactic flavors, including diacetyl, or buttery characters.
Typical Brix levels at harvest are 23.5 to 25 °Brix. Outside of this range leads to wines that are largely flat with no varietal character. The high Brix leads to higher alcohols and a total overwhelming of your taste buds. The pH is an important parameter to monitor as well, which rises as the fruit hangs on the vine longer, leading to flatter, thinner wines. That said, while pH is important and should be noted, I prefer to pay more attention to the titratable acidity (TA) of the grapes and resulting juice. The pH is important in driving the chemical stability of the wine, but it is the TA that contributes to mouthfeel and enhances the natural flavors in the grape. Target your acid levels to be around 6.0 to 7.0 g/L. Remember that this is the sum total of the weak organic acids in the wine. I will supplement acid deficient juice with tartaric acid to 6.0–7.0 g/L if the acid in the grape is too low. For partial malolactic fermentation, target for 7.0 g/L, and if you will prevent the ML, target for the lower number. Your goal here is to be in the range of 6.0 g/L on your finished wine. The variability of rootstock, soil type and region will affect the TA in the juice and even some good quality juice will require a supplement from time to time. Make sure you supplement at this stage, but don’t overdo it. I find that one of the biggest problems in home winemaking is making decisions about adding acid.
Premier Cuvée yeast works well for a Chardonnay fermentation, providing you can maintain 55–60 °F (13–16 °C). After fermentation taste your wine critically. Is the wine thin? At this point, if you are fairly comfortable with your winemaking skills consider aging the wine sur lie, which means “on the lees.” Only consider this if the lees do not smell of rotten egg, otherwise discard the lees. When aging sur lie, stir the lees every two weeks, until you are ready to begin clearing the wine for bottling.
If you had to remove the wine from the lees, you can add mouthfeel with oak products. Experiment with oak alternatives in small batches. Remove the oak before it imparts too much flavor. Remember there are other components in the product that will be extracted as well. Do not assume that a longer extraction will get more of what you are looking for.
Chardonnay Recipe (without malolactic fermentation)
Yield: 5 gallons/19 L
Ingredients
• 100 pounds (45 kg) Chardonnay fruit or 6 gallons (23 L) juice
• Distilled water
• 15% potassium metabisulfite (KMBS) solution: To make,weigh 15 grams of KMBS, dissolve into about 75 milliliters (mL) of distilled water. When completely dissolved, make up to 100 mL total with distilled water.
• 5 g Premier Cuvée yeast (also known as EC1118, Prise de Mousse)
• 5 g Di-ammonium Phosphate (DAP)
• 5 g Fermaid K (or equivalent yeast nutrient) *Wait to prepare this until the fermentation has initiated. Boil about 50 mL of water, let cool, suspend the powder and add to the juice.
Other essentials
• 5 gallon (19 L) carboy
• 6 gallon (23 L) plastic bucket
• Racking hoses
• Inert Gas (nitrogen, argon or carbon dioxide will do)
• Refrigerator (~45 °F/7 °C) to cold settle the juice.
• Ability to maintain a fermentation temperature of 55 °F (13 °C). This isn’t always possible for home winemakers, but you can control the fermentation in smaller carboys by submerging them in cold water or an ice bath, as required, and monitoring the temperature closely.
• Thermometer capable of measuring between 40–110 °F (4–43 °C) in one degree increments.
• Pipettes with the ability to add in increments of 1 milliliter
• Clinitest® tablets
• Tartaric acid
Step-by-step
1. Clean and sanitize all your winemaking equipment, tools and surfaces.
2. If using fresh grapes, crush and press the grapes. Do not delay between crushing and pressing. Move the must directly to the press and press lightly to avoid extended contact with the skins and seeds.
3. Transfer the juice to a 6-gallon (23 L) bucket. During the transfer, add 7 milliliters of 15% KMBS solution (This addition is the equivalent of 50 ppm SO2).
4. Move the juice to a refrigerator.
5. Take a sample to test for acidity and pH.
6. Let the juice settle at least overnight. Layer the headspace with inert gas and keep covered.
7. When sufficiently settled, rack the juice off of the solids into the 6-gallon (23-L) bucket.
8. Dissolve the DAP in as little distilled water required to completely go into solution (usually ~ 20 mL).
9. If you need to adjust for acid, this is the time to mix in your acid. Prepare yeast.
• Heat about 50 mL distilled water to 104 °F (40 °C). Do not exceed this temperature as you will kill the yeast. If you overshoot the temperature, start over, or add some cooler water to get the temperature just right. The end result is you want 50 mL of water at 104 °F (40 °C).
• Sprinkle the yeast on the surface of the water (not the must) and gently mix so that no clumps exist. Let sit for 15 minutes undisturbed
• Measure the temperature of the yeast suspension
• Measure the temperature of the juice. You do not want to add the yeast to your cool juice if the temperature difference exceeds 15 °F (8 °C). Acclimate your yeast by taking about 10 mL of the cold juice and adding it to the yeast suspension. Wait 15 minutes and measure the temperature again. Do this until you are within the specified temperature range.
10. When the yeast is ready, add it to the carboy and move the carboy to an area where the ambient temperature can be maintained at 55 °F (13 °C).
11. You should see signs of fermentation within about two to three days. This will appear as some foaming on the surface and the airlock will have bubbles moving through it. If the fermentation has not started by day four, you might consider warming the juice to 60–65 °F (16–18 °C) temporarily to stimulate the yeast. Once the fermentation starts, move back to the lower temperature. If that does not work, consider re-pitching the yeast as described above.
12. Mix up the Fermaid K in about 50 mL of previously boiled water (to sterilize it so you can add it to the juice)
13. Normally you would monitor the progress of the fermentation by measuring Brix. One of the biggest problems with making white wine at home is maintaining a clean fermentation. Entering the carboy to measure the sugar is a prime way to infect the fermentation with undesirable microbes. So at this point, the presence of noticeable fermentation is good enough. Leave well enough alone for at least two weeks. The cooler temperature will cause the yeast to ferment slowly.
14. If your airlock becomes dirty by foaming over, remove it and clean it and replace as quickly and cleanly as possible. Sanitize anything that will come in contact with the juice.
15. Assuming the fermentation has progressed, then after about two weeks, it is time to start measuring the sugar. Sanitize your thief; remove just enough liquid for your hydrometer. Record your results.
• If the Brix is greater than 7 °B (1.028 S.G.), then wait another week before measuring.
• If the Brix is less than 7 °B (1.028 S.G.), begin measuring every other day, and transfer to a 5-gallon (19-L) carboy (it’s ok to transfer some of the lees here), and place a fermentation lock on the carboy.
• When the Brix is about 2 °B (1.008), add 4 mL of the 15% KMBS solution (this addition is the equivalent to 20 ppm SO2).
16. Measure the Brix every other day until you have two readings in a row that are negative and about the same.
17. Measure the residual sugar using the Clinitest®. Follow the kit instructions.
• If the wine is dry, that being about 0.5% or less, add another 4 mL of KMBS (20 ppm) and begin to lower the temperature to about 40 °F (4 °C). A refrigerator works for this.
18. Taste the wine
•If there is any sulfide like (rotten egg) odors, rack the wine off the lees.
• If the wine smells good, let the lees settle for about two weeks and stir them up. Repeat this every two weeks for eight weeks. This will be a total of four stirs.
19. After the second stir, check the SO2 and adjust to 30–35 ppm free (see note at the end of the recipe)
20. After eight weeks, let the lees settle. At this point, the wine is going to be crystal clear or a little cloudy. If the wine is crystal clear, then that is great! If the wine is cloudy, then presumably, if you have kept up with the SO2 additions and adjustments, temperature control, kept a sanitary environment, and there is no visible sign of a re-fermentation, then this is most likely a protein haze. Clarify the wine with bentonite.
21. While aging, test for SO2. Maintain at 30–35 ppm.
22. Once the wine is cleared, it is time to move it to the bottle. This would be about six months after the onset of fermentation. Keep in mind this wine has had the MLF inhibited. If all has gone well to this point, given the quantity made, it can probably be bottled without filtration. Your losses during filtration could be significant. That said, maintain sanitary conditions while bottling and you should have a clean, crisp Chardonnay that pairs well with lemon-based chicken or seafood dishes.
Sulfur Dioxide Additions:
This recipe calls for specific additions of sulfur dioxide at specified intervals. Once these scripted additions are made, you must monitor and maintain to 30–35 ppm. Adjust as necessary using the potassium metabisulfite solution previously described or by methods of your own choosing.


