The Sulfite Blues, Curing A Stuck Fermentation and Freezing Grapes
Q
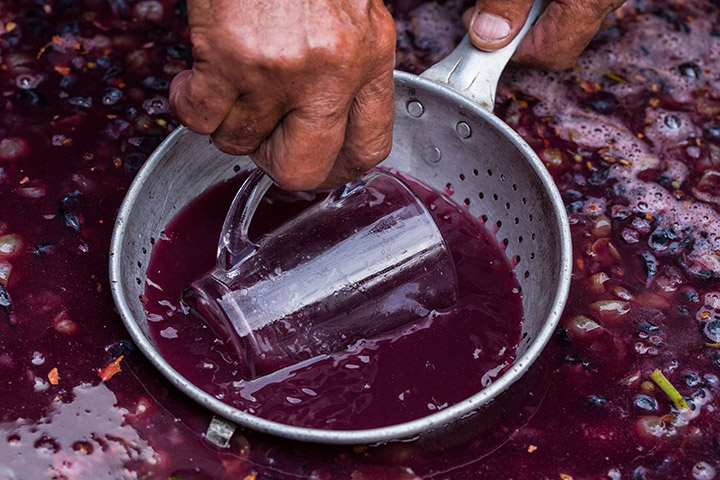
I have a Merlot to which I added SO2 thirteen days ago and it smelled ok. but last night I pulled a sample and it had a bruised apple smell and tasted sweet. The fruit is from the Dry Creek AVA in California (great fruit) at pH 3.5, but I tested SO2 yesterday and it was at 20 ppm so I boosted it to 45 ppm. I think the bung on my 100-L (26.4-gal) barrel is what caused the problem. It has a “burper” and I should have installed a solid bung.
Is there a fix? should I rack it or not? What about a tannin addition? I talked to someone at one of the wine lab supply houses and they suggested an aging tannin. Your thoughts?
Roger Mattar
Corona, California
A
Your nose (bruised apple/sweet smell) and your chemical analysis (loss of Free SO2) are telling me that you have an oxygen ingress problem and aldehydes and perhaps an increase in VA (volatile acidity) are the result. Please do your future wines a favor and always switch from fermentation “burper” bungs to hard bungs upon racking and adding SO2 for the first time, right after the wine is done with malolactic fermentation and topped up.

Aldehydes are aromatic (detectable by smell, but not necessarily always pleasant) compounds formed by the oxidation of alcohol and may be familiar to wine aficionados as one of the key elements of Sherry wine. Sherry is deliberately oxidized during the aging process to give it that bruised apple, nutty aroma that many people find so appealing in its profile. Unfortunately, it’s not so appealing in still red wines like your Merlot!
You did the right thing by adding SO2. Often a slight aldehyde defect, if it hasn’t gone too far and the wine hasn’t been exposed to oxygen for too long, can be reversed by a nice hit of SO2, which you indeed gave.
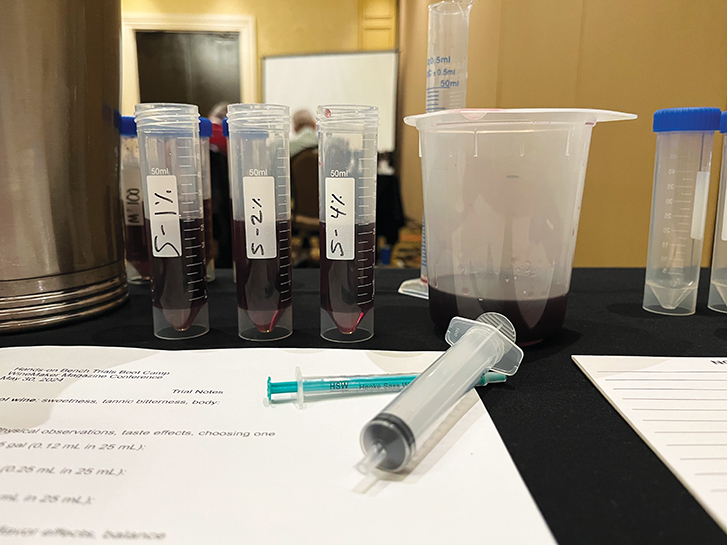
If that SO2 didn’t do the trick and you still smell aldehydes and oxidative effects, you certainly can try adding some aging/cellar tannins. There are many, many grape and oak tannin products on the market that are legal for commercial winemakers to add and completely food safe. Sourced from grape skins and seeds as well as oak galls or oak tree wood, they range in effect from adding structure and “grip” to simply serving as an antioxidant. Tannins come in powdered and liquid form and are added in very small doses; a little goes a long way. Though you know I always advocate bench trials (measuring a very small amount out and applying it to a small sample of your wine before treating a bigger lot), typical addition rates are in the 50-300 ppm (or mg/L) range (see this “Techniques” for more on this).
Cellaring and/or aging tannins tend to be “bigger” or slightly rougher particles and will need about 4-6 months of aging to take full effect. Never add a large tannin dose close to bottling, or you’ll risk instability and possible particle precipitation in the wine. Even filtration might not take care of all of the issues because what you’re doing is introducing tannin molecules, most of which will be smaller than the typical 0.45-micron pore size, which is small enough not to allow a bacterial cell to pass through. When things happen at a molecular level in your wine, there are all sorts of ramifications that can come to pass down the road including precipitation of larger particles in the bottle.
You may also want to send your wine out to a wine lab for a VA test. At my winery I test my VA every month on every lot; it’s a great window into the microbial and oxidative health of a wine as a rising VA can mean unwanted microbial activity and oxygen ingress. Unless you can afford it and have the wine volume to be able to send samples monthly, I don’t recommend monthly VA analysis for most home winemakers. In your case, however, you may want to get an idea of the damage done and so a VA number may give you a clue as the extent. Red wine legal limit is 1.2 g/L and many people can start to detect a vinegary smell around 0.65 g/L, depending on the wine. All of the above being said, the best way to treat aldehydic and oxidized wine is to avoid it in the first place!

Q
Harvest is coming up and I want to avoid one of the biggest problems I have in my cellar: Stuck fermentations. It seems every year I always have at least one batch that decides to quit fermenting on me. It goes bubbling along just fine at first and then tires out and stops with between 2–5 °Brix left. I perform a lot of small lots and varieties so it’s hard to blend this kind of mistake away. Can you give me some advice on how to prevent slow and stuck fermentations?
Elizabeth Stange
Napa, California
A
Yes, sluggish and stuck fermentations are one of the most common, persistent, and frustrating issues that winemakers encounter. They happen for so many reasons, and possibly for a combination of so many reasons, that it’s often difficult for a winemaker to diagnose and troubleshoot the cause. It’s even harder, unfortunately, to come up with a solution for dealing with them (more on that later). In the meantime, let’s talk about possible causes and their prevention, so you can enter the fermentation season with a little more confidence.
Sluggish and Stuck Fermentation Causes and Solutions:
1) Brix too high and yeast die off due to escalating alcohol.
Solution: Try to pick your grapes a little earlier or add some water to your fermentation. If it’s red must, please mix carefully as water pockets can cause bacteria to grow because the low pH of the juice won’t deter them. Water has a pH of around 7 which bacteria love, so be sure to mix in any water additions well.
2) Pitched yeast, or your indigenous house yeast culture, weren’t alcohol-resistant enough to ferment to completion.
Solution: Some yeast strains just won’t ferment in an environment where the alcohol is much higher than 14%. Be sure to choose a yeast strain that can. Most winery supply companies that sell yeast maintain a yeast selection spreadsheet or graphic where they point out the pros and cons of each strain. Strains like EC-1118 (aka Prise de Mousse) and Uvaferm 43 are naturally selected for their strong fermentation characteristics and ability to ferment at higher alcohol levels, sometimes up to 16–17% in ideal conditions.
3) Yeast didn’t have the right nutrition.
Solution: More often than not, you need to feed your yeast, more than just what the grapes will provide. Yeast need the right mix of vitamins, minerals, and biotin, just like we do, to perform at their best. Though you don’t want to over-feed, it’s cheap insurance to boost your must with a little bit of a complex yeast nutrient. Many supply companies sell them. Look for one that doesn’t just have DAP (diammonium phosphate, a source of nitrogen) but includes things like yeast hulls, vitamins, minerals, and amino acids. Though it’s impossible to know exactly how much to add unless you send a juice sample out for a YAN (yeast assimilable nitrogen) test, it’s always a safe bet to add a conservative dose like 0.2 g/L, though of course that does depend on the specific product’s composition you are using. When in doubt, ask your supplier for dosing suggestions.
4) Yeast died due to wrong fermentation temperature.
Solution: Yeast are pretty temperature sensitive. Too cold and they won’t get started. Too hot and their cellular membranes become increasingly sensitive to the alcohol in the fermenting wine. Make sure your fermentation is always between 55 and 85 °F (13 and 30 °C). Ideally you’ll have your fermentation temperature act like a nice bell curve, starting out between 55–65 °F (13–18 °C), peaking at 85 °F (30 °C) or so, and then cooling gradually back down to finish somewhere around 70–75 °F (21–24 °C).
5) Yeast had competition from other spoilage microbes.
Solution: Try adding 15-20 ppm SO2 to your must prior to inoculating with your selected yeast in order to retard the growth of spoilage bacteria.
Q
I have a dozen Marquette vines along my back fence, varying in age from 2–4 years. I haven’t had a harvest yet that’s large enough to make a 5-gallon (19-L) batch of wine, so I’ve been picking and freezing grapes from each harvest. I’ll do that until I hit the magic 100 pound (45 kg) level, but what do I have to do to those grapes that I’ve frozen to be able to safely add them to fresh grapes when I have enough of fresh and frozen together to make a batch?
Bill Mech
Des Moines, Iowa
I grow my own grapes — mostly Sangiovese with some Cabernet Sauvignon. Sometimes I have areas that ripen before the rest of the crop. Is it possible to freeze the grapes whole and then add them to the mix when I am crushing?
Sonrisa Roulier
Camarillo, California
A
Goodness, I’ve never answered two questions at the same time before! I decided to put the two of you together since your questions were so similar. There are some things that apply to you both, and then I have some specifics for each of you.
I love your ideas about freezing grapes for later use and I’m sure that commercial wineries would love to do the same, only, alas, they are prevented by their larger scale and that you probably couldn’t find freezers big enough. Three cheers for the benefits of being a small-scale micro-vintner like you. Absolutely you may freeze grapes as you like, then bring them out for adding to batches later in the season. Freeze all you have space for, and then thaw, crush, and ferment at your leisure, when you want.
Your idea reminds me of one of the ways we used to keep the cellar busy (and some fermenters full) almost year-round when I worked at Randall Grahm’s Bonny Doon Vineyard. We made a very popular raspberry dessert wine called Framboise, which essentially was a sweetened fruit and brandy infusion. Did we do it when raspberries were at their peak of ripeness, just before the grape harvest season? Heck no. We froze all those raspberries up in Oregon and Washington, then shipped them down to the winery in Santa Cruz, California when we felt like making a batch, usually February, March, or April. That way, we kept the tanks, pumps, and hoses clear for the crazy grape harvest August through November and were able to use the equipment in the off-season.
You do want to avoid freezer burn and oxygen ingress and keep a few things in mind. Here are a couple of tips:
• For red grapes, destem before freezing.
• Depending on volume, destem into 1-gallon (3.8-L) freezer bags, label with variety and pick date and store with all air excluded (vacuum seal if possible).
• Larger amounts of destemmed grapes can be stored in a topped-up plastic pail with lid in a chest freezer.
• Wrap or seal packages of frozen grapes tightly to exclude air. Press air out of plastic bags and lay plastic wrap over the surface of grapes stored in pails.
• Thaw completely before use. Cold grapes don’t do well starting fermentation. Grapes need to be at least 55 °F (13 °C), preferably 60 °F (16 °C) before pitching yeast.
• Use the grapes within a year. Storing anything too long in the freezer will degrade quality.
If you want to just save a few ripe clusters and add them a week or two later when the rest of the grapes ripen and are ready, just be sure you measure the sugar level (degrees Brix) of the frozen batch so you have an idea of when you’d like to add them to the other grapes. As I mentioned above, be sure that you have your frozen grapes up to a decent, warm-enough temperature before you combine them with the other grapes, otherwise it’ll have a distinct chilling effect (sorry, I had to write that) on your fermentation.
Similarly, do be aware that any microbes will be depressed if not outright killed by the freezing process. This could be a good thing, if you’ve got microbes you want to discourage, but it could be a problem if you’re relying entirely on your indigenous yeast population to carry your fermentation.
Especially when using all frozen grapes, be sure to feed your must or juice adequately to help make up for nutrients that might be degraded during the freezing process. It’s best to read manufacturer’s suggestions for the recommended dosage rate. Happy Fermenting!