Q I grow some Syrah grapes in our vineyard here in Oregon and this year we had an issue of getting ripeness. I hear that happened a lot in Northern California and on the West Coast in general for vintage 2023. If this happens to me again, I want to try to be prepared . . . I assume it’s possible to make a rosé from Syrah, right? How long on the skins should I leave it to get a good pink color? Also, is everything else the same as in red winemaking or is there a lot to do that’s different? Thanks for helping me prepare for upcoming challenging harvests!
Jim Masters
Salem, Oregon
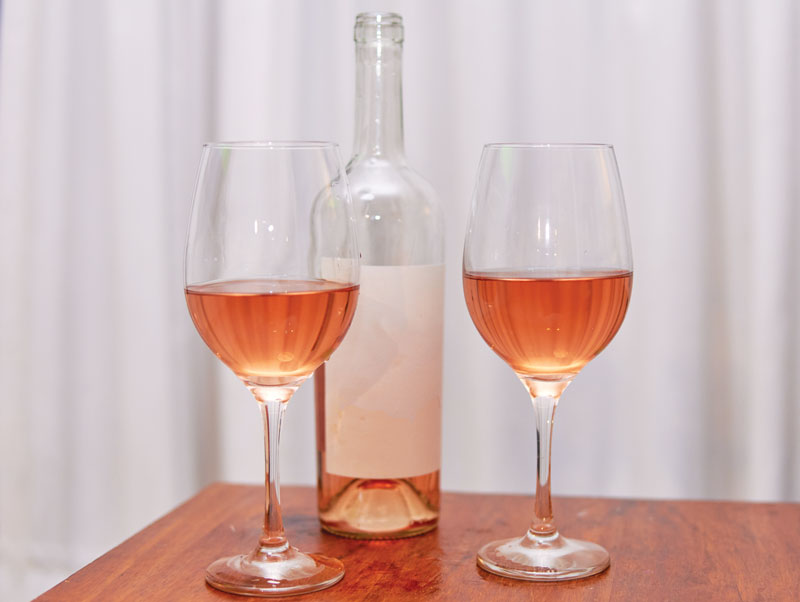
A I don’t know how many cases of rosé wine are consumed in the United States each year, but I know it’s a heck of a lot. Pooh-poohed in the past as cheap plonk, pink rosé wines, especially those made from good grape varieties like Syrah, can be a “gateway wine” for those new to drinking wine. Folks may start with the sweet pink stuff but as their taste buds mature, they start to gravitate towards other, more refined products. A person who used to only drink margaritas and piña coladas is suddenly a wine drinker. And pink wine isn’t just seen as “real wine with training wheels” anymore. Indeed, it could be argued that rosé consumption in the U.S. has never been higher as big retailers like Total Wine & More! and Costco all seem to have a very large rosé section these days full of some really engaging “serious” wines.
Part of the allure of rosé wine (it carries the fancy French accent over the “e” to distinguish it as different from the flower) is that it’s crisp, refreshing, and easy to drink. There’s something about a pink beverage that kicks eons of wine myths to the curb and it becomes fun rather than stuffy and casual rather than strait-laced. For those who are fans of the drier Provençal style of rosé, it can also be a wonderfully versatile food wine.

So aside from skin contact time, is making a rosé Syrah the same as making a red Syrah? The short answer is, “No way, rosé.” Just about every winemaking decision for a rosé made from Syrah (lightly colored, refreshing, lighter in alcohol, slightly sweet) is the opposite of what should be done when making a rich red wine. Think of it like pressing, making, and finishing a white wine (and not a red wine), and you’ll be steered right every time.
Here are my best tips to produce a quality rosé from a grape like Syrah:
Pick grapes for rosé earlier than you normally would for a red wine: You want lower alcohol and more acid in your pink wine, so target Brix levels between 21–23.5. I look for pHs around 3.2–3.3.
Press before fermentation, not after: Depending on how dark you want your color, increase or decrease skin contact time. One of the easiest ways for a home winemaker to make pink wine is to literally tread on the grapes with your feet in your picking container or containers (assuming it’s watertight) and letting the grapes sit for a little while. Monitor the color of the juice released until it’s to your liking, then press immediately. Keep in mind that you’ll lose a shade or two of hue during the fermentation and aging process, so skew a teeny bit darker than you think you’ll want, especially if making a pink wine with a poor-color varietal like Pinot Noir. Your Syrah should give you plenty of color quite quickly so do watch carefully. You may be happy with the color after only 1–2 hours of skin contact time!
Adjust acid as necessary: Adjustto a lower pH level below that of a red wine. Don’t be afraid to add tartaric acid to get that pH down and the TA up. You want every mouthful to be refreshing and acid will help you get there. I like to see a TA between 6.5–8.5 g/L.
Choose a yeast to maximize fruity aromas: I like the RC212 yeast strain for rosé, but other popular choices include BA11 and 71B.
Ferment cool/cold: As opposed to a red wine fermentation, where you want temperatures high (up to 90 °F/32 °C) to help you extract color and tannin from the skins, here your goal is to preserve aroma and crispness. I like to ferment between 57–62 °F (14–17 °C) if possible.
Arrest the fermentation (or add sugar later): Most folks like a little residual sugar in this wine, typically 0.3–3%, depending on your tastes. Many rosés are perceptibly sweet, though I like mine a little drier. This can be achieved by arresting the fermentation through chilling prior to completion, along with an SO2 addition, and then a filtration step. Though for home winemakers it’s easier and more foolproof to add sugar before bottling. More on that later.
Don’t allow malolactic fermentation (MLF) to occur: You want to keep acid, not lose it, remember? Also, when I’ve had rosés going through any kind of MLF, I experienced color that went from a pinky-purple (a hallmark of Syrah rosé) to pinky-orange. Adjust free SO2 to around 30 ppm immediately after primary fermentation to retard MLF.
Heat and cold stabilize: Just like a white wine, rosé looks best when it’s sparklingly clear with no sediments. I always recommend adding bentonite for protein stability and then doing what you can to cold stabilize.
Adjust residual sugar (RS) if needed: As noted in the “arrest the fermentation” section, a little RS is often desired. I like mine drier so I tend to go for around 0.5–0.75%, while others like 3% or more. It’s easier for home winemakers to add sugar later, right before bottling (but sterile filter first!) rather than attempting to stop the fermentation right at that perfect balance point. Adding table sugar for backsweetening is fine, but white grape concentrate should be considered to add a little extra grape kick.
Sterile filter: You’ll want to sterile filter here because of the residual sugar. With dry red wines, sterile filtration is not necessary.
Bottle with elevated free SO2: To preserve the color and freshness over time, be sure to bottle rosés with free SO2 of at least 30 ppm.
Drink within a year: While well-made red Syrahs can age for years and possibly decades, pink rosés of Syrah wines (and most rosé wines in general) have a shorter, more ephemeral shelf life. But if the pH is low, free SO2 is up, and the wine is sterile filtered, the life expectancy definitely can be extended some.
I make about 60 gallons (227 L) of Sangiovese with fantastic grapes from a neighbor’s vineyard near Ukiah, CAlifornia. Primary fermentation takes 6–7 days to reach 0 °Brix. Then I press it and rack/transfer into glass carboys.
Q My question is when and to what container should I add the Opti’Malo plus™ Malolactic (ML) nutrient and then my dry-pitch ML strain? Should each be added to the primary fermenter before press? should I press and add small amounts of Opti’Malo Plus™ and ML culture to each (10) carboy? Should I press and after two days rack each carboy, adding the Opti’Malo Plus™ to each? The carboys then go in a room at 72–74 °F (22–23 °C) for storage while they go through ML fermentation.
June Mistrioni
Cloverdale, California
A I’m glad you’re using an ML nutrient (Opti’Malo Plus™ — made by Lallemand and sold through various outlets like Scott Labs and many home winemaking stores), which makes for the most predictable and successful results. I must admit, I’m a little old school when it comes to malolactic fermentation, but it’s always served me well. There are some winemakers who try to get a jump on ML completion and co-inoculate ML bacteria and wine yeast at the same time, but in my mind this is a little risky.
You see, yeast and bacteria actually “talk” to each other during fermentation and sometimes they don’t like what they hear. In fact, when I was just getting my start as a winemaker in California, I read a really interesting paper published by Dr. Linda Bisson’s lab at UC-Davis showing how wine bacteria “query” the environment to check for competitors and adjust their metabolic process accordingly. Too many mixed messages in some cases can cause problems with fermentation completion, higher volatile acidity, and other non-optimal outcomes.
. . . once you have the wine separated from the skins you know how much wine volume you have so you can measure your bacteria and nutrients accurately.
The take-away for me is that I like to let the yeast do their job eating sugar first (and making carbon dioxide and ethanol) undisturbed by too many outside competitors. Once they die off after primary fermentation (and the fermentation is hopefully dry), I press off my new wine and immediately add my ML bacteria and any ML nutrients together at the same time to the container holding the new wine. If you add your ML bacteria and ML nutrients before pressing off, you’ll lose a lot of the dose (and those additives are expensive!) in the skins that get discarded. Also, once you have the wine separated from the skins, you know how much wine volume you have so you can measure your bacteria and nutrients accurately. It’s hard to tell your final liquid yield when the wine is still sitting on the skins.
I would add your ML bugs and nutrients evenly into your carboys right away after pressing and racking into the containers. This way you can also take advantage of any residual warmth carried over from the primary fermentation. I really like that you are using ML nutrients; that, in addition to the heat, will really help your ML fermentations get off to a great start!
Q I’m having a hard time getting some of my fermentations to get going and getting across the finish line this year. Do you have any general tips and hints for healthy, robust fermentations?
Celia Wilson
Flagstaff, Arizona
A I’m sorry to hear about your fermentation troubles! Indeed, it’s one of the most important aspects of winemaking to master since sluggish and incomplete fermentations can ruin a batch. Here are some things to keep in mind next time you find yourself in a battle with a balky fermentation:
Temperature too cold: All wines like to ferment above 50 °F (10 °C) so be sure your juices and musts are well above this temperature, and preferably at least 60 °F (16 °C). Don’t let red fermentations rise above 90 °F (32 °C), however.
Not enough nutrition: Some juices and musts are deficient in micronutrients like argenine or in macronutrients like nitrogen. You might want to add a little yeast nutrient (diammonium phosphate, or DAP, is better than nothing, but a mixed nutrient would be best) to your wine at a recommended dose range to make sure the yeast has something to boost them and aren’t missing out on critical nutrition.
High alcohol: Alcohol is toxic to yeast; it makes their cell walls permeable. High levels (over 15%) will almost immediately kill off many yeast strains. If your juices or grapes are very ripe, be sure to add water to the fermentation to bring the Brix down into the “sweet spot” 22–25 °Brix territory. It’s OK to add water, just try to keep an addition below 10% to avoid diluting colors, tannins, acidity, and flavors too much.
pH too low/acid too high: A pH below 3.3 can inhibit yeast growth. Check acid levels on juices and musts and try deacidification with potassium carbonate or potassium bicarbonate if needed. Shoot for a titratable acidity below 8.0 g/L.
Too much residual sulfur dioxide: Most yeast strains are sensitive to free sulfur dioxide over 15–20 ppm. While adding 25–35 ppm total SO2 at the crusher is wise to knock down indigenous yeast and bacteria (if you’re not including them/want to discourage them) try to make sure too much wasn’t added.
Use a “strong” and appropriate yeast strain: Some yeast strains are very sensitive to alcohol and sulfur dioxide. The good ol’ EC-1118 (aka Prise de Mousse) will work but there are other strains like Lalvin K1-V1116 that are especially good in tricky fermentation environments. Generally, any yeast advertised as working well for restarting stuck fermentations will be alcohol- and sulfur dioxide-tolerant, but be sure to match your yeast to your base wine’s alcohol level.
Correct yeast strain but culture not active: Be sure to proof yeast (proper rehydration) before pitching to make sure it’s active and robust. Do not use a particular batch if you don’t see a lot of activity. Try a new packet or try a new strain.
Correct yeast strain, active culture, but pitched incorrectly: When introducing new yeast into a “compromised” environment (high microbial load coming in from the field, low temperatures, low nutrition, high Brix, high alcohol), it’s important to really acclimate the new yeast well. Try feeding the active yeast small but increasingly larger bits of the juice or must, perhaps waiting around 15–20 minutes and checking for activity after each addition before pitching the expanded culture into your fermenter.
Keep in mind that a combination of the above factors could be your fermentation-limiting problem. I wish you luck diagnosing and working through your issues!


