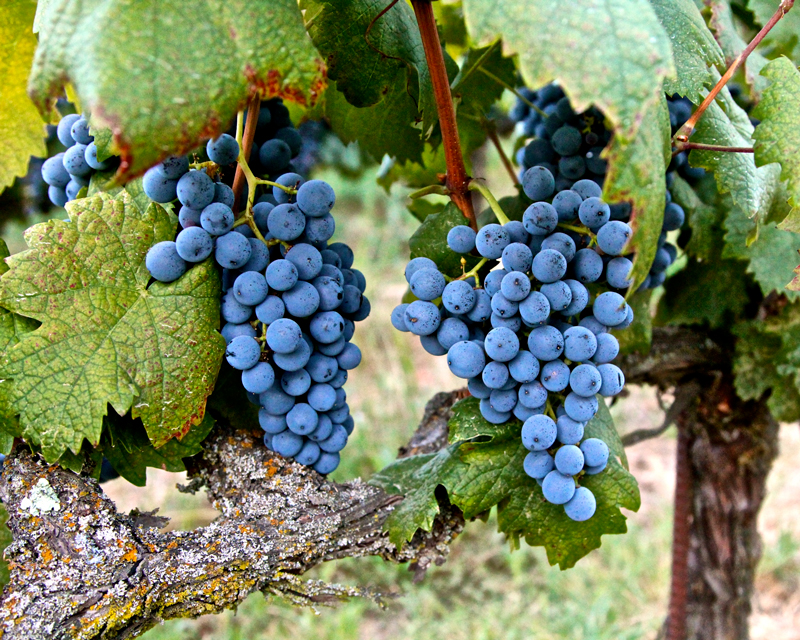
Q I have an extremely small hobby vineyard of about 30 vines (mixed varieties) and find it hard to get help here in the United Kingdom with either advice or supplies and I do rely heavily on your magazine. I envy you in the States where you seem to have a lot of amateur growers and resources to match. This year the weather has been very unusual, and all fruit growth has been poor. I have some grapes that are now ripe and need to be harvested but others of the same variety in a different part of the vineyard are well behind and not yet ready. Can I pick the ripe ones now and freeze or chill them and wait until the others are ready and crush and process them all together, which may be in three- or four-weeks’ time? Would freezing be better than chilling?
David Lodge
Smallfield, England
A Many thanks to you for being a WineMaker magazine reader! We love being a source of helpfulness in the sometimes difficult-to-navigate world that is international small-scale winemaking.
Uneven vineyard ripening is indeed a difficult thing to contend with. If one’s vineyard is large enough, it’s easy enough to divide it into “blocks” that ripen right about the same time and provide a convenient amount for winemaking purposes. When you’re dealing with 30 vines that ripen unevenly, I can see the difficulty; I’m going to guess you’ve probably got too much fruit to put into your freezer at once and too little to be able to ferment separately.

If you think that your grapes will be ready within a 3–4 week window, you can certainly freeze what I would call a “first batch” or the first wave of grapes to be ready, or as many as you can fit into your freezer. Keep in mind that frozen grape skins will already almost be pre-broken down and might be more difficult to press later on. Grapes can indeed be chilled under refrigeration, just as any fruit at the market. However, I would be wary of chilling down grapes longer than about 5–7 days because I think by that time the quality would deteriorate. Don’t forget, that once a grape is picked, wine starts on its own as the cells start to break down and ambient microbes on the grapes begin to make their way into the fruit. Is it possible to pick and ferment your vineyard in two small lots; one early and one late? That might be a good compromise.
Don’t forget, that once a grape is picked, wine starts on its own, as the cells start to break down and ambient microbes on the grapes begin to make their way into the fruit.
For the future, maybe there are some tricks from your own country you could employ to try to have a more even (and condensed) harvest. I’ve read that in the old walled kitchen gardens of stately homes in England the wily head gardeners would lay woven mats around blackcurrant bushes they wanted to “put off” while vines, bushes, and trees they wanted to “hasten” were planted next to warm south-facing brick walls. In this way, they were able to spread out the harvest and provide the master and mistress of the house with a longer season of choice fruits across many weeks and months. What you want to achieve is almost the opposite, i.e., get all of your grapes ready at once. You could try to do this by “shading” the earlier part of your vineyard by leaving more leaves or shoots on those vines, thereby retarding their ripening a little bit? Similarly, if you find the latest-ripening part of the vineyard is still behind, you should be sure to pull some leaves from around the fruiting zone of those vines in order to allow more sunlight in to hasten the ripening there. In this way you might be able to shave a week off of either side and find a more harmonious “middle of the road” harvest.
Q I went up to the vineyard I will be getting this year’s grapes from, but I forgot my refractometer at home and didn’t realize until I was out in the vineyard (a.k.a. a long way from home). How do I tell if my grapes are ready to pick?
Ben Corral
Fremont, California
A Hey, it happens to me too. But fear not, we’re going to impart some information that’ll give you the confidence to pick even if you don’t know the Brix number. Many winemakers like knowing a lot about the batch of grapes they’re going to be picking, from sugar level (Brix) to acidity (pH and total acidity or TA) to even more esoteric color and phenolic ripeness markers. Mind you, the latter are really only available to folks with serious lab budgets (a full panel of grape or juice analysis can cost into the hundreds of dollars) or to commercial winemakers with serious laboratory staff.
What about the rest of us, who don’t have the time and money to spend or those of us that get to the vineyard and realize we forgot our trusty refractometer? Well, obviously one can pack the plastic bags to collect a representative berry sample of the vines they’re going to pick and then squish the berries up and measure them when you get home . . . as long as you didn’t forget the bags too. If you’re going to be getting in a ton or five you could certainly walk your block and collect a good bucket-full of a representative cluster sample, being sure to pick clusters from the inside and outside of the canopy as well as high and low in the vine to ensure an even sampling. Then you destem and squish up the grapes and, if red, let them sit for at least 4–5 hours and taste the juice and measure with your refractometer.
As an aside, these days I make mostly Chardonnay and Sauvignon Blanc as well as Pinot Noir and Cabernet Sauvignon (though I do smaller amounts of a bunch of other varietals). For whites I like to target at least 22 °Brix for Sauvignon Blanc and 23.5 for Chardonnay and 24 for Pinot Noir and 24.5 for Cabernet. This is of course my California world, where I work with vineyards largely in Napa, Sonoma, Monterey, and Santa Barbara counties. Your world (and varieties) may be very different so please take these only as guidelines.
Back to our story: What do you do if you don’t have a refractometer, buckets, or bags? What if you are visiting a surprise vineyard you didn’t expect to get grapes from and have to make a decision then and there? I encourage us all to get away from becoming too reliant on a number and move more towards relying on the ample information available right in front of us, using the most sensitive and accurate analytical equipment you already possess: Your five senses.
Yes, you heard me correctly, five. Indeed, I’m sure our sense of taste is the obvious one when it comes to assessing the ripeness of a grape but don’t discount the other four: Touch, smell, sight, and yes, even hearing.
- Sight: Before you pop a grape in your mouth the first thing you’ll do is actually see the vineyard. What you see can give you some important clues as to the ripeness of the grapes for making wine. A vineyard with a large, green and lush canopy looking “springtime fresh” may just be that. Also, those grapes might be too shaded to be ripe yet. Vineyards getting their grapes towards ripeness often have a dusky or dusty look to them if the canopies are still green, and often sport a number of yellowing leaves in the fruiting zone and below. As the natural growing season nears its end, the photosynthesis machine that is the grapevine starts to shut down, in a phase also known as grapevine senescence. The vine starts re-allocating its resources as it prepares to shut down for winter dormancy, chlorophyll degrades, and yellow and red pigments become visible. This is triggered in part by shorter seasonal day length and is a sign that the grapevine’s job of ripening the clusters is coming to an end. When you get closer to an individual grapevine and can actually see the clusters, if they’re red grapes, look for dark, even coloring. There shouldn’t be any signs of green berries anywhere. With white grapes, like Chardonnay, you want to look for a golden translucent color. Green, opaque grapes are a sign of being underripe. In some varieties and in some locations (like my Oakville Cabernet Sauvignon) brown seeds are also a sign of ripeness . . . but sometimes they aren’t. Seed color is very dependent upon variety, clone, and location, so it’s the one variable that is difficult to give a universal rule of thumb about. Especially when making early-pick wines like sparkling cuvées, rosés, and low-Brix whites like Sauvignon Blanc, green seeds are just fine.
- Hearing: Hear me out (har har) on this one. As you approach the vineyard, be sure to listen to the sound the leaves are making in the breeze. A vineyard that is a long way from senescence will have plenty of those glossy, green leaves and will rustle like fresh green treetops. Grapes that are approaching ripeness are usually carried on canopies which are drier, more yellow or red and those leaves will make a sound like a pile of dry fall leaves on the ground. Bend some leaves between your fingers and a few of the leaves may sound crispy and may actually break. These are signs of vine senescence and a signal that the growing and ripening season is approaching its end.
- Touch: Touch the leaves, grape clusters, and individual berries themselves as you can get information from all of them. Leaves that are smooth, glossy, and bend easily without breaking are signs of a very healthy canopy that still has a lot of photosynthesis and nutrient and enzyme movement it can perform. Drying, brittle, or yellowing leaves are shutting down and won’t be able to push the clusters much further towards ripeness. Ripe grape clusters are soft and velvety and, even in a tight-berried bunch like Pinot Noir, have a “give” to them. Ripe berries pull off the rachis (stem) easily and, when squished gently between the thumb and forefinger, squirt out the pulp easily. Your fingernail should be able to readily scrape red pigments off the inside of grape skins — this is a sign that the color will release well when the grapes are crushed into must and is another signal of ripeness.
- Smell: I suppose it’s a little difficult to “smell” a vineyard. Well, you may smell a distant irrigation pond or the neighboring winery’s compost heap wafting on a long breeze but the smell you need to pay attention to is the retro-nasal sensations you’re getting once you actually put the berries into your mouth. Don’t chew up the seeds yet, just the pulp and skin, and like when tasting wine, try to pass some air gently in through your mouth (without inhaling any skins or seeds!). This will activate your olfactory bulb and is a great way to pick up on any green bell-pepper aromas (“pyrazines”) in Cabernet, Merlot, or Cabernet Franc as well as to assess the general fruitiness of the berry itself. If there isn’t a lot of olfactory retro-nasal sensation or “smell” while tasting your grapes it may be a sign they’re not quite ready yet. A high level of green, grassy, or pyrazine aromas means the grapes also may not be ready yet and need some more time on the vine.
- Taste: This is the sense we most often think of using when assessing grapes for winemaking. Take a few berries here and there off of many different clusters in many different locations in the vine: Up high in the canopy where it’s more shaded, out on the south-facing edge where the berries will be riper. When you taste them obviously pay attention to the sweetness (“Brix”) and acid (“pH/TA”) balance but also pay attention to the astringency. Especially in red grapes, underripe tannins give a chalky or sometimes gritty sensation in the mouth. If a grape gives you a sensation like biting into a green banana (ouch!) it still has weeks to go. If the sensation is more like a gentle chalkiness, it could be a few days to a week away. Remember, in red grapes we do want and expect some astringency in the tannins; we just want them to be ripe. Overall, is there a “deliciousness” to the overall taste and flavor sensation? Do the flavors “pop,” meaning do they make you go “wow, this would make great wine”? I know it’s subjective, but the taste of your grapes coupled with the above input from all of your five senses can give you the bigger picture you need.
So next harvest don’t just taste your grapes and especially don’t just look at laboratory analyses to try to guess if a block is ready to pick. You have to actually go, be, and do. Fully immerse yourself in a whole vineyard assessment paying attention to all five of your senses. It does take experience, but with enough harvests under your belt using all of the available sensory input, eventually you’ll be able to confidently make the perfect pick call without once glancing at numbers.
Q I have the opportunity to ferment three separate batches (barrels) of Zinfandel in the coming weeks. I plan to contrast and compare the effects of using different yeast strains on each of the batches. My concern is that two of the strains chosen are killer factor positive (active) and one is sensitive. Do I need to worry about cross-contamination via punch down tool during fermentation? If so, what do you recommend I do to avoid a stuck fermentation in the Killer-Factor sensitive batch. All recommended rehydration and nutrition protocols will be used. Your guidance is greatly appreciated. Cin cin!
John DiMeo
Forest Hill, Maryland
A I’m glad that you are attuned to your yeast and realize that some strains are “killer factor positive” and one is “sensitive.” I really wish that the yeast industry had come up with a different term than “killer,” it makes it sound like yeast cells are going to, like some monster from a 1960’s B movie, take over the neighborhood and eat everything in its path! What it means in practice is that yeast strains with “killer” factors are more likely than others to dominate and eventually take over a fermentation if present in large enough numbers. There’s a point at which at low enough concentrations, even killer-factor (KF) yeast will be present in a given fermentation but will not be able to dominate if you inoculated with sufficient non-killer yeast at the beginning.
It’s clear that you’ve chosen your three yeast strains on purpose, however, and to make sure you only have those chosen strains impacting its assigned lot of grapes, you should make an effort to clean and sanitize your punchdown tool between punchdowns. This can be as simple as rinsing your punchdown tool with hot water, then spritzing it with a 70% ethyl alcohol solution, with a “One Step” sanitizer solution, peracetic acid solution, or similar. I would start your punchdown round with your “sensitive” yeast strain first, so that there’s less chance of one of your “killer” yeasts getting carried into it from the others.
It’s unlikely you’ll get a stuck fermentation with your non-KF yeast based on that fact alone. As long as you inoculated your fermentation at a high enough rate (about 0.25 g/L), aren’t cross-contaminating during your work, and you have a healthy must, I wouldn’t worry about it too much.


The Wine Wiz explains the differences winemakers must consider when aging wine in smaller-volume oak barrels. She also troubleshoots an unwanted secondary fermentation, explains that all fermentations are “natural,” and offers tips for cold stabilization.
Oxidation is one of the most common faults among homemade wines. The Wiz has some tips for minimizing exposure during racking along with advice for how to read fermentation temperature, reducing reductive stink with copper, and carbonating a dessert wine.

