Screw-top Bottle Closures, Aging Temperatures and Blueberry Woes
Q I have kept screw-top bottles To reuse for bottling my wine. Is there a special cork size needed when Reusing screw-top wine bottles (cleaned and sanitized)? I have corked screw-top Bottles before but felt that the fit was slightly looser than a traditional cork bottle. Thanks in advance for your help.
Tony Ambrose
Folsom, California
A It’s a little tough to tell from your letter which kind of screw-top bottles you’ve got so I’m not sure if you’re talking about what I would call screw top “sample bottles” or the kind of wine bottles you’d buy off the shelf in a wine shop. The former are best used for lab samples or as a temporary container for wine (and come in many shapes, sizes, and configurations) and the latter have their tops put on by a special machine on the bottling line. Sample glass bottles and their little plastic tops will never have the safe connectedness of a seal needed for long-term wine aging. Just one little bump or jostle and it’s possible that the top could start to unscrew and begin to let oxygen in. The quality control on sample glass also tends to be less than that for wine bottles for finished product, so I wouldn’t expect the glass to be blown, made, and measured for conformity at the factory like what I would call “final package” glass (glass ready to accept a cork or a screw cap). That means that there’s an increased likelihood of an inadequate seal between the glass lip and whichever stopper you’re trying to screw on.
In regards to the Stelvin™-type screw caps we see on commercial wine bottles, they require an expensive machine to put on correctly. I’ve heard of some folks re-using commercial screw-cap wine bottles for their finished wine. I don’t recommend this either as you’ll never get the same integrity of seal as you would with a professionally applied cap and the thinner glass neck on these bottles makes reuse dangerous when inserting or removing corks.

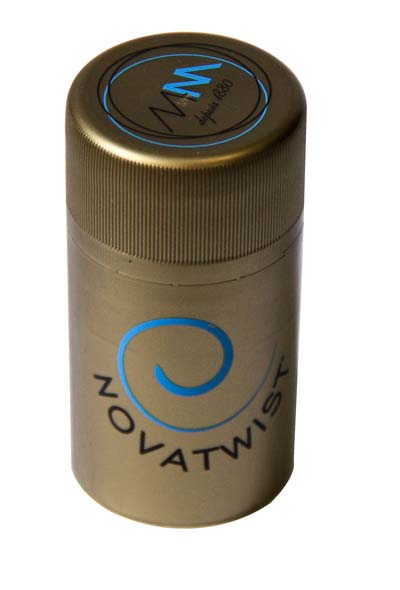
On the bright side, look up the Novatwist screw caps. They can be applied by hand, fit on standard Stelvin™-type bottles, and currently run at about $0.50 per unit at home winemaking shops. Unfortunately I can’t speak to their quality at this time since I don’t have experience with them.
But back to your question — can you just stick a cork in one of those threaded-top bottles (and maybe just buy a slightly larger diameter size)? Below are some things you should consider before you stick a cork in your screw-top bottle:
• Aesthetics — All right, this might be the most minor item on your priority list but there’s no doubt that a cork stuck into a screw-top bottle looks a little bit strange. It’s just not quite a traditional look shall we say? However, if the folks on your holiday gift list are into recycling and have slightly quirky tastes, you might just get away with it. If looks don’t bother you, then you may find the performance issues of why you may not want to put a cork in a screw-cap bottle a bit more compelling.
• Screw-top wine bottle necks can be more fragile — Even if the type of bottles you’re talking about aren’t in the cheap lab, sample-glass category, the top of any screw-cap bottle tends to be thinner and more fragile. This is related to how the bottle is made and its architecture; it’s made with less raw material and is just simply not made to withstand the downward and outward pressure of a compressed cork being forced into it. There’s not as much glass built around the neck and top of a screw-cap bottle and this becomes a safety concern as you might break some glass trying to fit it into your hand corker, especially if you have dry or stubborn corks, or when you are removing it with a corkscrew.
• Screw-top wine bottle neck configuration can be suboptimal for corks — Most screw-top wine bottles I’ve seen (like the ones I use to bottle my own commercial wines at Plata Wine Partners), whether Burgundy or Bordeaux shape, tend to flare out a little more below the neck than cork-ready traditional bottles do. That means that if you did manage to insert a cork without breaking the top or neck of the bottle, the inserted cork would flare out a little bit more at the bottom. Over time, this could lead to the cork being pulled down further into the wine bottle. Another QC issue is that cork-ready bottles are purposefully made with very straight sides and there is less “wobble” tolerance, which creates a better cork-to-bottle seal for the cork-ready bottle vs. the screw-cap bottle.
If looks don’t bother you, then you may find the performance issues of why you may not want to put a cork in a screw-cap bottle a bit more compelling.
If you don’t want to use cork for some reason (maybe bottling up a delicate white wine or rosé which you don’t want or need any air to get into at all) you could always use sparkling wine bottles and a crown cap applier. Bottles and those caps should be pretty easy to get at your friendly neighborhood homebrew and winemaking supply shop or online. Aesthetically, I’ve seen plenty of good-looking homebrew and wine packages that look great with that jaunty little metal cap on top. Even some commercial wines, especially pét-nats or slightly fizzy rosés, are coming out in the marketplace in crown caps. Applying crown caps is super simple. You can buy (or presumably, rent) a special tool that clamps the metal caps down over the glass lip on the sparkling wine bottle. I’ve known winemakers to go this route when they really want to make sure their product doesn’t get oxidized prematurely and I would argue it’s a safer, more quality-conscious choice than bottling your wine into an ill-fitting bottle-to-closure combination.
I’m a huge fan of screw caps on wines, when done right, i.e., when the tops are purposefully bought and are applied on a high-quality bottling line. I’ve got years of pairing the right wines with the right screw-top closures and use them in my current wines.
In summary, I strongly recommend using cork-ready bottles if you want to use corks as your closures. And look into purchasing Novatwist closures if you want to use screw-cap bottles. I wouldn’t waste your time or risk your safety trying to find the “right” size of corks to smash into screw-top bottles because there are so many hazards that come from this mismatched pairing.
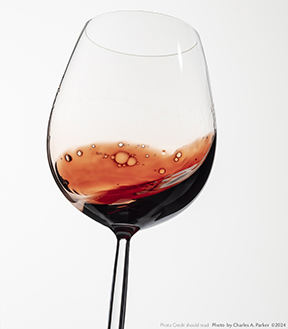
Q Your website makes the following statement: “Aging temperature is also important. Often people believe wine should be stored in a wine refrigerator set around 55–60 °F (13–16 °C), but this temperature is meant for wines that are already mature, to keep the wine from changing more. Young wines should be kept closer to room temperature (70–75 °F/21–24 °C) to allow the compounds to mature, or your wine might never open up.” (From https://winemakermag.com/technique/aging-wine-kits-tips-from-the-pros)
I can’t find any other discussion on this topic — that aging temperatures should be warmer (70–75 °F/21–24 °C) than storage temperatures (55–60 °F/13–16 °C). Everyone just seems to talk about storage temperatures in term of “Castle temperatures.” In some cases, folks warn against those warmer temperatures.
Eric Bosell
Truro, Nova Scotia
A I read the article you reference and I agree with the advice, to a point. That it’s OK to keep wines in the bulk-aging stage (before bottling) warmer (the referenced article says 70–75 °F/21–24 °C) than wines that have been bottled (55–60 °F/13–16 °C). While I’m OK with non-barrel wines being aged 55–65 °F (13–16 °C), I would never go as far as 70 °F (21 °C) for any stage post fermentation. That’s just my opinion, however. Read on for more information as to why I think this way and why it’s OK for us to have differing thoughts on matters.
If you took a survey of wineries around the country and measured cellar and barrel storage temperature caves and warehouses (rather than just talk anecdotally to folks) you probably would find a decent range of temperatures reported. However, if you’re barrel aging the one thing you really want to guard against is evaporation/transpiration through the porous wood of the barrels. We can’t ignore chemistry or physics and as many of you know the warmer a liquid is the quicker it evaporates. Steam vapor off of a hot kettle of soup is just very warm water, after all. So I do believe that barrels need to be kept in slightly cooler conditions than perhaps one’s tightly bunged up keg or carboy “farm” in the home basement.
I think that the 70–75 °F (21–24 °C) range mentioned for ideal long-term bulk aging is a little high. Especially if you’ve got a big red wine that might take the usual 18 months, and especially if I were storing my wine in barrels, I would hesitate to store my wine for that long in that high of temperatures. Just like we can’t ignore chemistry and physics, we can’t ignore microbiology. It’s a proven fact that the vast majority of microbes, including our not-so-friendly spoilage yeast and bacteria (the “bad guys” I’m always talking about trying to exclude from our wines) grow better in warmer temperatures. Just like human beings, they like to be warm and cozy and are inhibited once temperatures start to get below about 55 °F (13 °C), though any reduction in temperature helps. Part of the reason most commercial wineries keep their cellars chilly is to ward off the growth of wine-spoilage microorganisms.
As far as risking your red wines not opening up after two years of aging at 55–65 °F (13–16 °C), if your red wine hasn’t opened up and aged nicely in that time period I think a cool storage temperature is the least of your worries — likely your wine kit had too much tannin in that tannin packet. In my experience, kit wines and wines made with concentrate don’t tend to have the tannin and anthocyanin structure that many wines made from whole grapes do and often can actually age faster than fresh grape wines. I would think that two years at 75 °F (24 °C) would pre-age and oxidize a kit wine, but that’s just me. Do also keep in mind: White wines and more delicate reds like Pinot Noir just can’t hold up to the number of years in bulk aging that bigger reds like Cabernet Sauvignon, Barbera, or Petite Sirah can and generally benefit from a shorter bulk-aging period. Keeping temperatures cooler, like under 65 °F (18 °C), would provide some beneficial protection to the wine’s color and flavor elements.
It’s also very true that kits can vary quite a bit brand-to-brand and variety-to-variety — who knows, maybe some kits are tannin monsters that don’t open up after two years of aging. Though that does seem a bit of a stretch to me. The first time trying a kit it’s always best to follow the manufacturer’s instructions, including aging guidelines, and then tweak it from there if necessary. If you belong to a home winemaking club or online organization, be sure to check around and ask your friends if they have experience with aging times and temperatures with certain kit brands and flavors.
As always, keep in mind that different authors and guest contributors will have different opinions and lived experiences. Most of my longtime readers know that I’m a small- to large-scale commercial winemaker based mostly in California, that the thoughts and opinions herein expressed in my WineMaker magazine columns are entirely my own and that I’ll always be bringing my unique perspective to each piece I write.
All of our articles go through an editorial review (yeoman’s work, many thanks to those folks over the years who’ve labored to do it!) and though it’s always the magazine’s goal to educate and be consistent, I do also think there’s room for debate around what’s a very complex subject matter. Which is why I’m not afraid to disagree with something another author wrote at some time in the past and why I retain respect for and perspective on what they might have written then based on their own experience. For what it’s worth, I personally like to bulk-age my wines (all made from whole grapes) in cooler temperatures in the cellar (50–60 °F/10–16 °C) and try to keep them 50–55 °F (10–13 °C) when bottled.
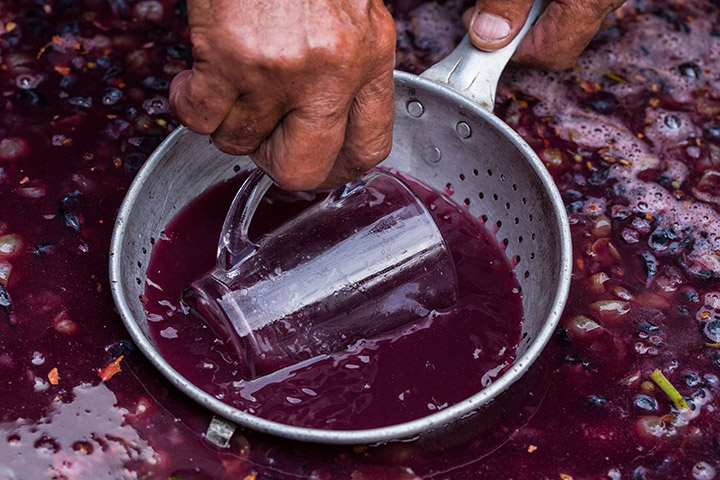
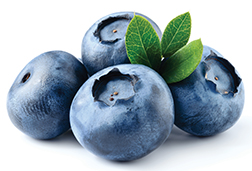
Q I failed again this year making blueberry wine (Attempt #2). I would like my third time to be the charm. Any tips? Honestly, it was tainted with volatile acidity (VA). It didn’t have a nose, was too hot from ethanol, and was too acidic. Do I Need some sweetness to it? Maybe I need to blend it with red? Help!
Andrew C. Mocny
Buffalo, New York
A Ah, blueberry wine! Blueberries, huckleberries, and black currants are all favorites when it comes to home winemaking, partly because they can make dark, mouth-filling wines that can resemble the finest red wines in the world. Just like any fruit, however, they do have their own persnickety problems that need to be addressed and you’ll have to practice anti-microbial, anti-oxidation, and sanitation techniques just like you will with any winemaking project.
• Pectic Enzymes — Blueberries, like most fruits, have a higher pectin content than wine grapes and you’ll want to add either a liquid or powdered pectic enzyme. Whichever brand you go with, be sure to follow the dosage instructions and don’t add too much. Be sure to add it at the time indicated for maximum effectiveness. Be sure not to add enzymes at the same time as SO2 — SO2 in high concentrations can damage the delicate protein structure.
• Sugar — You will need to add sugar to your blueberries because blueberries just aren’t as sweet as grapes. I always aim to have table wines end up at dryness in the 11–13% alcohol range, so you’ll want to add enough sugar or red grape concentrate to get up to 21–24 °Brix to get there. Red grape concentrate (which you should be able to buy canned or frozen from most home winemaking supply stores) can be a wonderful thing to add because, as opposed to straight up sugar and water, concentrate brings necessary micronutrients and other materials from the grapes that will enhance the finished product. You mentioned you think the wine was too alcoholic — I’d guess that it was unbalanced….meaning that you had too much alcohol which overpowered the other elements. You may want to try adding red grape concentrate instead of sugar to be sure you’re also getting some tannins and color elements in with the extra sugar.
• VA Control — Just like any grape wine, you’re going to want to make sure you control against acetic acid bacteria every step of the way by using sulfur dioxide at the correct times along the way — from fermentation all the way through to the bottling process. Clean wines come from a well-regimented sulfur plan.
You may also benefit from this “Tips From the Pros” article on making blueberry wine: https://winemakermag.com/article/making-blueberry-wine-tips-from-the-pros