Vineyard Planning, Varnish on Mini Barrels, Macerating Skin Packs, and Degassing Wine
Q
I live in wine country and want to get started on a little 50-vine hobby vineyard. I Am currently reading Jeff Cox’s From Vines to Wines and the winemakermag.com articles on vineyard planning. Are there any other good resources that I should be looking at? Should I do soil testing, etc. this fall before we plan to plant in the early spring next year?
Lars Tandrup
Santa Rosa, California
A
That is so great to hear that you’ll be planting a vineyard. Welcome to the great Sonoma County viticulture adventure! My company has vineyards in Sonoma too and I’ve been making wine from Alexander Valley and the Russian River, not to mention Carneros, AVAs for 15 years now. Hard to believe how time flies (and it will for you too on your viticultural journey).
Of course Winemakermag.com is a great resource and I’m especially a fan of the recurring “Backyard Vines” articles, authored by my friend Wes Hagen, who has done so many great viticulture articles over the years. There are some great books out there too, the one you chose, From Vines to Wines is considered a home growing-and-winemaking classic, and it’s now in its 5th updated edition.
Don’t neglect the homegrown resources in your own backyard. Because you live in one of the most famous and prestigious grape growing AVAs in the world, definitely look into the local education scene. Get to know your Sonoma County UC Cooperative Extension office and the seminars and resources they offer to the general public (http://cesonoma.ucanr.edu/). UC-Davis is close by as well (about an hour from where I live in Napa, just east of you), and they offer a rotating calendar of classes for folks just in your position (https://wineserver.ucdavis.edu/extension). Sonoma State has a burgeoning viticulture and enology program too. Here’s a link to a lot of grape growing, winemaking, and general agricultural resources they maintain — and you can check out books from the good, old-fashioned library as well. (https://library.sonoma.edu/research/guides/regional/agriculture). Now, because of COVID-19 there are no in-person classes being held right now, but be sure you check the schedule for Zoom, online, or recorded material you can take advantage of. Low-cost community colleges in the area, like Santa Rosa Junior College (SRJC) and Napa Valley College, sometimes offer viticulture classes as well. SRJC’s Shone Farm hosts hands-on classes like pruning (when there isn’t a pandemic going on). Sure, they are all online for now, but the resources are still awesome. And hopefully we’ll come out of this before too long.

Be sure to talk to your neighbors who have vineyards and see what they are successful with.
With regards to developing your vineyard, I would definitely do all of the legwork you can up front, so that you are armed with all of the information that you can. Learn, watch, listen, absorb . . . then you’ll be well poised to make the best decisions when it comes time to put in your own vineyard. As Wes Hagen would recommend, volunteer at a local winery for harvest to get an idea of what that may look like . . . and ask questions!
Vineyard spacing, row direction, irrigation set up, what you want to grow, and really, what you hope to achieve, are all important questions you have to ask. For your area you’re pretty flexible — if you were any farther north I’d so go with classic Bordeaux grapes, Cabernet/Merlot/Malbec, but you’re southerly enough you could probably even get away with some Burgundy varietals, Pinot Noir and Chardonnay, if you wanted. Zinfandel does best out west of town in the Dry Creek area where it gets enough heat. Be sure to talk to your neighbors who have vineyards and see what they are successful with.
Q
I received a 10-L (2.75 gallon) oak barrel as a gift. The exterior of this barrel is finished with a light varnish. I am concerned that the varnish will interfere with the oxygen permeability of the barrel, negating any microoxygenation benefits of barrel aging. But, considering I’m dealing with a very small size, I know I won’t be leaving the wine in for very long. So perhaps it is not a concern? I would appreciate any advice you might have. I’ve read your article on small-batch barrels but couldn’t find any mention of varnish.
Pete Gabriel
Mullica Hill, New Jersey

A
Well, I suppose you could sand the varnish off if you didn’t like it very much . . . but, realistically, I don’t think it’ll affect the wine that much. If you’ve read some of my pieces on smaller barrels you know that the smaller the vessel the higher the ratio of air exposure to wine volume anyway, which I wager would make up for loss of porosity. You’ll probably get quite a bit of oxygen ingress around the bung as well as every time you open it to adjust free SO2 (something you should be checking on monthly). A word to the wise, however: Sometimes smaller barrels carry their own problems, like they’re just “for show” to keep on top of your bar, or have been sitting around in a warehouse for far too long so they’re all dried out. Even if it was given to you as a gift, see if you can find out more about where the barrel came from, what kind of wood it’s made from, and how long the store carried it before they sold it to your gift-giver. Then you’ll have a better idea if it’s going to be the kind of vessel appropriate for proper winemaking and proper wine aging (note that some novelty barrels are charred for aging spirits).
No matter what, you should clean it thoroughly with very hot water and, if you have it, soda ash or sodium percarbonate (peroxicarb). Fill it up with hot water first to see if there are any leaks. These small barrels just don’t sell as quickly as standard sizes (like I said, they’re often seen as decorative pieces only) and so might not be as well made as a regular wine barrel from a producer you trust. If, upon first filling with hot water, you get a lot of leaks that don’t stop once the wood gets wet and swells up, it might be better to just keep it as a decoration for your bar. If it’s very dry, a small barrel can be placed in a laundry sink and submerged as well as being filled up to help the wood rehydrate.
Q
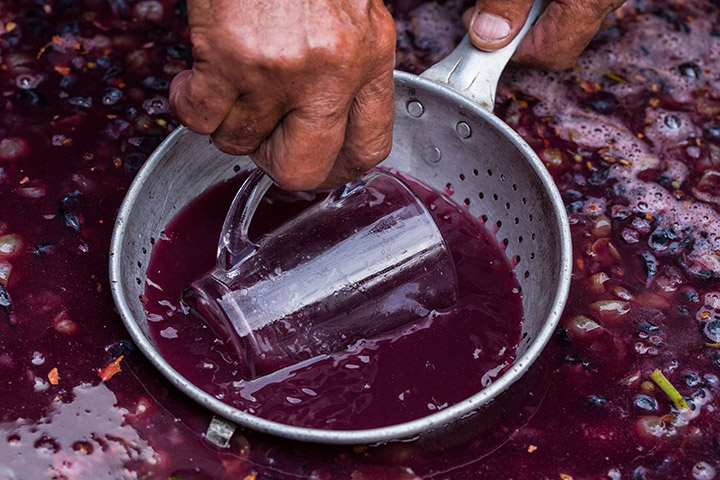
I would like to attempt an extended maceration (of sorts) to a couple high-end kit wines that include skin packs — specifically Cabernet Sauvignon and old vine Zinfandel. Do you have any recommendations as to length of time to leave in contact with the skins? Also, the frequency of checking in on the progress, if at all, and what to look for? Thank you!
Paul Martinez
Arlington, Texas
A
Ah, kits are getting so clever these days! I would say it all depends on the quality of what you feel, taste, see, and smell for the material that comes in your skin pack. Not specifically to kits, but in general you want to use all of your senses to try to figure out what that material might add to your wine during an extended maceration, which will expose it to the higher-alcohol content of your finished wine. Aroma, tannins, possibly color, and flavor particles will all come through. Seriously, put some skins in your mouth and chew them around — do you like the flavor? The tannin? If you have enough, put a few in a glass of water mixed with some neutral vodka at around 14% alcohol and let it sit overnight. That’ll give you another way to look at what might extract into the wine.
For fresh grape winemakers, leaving the skins in the wine after the fermentation is complete is a common practice, but even they need to be careful of going over two weeks and managing headspace for oxidation. Once the CO2 is gone from the top of that fermentation, it’s really easy for VA (volatile acidity, caused by Acetobacter) and other bad guys to grow in your fermentation because the wine is essentially unprotected. You may not have CO2 on top nor have free SO2 in the wine yet since fresh grape winemakers may still want to send their wine through MLF and it isn’t sulfured yet. But the fact is wine kit companies don’t recommend sending their wines through MLF since sorbate and lactic acid bacteria are not a good combo.
Spoilage is absolutely the biggest risk with extended maceration. A normal kit size, like 6 gallons (23 liters) will be very challenging. With a larger volume (like if you’re working with at least a 50-gallon/190-L, trash-can size) then yes, you would check in every day for sure. In that case, if you can get some dry ice, you can keep the headspace protected by floating an empty pie tin on top of the skins, and then filling it with dry ice pellets once or twice a day. Be sure to keep the lid of your fermenter tightly covered. Be aware that CO2 is slightly heavier than air, so if you want to preserve the headspace in good condition, open the lid carefully so as not to disturb the settled carbon dioxide layer. Carefully (because there’s CO2 gas . . .) sniff the interior of your fermenter. If you smell VA, acetaldehyde, or ethyl acetate, (the last two are ingredients of nail polish remover) then it’s time to pull the plug and think about pressing or straining out the skins.
With all that said, my expertise doesn’t necessarily lie in the world of kit winemaking. With that in mind I decided to reach out to one of the kit making companies to get their feedback. Technical expert Gail Tufford from the Winexpert line of kits had the following to weigh in: “There is no benefit to extending the fermentation period of a kit with skins. It is best to rack off of the skins and sediment after 14 days, 17 at the most. The skins will be spent by this point and will offer no further alcohol, flavor, or aromatics to the wine. The lees will start to break down and can give off-flavors if the wine is left on the sediment too long. It is really important to punch the skins down every day during fermentation. Mix them around and squish the skins bag to the sides of the fermenter and give it a good stir to incorporate flavors and tannin into the must. Even though the wine is naturally off-gassing, which offers some protection, there is still a risk of exposing the wine to bacteria if left in the fermenter too long.”
So there you go Paul, we’ve got some general advice on extended maceration and some kit-specific advice for you. Hope that helps and happy winemaking!
Q
My question has two parts: 1) How do you degas your wines? 2) How do commercial wineries degas their wines, especially whites that will be drunk young?
Dwight Brown
Greenwood Village, Colorado
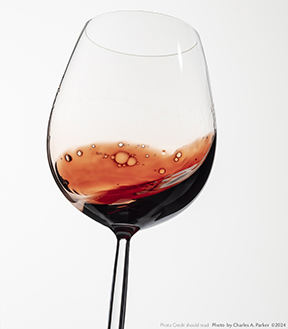
As you know, the fermentation process (both the initial fermentation turning sugar into ethanol and the secondary malolactic fermentation) produces quite a lot of carbon dioxide gas. The majority of this escapes from the wine’s surface during and immediately after the fermentation itself, but quite a lot will be dissolved into the wine and will be retained in solution. Over time, most of the gas will naturally evolve out of the wine but depending on the storage temperature, age of the wine, and the wine’s individual chemistry, sometimes there’s more CO2 left than we desire.
igher than desired levels of carbon dioxide gas can contribute to a sense of “hardness” and can make a wine taste overly acidic and even fizzy or spritzy if levels are too high. Often a winemaker will want to adjust the level of CO2 as a wine approaches bottling. Too little carbon dioxide, especially in white wines, can leave the wine feeling flat and flabby in the mouth. Too much, however, can make a smooth Chardonnay taste not like itself at all. Wines will naturally degas themselves with time, racking, and especially during time spent in barrel.
However, so many times we’ve got a white wine that we may want to bottle young, as you mention, or have to accelerate a wine along the way . . . small-scale folks degas, especially if the wine is very spritzy and young, by using a tool like the “Wine Whip” from Fermtech. It’s a slightly-angled plastic rod that fits on the end of a standard power drill and is inserted into the barrel or carboy and turned on briefly, ‘whipping’ up the wine and stirring up any carbon dioxide bubbles, underneath the surface of the wine. An alternative for home winemakers is to buy a purpose-built vacuum pump degassing system, usually sold with various stoppers and adapters for different fermenters. A simpler and less-invasive approach (especially good if the carbon dioxide levels are not too high in your wine) is just to rack from one container to another, or moving the contents from one container to another with a siphon hose. With either method, it’s really important to protect the wine from surface oxygen, especially if white, with a layer of argon gas as you go from one to the other. We don’t want any oxidation!
Commercial wineries with tanks far too large for a Wine Whip do it a couple of different ways, often involving sparging stones, nitrogen cylinders (which helps strip CO2 from wine), and pumps. (Take note — if you stuck a mixer into a tank with a lot of dissolved CO2, you’d blow the top off. There are some pretty spectacular videos on YouTube showing just that!) During cellar movements, like when going from tank to tank with a pump and hose setup, a winery will install a sparging stone (somewhat like those used to diffuse air into a fish tank, just much bigger and stronger) on the outlet side of the pump and meter in a gentle flow of nitrogen gas. As the wine passes by the nitrogen gas and sparging stone, the nitrogen will help the carbon dioxide come out of solution, and then the wine in the end tank will have less CO2 — both the nitrogen and CO2 will come out in the tank’s headspace.
It’s really hard to dissolve CO2 in a wine’s headspace back into a wine — though it will happen if the wine is cold enough and there’s enough time involved. I tell my home winemaker friends their best degassing bet is just plain old bulk storage in their barrels and carboys — the wine will naturally off-gas during the aging process. Time is your friend! Leave the whips for the cream and egg whites.