White Wine Fermentation Decisions

Wine is far more than alcohol and grape juice. What makes the magic? Fermentation is the star. I like to drink white wine, I like to make white wine, and I like to help others make white wine, too (and I also enjoy red wines). In the nearly 20 years I have been making wine at home, I have fermented over a half dozen different white varietals. I grow Chardonnay grapes in Sonoma County, California, and make that wine every vintage. I often also buy regional grapes of other white varieties just for the fun of it. In addition, I’ve also turned another half dozen red varieties into rosé wines and almost everything I say here about whites also applies to rosés.
Pre-Fermentation Decisions
Before you begin fermentation, you need to make sure you have the needed equipment. If you buy fresh or frozen juice, you need just basic cellar equipment plus fermentation and aging containers. Keep in mind that each time you rack the wine, the volume will be a bit less than it was before. So you need either a variety of container sizes to keep them topped up, or you need to purchase a compatible commercial wine to fill up any headspace that results from racking losses.
If you start with grapes then you will need more equipment. While it is quite common for commercial wineries to “whole cluster press” the juice for white wine, that is harder to do at home. Most of the ratchet-style basket presses we use simply do not press hard enough to produce a good juice yield from whole clusters. Some home winemakers go to larger water-filled bladder presses or hydraulic ram presses that may do the job, but the investment is more than with a basket press.
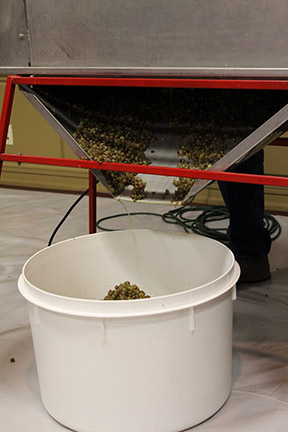
The alternative, if you have a basket press, is to crush the grapes. As you crush, make your first sulfite addition to the crushed must. I commonly add about 50 ppm (mg/L). Very clean fruit can use as little as 20 ppm and if there is some mold or rot, you may want to go as high as 75 ppm. Note that these are calculated gross additions, not targeted levels in the juice. Most will dissipate quickly, but provides protection against oxidation and spoilage organisms until fermentation starts. If you intend to use native or feral yeast rather than adding commercially-produced wine yeast, do not add any sulfite when you crush. We’ll get deeper into this later during the discussion of yeast.

If you are taking crushed must directly to a press, there is no particular need to destem. Indeed, for some slippery varieties like Muscat, having some stems in the press basket may actually help with free flow of juice. However, one of the process decisions for white wine from grapes is whether you will soak the must and, if so, how long. For a soak of minutes or a couple of hours, you may be able to get away without destemming. If you want to soak longer — and some white winemakers will cold soak for up to 24 hours — leaving stems in may introduce unpleasant vegetal flavors and aromas that will negatively impact the finished wine. So little or no soak, it’s not a big issue. For longer soaks, destem as well as crush.
After destemming (or not) and pressing fresh juice, you are in need of the same equipment as if you purchased some form of juice. This is the stage to do your juice testing. At home, you can easily test for pH, Brix, and titratable acidity (TA) and decide if you need an adjustment for either stability or wine style. If you have access to a wine laboratory, a nutrient test is of value in making fermentation decisions.
Most commercial winemakers chill and settle juice, then rack off of heavy fruit lees before beginning fermentation. Since you need to hold the juice below about 50 °F (10 °C), only do this step if you have a means to keep the juice cool. If you don’t, it is better to go ahead and start your fermentation with the fruit lees present rather than risk spoilage and oxidation of warm juice. Some winemaking books suggest that leaving in fruit lees may introduce vegetal flavors and aromas, but I have not found that to be a problem on the occasions when the urgency of the harvest season made me skip the settling and racking. You will wind up with heavier lees after primary fermentation, so that may be a consideration in your decision. If you do decide to chill and settle, equipment solutions include a dedicated refrigerator that can hold a small tank or carboys, a cellar room with a cooling unit capable of these temperatures, or a glycol chiller that circulates coolant through a coil or dedicated tank jacket. One non-equipment solution is to freeze some plastic jugs full of water and alternate some frozen jugs into the juice while putting thawed ones back in the freezer, all while monitoring the temperature frequently. Similarly, a carboy can be placed in a wash tub filled with water and have ice or frozen jugs added to the water bath. These require much more attention than a thermostat-controlled room or chiller but the cost is low.
Primary Fermenter Decisions
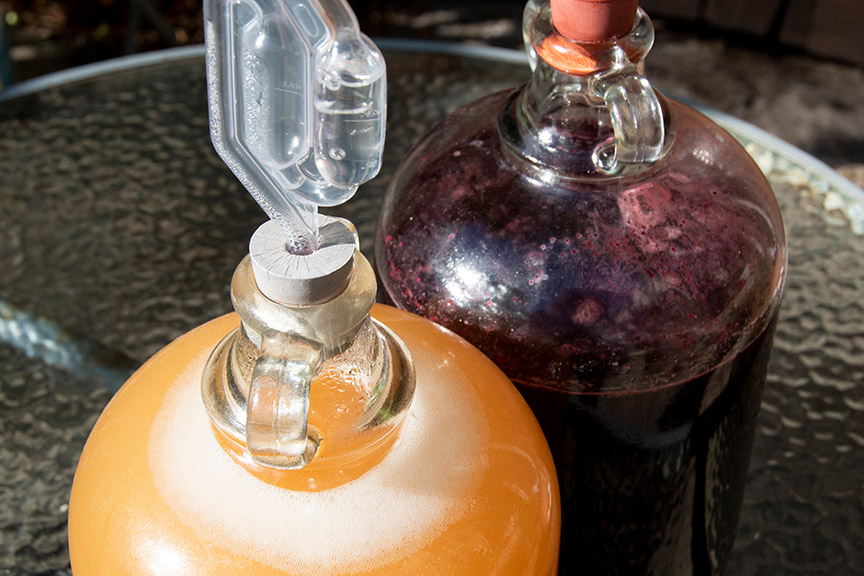
Fermenters for white wine usually include a closely stoppered opening with a fermentation lock. That means a narrow-mouth carboy, or a tank or bucket with a lid that can accept a fermentation airlock and stopper. The closed vessel is used, unlike the open tanks for red wine, because white juice is much more at risk of oxidation than is red must. In addition, with no solids present the white fermentation does not need any punch downs. During primary fermentation the container does not need to be topped up. Naturally-produced carbon dioxide will blanket the fermentation and you need some headspace for foaming. If you are using a carboy or closely covered bucket, a good rule of thumb is to fill it about 3⁄4 full of juice for fermentation. If you are using a variable capacity tank, position the lid to sit about 3–6 inches (8–15 cm) above the juice level once all the juice has been poured or pumped into the tank. You may use either a water-filled conventional fermentation airlock or one of several different designs of silicone breather bungs. These bungs typically make a tight fit into the neck or bunghole of the fermenter and are equipped with some sort of silicone flap that allows carbon dioxide to escape through holes in the bung. Although the flap is very flexible, it does not usually move visibly during fermentation, even in the presence of rapid gas evolution. Because I want to observe the progress of my white wine fermentations, I prefer a conventional water-filled airlock at this stage so I can easily see and hear the gas evolving.
Another fermenter decision concerns temperature control, just as in the original settling period. One temperature choice is to keep the fermentation quite cool, near the lower end of yeast growth. For many yeast strains, that would be about 50–60 °F (10–16 °C). At a low temperature range, the natural aromatic compounds present in the grape juice will tend to be retained in the fermentation rather than being volatilized and carried away by evolving carbon dioxide. That makes this kind of temperature selection especially attractive for grapes that are highly aromatic to begin with, such as Viognier or Gewürztraminer. If you want to retain natural fruity and floral aromas, go low. Be aware that most yeast strains will ferment quite slowly at these lower temperatures and your primary fermentation may take as much as two weeks or more.
Another choice is to go a bit warmer. Since natural aromas are important in just about all white wines, “warmer” for white fermentation still means no higher that about 70 °F (21 °C). In any case, yeast that is fermenting in a warmer environment will typically produce some fruity esters as part of the fermentation process. That is one of the principal advantages of warm fermentations for red wines, where native grape aromas are not considered as significant in whites. If you are producing a relatively less aromatic white wine, like Chardonnay or French Colombard, you may want to encourage some ester production by your yeast and push the temperature up toward the 70 °F (21 °C) level. Whatever losses you incur in native aromas being driven off may be more than compensated by pleasant fermentation esters. Another benefit of the slightly warmer range will be a faster fermentation, possibly a consideration if you want to use your primary fermenters for a second wine before harvest season is over.
For temperature control, the same mechanical equipment options as juice chilling may be used, but ice jugs cannot be added directly because you will be using a narrow-mouth container. The low-tech workaround of a water bath and ice blocks or frozen water jugs can still work well, although it does need a lot of attention to keep the temperature reasonably constant. If you happen to shock a fermentation with sudden extreme cooling of more than about 15 °F (8 °C), it may stun the yeast and cause it to drop out, leaving you with a stuck fermentation and an unintentionally sweet wine. For a very simple (if not very controllable) cooling system, you can improvise by filling a tub with cool water and draping a T-shirt over a carboy, making sure the lower hem of the T-shirt is submerged in the water. The cotton fabric will wick up moisture and evaporate it, cooling the upper part of the carboy while the lower part is cooled in the water bath. If the system you employ does not involve a thermostat, you will need to monitor the temperature regularly.
While the most accurate reading would come from using a glass or dial-type thermometer inserted directly into the fermenting wine, that process risks exposing the fermentation to air or contamination. A very good temperature measurement solution is to use a two-hole stopper with the airlock in one hole and a thermowell and probe inserted in the other. A thermowell is a stainless steel tube, closed at the bottom, that will accept the temperature probe of a digital thermometer or other temperature controller. (See the article “Home Glycol Cooling Systems” in the August-September 2020 WineMaker for more details).
A less accurate but very simple measurement technique for carboys and tanks is to attach a liquid crystal thermometer strip to the outside. These are self-adhesive strips made specifically for fermentation with colored windows that show up at different temperatures throughout common ranges used for beer and wine production.
Yeast Decisions
With fermenter considerations settled, your biggest fermentation decision is yeast. You may even be thinking about whether to select and add a commercial yeast strain at all.
The use of “native” or “feral” yeast for fermentation is much more common in red wines than whites. One reason is that warmer temperatures in red fermentations allow completion to dryness by wild yeasts that may not grow well at the low temperatures often selected for whites. Another consideration is that grape skins are often sources of feral yeasts and those skins are left in a red fermentation but removed from white. You can, though, consider this approach to white wine if you want to experiment with making a unique beverage, especially if you grow your own grapes and want to further explore your unique “terroir.”
I always add commercial yeast to my wines, but here are some considerations if you do decide to try a wild white. First, add no sulfite at crushing or pressing. Native yeasts are much more sensitive to being stunned or killed by sulfite than are selected, proven, commercial strains. The cell count in a feral population is also likely to be much lower than if you added a dry yeast. To help with that, you may want to leave your crushed must with the skins still in it for a few hours or overnight before you press off the juice. That may give yeasts on the skins a chance to start growing in the juice. As an alternative to extended skin contact, you may want to just lightly crush a few clusters by hand and add those grapes to the fermenter. That will leave you with some skins in the ferment as you begin. It would also be a good idea to keep the juice warmer than the usual white wine range for the first few days of fermentation to give the population a head start. Once you see foam production and gas evolution, you can gradually cool the fermenter into the normal white wine range. Even then, you should probably favor the higher end, like 70 °F (21 °C), rather than stressing your unknown yeast at a challenging lower temperature. Finally for this choice, have a backup plan with a commercial yeast already selected and either on hand or readily available. If you don’t see good fermentation in a few days, or if you detect any sign of mold or odor of vinegar, add a commercial yeast quickly to salvage the experiment.
If you go the way I do and purchase a commercial yeast instead, you still have a number of choices to make. One of these is how much yeast to use. Back at the turn of the century when I worked at a commercial wine laboratory and product supplier, the rule of thumb among winemakers was to add dry yeast at a rate of two pounds per thousand gallons of juice (0.9 kg/3,785 L). Later, when I owned a home winemaking store, I found that guide translated to a home scale as one gram per gallon (1 g/3.8 L). That is an effective inoculation rate while still being reasonably economical for a winery purchasing large amounts. As a home winemaker you are probably purchasing much smaller amounts, so the economics may not be such a concern. Without any negative effects on the fermentation, you can easily double your inoculation rate to 2 g/gallon (2 g/3.8 L) and possibly get a faster start at your lower white wine fermentation temperature.
Having decided to purchase yeast, you still need to select a strain. Here we can look to the white wine fermentation characteristics for guidance. All of the major yeast producers recommend some strains for white wine, but the strains may differ in how they handle fermentation conditions and what they do to the juice. Because of the low temperatures involved, that becomes a primary consideration. If you want to ferment one of those very cool aromatic whites, look for a tolerance range that will get you there. Both Lalvin ICV D254 and Red Star Premier Blanc are rated as capable down to 50 °F (10 °C).
If what you really want is a highly estery wine and you are willing to ferment a bit warmer to get a strain that is recommended for aroma development, you might select something like Enartis Aroma White, which is rated down to 57 °F (14 °C) or Lalvin QA23 rated to 59 °F (15 °C).
For red grapes grown in warm climates, high alcohol tolerance is a yeast consideration. It does not come up often for whites as they are usually harvested at lower sugar levels, but you may in fact want a lower alcohol tolerance in hopes of leaving some natural sweetness in the finished wine. Vintner’s Harvest BV7 and Uvaferm Steinberger are both rated to only 13% alcohol by volume (ABV). One final yeast consideration is nutritional need, but that is more advisory to your practice than a selection criterion. If you especially want a low-need yeast, though, Lalvin QA23 and Enartis ES 181 are listed that way.
Regardless of yeast selection, most fermentations will benefit from added nutrients. If you have had nutrient testing done, adjust your nutrient program according to what is native in your juice and the needs specified for your chosen yeast strain. In meeting the nitrogen demands of yeast, I like to use a complete nutrient product like Fermaid K, Fermaid O, or Superfood. Although they may contain simple diammonium phosphate (DAP) as a nitrogen source, they also bring along B vitamins and other trace nutrients to support healthy yeast growth. That makes them a better balance for the yeast than DAP alone.
Secondary Fermentation Decisions
At or near the end of primary fermentation, you face the decision of initiating a malolactic fermentation (MLF) or not. Adding a strain of Oenococcus oeni begins the MLF in which native malic acid is converted into the milder tasting lactic acid, acidity is lowered, and sometimes buttery flavors and aromas develop. Other than red wines, MLF is most common in Chardonnay and some Sauvignon Blancs. Of course, you are a home winemaker and can do whatever you want, so you might try it in, say, a Viognier or a Pinot Gris.
For MLF, the pH number generally needs to be above about 3.2, specialized nutrients may be required, and again temperature control comes into play. In this case, most strains require a temperature above 65 °F (18 °C) for MLF to proceed well. Once MLF is complete, or after primary fermentation without it if that is your style choice, you need to continue your sulfite program. Do not add sulfites during MLF as the bacteria may be killed or inhibited by any addition.
Rack the finished wine into topped up carboys, tanks, or barrels. Topping up is critical at this stage to continue avoiding oxidation and browning. Add sulfite to produce a level of 0.8 mg/L (ppm) molecular SO2. Depending on your wine’s pH, that typically means you need about 30 to 50 ppm of free SO2 in the wine. Use the sulfite calculator at www.winemakermag.com/sulfitecalculator to find your target level, add at least once a month, and test from time to time to keep on track. Once again, white wine is much less tolerant to oxygen than red wine and a steady sulfite program is needed to keep it tasting and smelling fresh. During this time, you will keep the wine in topped up containers and keep cool if you can — 55 °F (13 °C) is ideal. Keep the wine in the dark or use opaque containers.
For most styles of white wine, oak aging is used only a little or not at all. That means you will be using PET plastic carboys, glass carboys, or stainless steel tanks. For those few white wines that seem to benefit from oak, you may want to use a barrel. Oak is often used in Chardonnays, particularly those that undergo full MLF. Sauvignon Blanc often uses oak when the style is Fumé Blanc (literally “smoked white”). A barrel is the best way to introduce oak in aging wine, but if your volume is too low or a barrel is out of your price range, there are a number of oak alternatives such as sticks, staves, or beans that you can put in the aging wine to add some oak character.
If you do have a barrel program for your winemaking, you can use a barrel in white winemaking and move it to reds later, but not the other way around. My barrel program is based on three different one-hectoliter (26-gallon/100-L) barrels. A few years ago, after using my first French oak barrel several times for red wine aging, I bought a new American oak barrel to expand my little “program.” As a fun project, I barrel fermented that year’s Chardonnay in the new barrel before moving it over to be a red wine aging barrel as well.
That project gave me the opportunity to exercise another optional step in white wine making: Stirring the lees. After primary fermentation was complete in the barrel, I racked the wine temporarily to a stainless steel tank and rinsed the gross yeast lees out of the barrel. I returned the still-cloudy young white wine to the barrel and let the fine lees settle. After a few days of settling, I began stirring the lees twice a day. I did not have a specialized barrel stirring tool for that process, called bâtonnage, so I bought a new hardwood dowel at my local hardware store, sanitized it, and put it in through the bung opening to stir the bottom of the barrel (lying on its side) in a vigorous figure eight pattern twice a day. After a few weeks, I racked the wine into topped-up carboys, washed the barrel, and switched it to red wine aging. If you would like to try improving the mouthfeel of your white wine, aging it on the lees may be worthwhile. Either after MLF or without inoculating for it, begin your sulfite program. Allow the fine lees to settle and stir as described. You may need to monitor and add sulfite more often if you do this because you expose the wine to air every time you remove the bung.
As you can see, there are a number of choices a winemaker must consider with every white vintage. The more batches under your belt, the more comfortable you will get with the effects each of those choices cause. Winemaking is all about preference, and when you understand the techniques, you can make a wine that fits your preference every time.