 Editor’s Note: This is the fifth installment of a year-long series of the life of a homemade wine, from homegrown grapes in New York State.
Once the primary fermentation is complete in all of my fermenters, by definition I now have wine. So is that it? Far from it. When primary fermentation is over, it is time to start a number of other processes and steps as I work towards refining the wines and ensuring their stability over time.
Malolactic Fermentation
Malolactic fermentation (MLF) is the conversion of malic acid to lactic acid via a secondary fermentation using specialized bacteria. This is an important process that is used to achieve greater balance and enhance structure of wine. It is not appropriate for all wines, however, and in fact MLF is most commonly employed with red wines.
Malic acid is a stronger and harsher acid than lactic acid; it’s actually the acid that is responsible for the sourness in apples and pears. The conversion of malic to lactic acid helps to mellow a red wine and also enhance its mouthfeel as tannins are less harsh with the reduced acidity. It is rarely employed with whites or rosés as the focus in these wines is to maintain acidity and freshness while enhancing fruit character. There are a few exceptions in the world of white wines, however, and one of the most well-known examples is in full-bodied and/or oak-aged Chardonnay. This particular variety can be enhanced, depending on your palate and taste preference (i.e.: Big, buttery style Chardonnay), using MLF.
So once primary fermentation is over for my dry red wines, I seed them with MLF bacteria. From an aroma and flavor standpoint it helps to enhance red berry fruit aroma and mouthfeel, so much like choosing a yeast for primary fermentation I also have a favorite ML strain, which is Lalvin VP41. This strain was isolated in Italy and it stands out as a highly tolerant strain, which can perform under the most difficult winemaking conditions such as high alcohol and low pH. VP41 is also very tolerant of SO2.
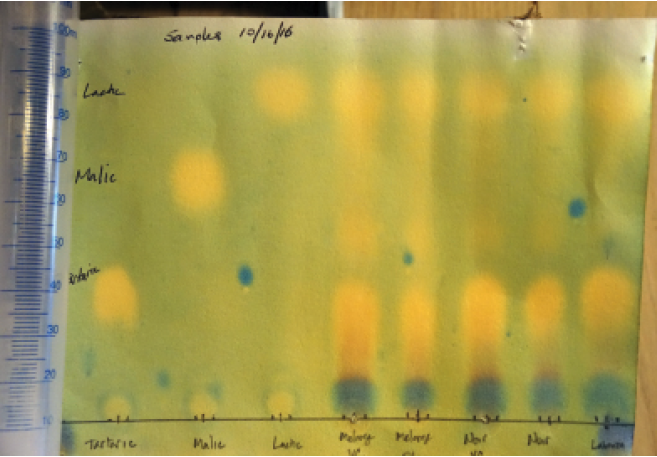
To perform MLF, I rehydrate the bacteria according to the manufacturer’s instructions and add it to my dry red wines, along with an MLF nutrient, Opti’Malo Plus (from Lallemand). Once the bacteria and nutrient are added, I give the wine a good mix and the process begins soon thereafter. Unlike primary fermentation, which is typically very active and vigorous, MLF can be a slow process. During this time I do my best to maintain a constant cellar temperature where the new red wines are housed at 65 ºF (18 °C) to create the best environmental conditions to help the MLF process along. I also regularly check and document the wines’ pH to check on the MLF progress. It is typical to see a regular rise in the pH as an indicator that the process is underway because there is a drop in acidity. Once I notice little to no change in pH readings, I check to make sure the process is complete utilizing a paper chromatography test. Once complete, I rack the wines and add potassium metabisulfite to stabilize them.

As you might recall from earlier in this series, this vintage I decided to make a barrel-fermented and sur lie aged Chardonnay (sur lie aging means leaving the wine on the lees to try and capture additional flavor). I also wanted to enhance the mouthfeel of this wine and bring out a touch of buttery aroma and flavor. To achieve this, I employed MLF.
One issue I had with MLF in my barrel-aged Chardonnay this year was low pH, which was 2.9. Most malolactic (ML) bacteria are not tolerant of a pH of less than 3.2, so for this wine it was my task as a winemaker to decide if I wanted to try to increase the pH or try to find a strain of bacteria that might do the job at such a low pH. I have never been a fan of trying to increase the pH of wines, which is typically done by adding salts (potassium bicarbonate, for example). I find that the salts alter the flavor of the wine when this is done; and not for the better. With this in mind, I decided to try the second route and find a low pH-tolerant strain of ML bacteria. After some research I found that Wyeast 4007 could do the job at a pH as low as 2.9, so I seeded my Chardonnay with this strain, which came in a liquid form, and again added Opti’Malo Plus nutrients. Like the reds, I then gave the wine a good mix and monitored the progress. Due to the low pH in this wine, the process was extremely slow. In fact, in the end I ended up with only a partial MLF conversion. But you know what? The touch of acidity, I believe, actually improved the wine; it brought out a bit more fruit character. Combined with an up-front nuttiness that sur-lie aging provided to the mix, I ended up with a very complex and unique white wine. This will be my go-to wine for pairing with roasted chicken or truffle risotto.
Fining and Cold Stabilizing the Whites and Rosés
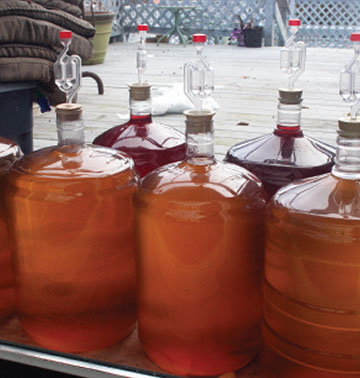
For my whites and rosés, almost all of which do not go through MLF (other than the barrel-aged Chardonnay I mentioned earlier), the focus after primary fermentation is stabilization. As you may recall from earlier in this series, early on in the winemaking process I utilized pectic enzymes in my whites and rosés to break down pectins to avoid pectin haze. Now, after primary fermentation is complete, I add bentonite, a fining agent, to each wine in order to eliminate the risk of protein haze. Bentonite, a volcanic clay, does an excellent job of taking care of this potential wine instability issue. After stirring the bentonite into each wine I allow them to settle for a minimum of three weeks. Following this fining process, based on the long-term weather forecast, I bring all my carboys up onto my deck and take advantage of the late winter/early spring outdoor subfreezing temperatures to cold-stabilize the wines. Cold stabilization is very important for the whites and rosé wines, as most people prefer these wines served chilled. If they are not cold-stabilized, tartrate crystals will form in the bottles. These crystals, sometimes called “wine diamonds,” are perfectly safe but can be construed by the wine drinker as a flaw. If you plan to enter a wine into competition, a judge may also deduct points if tartrate crystals are present.
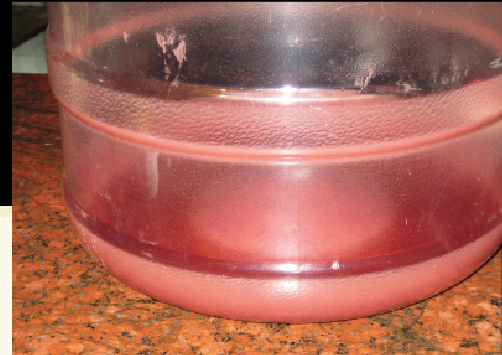
I keep the carboys of white and rosé, with airlocks filled with vodka to keep them from freezing, on my deck for a minimum of a month or longer, based on the outside temperatures. Once I feel comfortable that cold-stabilization is complete, which I do by taking a sample from each of the carboys and putting them in the freezer for a time (not allowing them to freeze) to make sure no tartrate crystals form, I then bring the carboys back inside to the cellar, rack the wine, and add potassium metabisulfite and potassium sorbate to further stabilize the wines. Sidenote — do not add potassium sorbate to any wines that have gone through MLF as it will create an undesirable geranium odor. The racking process is very simple when done after cold stabilizing as the tartrate crystals form a crust over top of the fluffier sediments (see photo, below).
The potassium metabisulfite along with the potassium sorbate provides protection against oxidation, microbial spoilage, and inhibits yeast growth. This is important if I need to backsweeten any of the wines as additional yeast growth can occur when sugar is added.
Taste, Taste, and Taste Again
Prior to this point, the wine cellar (along with other areas of my home where winemaking takes place) has been very active and somewhat hectic with my efforts and inputs in trying to develop and create the styles and types of wine I am after for this year. This point in the life of my wines start a period of becoming familiar with each of this vintage’s wines. To do this I do a combination of regular testing of pH and SO2 along with regular tasting. After making wines with my homegrown grapes for a few years, I have started to develop a palate and understanding of how a wine may develop from where it is at this point in the process. I also can closely monitor its evolution over time. This knowledge helps me to understand if I need to intervene at all. The decision to intervene, however, can still be a tough one, even for an experienced winemaker. As a wine develops, especially a red, the flavors and aromas can swing from something I really like to something that I am not happy with at all. What I have learned with experience is to keep calm and not immediately react and intervene based on one bad tasting.
The very complex chemistry of wine is amazing to experience through tasting. The other thing to keep in mind is that your palate changes from day to day. Think about questions like, “What did I eat or drink before the tasting?” “Do I have the onset of a cold?” These and other physiological and environmental conditions can greatly influence your perception of a wine. So if I’m not happy with the aroma and flavor of a wine today, I’ll taste it again in a couple of days at a different time of the day. Yes, that makes a difference too. More often than not, I’ll get a different perception of the wine’s progress the next time I taste.
Regular monitoring of the wine’s pH and SO2 provides the data I need in maintaining a good sulfite management program. This is imperative in guarding my nouveau wine against the potential destructive effects of oxidation and bacterial spoilage.
So now my wines are in the stage of bulk aging — a time of major development and change in the wine’s life. More to come on this and the remaining stages of a year in a home made wine in the upcoming issue. Happy winemaking!
Budbreak and Beyond (sidebar)
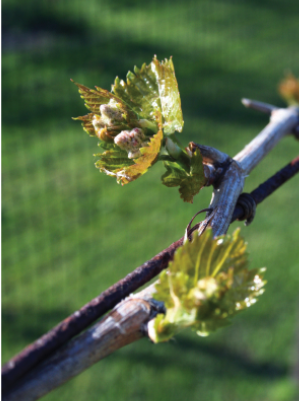

Around the time that the weather warms to 50 ºF (10 °C) or more here in my Upstate New York vineyard, the warmth allows the grapevines to come out of their dormancy and begin to wake up for a new vintage year.
The first indicator that the vines are coming back to life is after spring pruning, when sap starts to drip from the pruning points. (These points will eventually seal over with that sap.) Next, the buds will begin to swell until the all-important point of bud break. Bud break is both a great and sometimes very concerning day in my Northeast vineyard. It signals the promise of a new vintage, but I am also always concerned about late frosts in the forecast. Once bud break has occurred, the new growth is at tremendous risk should subfreezing temperatures occur. The cold temperatures will damage these tender new shoots and cause them to die.
A grapevine is a sturdy plant that wants to survive, and as such, they develop secondary and tertiary buds. This way if the primary shoot is killed off, another will emerge. So no big deal right? Well it depends. Depending on the grape variety, secondary shoots could be a big deal or not so much. Some varieties can be just as productive on secondary shoots as they are on their primary shoots. This is true of the DeChaunac variety I grow. Other varieties will have dramatically reduced production on their secondary shoots, however, which is the case for the Concord grapes that I grow.
If a frost is predicted, as a home winegrower, there are a few options to try to protect those primary shoots. One is to set up spray irrigation and spray the vines with water throughout the period of freezing temperatures. The freezing water will encapsulate the shoots. This is because freezing of the water actually provides a little protection, just enough to keep the tender shoots from being damaged. Another option, commonly used in Old World European vineyards, is to set up burn cans along your vineyard rows and keep the fires burning through the freezing temperatures. Neither of these methods are perfect, however, and the potential for losses from a frost is quite high. So in any event, I pray for no frost.
Once the threat of frost is past, though, I can breathe a sigh of relief for another season. I can then turn to evaluating the new shoots and the primordial fruit clusters to make an assessment of what type of production I am hopeful for this year. Based on this assessment I may then begin the process of shoot thinning to properly balance the vine with the amount of vegetative growth along with the fruit crop that is available. Many secondary and sometimes tertiary shoots are removed in this process.
And so begins the new vintage year. Much more planning and additional work is to come, leading up to that not-so distant all important day called harvest.
Next time, we will check in on the ripening grapes, spraying and pest control, and of course getting ready to pick!

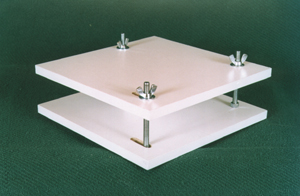
Plate filtration systems are popular among home winemakers. These systems use disposable filter plates with a filter selectivity that usually ranges from 0.5–6.0 microns. The filter plates must be changed every so often, a tedious chore that involves removing several wing bolts, six in the case of the popular Ferrari-style filter, to replace the filters. Fortunately, there’s an easy solution that will allows you to change filter pads more quickly and with…

