Year in a Life of a Wine: Part III (Testing & Adjusting)
Editor’s Note: This is the third installment of a year-long series of the life of a homemade wine, from homegrown grapes in New York State.
 It’s time again to check in on the year in the life of a homemade wine. In the last installment, I was crushing and destemming my homegrown grapes, pressing the white grapes, and macerating the reds. Now, it’s time to talk about fermenting the must and moving on to the next stage.
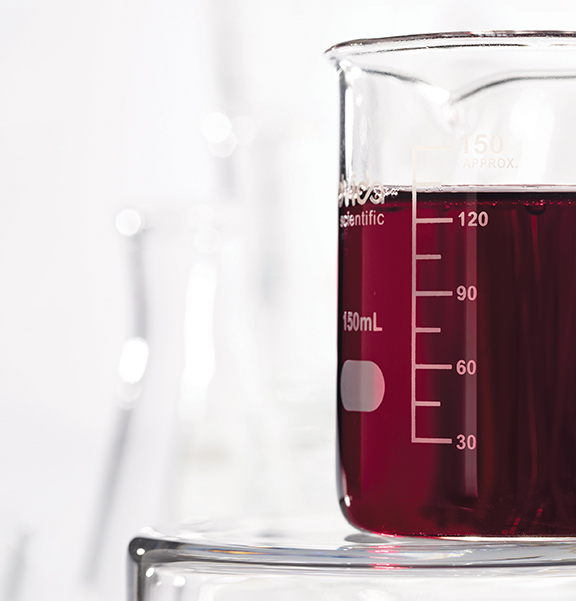
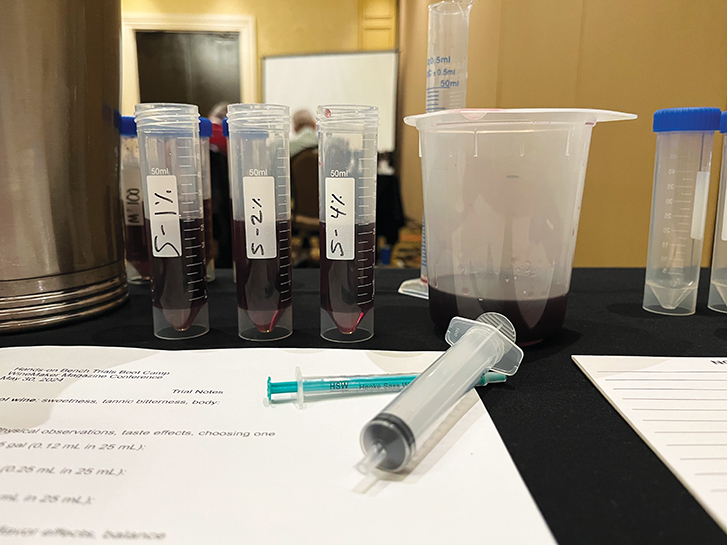
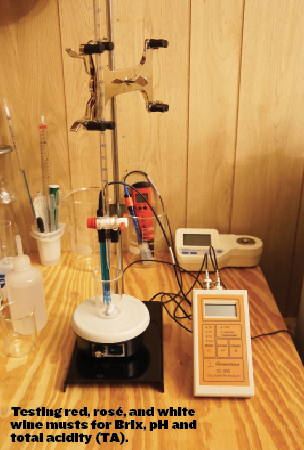
The morning after crushing/destemming, and pressing, and settling brings on a series of winemaking tests. These tests include the Brix, pH, and TA. If you don’t test for Brix, this is also the time to take some hydrometer samples to determine the starting specific gravity of each must. I actually often rely only on Brix to determine where the starting point of the must is, and to also determine where I need to go in order to reach my desired percent alcohol in each of my wines. Utilizing a wine thief, I grab a sample of each must, and then measure the Brix, pH, and TA (total titratable acidity). There are a few means for performing these tests that vary in cost, but these days the analysis of my pH and TA is simple and accurate thanks to my newly purchased Vinmetrica SC-300 Sulfite & pH/TA Wine Analyzer unit (about $425). Always seems like some kind of upgrade is needed in the home winery, and while this is a bit of an investment, I make enough wine each year to justify the cost. These tests can all be done on their own, of course, with other test kits and meters.
White and Rosé
I start my fermentations with the white and rosé wines, which I handle the same way in the winery. After I take my sample of each batch of must and analyze it, I determine what, if any, adjustments need to be made to the juice. My target finished ABV (alcohol by volume) for these wines is 12.5%. By measuring the Brix, I then know if I need to chaptalize or not. Chaptalization is the addition of sugar to the must in order to provide enough to achieve the target final alcohol, assuming fermentation to dryness (read more about chaptalization at winemakermag.com/story371). This is a relatively simple step: Using a rule of thumb that Brix multiplied by 0.55 (assumed conversion rate of sugar to alcohol) equals the final percent alcohol of the dry wine, I determine the need for chaptalization. The target Brix for my white and rosé wines is therefore 22.7. If my Brix is lower than this number I then add sugar based on a rate of 1.5 ounces of sugar per gallon (11.3 g/L or 1.1%) of must for each degree Brix I need to raise the must. Not to skip an important step here — I add the sugar to the settled juice that was allowed to stand overnight, and then rack it into cleaned and sanitized carboys.

I next deal with the TA and pH results. For my white and rosé wines, I look for starting pH between 3.2 and 3.5 and TA between 6.0 and 9.0 g/L. My Vidal Blanc, which is a relatively low pH and high acidity grape, always falls on the edges of these ranges. I don’t make any chemical adjustments with this wine, however, as I find the resultant wine lends itself to this higher acidity and just a touch of sugar can balance it well. This will be a topic for a future installment. The rosé is also typically right in range.
Once the Brix is adjusted, I prepare my yeast cultures. Ask any winemaker, hobby or commercial, and they will have their favorite yeast strains. There is definitely some science in this selection; but really it comes down to what your palate is trying to achieve. In the case of my white Vidal Blanc, I traditionally use Epernay II. This yeast has been my go-to strain for years, especially for Riesling wines. It is a medium, low-foaming fermenter that brings out the fruit characteristics in your wine and can leave a touch of residual sweetness as it nears the top end of its alcohol tolerance. I think it’s a perfect yeast for my Vidal Blanc. For my rosé I have found that Lalvin 71B-1122 provides what I want. It is also a medium, low-foaming fermenter, and it brings out the fruit characteristics in my wine (similar to Epernay II) but provides for a partial reduction of malic acid. In my opinion, a dry/off-dry rosé should be a bit smoother than a white, somewhere between a white and a red, and this yeast achieves that goal for me. To inoculate, I rehydrate my yeasts per the packet instructions, utilizing Go-Ferm nutrients in the hydration water, temper that mixture to get within a few degrees of the grape juice, and then pitch it into the fermenter. I then move all of my white and rosé carboys downstairs to my wine cellar to maintain a cooler fermentation. At this time of year my basement temperature is between 55 to 65 °F (13 to 18 °C), which provides for a significantly lower temperature than in my garage (typically still in the mid 70s F/mid 20s C). The lower fermentation temperatures are all important in maintaining the fruit characteristics of these wines.
All my white wines are not made only from my own home grown Vidal Blanc. I do enjoy a good Riesling as well as a buttery and oaky Chardonnay. So this year, I purchased a new American oak barrel and am in process of doing a barrel fermentation of a California-style Chardonnay, using the CY3079 yeast strain and doing some sur-lie (on the lees) aging. More to come on how this wine turns out in later installments of this series! The Riesling must is being fermented in a carboy in my wine cellar, again utilizing the Epernay II yeast.
The Reds
As with the white and rosé wines, I next check my Brix, pH, and TA for all my red wines. For the reds I look for a target ABV of 13.5%. This equates to a starting Brix of 24.5. Each must is adjusted, if necessary, using cane sugar to get to this target. My TA target range is between 6.0 and 7.0 g/L; while pH should be between 3.4 and 3.7. In the past I have had to make adjustments to my red musts due to higher pH readings. As I put all my dry red wines through malolactic fermentation (MLF) (another topic for an upcoming installment), I have to be cautious. MLF can increase pH due to converting a stronger acid (malic) to a weaker acid (lactic). With this in mind, if I am starting off with a relatively high pH, I can end up at the 4.0 danger zone. This is dangerous due to stability issues at this and higher pHs. So if a must pH is too high I will adjust the level down by adding tartaric acid at a rate of 3.8 grams of tartaric acid per gallon to raise the TA by 1 g/L; also reducing the pH. This process is know as acidulation. When I do this, I proceed slowly and check the pH and TA multiple times to get to a more comfortable pH, close to the target range.
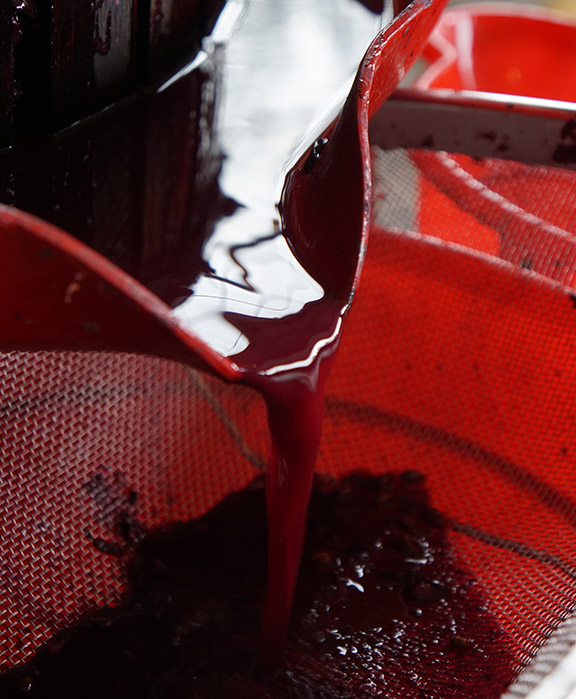
Once all of the readings are in range, I add 2 pounds (~1 kg) of French oak chips to each of my large-batch dry red musts (see photo, top of page). I find that adding the oak chips during fermentation enhances color, body, and mouthfeel through the extraction of tannins. I then prepare my selected yeast and pitch, as described with the white and rosé wines. Yeast selection for my reds has varied from year to year. I’m still searching for the perfect match for my dry red blends and my palate. I have been relatively happy with Lalvin 71B-1122, but I still feel that I need more depth and interest than this yeast seems to give my reds. This year I am utilizing BDX, a Bordeaux red dry wine yeast as it is recommended for many of the varietals that I enjoy. I’m giving it a try; as with all experiments, time will tell on its success. Experimentation, however, is what keeps home winemaking new and interesting from year to year. My Concord-based wine has historically been, and will continue to be, fermented with the Lalvin 71B-1122 yeast strain.

In my next installment of this series, I’ll get more into the processes that are needed moving forward from this point in the year of a homemade wine.
Winter Slumber (sidebar)
Meanwhile, in the vineyard . . . A few hard frosts have come and gone and we are due to get some snow. The leaves on the vines have changed color and fallen from the vines. Now my main concern and hope is that the vines have done a good job storing enough carbohydrates to get them through the winter and be ready for the next growing season. I also hope that the winter is mild enough that it won’t cause any winter damage to the buds, or to the trunks themselves.
I remember one year when my daughter asked me when she was much younger why the grapevines had died. As with many other situations that come along as a parent, I found myself at a teaching moment, so I did my best to describe to her the difference between deciduous and evergreen plants, using a number of analogies. I described, how like bears, deciduous plants go through a winter slumber — it is nature’s way of allowing them a time to rest and recharge, during a period when many of the food sources and other nutrients they need, like warmth and sunlight, are in short supply. I also described how important it is, like squirrels collecting nuts for food to be utilized throughout the winter, that deciduous plants, like grapevines, must build up their stores of food in order to survive the winter months. She seemed to understand it when I put it into these terms. In fact, when one of her friends commented that, “Your father’s grapes are dead,” she was quick to correct him — that they were just sleeping.
So now is a time to allow your vines to rest. It is also the time to start planning for next season. What repairs and/or additions need to be done next year? Do you need to do trellis repairs, or to add additional trellising for new vines that may be coming in the spring? Do you need to mend or consider installing deer fencing? This list goes on and on. This time of year is also a good time to start straightening up your vineyard tool area; including sharpening your pruning and harvesting shears, making sure your spray equipment is cleaned and stored properly, and taking inventory of your sprays and grape tying supplies. There is a lot to think about and plan for.