Performing Winery Lab Tests
Wine is, indeed, all about taste. Some winemakers insist that wine analysis is superfluous because we should be able to use our discerning taste to determine when to harvest, how long to macerate and ferment, etc. I have some sympathy for this approach, as I agree that sensory analysis is a critical component of wine analysis and production. Still, in the early stages of winemaking it can be difficult to discern the acidity in grape juice because of the high sugar content, and vice versa. Having an analytical tool to test for sugar and acid levels is helpful, especially if you’re responsible for determining when to harvest the fruit. Of course, the analytical values for sugar concentration and acidity should not be the sole factor used to determine harvest and winemaking protocols, but they can help guide decision making. Analysis values may also help determine additional processing steps if the grapes aren’t in the ideal range for sugar or acid content. There are also other juice and wine parameters, such as yeast nutrient and free SO2 levels, that cannot be determined through simple sensory observation.
This article will discuss analyses chronologically from grape harvest through bottling. As we discuss each type of lab analysis, it is important to think critically about the utility of each analysis for your own winemaking goals. It’s only necessary to go through the trouble of lab analysis if the results will help your decision-making. An example of this concept might be alcohol content after fermentation. Commercial producers need to know this value for record-keeping and labeling, but home winemakers are often not going to make any decisions based on ABV unless they are considering fortifying the wine or blending two wines together with markedly different ABVs. So, do you need to analyze your wines for ABV? Perhaps not. Throughout this article I’ll try to emphasize why each test is important for decision-making throughout the winemaking process.
°Brix, pH, and TA Pre-Harvest and at Crush/Press
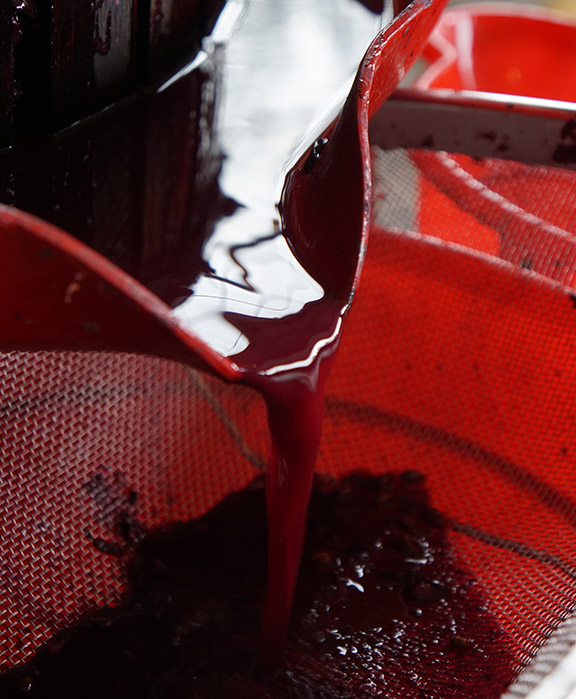
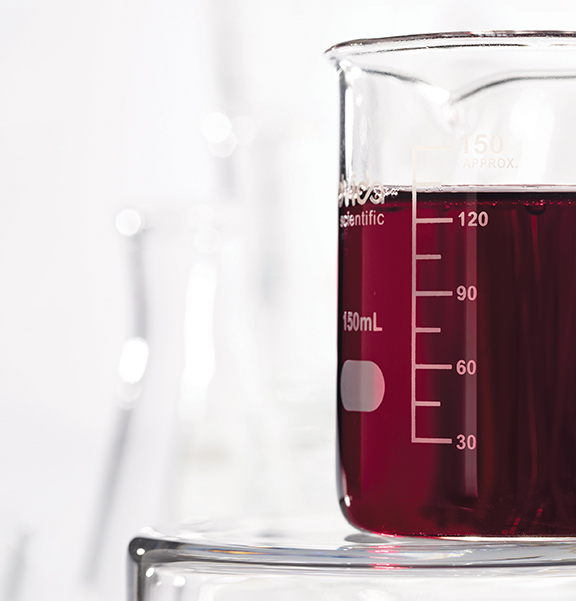
Sugar concentration is directly related to the final alcohol concentration in the wine (and residual sugar level, if fermentation is arrested), so knowing initial sugar concentration is critical for wine balance and processing choices. Using a refractometer or hydrometer is relatively straightforward, but there are some considerations for determining accurate measurements depending on the wine style. For vineyard sampling, I think it’s difficult to get an accurate idea of the whole bunch sugar concentration by just sampling berries, so I sample about 10 clusters in a vineyard block (from high and low and both sides of the row) and crush them together to determine a sample concentration. If you do sample berries to determine harvest ripeness, I recommend crushing all the berries in a bag and allowing the composite juice to settle prior to analysis. The sugar and acid concentration in the grape pulp varies from the pulp attached to the skin to that closest to the seeds, and the juice which is easiest to squeeze from the berry contains the highest levels of sugar and acid. Thus, if you just squeeze the juice from one intact berry onto the surface of the refractometer window you will probably overestimate the sugar and acid concentration of the whole berry. This is also true of whole cluster samples; they must be aggressively crushed in order to simulate the force applied to them in a grape press. I like to crush my whole cluster samples in the bottom of a 5-gallon (19-L) bucket using my fist.
Vineyard sampling analysis values often don’t exactly match the pressed juice or macerated must, so it’s important to measure the sugar and acid again after pressing or crushing. For crushed red grapes, the sugar and acid concentration can change a bit as the skins release their tightly held pulp, especially for ripe clusters with some raisined berries, so it’s often best to sample 12–24 hours after crushing. It’s important not to wait too long, however; as the sugar concentration may start dropping soon after crushing if the must is warm and fermentation begins rapidly.

pH and titratable acidity (TA) are correlated, but measure slightly different aspects of wine acidity, and because there are varying levels of other ions in juices and wines it is not possible to infer one from the other. pH is important for microbial stability, while TA is important for taste and balance. If the acidity is out of balance, early correction is better than trying to adjust acidity late in the winemaking process. Knowing the acid level of the fruit may also be important if sugar levels are too high and the juice needs to be watered down because diluting the sugar will also dilute the acid concentration. In this situation, most winemakers add both water and tartaric acid when diluting must to keep the wine in balance. Many winemakers make harvest decisions primarily on sensory analysis and sugar concentration, but some winemakers, particularly those in cold climates or dealing with hybrid grapes, will base harvest decisions more on acid concentration than sugar.
pH is nice to know when considering the microbial stability of the wine, and important later in the production process for dialing in free SO2 rates after fermentation. Still, knowing the pH is not as important as TA in terms of taste and wine balance.
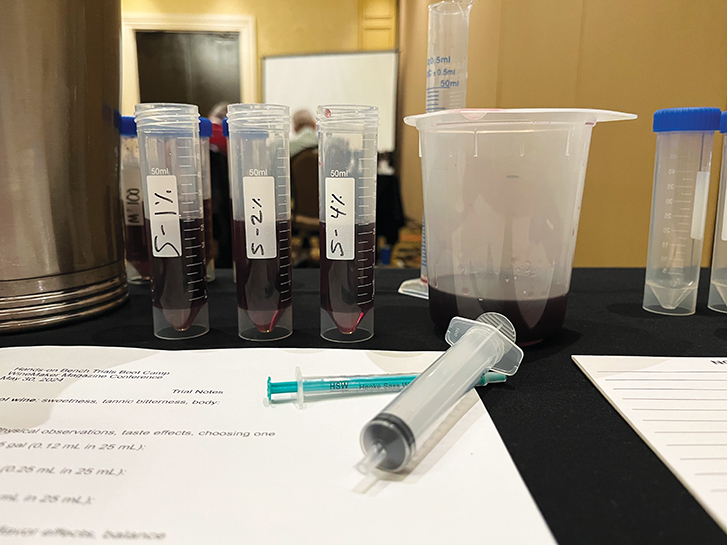
pH and titratable acidity are both relatively easy to measure. pH is measured directly in enough wine volume to cover the probe. TA is measured with a small sample volume (usually 5 or 10 mL) that is diluted with deionized water so that there is enough volume of liquid to either use a pH probe or to easily see a color change with phenolphthalein. When using a pH probe for either pH or TA measurement it is important to remember that liquid needs to keep moving at the surface of the probe to limit pH drift. Also, pH meters must be calibrated daily with buffer solutions; most wineries use two buffer solutions at pH 4 and 7 to calibrate the meter.
The optimum sugar and acid concentration really depends on wine style. A rough estimate of sugar-
to-alcohol conversion is to multiply the °Brix measurement by 0.6 (e.g., 18 °Brix x 0.6 = 10.8% ABV). Sparkling wines seem to achieve the best balance at low ABV (10–11% before second fermentation), white and rosé wines at moderate ABV (11–13%), and reds at higher ABV (13–15%). Optimum acid concentration also depends on wine style, with sparkling wines typically quite high in acid (7–10 g/L TA), white and rosé wines still crisp but moderate in acidity (5–8 g/L TA), and red wines relatively low in acid (4–6 g/L TA). Still, there is much variability in these ranges depending on grape variety and style, from high-acid Riesling and hybrid red wines, to low-acid Chardonnays and Zinfandels.
Yeast Assimilable Nitrogen
Yeast assimilable nitrogen (YAN) concentration is critical for healthy alcoholic fermentation. Low YAN levels result in yeast stress that can cause off aromas like H2S (rotten egg) and sluggish or stuck fermentations. YAN only needs to be measured once prior to fermentation, but like pre-fermentation sugar measurement the timing is critical. It’s best to measure YAN after the juice has had a chance to settle (or the skins have had a chance to soak, for reds), but before fermentation begins. When yeast begin metabolizing sugar, they quickly sequester YAN in their cells for use in later growth and propagation, so the YAN level in the juice drops and you will no longer have an accurate estimate of the nitrogen level prior to fermentation. Thus, once fermentation begins it is no longer helpful to measure YAN, as the level will most likely be quite low and the concentration in solution is not indicative of the amount the yeast will need to complete fermentation.

Winemaking texts recommend a minimum of 140 mg/L of nitrogen, with higher-Brix fermentations and some yeast strains requiring more. However, too much nitrogen can also cause fermentation off aromas, so a range of 200–350 mg/L nitrogen is considered best for most wine types. Yeast suppliers recommend increasing the nitrogen level for higher sugar concentration in juice. In addition, commercial yeast strains also have varying levels of nitrogen demand, so if you’re using a commercial strain, it’s best to find out the relative nitrogen needs of that particular strain to determine how much nitrogen supplementation is needed. Many winemakers assume a small level of nitrogen is in any juice and without analyzing for YAN will prophylactically add 100–200 mg/L of nitrogen to all their juices prior to fermentation. This should work most of the time but could result in under or over-supplementation of nitrogen for especially low or high levels of juice YAN, or specific yeast strain requirements. For a full discussion of yeast nitrogen needs refer to “A Nitro Boost: Nitrogen’s role in primary fermentation.”
Brix, Temperature, and Sensory During Fermentation
The goal of °Brix, temperature, and sensory assessments during fermentation are to track the progress of fermentation and ensure that the fermentation is moving toward completion while generating positive aromas. If red wines are being produced, the sensory assessment also guides the maceration schedule for the wine. During fermentation it is helpful to track the change in °Brix over time, especially near the end of fermentation, so that next steps can be completed quickly. How often to sample for °Brix and temperature depend on the fermentation activity; for a fast red wine fermentation above 75 °F (24 °C) once a day, for a slow white wine fermentation at 60° F (16 °C) perhaps once or twice a week.
Tracking temperature also documents fermentation performance and can help with troubleshooting stuck or sluggish ferments. If your lot size is large enough, the tank will increase in temperature during fermentation because the fermentation reaction is exothermic. With small wine lots there isn’t enough heat generated compared to the surface area of the tank to markedly increase temperature, so the tank temperature will stay the same as the room temperature. Yeast will ferment in a range of about 50–100 °F (10–38 °C). Yeast go dormant at lower temperatures, at high temperatures yeast are inactivated.
With sensory analysis, tracking the aroma can help identify potential fermentation nutrient issues. For red wines, sensory analysis of the astringency level allows the winemaker to adjust maceration frequency and length of time on skins (i.e., how many times per day to macerate and when to press off).
Residual Sugar (RS)
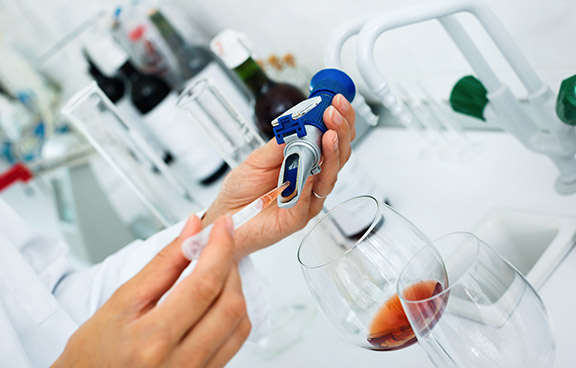
Because hydrometer or density meter measurement no longer represent sugar concentration at the end of fermentation, it’s important to measure residual sugar using some other method to confirm fermentation is complete. Residual sugar is usually analyzed after several days of seeing no change in hydrometer or density measurement. Aimtab tablets are an easy, effective way to analyze for residual sugar, but may give false negative results (showing a small amount of residual sugar remains when the wine is actually dry) in some wines, particularly red wines. Technically, these pills are measuring “reducing substances” in the sample, of which glucose and fructose are the main components in wine. There are other substances though, especially in red wines, that can cause a color change in the test even when no sugar remains, which can lead to false positive results when trying to determine if the wine is completely dry. There is a chemistry-based method for determining residual sugar known as the Rebelein or Gold Coast method, but this method is somewhat involved. Vinmetrica sells the reagents needed for this method, as well as a much more expensive test strip reader called Sentia™, which can be used to measure several different wine analytes with different test strips. Anton Paar has also introduced a combination refractometer/densitometer system that is capable of measuring both ABV and residual sugar.
Winemaking texts consider residual sugar levels at or below 2–3 g/L (0.2–0.3%) as dry and safe from refermentation issues. If the wine has successfully fermented to dryness, it is unnecessary to measure the residual sugar again.
Malic Acid
Wines that are expected to complete malolactic fermentation (MLF) should be measured for malic acid when it is assumed the fermentation is complete. MLF is trickier than alcoholic fermentation, so measuring malic acid is a great help in understanding if the lactic acid bacteria are having trouble in starting the fermentation, or if they have slowed down or stuck. MLF completion is important to know because SO2 cannot be added to the wine until MLF is complete, but the sooner SO2 is added to wine, the better in terms of inhibiting microbial spoilage.
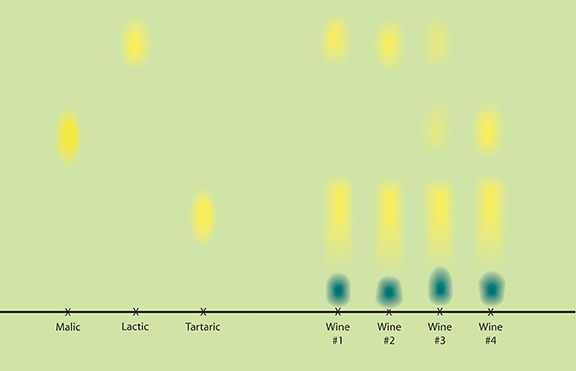
Winemakers usually analyze for malic acid when bubbles are no longer apparent in the wine or if several weeks have passed since inoculation with malic acid bacteria. The most basic and inexpensive method for checking MLF is paper chromatography, with kits offered by several suppliers. The only problem with paper chromatography is that it can be difficult to determine when the malic acid in the wine has been completely converted to lactic acid, as the blot on the paper can be difficult to see. Some commercial winemakers use paper chromatography as a first step, then confirm MLF completion using a more quantitative technique. Vinmetrica sells a quantitative method for malic acid analysis. There is also the Sentia™ test strip system mentioned earlier, as well as enzyme kits that require a spectrophotometer for measurement.
Winemaking texts consider malic acid levels of 0.01-0.2 g/L (10 to 200 mg/L or ppm) as completed MLF. I use a value of 0.3 g/L as the cutoff for MLF as I also use 3 g/L RS as the cutoff for primary fermentation and having both numbers with a “3” makes it easier for me to remember. Like residual sugar, once analysis shows that MLF is completed there is no need to test for it again.
Free SO2
Free SO2 is important during wine aging because SO2 acts as both an antioxidant, keeping wine aromas fresh, and as an anti-microbial preventing the growth of spoilage microbes. There have been many articles written about SO2 in wine, so we’ll keep the following explanation brief. When potassium metabisulfite is added to wine, some of the SO2 will become bound to chemicals in the wine, but some will remain free, and the free form is what has antioxidant and antimicrobial activity. Since it is impossible to know how much added SO2 will be bound and how much will remain free, and since free SO2 in wine is consumed over time due to oxidation reactions, testing for SO2 becomes important to maintain antimicrobial and antioxidant activity during aging.
The proper amount of free SO2 to maintain microbial stability depends on the wine pH and on winemaker preference. As an example, for a high-acid Riesling with a pH around 3.1, an adequate free SO2 level might be around 12–15 ppm, whereas for a Cabernet Franc at pH 3.6, an adequate level might be 35–45 ppm. Most winemakers will not add more than 50–60 ppm of free SO2 to wines with high pH, even though that means the wine isn’t fully protected from microbial spoilage, because they believe it starts to impact aroma and taste at high levels.
Protein Stability
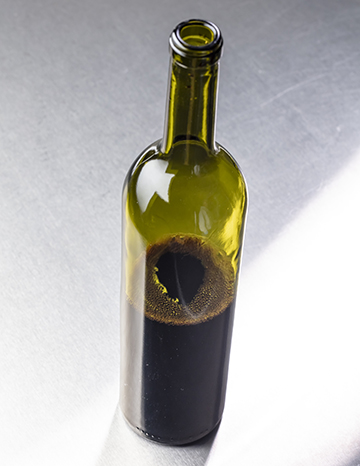
Protein stability testing determines whether the wine is likely to develop a protein haze during storage after bottling. Protein haze is harmless but does detract from the visual appeal of wine and at high levels a cloudy sediment can settle in the bottle. Warm storage can cause some proteins in wine to aggregate and form a haze, but I’ve also seen hazes develop over time in wines stored at low temperatures. Because high temperatures can force protein precipitation, heat stability is another term used to describe protein haze-forming potential.
The classic test for protein stability is the heat test, where a wine sample is submerged in a 176 °F (80 °C) water bath for two hours. An oven could also be used for the test with glass test tubes and an oven-safe test tube rack. Starting with a brilliantly clear sample is important because the test is trying to assess the haze formed by protein aggregation after heating. After being exposed to high temperature, the sample is allowed to cool to room temperature then checked for haze, either by eye or with a turbidity meter. Commercial producers consider turbidity values at 1 nephelometric turbidity unit (NTU) or below to be acceptable for protein stability. However, a turbidity reading of 1 NTU is almost imperceptible to the naked eye so many winemakers are satisfied with levels of 2–3 NTU. Haze is evident to the naked eye at an NTU of around 5, and by 10 NTU haze is easy to see in a wine glass held at arm’s length. If you aren’t familiar with NTU, you can find online images of NTU standards to get an idea of what different NTU values mean in terms of visible haze.
The most common method for limiting haze-forming potential is fining with bentonite. Winemakers often combine a bentonite fining trial with the heat test so that a minimum amount of bentonite addition may be determined, since high bentonite addition rates can strip aromas. Thus, protein stability testing is often performed after fermentation and before bentonite is added to the wine. One important consideration for the heat test is that in order to judge haze after heating, the wine sample needs to be carefully filtered so that it is crystal clear prior to heating. Thus, small, lab-scale filtration equipment is needed to reliably perform this test.
Potassium Bitartrate Stability Testing (Cold Stability)
Potassium bitartrate (KHT) stability, like protein stability, is another aesthetic wine defect that can be seen in the bottle but has no impact on wine aroma or taste. Therefore, like protein stability, the importance of KHT precipitation is dependent on winemaker preference. Potassium bitartrate is a salt, so precipitation appears as crystalline wafers (like some brands of sea salt) or shards, often with some entrained color molecules from the wine.

Potassium and bitartrate ions exist in grape juice. Their ability to form KHT crystals depends partly on their solubility. KHT is less soluble in solutions with ethanol, which is why crystals are formed during and after fermentation. KHT is also less soluble at low temperatures, thus KHT stability is also known as cold stability. The idea behind the cold stabilization process is to force the crystals to form in the wine cellar so that there are not enough of the potassium ions left to form more crystals in the bottle.
Because KHT crystals are more likely to form at low temperatures, cooling a sample to a low temperature for a specific amount of time is a common method of checking stability. Low temperature stability testing basically falls into two methods, storing samples at refrigerator temperature (40 °F/4 °C), or freezing samples in a freezer. The potential problem with the refrigerator test is that KHT crystal formation may occur very slowly, so it’s unclear if a three-to-four-day refrigerator test is aggressive enough to ensure stability. Conversely, completely freezing the sample is aggressive, and nearly all wines, even bitartrate stable wines, will develop potassium bitartrate crystals when frozen. If allowed to thaw to room temperature, the crystals formed in a frozen sample may dissolve back into the wine and disappear after several hours at room temperature, so judging the stability of a frozen sample is tricky. I recently spoke with a winemaker who tried to solve this issue by freezing the sample first, then allowing the sample to thaw in a refrigerator. If the thawed sample still had visible crystal formation at refrigerator temperature, then the winemaker considered the sample unstable. If the sample had no crystals after being thawed to refrigerator temperature, then the sample was considered stable.
KHT stability testing is often performed during wine aging in cellar, either before or after cold stabilizing the wine. KHT stability testing may also be performed after KHT precipitation inhibitors have been added to the wine — e.g., carboxymethyl cellulose (CMC) or potassium polyaspartate (KPA).
Bottling Analyses
You may wing it at this stage and simply add SO2 based on what you hope will be needed to keep the bottled wine fresh prior to popping the cork, but if you’ve been adding SO2 to the wine during storage it is helpful to know if there is any remaining prior to bottling to make a more appropriate addition before the wine is packaged. Knowing the pH, TA, and ABV may also be helpful, but is not a requirement for home wine production. If you haven’t made big changes to the wine during storage (e.g., malolactic fermentation or large blending additions) the wine parameters calculated earlier should be relatively unchanged at bottling, except for free SO2.
Sensory Analysis
In the end, wine is all about taste. The most important tool in your wine lab is going to be your own sensory skills. Can you split the wine into its sensory components, identifying the main aromatics and determining the balance of sweetness, acidity, and astringency that make up the main taste components in wine? You can develop your own palate by tasting common wine styles with known attributes and comparing your sensory impressions with the consensus view of a particular wine style. Tasting with other people can also help by comparing and contrasting your own sensory impressions with those of the group. I find forcing myself to write tasting notes for the wines I’m tasting is an excellent way to practice deconstructing wine into its component pieces.
Conclusions
The chart below visually summarizes common lab tests in the white wine production process. If the wine is not going through MLF, then malic acid testing is unnecessary. Considering red wine production differences, because most red wines contain moderate levels of tannin (which binds with and precipitates proteins from wine) and usually age in cellar for longer periods prior to bottling (which promotes KHT stability), red wines are usually not tested or treated for protein and KHT stability.