Making Wine From Juice
You may be curious about a way of making wine intermediate between using fresh fruit and making kit wines. Increasingly popular, the hobby of making wine from grape juice comes in two formats: sterile and frozen. In turning these juices into fine wine, the winemaker uses steps and processes from both the fresh and concentrate sides of the practice.
Frozen juice for winemaking got its start in the 1970s when Peter Brehm (now of Brehm Vineyards) owned a homebrew shop in Berkeley, California. At that time, North American wine grapes (Vitis vinifera) were mainly grown in California and a few other places, and that severely limited the options for home winemakers.
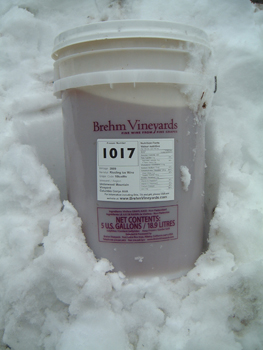
Since the days of Prohibition, some fresh grapes had made their way to eastern US and Canadian cities by rail, though they often didn’t arrive in the best of shape. Brehm wondered if it might be possible to put red grapes through a stemmer/crusher, and freeze the unfermented must. White grapes could be both crushed and pressed, with only the juice frozen. Once put in buckets, frozen and stored, grapes or juice could be shipped almost anywhere anybody wanted to make wine, and winemaking could be carried out year-round. Because the fruit and pulp is included in the red must bucket containing about 5.0 gallons (19 L), the eventual wine yield will be about 3.0 gallons (12 L). Since the whites are all juice, a volume close to the original 5.0 gallons (19 L) will result.
Freezing, cold storage and shipping would add to the cost of the grapes, but expanding both the places and seasons in which premium wines could be made was an exciting possibility. One of us (Byron) was working for Peter back then, and participated in some of the earliest experiments, which proved a great success. In some years since then, he’s continued to buy a few buckets of frozen juice and make wine in years when the pace of the grape harvest was so intense that there just wasn’t time for those of us in the trade to make as much wine from fresh grapes as we wanted during the season.

Sterile juice for winemaking comes to market in a completely different format. Many of these products originate in Italy or France, although much of the packaging and distribution takes place in Canada. White grapes are crushed, pressed and sulfited to preserve low color levels. Red grapes are crushed and destemmed, with skin tannins and color compounds extracted using steam or vacuum processes such as “flash détente.” The combination of grape juice and skin extracts (or juice alone, for whites) is then flash sterilized and aseptically packaged. These 6.0-gallon (23-L) bags of juice are just as stable on the shelf as those tiny boxes of apple juice so popular in children’s lunch boxes these days. Since the product is sterile, the bag of juice can be packed in a plastic bucket and distributed through normal (non-refrigerated) shipping channels. These sterile juices are generally packed as 6.0-gallon (23-L) containers.
Byron’s most recent experience with frozen juice has been this year when he bought two 5.0-gallon (19-L) pails of Sauvignon Blanc juice in late October. Conveniently picked up at Brehm’s Richmond, California frozen-food warehouse, it has finished fermenting and will be bottled some time next spring. Bob’s most recent sterile-juice wine dates back a couple of years and was a delightful Montepulciano from Mosto Italiano. He wanted to make this unusual Italian red variety and could not find any fresh grapes for it, despite living in Sonoma County. The sterile juice offered a very viable alternative. Whether you choose frozen juice/must or sterile shelf-stable juice, these products offer a rewarding way to experience your hobby and add to your cellar on your own schedule.
How to Make Great Wine From Juice
Step 1. Getting Started
Frozen. Most of the differences between making wine from frozen juice and fresh grapes have to do with the processing the juice undergoes before fermentation starts. There is a thawing period first which will last approximately three days. It is important to get the juice thawed as quickly as is reasonably possible, so keep it, during this period, at ambient (room or cellar) temperature. If you live in a place where the frozen juice will have to be shipped, it is convenient that this process starts while the juice is on its way! It is not a good idea to thaw the juice or must under refrigeration, as that will make thawing take longer, and increases the chances of encouraging mold development. Heat could also be damaging, so don’t rush things. If your frozen juice/must is from Brehm, you can find detailed test results on the company website. Take advantage of the thawing period to plan your winemaking and make fermentation choices.
Sterile. Open the bucket and unpack all the supplies on top of the bag of juice. Read the instructions through once or twice.
Step 2. Sulfiting (or Not)
Frozen. Do not add any sulfites to thawed white juice before fermentation beyond that which may have been added by the producer prior to freezing. This is to avoid fixing any brownish pigment the juice may have. Frozen red must, on the other hand, presents a possible alternative to the white. If the thawing period — equivalent to a cold soak for fresh fruit — goes on for more than two or three days, a small sulfite addition may help prevent mold or lactic bacterial spoilage. Using Campden tablets or a potassium metabisulfite solution, add 30 to 50 parts per million (ppm or mg/L) of sulfur dioxide to the must and stir well. Let stand a few more hours before initiating fermentation.

Sterile. Do no initial sulfite addition. Small sulfite additions may have been made at the time of crushing, as determined by the producer. Since the juice is promptly flash sterilized after that, it is ready to ferment without further additions upon opening.
As with wine from any source, further sulfiting should be withheld until all fermentations are complete. For all wines from then on, of course, sulfite should be added at each racking, and again at bottling.
Step 3. Initiating Fermentation
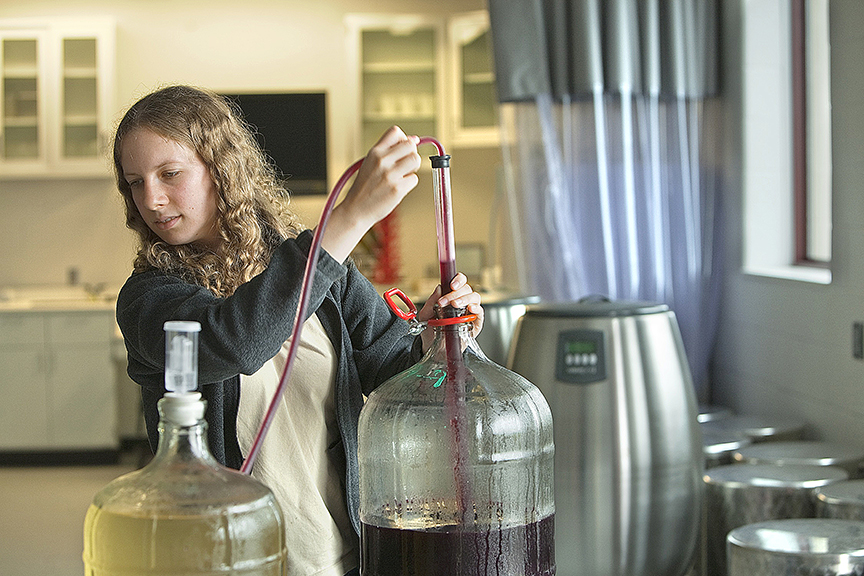
Frozen. As soon as frozen white grape juice has thawed, and warmed close to 70 °F (21 °C), it should be moved into your fermenter. For most white wines, we recommend fermenting in glass carboys, the new PET plastic carboys or stainless steel under either silicone “breather bungs,” or the more traditional fermentation locks. A few wines (notably Chardonnay) may be fermented in oak. Regular polyethylene containers, or the common blue water bottles, should never be used for white wine production. Because there will be some foaming during fermentation, you will need fermentation capacity in excess of the 5.0 gallons (19 L) of juice you received. With a low-foaming yeast, a single 6.5-gallon (25 L) carboy may suffice, but a safer option is to split your batch between two 5.0-gallon (19 L) carboys.
Pour your thawed juice into the fermenter through a funnel, remembering that oxygen at this stage helps with yeast growth. The juice may also, of course, be siphoned. In any case, stir the juice thoroughly before moving it, making sure solids on the bottom of the bucket are mixed back into the juice. Because the freezing process causes partial separation of the juice components, the thick material at the bottom of the bucket is rich in tartaric acid and sugars — components you want in your wine.
At this stage, with the juice well-mixed, you would ordinarily collect a sample for analysis of sugar, acid, pH and possibly nutrient levels. For Brehm juices, some of these tests will already have been run on tank samples before freezing. You can skip these steps by using Brehm’s figures, or take a sample and run your own tests anyway, or send a sample to a wine testing laboratory. Make any corrections you wish according to your usual winemaking program, and move on to adding your yeast.
While the Brehm website and many winemaking experts recommend yeast rehydration, we have had good success at The Beverage People with direct addition of dried yeast. Over the years, we have seen many home winemakers rehydrate yeast at the specified temperature of 104 °F (40 °C) or so, then too quickly pitch the slurry into cold must without adjusting it. That shocks the yeast and may retard or prevent the fermentation. So, if you rehydrate your yeast, do it exactly as specified and avoid a temperature difference greater than 18 °F (10° C). Or take the easy way, and just pour the yeast into the carboy and come back a couple of hours later to swirl it in.
For thawed red must, you will need to use an open fermenter — usually a food-grade plastic bucket. The bucket in which the must was shipped may not have enough room for the eventual rising of the “cap” and you may be better off with a 6.5-gallon (25-L) or 10-gallon (38-L) food-grade polyethylene bucket. A loosely fitted lid is helpful for keeping out contamination while still letting carbon dioxide from fermentation escape. Rehydrate or direct pitch your yeast and stir it into the must.
Sterile. Because the color and tannin extraction has already been carried out on the fruit, red juice may be treated just like white juice. For either, use a funnel to pour the juice from the bag into one large (6.5-gallon/25-L) carboy or split it into two smaller ones. Although the bucket used in shipping may be used, we think you will be happier with the more careful exclusion of air that can be achieved in a carboy. The lack of grape solids in these clarified juices can make it difficult for yeast to start and propagate. To address this issue, the juice is usually packed with a pouch of bentonite (enological clay) to provide some solids for the yeast. Mix the bentonite with water as directed in the juice instructions and pour it into the fermenter. Pitch your yeast, fit airlocks and expect fermentation.
Step 4. Nutrients and Monitoring
Frozen. For white wines, cool fermentation can help preserve delicate, fruity aromas that will enhance the finished wine. After the yeast has been pitched, and the fermentation shows some signs of being ready to begin, reduce the temperature to your desired level. The actual fermentation temperature will depend on how much control you have, and perhaps on the strain of yeast you’re using. A fermentation temperature of 70° F (21° C) or above will cause a white wine’s aromatic qualities to suffer.
At the same time, various yeast strains have minimum temperatures below which they will not ferment effectively. For this year’s Sauvignon Blanc, for example, Byron used Prise de Mousse, which will work down to 50 °F (10 °C). It’s a good all-purpose yeast which has long been his favorite for this grape varietal. Many commercial wineries ferment white wines in jacketed tanks, with relatively exact temperature control. At home, you may not even have refrigeration. Even then, though, in most situations, you can cool things down, if necessary, by placing your fermenter in a water bath. This can be as simple as setting the container in a large bucket of cold water.
Frozen juices are not adjusted for nutrient content prior to packaging. Consequently, a good yeast nutrient should always be used to help insure a healthy fermentation, and also to minimize the chances of developing off aromas like hydrogen sulfide (H2S). Use a complete nutrient, something like Fermaid K, or Superfood. Diammonium phosphate (DAP) is a source of nitrogen, but lacks the vitamins and trace minerals to be considered a complete nutrient. Add yeast nutrient about 1⁄3 of the way through fermentation at the rate of one gram per gallon. If using a yeast strain with a high nutritional need, or if you have any question about the health of your fermentation, a second addition at about the 2⁄3 mark is suggested.
For thawed red must, fermentation at ordinary room temperature of 70 °F (21 °C) or above will work well. Many winemakers seek to reach a must temperature of 85 °F (30 °C) at least once during fermentation to improve color extraction from grape skins. Since freezing and thawing causes a partial maceration of the skin cells and release of their contents, this temperature rise is probably less significant for these fermentations and ordinary room temperature will do just fine. After the first day or so, carbon dioxide will inflate the skins and produce a “cap” on top of the juice. Using a sanitized stainless steel potato masher or other suitable tool, punch down (sink and stir) this cap two or three times a day. Add a good complete nutrient at 1 g/gallon (1 g/3.8 L) at about 1⁄3 of fermentation. If your testing or the producer’s data suggests a low-nutrient must, or if you use a yeast strain with high nutrient need, make a second addition at 2⁄3 of fermentation. For each nutrient addition, sprinkle the powder on the cap and punch it in.
Sterile. The same temperature considerations apply to sterile-juice white wine fermentations as described earlier for frozen juice. Try to keep the fermenter below 70° F (21° C) and above the minimum temperature recommended for the yeast strain. Since all the color you can get is already in the red juice as delivered, no temperature rise is needed. Anything near room temperature will suffice.
Nutrient, sugar, or acid adjustments are not generally needed for the sterile juices. That is because unlike frozen juice or must, the sterile juice is not a raw agricultural material. Rather, it has been processed, homogenized and adjusted prior to sterilization and packaging. It should be uniform enough that no additional nutrients will be required for clean fermentation.
Step 5. Finishing the Wine
Frozen. Putting a wine through malolactic fermentation (MLF) reduces the youthful fruitiness, replacing it with an older, “winier,” character. That makes MLF very desirable for most red wines, but not for most whites. There are, of course, exceptions to the rule, such as Gamays and some Zinfandels among the reds, and Chardonnays and some Sauvignon Blancs among whites, but we prefer the crispness of Sauvignon Blanc without MLF, and leave it out of most other whites as well.
If you decide you want a malolactic fermentation, the best time to inoculate is at the end of your sugar fermentation. Make sure that you select a bacterial strain that is suitable for your wine. Either high alcohol content or low pH can give the bacteria trouble. Check out the tolerances for the strain you’re planning to use.
If you are initiating MLF, press your red wine or rack your white wine into a nearly full carboy. Add the bacteria as directed by its producer and maintain the recommended temperature. Do not add sulfite until the malolactic fermentation is complete. After that, sulfite at each racking and again at bottling. Fine or filter the wine according to your preferences.
Sterile. These juices usually come with fining agents and include instructions for degassing the wine at the end of primary fermentation. They do not generally include a malolactic bacteria inoculant or any description of that fermentation in the instructions. For the most part, these decisions are aimed at producing an early-drinking wine. You may follow the instructions exactly and achieve a very nice wine. On the other hand, you can treat your newly fermented wine like any other wine and develop it as you wish. The same considerations as described earlier for frozen juice apply to MLF for wine from sterile juice. If you do choose to initiate it, hold off sulfiting until it is complete. Fine or not, as you choose (or as the package directs). Having never used the process before, Bob carried out the stirring/degassing procedure on his Montepulciano as the instructions directed. It worked, but early drinking was not his major goal, and he has now gone back to using several rackings for all his wines.
Making wine from juice can spread out the winemaking season, allow home winemakers access to grape varieties not available to them nearby. It can also serve as a bridge between kits and making wine from fresh grapes. If you have not made a wine from frozen or sterile juice yet, give it a try. We think you will like it.