Wonderful Wine in a Box
A few months ago, I decided to open a bottle from my collection of homemade wines. I selected an Austrian red and pulled the cork. The wine was healthy, almost vibrant. It had a soft but distinct Pinot Noir fragrance with a pleasant hint of herbs. The feel was velvety, with a fine thread of acidity.
It was a wonderful wine. And I’d made it from a kit.
Everyone knows that good grapes make world-class wine. But in recent years, the quality of kit wines has improved enough to impress even the most dedicated fresh-fruit purist.
Besides offering first-time winemakers an easy introduction to the hobby, kits offer experts a chance to makes wines from grape-growing regions around the world. Some varietals simply aren’t grown in North America, or are grown in quantities too small to supply the home winemaking market.
Would a vineyard have enough surplus Nebbiolo or Viognier to ship you a few cases? Doubtful. But high-quality varietal wine kits are available nationwide at any time of the year, sourced from vineyards in California, Australia, France, Italy, Portugal, Spain and other classic wine areas. You can also find kits for interesting styles, like late-harvest wines, ice wines, noble-rot wines, even sparkling wines, ports and sherries.
The wine-kit boom began in the 1970s, when high-quality kits first emerged from California. Although state law called for a minimum 51 percent content for a wine kit of any stated variety, many manufacturers were providing 70 percent. This means that in a Chardonnay kit, for example, 70 percent of the juice or concentrate is made from pure Chardonnay grapes. The higher the Chardonnay content, the more varietal character in the finished wine.
Because these California kits were considered better than their European counterparts, it forced a wholesale effort to increase quality worldwide. The boom in asceptic packaging, fueled by cutting-edge Canadian companies, also fueled the drive for quality and freshness. In the 1970s in Canada, for example, less than one percent of all wine consumed came from homewinemakers. Now, the figure is closer to 10 or 12 percent. This increase is attributable not only to popular “you-vint” outlets but also to the widespread availability of good kits.
Making a kit wine is less labor-intensive than making wine from fresh grapes. So it’s also much cheaper. You’ll gain savings in time and money because you won’t need to buy (or rent) the destemmers, crushes and presses that are required when starting with fresh grapes. To make a five-gallon batch of wine, you need almost 90 pounds of grapes, which could cost as little as $100 or as much as $400. Kits that yield the same volume run anywhere from $40 to $100.
Another bonus: Many kits are all-inclusive. They contain all the additives you’ll need, pre-measured. The recipes are easy to follow and the results are fairly predictable. Recipe options allow you to add more concentrate for a bigger, grander wine. You can also choose to add less water than a concentrate recipe suggests. These two tactics would be akin to “letting the vats bleed” at a larger winery.
If you’re a novice winemaker, a kit is a great way to start learning the art. If you’re an expert fresh-grape winemaker, you should supplement your portfolio with a kit wine. It’ll broaden your skills and deepen your knowledge.
BUYING THE KIT
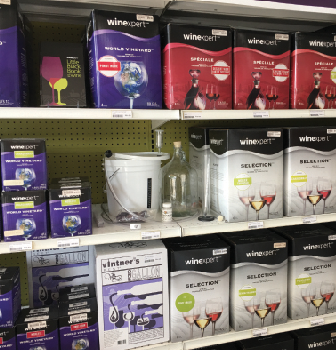
The first step is to select a kit. There are four main types of wine kits: pure juice; fully concentrated grape juice; partially concentrated grape juice; and kits that combine juice and concentrate.
The approach to making wine from these kits is similar. The only difference is that the pure-juice kit requires no additional water. These kits are the most expensive due to juice’s comparitive purity, costly transport (it weighs more than concentrate) and storage requirements (it should be refrigerated).
Grape concentrates are simply grape juices that have had their water removed through a high-tech vacuum process. Some kits are fully concentrated; you have to add water, and sometimes additional sugar, before making the wine. Partially concentrated kits require less water added back. Because of that, they produce a wine that’s truer to character.
Kit prices should directly correlate to the purity of the product. Pure juice kits will be more expensive than concentrate or mixed kits.
Before committing to a purchase, ask the merchant if he has any finished wines to sample. Retailers that conduct any in-house fermenting — like the “brew-on-premise” or “you-vint” shops that are common in Canada — will almost always have samples on-hand. You may find that a less-expensive kit generates results comparable to a higher-priced one; some wine styles, especially delicate whites, have proven this to be true.
Before you leave the store, check the kit ingredients against the recipe. You may have purchased a concentrate or fresh-juice container that doesn’t come complete with additives. If that’s the case, you’ll have to buy these ingredients and measure the quantities yourself.
These additives might include grape tannin, nutrients, wine acids and yeast. Some concentrate kits also require additional sugar; some do not. The recipe will spell it out.
GETTING READY
Before you begin, be sure you have everything you need. When you’re starting a batch, the timing of tasks is critical. So it’s good policy to have all equipment pre-sanitized and rinsed. Some sulfite solutions are not meant to be rinsed away. In these cases, another quick treatment just before using that piece of equipment is fine.
A note on sanitization: You should gently but thoroughly scrub and rinse any equipment, especially a container that will house your wine for any extended periods, immediately after you’ve emptied it. Getting into this practice will make the (already) tedious task of sanitizing equipment much easier. Resist the temptation to delay the cleaning job until you need the equipment; the chances of contaminating a subsequent batch are greater this way.
If you are a first-time winemaker, follow the recipe exactly. Later, you may wish to change, add or eliminate ingredients and steps.
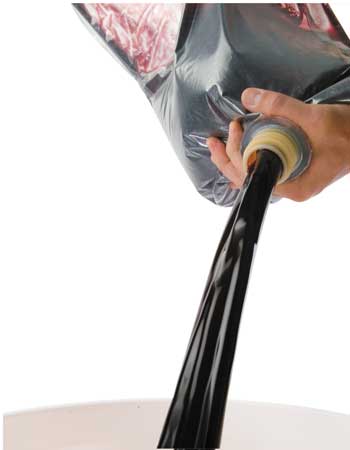
A typical recipe for a Pinot Noir concentrate, generating five gallons (19 liters) of wine, will contain one bladder pack of concentrate (100 ounces minimum), one or two yeast packets, and three or four numbered, pre-measured and pre-mixed additive packets.
A similar recipe for a Clairette Blanc (a Rhône-style white) has an option to create a late-harvest wine by holding back some concentrate (5 percent) and introducing it later.
I will walk us through these two kits and we’ll make three wines. I’m assuming you won’t make all three wines at once, so I haven’t worked out any logistics concerning the sharing of fermenters or carboys.
STARTING THE BATCH
Open the can, pail or bladder pack in your kit. Taste the contents — they should be clean, sweet and fruity. Pour the contents into a primary fermenter and add the first group of ingredients (water, sugar if required, any wine acids, grape tannins and nutrients). The recipe will be very specific. For the late-harvest style wine, hold back 150 ml of the concentrate, to be re-introduced later. Put it in a baby-food jar, seal it and stick it in the freezer. Once you have mixed the concentrate and the first group of ingredients, stir them well with your spoon and sprinkle on the yeast.
You may now want to take a specific gravity reading, even though the recipe will usually provide it. It’s just nice to know that you’re on track, especially this early in. The Pinot should have an SG reading of about 1.090, the Clairette should be at about 1.080 and the late-harvest white will measure just below the Clairette (by holding back some of the concentrate, you’ve made the must less dense and this will be reflected in the reading).
If you’ve never used a hydrometer, you’ll find it a snap. You simply place it in the newly-made must and, once it has stopped bobbing, read the value on the “specific gravity” scale where the surface of the liquid crosses the hydrometer. Specific gravity is the density of the liquid compared to water, which has an SG of 1.000. One of the other scales on the device is useful in measuring your finished wine’s alcohol content.
MONITORING THE BATCH
Fermentation temperatures can be a personal choice. Usually, red wines are kept at 80° F to start off, to foster colonization (or multiplication) of yeast cells before they begin the fermentation process. Once fermentation has begun, it is fairly common to bring that fermenting red into an environment between 70° F and 80° F. Whites should begin between 72° F and 75° F and then be brought down to 68° F to finish fermenting. Note: Don’t go below 68° F or you’ll risk a “stuck” fermentation.
I like to bring my wines (especially whites) into a cooler environment as soon as I see the signs of an active fermentation. This practice can impart to the wine subtleties of flavor that a warmer fermentation may not provide.
During the first 24 hours after inoculating a batch, yeast cells merely multiply until they reach a mass that can take on the job of fermentation. So it may be two to three days before you see any real action. If you keep your batch at the right temperature, the yeasts will start working fairly quickly and provide a rigorous fermentation. Above 90° F, yeast becomes too weak to work and the alcohols produced will have off-flavors.
While you can’t really add too much yeast, you can add too little. This could contribute to a stuck ferment and could lead to bacterial spoilage. Any spoilage should give off unpleasant odors, so check for it. Use the recommended yeast and monitor the temperature of your fermentation room.
Once the must has reached 1.020 specific gravity, you are ready to rack the wine. This should take about 7 days or, if you opted for a slightly cooler fermenting temperature, 10 or more.
RACKING THE WINE
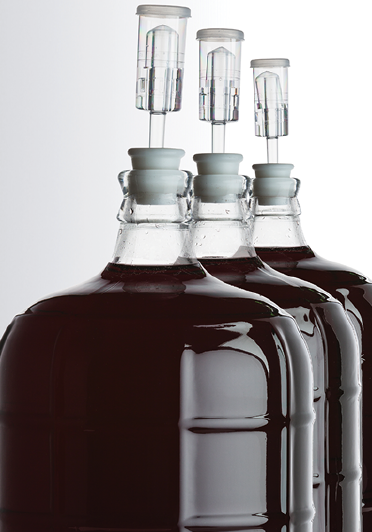
This is a process that is completed three to four times during the creation of your wine. The main purpose is to draw the wine off the sediment into a fresh, sanitized carboy. The last two rackings will also introduce sulfite powder to fight any oxidation brought on by your wine’s contact with air.
First, be sure the specific gravity has dropped to (or below) a reading of 1.020. (A reading of 1.020 or less tells you that most of the fermentation is complete and that the must can be racked to a clean carboy to finish.) Place the primary fermenter on a table top. Place the stiff plastic end of the siphon tube at the bottom of the fermenter. Hovering your head just over the clean carboy, suck two to three times sharply on the other end of the siphon hose and quickly place that end into the neck of the carboy. You could buy a special pump gizmo to do this, but this method is works just as well.
Top up the carboy with boiled, cooled water, if necessary, to just below the bottom of the rubber bung stopper. You may want to taste the must again; it’s a good way to determine that everything is healthy and you may start getting an indication of the flavors in the finished wine. Attach the airlock. Leave the wine for ten days.
After ten days, repeat the previous step. Now leave the wine for three to four weeks. After this time, you will do the last racking, but before doing so, sanitize a carboy, rinse and add 3/8 teaspoon of sulfite powder. Dip your wine-thief into the carboy, extract a few ounces and mix this with the sulfite powder in a cup. Pour the mixture into the receiving carboy, using your funnel, then siphon in the remaining wine.
The Pinot Noir will also have 60 grams (about two ounces) of oak chips put into the receiving carboy. When using oak chips, soak them in sulfite solution for a few minutes. This eliminates the heavy foaming action that usually takes place when these chips are added. When using oak, adhere to the recipe — you can easily over-oak your wine and there’s no turning back. The idea is to smell and taste, and once you do smell and taste the oak, that should be enough. (At room temperature, a slight oak flavor might appear within 12 hours. A few days should certainly be enough!) Rack the wine immediately. For this racking, place the hose at the very bottom of the receiving carboy, in order to introduce as little oxygen as possible.
The Pinot will undergo a fourth racking to draw the wine away from any fine sediment. Now leave all the wines for four to six weeks.
After all the racking, try to find a cool, dark area to allow your wines to recover. Resist using dark garbage bags as carboy covers to keep light out. Some bags are chemically treated to repel hungry vermin and these chemical toxins could find their way into your wine!
FINING AND FILTERING
Fining is a process that aids in the settling of particulate matter in a finished wine. Not all wine kits call for fining, as they are formulated to proffer predictable results. Plus, some ingredients already help to clarify the wine — tannins and oak chips, mainly.
White wines in particular can benefit from fining. It preserves their clarity by settling excess proteins that could form haze. Some red wines might also need fining to reduce their harsher tannins. The most common fining agent used in wine kits is bentonite; it is very easy to use and doesn’t add any flavor or aroma to the wine.
Not all wines benefit from fining. It’s always advisable to do tiny “benchtop” trials. Take small samples of your wine, subject them to varying amounts of fining agents and make a judgment call.
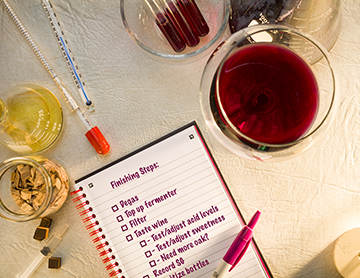
If you choose, you can also filter the wine. A carefully reared wine that has been properly fined may not need any filtering, and you may decide to skip this step. I’d advise filtering anyway, as the wine stands a better chance of seeing a healthy bottle-maturation period. The wine will also be ready to drink sooner and will be stabler than an unfiltered wine. Many shops will loan or rent filtration units; ask the retailer how to use it.
BOTTLING THE BATCH
Bottling is very easy. There is a broad selection of bottle styles and sizes to match the wine of your choice. For each five-gallon batch, you will need the equivalent of 26 standard 26-ounce (750 ml) bottles. Take your carboy of wine and place it on your work table. You should splurge the few extra dollars for a bottling attachment that is placed at the pliant end of the siphon hose. This hard plastic device has a simple flow valve that simplifies filling each bottle to the level desired (optimally, one-half inch below the bottom of the cork, once placed in the bottle).
Sanitize your bottles. Place the hard plastic end of the siphon tube into the carboy (not the end with the flow valve attachment — the other end). Have a few bottles ready and a helper, if possible. Siphon the wine as you did before, during the racking tasks. After you fill the bottles, cork them. Confer with your merchant regarding the need to ‘prep’ your corks (some corks require a cursory soaking in hot water to make them easier to place in the bottle). Your retailer can doubtless lend you a good floor corker, the easiest type to use.
For our wines, I would suggest Burgundy-style bottles for both dry wines and colorless, Alsace-style fluted bottles in the 375 ml size for the late-harvest wine. After corking, allow all bottles to stand upright for one week to ten days to allow the corks a chance to completely stopper the bottles. Lay down all bottles after this time. Re-cork any bottles you may find leaking (leakers usually show themselves after a day or two). I have also found it useful to bottle, from each batch, one “index” bottle: a colorless bottle from which I monitor the progress of the wine.
AGING THE WINE
There is no perfect time to drink your wines. Wines go through a continuous metamorphosis during maturation and demonstrate several personalities during their lives.
“Bottle shock” is a recognized part of a wine’s bottle maturation. This is the indeterminate period of time immediately following bottling when a wine doesn’t seem to show many (or any) of its charms. The act of bottling has stunned the wine; indeed, many wine writers and other aficionados refer to this as a “dumb phase.” This is the main reason why many recipes usually recommend that you first sample the bottled wine no sooner than one month after bottling.
To draw generalizations about aging would be wasteful. I’ve tasted kit wines that barely made it out alive after two years (poor quality fruit, I would guess) and I’ve tasted others that were finally showing the true character of the wine after four years. Some of these wines lived for a decade or longer.
For general health, check your “index” bottle frequently. Look for signs of crystallization. Potassium bitartrate crystals look like little beads or flakes of ice or glass, depending on how fine is the crystal formation. These crystals are odorless, flavorless and impart nothing harmful to the wine. These crystals are easier to detect in the white wines but they do also form in the reds, along with other sedimentary deposits such as tannins, polyphenols and pigmentation molecules.
Dry wines seem to manifest these crystals faster than sweet wines. Also look for sedimentation in your red wines. Generally, the appearance of a more compact and isolated deposit bodes better than an ashy, scattered deposit (this type of sediment may suggest a renewed fermentation in the bottled wine).
AND ENJOY IT!
This isn’t a suggestion as much as it is a prediction. Treat your wines well and they will delight you. Ask around and trade around to broaden your knowledge and to gain exposure to other people’s wines and their winemaking methods. Take a few notes when you are enjoying your bottles, as you might do with commercial wines. It’ll give you a feel for the personality and promise of the wines you’ve chosen. With any luck, a few years from now you’ll open a bottle that tastes as terrific as my Austrian red. And it came from a kit!
