Bottling Basics

You’ve spent months, if not years, preparing your wine for this day. Selecting fruit, juice, or maybe the perfect kit, monitoring it closely, treating it with care, and helping it along the way to creating great wine. After all of this time, you reach the point when it’s time to bottle. Exciting! But possibly also nerve-racking if you don’t have a lot of experience bottling wine. When done right, bottling is pretty simple, but that doesn’t mean things can’t take a left turn quickly if you don’t know what you’re doing.
Let’s explore the steps that should be taken immediately before and during bottling as well as the various equipment and supply options available to home winemakers.
The Process
Step 1: Prepare Your Wine
The last thing we want to do is bottle wine that we don’t like or that can have problems in the bottle. Here are the primary things I suggest you focus on to be sure your wine is “bottle-ready.”

Make sure your wine is done fermenting
As someone who works with home winemakers daily, I can tell you that once the spring hits we get a ton of calls asking, “Why is my wine sweet?” or “Why are my wine bottles popping corks?” If your wine is unexpectedly sweet, it is most likely that it didn’t finish fermenting and you have to do a restart to finish it. If your wines are popping corks, the most common reasons are you bottled it before it finished alcoholic fermentation or prior to finishing malolactic fermentation. Malolactic fermentation (MLF) is a slow and quiet secondary fermentation — you can’t always see it happening, so it is easy to assume that it completed. Also, malo is sensitive to temperature, so it can “go to sleep” and “wake up” on you when it’s in the bottle.
The best ways to avoid bottling a wine that is not done fermenting is to test using a hydrometer. Make sure it is below 0 °Brix. If you want to stop your wine at a certain point in fermentation to keep it sweet, use metabisulfite to halt the fermentation, add potassium sorbate to help keep it from fermenting again, and if it is a red wine, add lysozyme to kill any possibility of malolactic fermentation. To ensure MLF is complete, test your wine either using a chromatography kit or by sending it out to a company that can test it.
Something to note about malo: Even if you didn’t put your wine through MLF intentionally, that doesn’t mean it didn’t happen, especially if you haven’t sulfited your wines. MLF can happen naturally without inoculation. Always test your wines before bottling. A simple test can save you time, money, and frustration in the long run!
Check your sulfites
The easiest way to ensure your wine will age well in the bottle is to add sulfites. I’m all for “natural wine,” but what rarely gets mentioned is that sulfites are natural! An addition of sulfites is not a bad thing, especially if you want your wine to last a year or more. Wine always wants to turn to vinegar, no matter what. It is a living, breathing thing.
Remember that.
Filter your wine
Filtering is something you especially want to do if you backsweeten a wine. This is because wines with additional sugar can start to referment in the bottle. If you backsweeten your wine, make sure to run your wine through a sterile (0.45 micron) filter and add potassium sorbate at a rate of 1 gram per gallon (1 g per 4 L). Filtering also helps with the clarity of the wine, and any possible issues going on in the wine that you can’t see. While filtering dry wines is a decision left to personal preference, I advocate for filtering in most instances.

There are many styles and protocols for filtering wines. Here are the abbreviated industry standards for
most wines:
• Red wines – Run through a coarse and medium filter.
• White and rosé wines – Run through a coarse, medium, fine, and sterile filter.
• Sweet wines – Run through a coarse, medium, fine, and sterile filter.
Heat and cold stability
A wine is considered heat-stable if it doesn’t throw a haze when heated. Cold stability is achieved when it doesn’t throw a precipitate of potassium bitartrate crystals when chilled.
Heat stabilizing can be done through the addition of bentonite clay and racking the wine off of it. It may not be necessary if you are happy with the appearance of your wine and you know the wine will be stored in a cool environment. Cold stabilization can be done by chilling your wine close to freezing temperature for days and racking, or using carboxymethylcellulose, or CMC, which inhibits crystallization in white wines.
A lot of home winemakers don’t worry about heat and cold stability because they can better control how their bottles are treated (vs. commercial wineries who lose that control once it leaves the winery). But if you plan to ship your wine to competition or share bottles with friends, heat and cold stabilization should
be considered.
Taste it
Does your wine have any off aromas or tastes? Are you happy with the wine? Is there anything you want to blend in there? Don’t rush this process. In my opinion, this can be the most fun part of the home winemaking hobby, especially if you are doing blending trials! There is no sense in bottling a wine that is good if you can make it great.
Step 2: Choose Your Bottles
Ultimately, the shape of your bottle will not have an impact on the wine inside of it. Yet, it does impact the presentation and if the saying “we taste with our eyes” is true (it is), then bottle selection should not go overlooked. There are traditions of which varieties get packaged in which bottles that you can take a cue from, but you can also pick bottles based on shape, color, size, and price. Let’s quickly review some of the styles of bottles that are available to home winemakers.
The classic connoisseur: Bordeaux vs. Burgundy
Ah, the age-old debate, Bordeaux or Burgundy? Both are classics in their own right, each with its distinctive shape and charm. Bordeaux bottles boast straight sides and high shoulders, exuding an air of sophistication and elegance. They’re the most common bottle of choice, including for varieties like Cabernet Sauvignon, Sauvignon Blanc, and many other red and white varietals and blends.
Burgundy bottles feature gently sloping shoulders and a wider body, evoking a sense of romance and refinement. These bottles are common choices for Pinot Noir, Syrah, and Chardonnay.
The modern maven: Sleek & chic
For those with an eye for contemporary flair, sleek and chic bottles are the way to go. Think slender profiles, elongated necks, and minimalist designs that scream sophistication. Hock and Alsace bottles epitomize modern elegance, with their clean lines and understated charm. Perfect for the sleek, modern interior or the avant-garde wine label, these bottles are sure to turn heads and elevate your wine-drinking experience to new heights of style. These bottles are common for Rieslings and many sweet and dessert wine styles.
The eccentric enthusiast: Specialty & unique shapes
For the adventurous souls and free spirits among us, specialty and unique-shaped bottles offer endless opportunities for self-expression and creativity. From whimsical designs to unconventional shapes that defy tradition, these bottles are sure to add a dash of personality and flair to your wine collection. Whether you’re showcasing a limited-edition vintage or simply want to stand out from the crowd, these bottles are bound to spark conversation and intrigue.
Step 3: Sanitize, Sanitize, Sanitize!
Sanitation is key to maintaining the integrity of your wine. Sanitize all equipment that will come into contact with the wine, including bottles, siphoning equipment, and anything else you’ll be using.
First things first, gather your empty wine bottles. If you are re-using bottles, ensure they are clean and free from any lingering odors. You can clean them by washing them with hot water and using a product such as B-Brite. For the sanitizing solution, there are a number of sanitizers available to home winemakers, or you can use a solution of potassium metabisulfite dissolved in warm water. Add 2 Tbsp. to a 5-gallon (19-L) bucket of water. Rinse the bottles and all other equipment thoroughly and let them air dry.
Cleaning vs. sanitizing
There is a big difference between cleaning and sanitizing. A simple way of looking at it is that cleaning gets everything you can see, and sanitizing gets everything you can’t see. If your equipment has visible soil or stains then you need to clean it first, then sanitize.
If you have brand new bottles, you are already off to a good start and can skip the cleaning step, though you may still want to give the bottles a quick rinse with sanitizer to remove any dust or airborne contaminants. If instead you are reusing bottles, you will need to clean and sanitize them carefully.
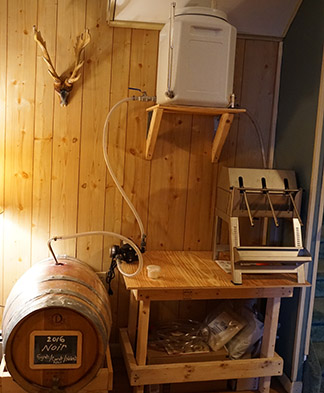
Step 4: Filling the Bottles
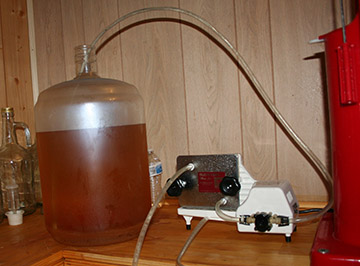
Now, it’s time to transfer your wine from its aging vessel into the bottles. For this you’ll need siphoning equipment, for which there are various options depending on your desired price point and batch size. No matter the choice, be cautious not to disturb any sediment that may have settled at the bottom.
Once your siphoning equipment is in place, carefully fill each bottle. Leave some headspace at the top of the bottle to allow for expansion and contraction as the wine matures. A good fill is a half-inch (1.2 cm) from the top of the wine to the bottom of the cork.
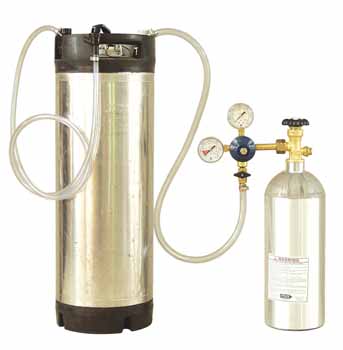
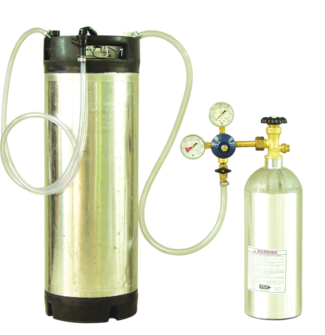
To fill bottles, you have the option of relying on gravity with gravity filling systems, or for more cost and convenience, there are automatic fillers.
Gravity Bottle Fillers
Keeping it simple and down-to-earth, the gravity bottle filler lets the wine flow naturally. Elevate your wine as high as you can in relation to your bottler. Some people can put their tanks on pallets and hoist them up high using a forklift in order to have the bottler at a reasonable height. Others will keep their carboys on a high table or shelf and bottle wine at ground level.
You want your wine suspended higher than the bottler to utilize gravity to get the bottler to flow. You need to prime most of these bottlers, which can be done with an auto-siphon. Some people will even suck on the hose to get the flow going (if you do this, be sure to dip the end in high-proof alcohol or sanitizer afterwards).
Let’s now run through a few popular gravity filling systems.
Bottle wand fillers
The most basic system relying on gravity, and that which comes with many beginner home winemaking kits, is a simple bottling wand. Tubing runs from a bottling bucket to the bottling wand, which has a spring at the bottom. When the spring is pushed down inside of the bottle it unlocks the seal, allowing the wine to flow. When lifted, the spring seals shut and stops the flow of wine. No priming is necessary. You can attach this to a siphoning hose and use gravity to bring the wine down the hose into the tube, and into the bottle.
Cost: $4–7
Pros: These are inexpensive and straightforward.
Cons: Time-consuming, and sometimes messy.
Pro Tip: To get all of your bottles to be the same fill level with this style of filler, take a 10-mL syringe and figure out how much to add to bring your wine to the ideal level in the neck of the bottle. It is usually about 3–5 mL, depending on how you are
working your wand.
Multiple spout gravity fillers
These usually have 3–5 spouts. Options come both in stainless steel and painted. I always suggest going for the stainless steel as it should last forever as long as you clean it and store it correctly.
Cost: $150–800, depending on finish and spout amount.
Pros: Can do multiple bottles at once, which saves a lot of time.
Cons: If your bottler loses the flow of gravity, it can be tough to get moving again. Sometimes the gaskets (if not cleaned well) can get sticky and cause issues.
Buon Vino automatic filler
This filler is part auto but mostly gravity. It is my favorite for winemakers making 6–25 gallons (23–95 L). It needs gravity to get flowing, but it will automatically shut off when the bottle is full and shoot any extra wine into the overflow tube.
Cost: $30–35
Pros: Reasonably priced and easy to use.
Cons: Time-consuming when compared to a multi-bottle filler.
Automatic Bottle Fillers
Automatic bottle fillers are a winemaker’s dream, whether you are making 6 gallons (23 L) or 200+ gallons (750+ L), these fillers can make for an efficient and fun bottling day. No need worrying about elevating your wine above bottles, these systems let pumps do the work of moving wine for you.
Enolmatic filler
This vacuum pump bottler is my personal favorite. The ease of operating this pump is worth the price. If you hit 60+ gallons (225+ L) and you are looking to upgrade, I highly recommend going to this pump. Even if you are making 6 gallons (23 L) you won’t feel as if it’s overkill.
Cost: $350–500
Pros: Ease of use, can attach filtration to it and filter into the bottle, less air contact during bottling, easy to clean, automatic shut off, adjustable fill speed.
Cons: Higher priced, only fills one bottle at a time.
Enolmaster filler
This is the next step up from the Enolmatic. It has 4–6 spouts and works in the same capacity. It is considered commercial-grade and can fill up to 600 bottles per hour. Definitely overkill for smaller-batch winemakers, but a good investment for home winemaking clubs, home growers, or serious winemakers making the legal limit of wine each year.
Cost: $3,000–3,750
Pros: Ease of use, speed, can attach filtration to it and filter into the bottle, less air contact during bottling, easy to clean, automatic shut off, adjustable fill speed.
Cons: High price, not conducive to small batch sizes.
So those are some of the options, and there are many more so do your research. Before we get to corks, here is another pro tip: If you have leftover wine and not enough bottles, think about filling up a few jugs. Filling up some ½-gallon (2-L) jugs is always a good idea. They fit great in the fridge and are the perfect size for parties.
Step 5: Corking with Care
With your bottles filled, it’s time to seal the deal — literally! Just like bottlers, there are a bunch of options for corkers. With any, you’ll want to make sure the cork (or other type of closure, which we’ll get to soon) is inserted evenly and fully into the neck of the bottle to create a tight seal.
Corkers
Manual corker: The workout buddy
Imagine a mini gym for your bottles. The manual corker is like your trusty workout buddy, requiring a bit of muscle power to get those corks snugly into place. Perfect for those who like their biceps as robust as their Cabernet! To use, take your cork, place it in the “capper” part of the device. Put your bottle underneath the “capper” and line up your cork to your bottle. Then use the winged handles on either side to clamp down and push your cork into the bottle.
Cost: $20–30+
Pros: Inexpensive.
Cons: Time-consuming, labor-intensive and requiring a lot of muscle, and sometimes bottles can slip and break during the corking process.
Floor corker: The tower of stability
A floor corker is a rock-solid tower of stability in the bottling kingdom. It’s big, it’s sturdy, and it’s got a lever for days. Ideal for those who want to feel like they’re dominating the wine world, one bottle at a time. Drop your cork in the top slot, make sure it is vertical, place your bottle under the head of the corker. Line your bottle up with the cork head. Then bring the lever down to squish the cork into the bottle. These come in a few different designs and price points.
Cost: $65–250+
Pros: Easy to use, reasonably priced.
Cons: Time-consuming, can do a number on your back when corking many cases at a time.
Semi-automatic corker: The team player
Get ready to tag in because the semi-automatic corker is here! It’s a team effort – you place the cork; it does the rest. Perfect for those who want a little automation without losing that personal touch. The corker uses compressed air to push corks into bottles, with a plastic door to activate the corking process.
Cost: $1,900–2,850+
Pros: Easy to use, quick.
Cons: Commercial-grade costs.
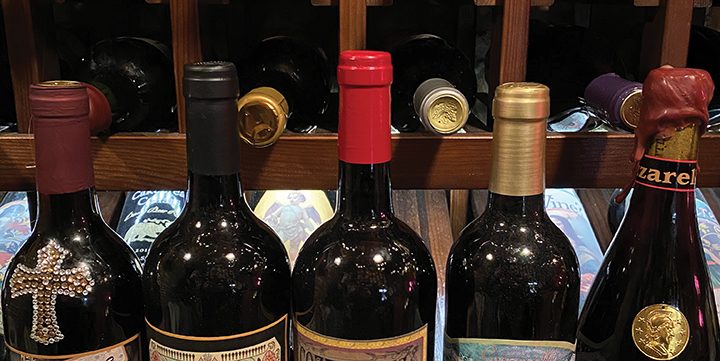
Corks & Closures
As with corkers, there are also numerous options when it comes to closures. Why should you care about the style of cork you use? Some corks are only “good” for up to a certain period in the bottle. The more expensive ones usually are considered longest-lasting, but each style has its own benefit.
The classic cork
Ah, the classic cork — the epitome of tradition and elegance. Made from the bark of the cork oak tree, these corks are the go-to choice for most high-end wine producers. With their tight seal and impressive durability, they ensure that each bottle of wine ages gracefully, preserving its flavor and character for years to come.
There are many different styles of corks to choose from. The most popular are natural grade, agglomerated, micro-granule, and colmated. Each grade differs in the amount of cork used, as well as the binding agent used. Agglomerated is around 80% natural cork with a binding agent of something like vegetable polyols. Of course, this depends on the producer of the corks, as different producers have degrees of their products. Natural corks are usually 100% cork, meaning they are also a 100% renewable resource.
Natural corks are the gold standard, but they do pose some potential drawbacks. Beyond the higher price, they also have an inherent risk because they are a natural product. If not properly handled or of lower quality, mold can be found in the cork, which can lead to a condition known as TCA (2,4,6-trichloroanisole), more commonly referred to as cork taint. Though not very common, it is something to keep in mind when buying natural cork products.
The synthetic surprise
Synthetic corks offer a modern twist on a timeless tradition. Made from materials like plastic or composite, these corks provide a reliable seal without the risk of cork taint. Plus, they’re environmentally friendly, making them a favorite among eco-conscious wine enthusiasts.
Corking with a twist
NovaTwist is a plastic screw cap-like look without the heavy investment of a bottling line. No special tools are required — push it on and screw it clockwise until tight, and it is that simple. The NovaTwist capsules can be opened and closed repeatedly with ease and comfort while remaining airtight. The cost is often less than natural corks, though greater than synthetic options.
Step 6: Capsules and Labels
After corking, it’s time to make that bottle stand out by adding a capsule and wine label.
The allure of capsules
Wine bottle capsules, also known as foils or hoods, are metallic or plastic coverings that encase the top of the bottle and the cork. Originally designed to protect the cork from moisture and pests, capsules have evolved into a symbol of quality and craftsmanship. While they pose little, if any, function beyond aesthetics, they do dress a bottle up!
Capsules come in a variety of colors, designs, and materials, allowing winemakers to customize their bottles and make a lasting impression on those receiving a bottle.
Home winemakers most commonly use PVC, or polyvinyl chloride, capsules as other options (such as tin, aluminum, and polylam) foil needs to be applied via spin action, which commercial wineries often have at the bottling line, though single-bottle spinners are available for home winemakers. With the PVC capsules, just slip them onto the neck of the bottle and use either a hair dryer, boiling water, or a heat sealer tool to seal over the cork.
The art of wax seals
If you’re looking for a truly special touch, consider wax seals — the ultimate in wine bottle embellishment. Traditionally used to secure the cork and prevent tampering, wax seals have become synonymous with luxury and exclusivity. Crafted in a variety of colors and textures, from glossy to matte, wax seals create a tactile experience that elevates the act of opening a bottle to a sensory delight.
However, wax seals aren’t just about aesthetics; they also serve a practical purpose. By creating a tight seal around the neck of the bottle, wax helps to preserve the wine’s freshness and flavor, ensuring that each sip is as delightful as the first. Plus, there’s something undeniably satisfying about breaking through the wax barrier to access the precious liquid within, like breaking the seal on a secret treasure. A messy process that requires a lot of patience but can pay off by displaying the romance
of wine.
Put a label on it
The final piece of the puzzle after bottling is creating a label (if you want to). Get creative with your labels, designing them to reflect the personality of your wine. Include essential details like the vintage year, grape varietals, and any special notes about the wine’s flavor profile.
Step 7: Let Them Rest
Once your bottles are corked and labeled, it’s time to let them rest. Let them stand upright for 3–5 days to allow the corks to swell and seal into the neck of the bottle. Then lay down the bottles on their side and store them in a cool, dark place where they can age gracefully and develop their full potential.
And there you have it — the art of bottling wine, demystified! As you continue your winemaking journey, remember that each bottle tells a story of your dedication, passion, and creativity. So, raise a glass to your newfound skills and savor the fruits of your labor.