Finishing Wine from Kits
As I sat down to write this article, I thought it might be apropos to relax with a small glass of wine. Time passed as I was collecting my thoughts and savoring my wine and before I knew it I had finished my wine. Then it dawned on me — I had finished my wine! I wonder how many other winemakers would think it was that easy, so I started asking other amateur winemakers how they finished their wine. Much to my dismay, the answers ranged from “I corked it” to “I took the extra step to filter my wine before I bottled it.” When I asked further questions about their process like if it was balanced, how it tasted, and how it would score if they entered into a competition, I was met with blank stares. You know, that “deer in the headlights” look when someone is stunned. That is why I thought it was important to share the helpful steps I take to turn an average kit wine into a medal-winning kit wine that you can truly feel proud to share.
To begin, please allow me to share a little bit about how I got to this point in my winemaking. Back in the day when my folks were attempting to create wine from their backyard Concord grapes, they knew absolutely nothing about yeast, the chemistry, or the process that modern day winemakers utilize. They simply stemmed the grapes, pressed them to separate out the seeds, and then transferred the juice to a crock where it fermented on its own under a drying towel. After a while, if it hadn’t turned into vinegar, it was put into bottles. I’ll never forget my Dad pushing the corks into the bottles by pressing them against the kitchen counter. After a month or two, we would start drinking it.
It was quite a few years before I would even contemplate the thought of making my own wine. That stuff my dad made was nasty.
When my folks moved into a retirement community, I inherited their grapevines. The jelly that I made from those grapes was award-winning, but I was told that they would never make a good wine.

One year I had a bumper crop of grapes and prepared the juice for making jelly. Well, long story short, life got in the way, there was no time to make the jelly, so I froze the juice. The next spring I decided to thaw it out to make the jelly and again, life got in the way, and it started to ferment on its own. I certainly didn’t want to head down the slippery slope to create the same wine that I had remembered, so I started doing some in-depth research on making wine. Through some initial trial and error periods, I was able to create a drinkable wine. I did have some help and encouragement from a local wine and beer making store where I purchased supplies that made that possible. That is where I discovered that a kit had been developed to make your own wine. A kit wine!
I thought, are you kidding me? I am going through all of this work to make wine and they have a kit? They told me that if I could follow directions, I could be a successful winemaker. Well, I was all in! One of my first wine kits turned out so well I entered it into the state fair and won a ribbon. Over the years, I became more knowledgeable about the winemaking process and science behind making wine, and continued to have success in competitions.
So, let me share with you what I have learned — hundreds of kit wines later — to take a kit wine to the next level. I will not take you through all of the steps that the kit has in its instructions, but instead the focus of this article will be on the steps near the end of the process and after the instructions that come with the kit come to an end that you can take to improve on them.
A Few Tips Before We Get to Finishing
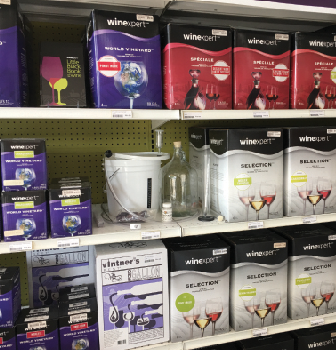
The first thing to know is that you get what you pay for. All things equal, the higher the quality of the kit, the better the resulting wine will be. Choosing a kit that has the highest concentration of juice (4.2–4.8 gallons/16–18 L) will yield a fuller-bodied finished product like a big bold red or a great white wine true to its origins, whereas a lower concentration of juice (2.6–3.2 gallons/10–12 L) will result in a much lighter-bodied wine. Other kits may be lower yet (1.3–2 gallons/5–7.5 L) and will yield a light-bodied, lower alcohol, easy-drinking wine.
The second thing to know is to make sure you use good quality water. All of the other ingredients are supplied in the kit, so don’t ruin it with water you wouldn’t drink. I use good spring water or filtered water. I have found that distilled water doesn’t work well as it lacks necessary chemicals that the yeast needs, and some well water may have too much iron and affect the taste of the finished wine, but it depends on the well. Taste the water before you use it, or go a step further and get a water report on the water you’ll be using.

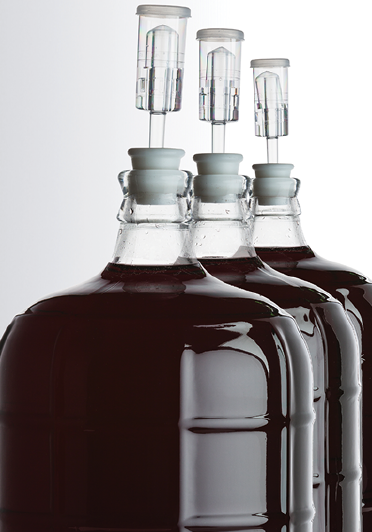
Now you can begin. Some important things to remember during the fermentation process are to avoid subjecting the wine to extreme temperature variations or vibrations. That means that fermenting on the top of your washer or dryer would be a bad idea. And remember that oxygen is your enemy and poor sanitation habits will ruin the wine before you get to the final steps. Always use siphoning tools to keep oxygen contact to a minimum, and sanitize everything before and after use.
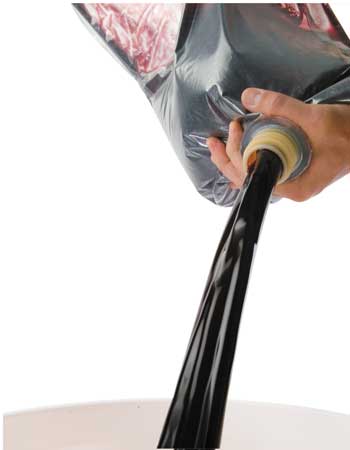
When you get to the final steps, you will encounter the degassing step. All too often beginning winemakers will run into a few challenges when it comes to degassing the wine properly. I successfully use the three-prong wand with a corded drill to remove CO2. You’ll want to be careful with this step so that you don’t wind up with a volcano and waste a lot of good wine. You also don’t want to churn it so fast that you create a lot of foam. Use some finesse with reversing the drill. Use a back and forth technique like a washing machine a few seconds each way. The wand creates nucleation points that help release the CO2. Let it rest for a bit to calm down and allow the CO2 to escape, then go back to it. When small bubbles are no longer visible riding up the sides of the carboy, you have completed the degassing process.
Remember to keep the wine topped up at this point as there is no longer CO2 to help protect it. I will keep a couple of bottles of different varietals on hand just for this purpose. Use only a good wine that is similar in taste and structure for topping up so that you don’t ruin the integrity of the finished product. Taste it first before you add it. That’s a nice perk in the process, don’t you think? If it takes a couple of bottles, that’s okay because you will get them back when you bottle this batch. Another option to keep carboys topped up is adding sanitized glass marbles to the carboy — this will take up space and have no impact on the final result.
Once the wine has cleared by using the additives included in the kit, you can enhance the clarity by mechanical means if you so choose. I filter all of my wines, as do most of the commercial winemakers that I know. The wine will be discombobulated for a time, but it will recover. Typically, there are three types of filter pads:
• #1 Coarse is used for wine that is still a little cloudy and may have some residual sediment.
• #2 Polishing is used if the wine has cleared nicely or if you have already run it through a #1 pad and you prefer a more brilliant wine.
• #3 Sterile is used to remove very small particles and most of the yeast.
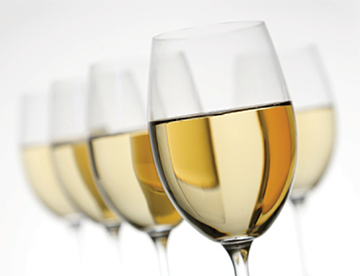
I filter my red wines once using a #1 Coarse pad, and my white and dessert wines a second time through a #2 Polishing pad. When the wine is judged, the clarity of the wine will be the first thing that they will focus on. Remember that your wine will be agitated after filtering, so be patient and wait at least 2–4 days for it to calm down before you bottle your wine.
If you plan to cellar the wine longer than six months, it is a must (excuse the pun) to add 1⁄4 teaspoon of potassium metabisulfite (K-Meta) to a 6-gallon (23-L) batch after filtering and before the bottling process. When you mix K-Meta with water and add it to your wine, it will create an antioxidant that will bond with the oxygen in your wine to protect color and aroma, and create an environment where microbes are inhibited. It will also create SO2 gas that you don’t want to breathe in, and you should not taste the wine immediately after adding it. Give it some time to bond and then it will be stable and safe to drink.
A stable wine will last longer once it is bottled and the flavor and color will be better preserved. This is another big plus for the judging process.
I just want to point out here that there are two types of sulfite stabilizing agents available and they both do an adequate job — sodium metabisulfite and potassium metabisulfite. You can find Campden tablets from winemaking retailers that come in both forms. Potassium is found naturally in grapes, so I only use potassium metabisulfite in winemaking. The byproduct of the chemical reaction leaves potassium behind versus sodium. I prefer not to add any sodium to wine, and for what it’s worth commercial winemakers are not permitted to add sodium salts to their wines.
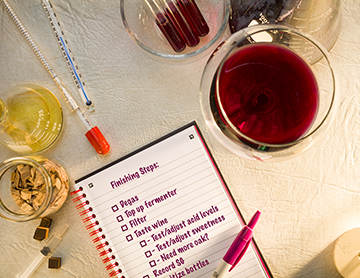
Finishing the Wine
Once you have completed the fermentation and clearing process, you have a carboy with wine that is ready for its final finishing. This is where the instructions say to bottle it, but this is where the magic happens.
Before you do anything else, taste it! You don’t know how many times that I have been asked to evaluate a wine and have asked if the winemaker bothered to taste the finished product. They assume that if they have followed the instructions, that it will be an excellent wine. Could be, or it could use some help.
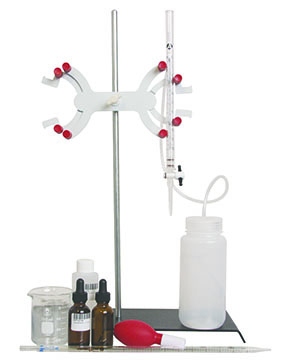
Take good notes and record the acid level with a pH meter and an acid testing kit that measures total acidity (TA). This information will be quite valuable if you are entering any competitions. A wine that lacks an appropriate TA level will taste flabby and out of balance. A well-balanced wine will last longer, taste a lot better, and it will score more points with the judges. For the most part, wine kits are balanced properly, but K-Meta can sometimes act as a buffering agent and possibly alter the acid. If any adjustments are needed, conduct bench trials first.
A bench trial is simply lining up three small glasses with a measured amount of wine in each of them. I use 4-oz (118-mL) juice glasses and measure out 2-oz. (59-mL) samples. Add a measured amount of acid (preferably tartaric acid) to the first test glass, twice the amount in the second glass, and three times the amount in the third glass (you can add a fourth control sample if the wine tastes good as is and just want to experiment, or to use as a reference while tasting the other samples). The endgame here is to find out where the best balance is. If the third sample still tastes out of balance, repeat the process of adding more acid in measured amounts. If the first test glass is too acidic, simply rerun the test with smaller amounts. The reason for using specific amounts is to make it easier to translate the addition from a 2-oz. (59-mL) sample to your 6-gallon (23-L) carboy. Yes, math will be needed here.
Next, record the final specific gravity (SG). If you are making a wine that has been back-sweetened with a reserve pack, this will be valuable information before entering a competition as well.
Also, many people have asked me about storing their wine in oak barrels or adding oak to their kits. Generally I have answered by saying that the kit manufacturers have spent a lot of time and energy to balance the oak in their products for the best stability. If you want to enhance your wine with oak, you surely could experiment with adding an oak spiral or more chips, but if you do choose a barrel, I would recommend a more neutral barrel as it is easy to over-oak 6 gallons (23 L) of wine in a barrel, and not so easy to correct an over-oaked wine.
At this point everything should be a go for bottling. Make sure the bottles are sanitized and the corks are clean and fresh. Use clean siphoning equipment so that you are not exposing the wine to oxygen or germs, and don’t boil or soak the corks. The corks that are available today are shipped in sanitary bags and should be ready to use. If you use K-Meta or boil to sanitize them, you will run the risk of the agglomerate corks falling apart and you will not get a good seal. When you try to pull them out later to consume the wine, they will come out in pieces. If you use synthetic corks, that isn’t an issue. I’ve used both kinds with success, but every once in a while you will still have a cork fail. That is normal.
Once in the bottle, the wine will need to age. Make sure your cellar area maintains a constant cool temperature, is not subjected to vibration or bright light, and has a good relative humidity. If the cellar is too warm, the wine will be damaged, light will adversely affect the color, and if it is too dry in your cellar area the cork will dry out and the wine will wick out through the cork and oxygen will enter the bottle.
Let your wine rest for at least a month to go through its bottle shock before you taste it. White kit wines will develop nicely in 1 to 6 months and the big bold red kit wines may take 6 months to a year to develop. Take notes when you open a wine bottle to see how it has aged and how the taste has changed. This information will come in handy if you make the same kit again another time. You will then know how long to age it before trying it. I have been told that kit wines are meant to be consumed within about 18 months because of the low levels of K-Meta that was added at bottling. Commercial wines may have many times the sulfite levels so that they will cellar longer without damage.
Final Adjustments if Entering Competitions
Now that you have successfully completed everything to this point and your wine has properly aged, you are ready to enter some competitions. The best way to make sure your wine is award worthy is to uncork a bottle and taste it. If you haven’t aged it properly, a young wine will sometimes taste herbaceous or grassy. It will also be sharp tasting because the acidity is still quite high, which is necessary for long-term storage, not for early consumption. In this case, let it rest for a while longer.
Choose a bottle from your cellar to test. Check the acid level with a quality acid testing kit and get out your trusty pH meter. Check your readings against the notes you took when you bottled. K-Meta will act as a buffer at times, so your finished wine may need to be adjusted. Simply follow the same process as before to adjust the acid level.
If your wine kit included a sweetener, you may want to test your SG again. This should match your notes. If it doesn’t, you could add a bit of sugar syrup or sweetener to tweak the taste. You can create sugar syrup by adding two cups of sugar to one cup of boiling water. Stir until it is completely clear, then wait for it to cool before adding it to your wine. Again, this is a point where bench trials are important to determine how much to add. K-Meta nor potassium metabisulphite will inhibit cultured yeasts, however, the sorbate in your kit — typically added at the stabilizing/degassing stage — should prevent any renewed fermentation.
Also, take a small sample and pour it into a glass. Put your hand over the glass and shake it vigorously. If you remove your hand and you hear a pop sound, you have dissolved CO2 in your wine and it will taste carbonated or have a metallic taste. Hopefully, you eliminated the CO2 during the degassing process, but if not, get out your Vacu Vin or Wine Saver and pump it up to see if a lot of bubbles occur. Release the gas and try it again. If no bubbles occur, you are good to go. At no time should you shake a bottle of wine to degas it. Believe me, this will destroy the wine — remember that you should never subject the wine to excess vibrations.
Perform a final taste test. If the wine still seems to be a little rough, you could try adding a little gum arabic to help smooth it out. This will also help preserve the color and prevent formation of potassium bitartrate crystals if it gets too cold. If your red wine seems to be a little thin-bodied, you could try adding liquid tannin, or a liquid oak extract. These products can really enhance the mouthfeel and character of your wine.
When you feel confident with your finished wine, top up the bottle with a second bottle of the same batch and recork it. If you have argon or inert gas, I would suggest a shot of it into the bottle before corking to purge the oxygen. I believe that you are now ready for your well-deserved blue ribbon or your gold medal.
Now that you are armed with this information, you are now able to be successful at “finishing” award-winning kit wines. See you in the winner’s circle.