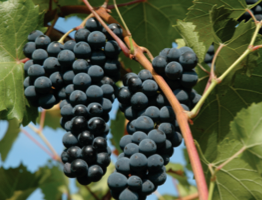
Get the Most From Harvest Numbers
Over many years of collaborating with home winemakers, I’ve witnessed a remarkable evolution in the quality of wines produced, alongside a deepening understanding in their craft. It’s gratifying to believe that our contributions at the magazine have played a role in this journey.
Yet, it’s essential to acknowledge that even the most seasoned winemakers occasionally benefit from revisiting the fundamental principles of winemaking. Whether it’s understanding the intricacies of wine chemistry or trusting one’s intuition honed by past experiences with grapes, there’s a delicate balance to strike.
I’ve noticed a tendency among home winemakers to meticulously scrutinize every winemaking parameter, sometimes to the point of overanalysis. There is another camp that possesses an innate talent for improvisation and when the numbers are run in the end they are perfect, and the wine matches. This is the balance between science and art that is winemaking.
I like to emphasize the scientific foundations while embracing the artistic flair as needed. It’s akin to a mantra I often shared in my extension classes at UC-Davis: When faced with a question about winemaking, the answer invariably begins with “it depends.” Indeed, the significance of analytical parameters varies throughout the winemaking process, underscoring the nuanced interplay between science and artistry.

As we head into the 2024 harvest, we start to use the numbers to assess whether we are in a typical or extraordinary year. This is akin to my “it depends” reply. With the current climate situation, it’s hard to assess typical anymore. In any given year, we’ve logged pruning date, bud break, flowering, veraison, spray frequency, and if all has gone well, we are now headed into the home stretch.
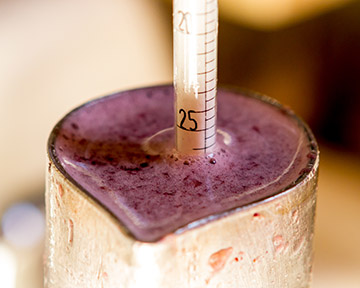
When exactly do we harvest? Grape sugar levels are what pops to mind first. In some respects that depends on the variety that you are working with. In California, harvest typically occurs when sugars range from 22–28 °Brix. White grapes typically on the lower side, reds at the other end of the spectrum. In other parts of North America and the world, sugars could be as low as 16–17 °Brix. When thinking about sugars, keep in mind the potential alcohol of the desired finished wine. A good range to work with for whites is 12–13%, with reds generally hovering around 13.5%, and some even higher depending on style. Determining potential alcohol takes a little math. The published conversion of sugar-to-alcohol ratio is 0.55. However, with today’s advanced yeast strains it is more like 0.60–0.65. Using a starting Brix of 23 and a 0.6 conversion rate as a starting point, our potential alcohol would be about 13.8% ABV. Not a bad wine, hopefully balanced, but what about if that wine that came in at 17 °Brix, or 28 °Brix, which would lead to 10.2% and 16.8% ABV, respectively? You might think of these as out of balance wines at either end of the spectrum, but residual sugar and overall acidity factor into how the wine is perceived. I only present this here as we all know there are wine styles that favor higher sugar, variable acidity, and a full range of alcohol.
For the purposes of this installment, we’ll focus on a typical winemaking scenario with respect to sugar. In a typical dry wine, that being one with less than perceptible residual sugar, for proper wine balance the potential alcohol should be decreased when needed by adding chlorine-free water to the must. This is called amelioration. Conversely, if Brix is low, sugar should be added. This process is called chaptalization. Winemaking math can sometimes be an enigma for the home winemaker, but there are several online calculators out there to help this process along. The best one I have found is from Wine Business Monthly (www.winebusiness.com/calculator/winemaking/section/4/). This particular link directs you to “Chaptalization and Water Dilution.” I use the chaptalization section for both water dilution and chaptalization, as I’ll explain.
The calculator is very simple to use — enter the total volume of the must and measured Brix. Using your desired conversion rate, 0.55–0.65, then enter the desired potential alcohol. The calculator calls for the Brix level of the “high-brix solution,” that is, the addition you will add to raise the total sugar level of the must or juice. The concentration of the solution is variable, but it is best to use higher concentration solutions to minimize the dilution of the grape flavor components you are trying to balance. I have found that making a 50–60% dextrose solution is possible, but it is done by heating the water enough to continue adding the sugar. In general, the higher the Brix in your solution, the better. I do not recommend adding sugar directly on top of the must and punching it in because your calculations are based on liquid additions. I have seen some very smart people attempt to convert the weight from liquid to dry sugar and overshoot their target alcohol considerably.
For chaptalization, it is best to use corn sugar, which is simply called dextrose (glucose). Some prefer to use beet sugar (sucrose), but sucrose is a dimer of glucose+fructose. Therefore, the yeast will need to convert fructose to glucose to ferment. Yeast strains vary in their ability to convert, most do, but there is a risk of stuck fermentation under certain fermentation conditions.1

As previously mentioned, in a situation of high Brix musts where you want to reduce the sugar, or ameliorate, you can use the same calculator. Simply place a “0” in the field that reads Brix Level of the High Brix Component. This will calculate the amount of water to use. Remember, in all winemaking decisions, whenever water is involved, make sure you use chlorine-free water. NOTE: There is a tab called “water dilution” that you may also use. However, it uses specific gravity. It works, it’s just that most of us are used to working with Brix units.
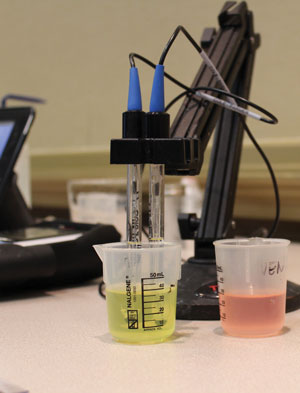
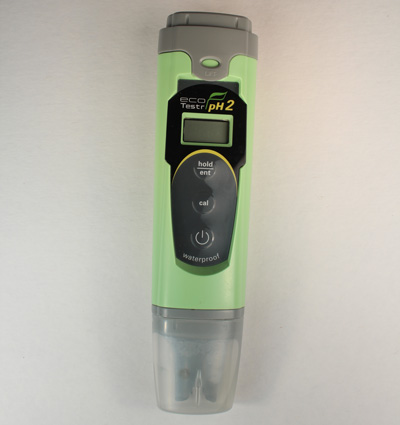
Wine balance with respect to alcohol is important, but you must also consider the other two most easily assessed parameters for the home or commercial winemaker. At harvest, our parameters should also address pH and titratable acidity (TA). Generally, low-sugar grapes are likely to have a high TA (>7 g/L) and low pH (<3.5), while high-sugar grapes are low in TA (<6 g/L) and high pH (>3.7). If you notice, there seems to be no overlap in the middle of these ranges. It does not mean that something between a TA of 6–7 g/L, and pH between 3.4–3.7 is perfect, it just means that there are “working ranges” in winemaking. This is a good working range, but what you taste is most important! pH is important in aging ability and sulfur dioxide effectiveness, and TA is a tactile expression of the weak acids in wine — essentially what you taste. Low-TA wines are generally a bit flat and lacking mouthfeel, while the high-TA wines make your mouth pucker. Again, what is right? It depends on the grape and the wine.
Cool climate or other short growing season grapes will have lower sugar, lower pH, and higher TA. From an acidity standpoint, a California winemaker should be jealous! Sugar is all you need to deal with at the point of harvest. To remediate, chaptalization is the simplest remedy. Use the calculator referenced. Once the alcoholic fermentation is complete, you can test your pH and titratable acidity to see if further deacidification is necessary. If you need to, inoculating for the malolactic fermentation is an option to consider.
Moving to warmer climates where the sugars will ex-ceed 23–24 °Brix, and potentially have lower acidity, we look at amelioration as a remedy for that alcohol balance and overall wine structure. Some pay attention to this, and some do not, but if you want an age-worthy wine, this is something to work with. When you have lower TA, you will want to add acid, usually tartaric, using the required water to dilute the high sugars. In general, 1.0 g/L addition of tartaric acid will increase the TA by about 1.0 g/L and will decrease the pH by about 0.1 pH units. The important part here is not to let pH drive the urge to add more acid to bring the pH down to around 3.5. In an average home winemaking scenario, where you do not have a comprehensive laboratory analysis (i.e., malic acid concentration), if the pH is greater than 3.7, it is generally safe to add 1–2 g/L, work the wine through fermentation and the MLF, and measure again. Based on the post-fermentation lab results, you would engage in setting up a bench-style acid trial and adjusting prior to aging.
The key point here is the comprehensive laboratory analysis. And with these results in hand, many must adjustment conditions can be better predicted. For instance, if you have a pH of 3.7, TA measured at 5.0 g/L, and a malic acid concentration of 1.5 g/L, and you plan to encourage the MLF, then the theoretical final TA will be about 4.25 g/L (TA – malic acid + lactic acid at half the original malic, so 5.0 – 1.5 + 0.75). In reality, factors such as yeast choice will impact the exact level, but this is a basic example based on the situation previously outlined. An addition of 1.5 g/L at the crusher should be sufficient with only minor adjustments post-MLF after conducting the bench acid trial. Keep in mind, every situation is different.
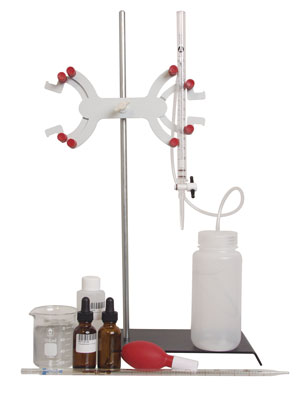
The aforementioned topics and examples underscore the importance of sending out a sample to a commercial wine laboratory for a comprehensive juice panel. The costs for these tests vary, but it is very useful. Most juice panels at a minimum should include Brix, pH, TA, malic acid, and an assessment of the nutritional status of the juice/must. All organisms need to eat. Grapes sometimes come with everything they need to conduct a successful fermentation, but other times they are deficient in nitrogen. With respect to nutrient status, this is a very difficult situation to make a general assessment. Early on, I was taught that early season grapes were higher in nutrient and grapes that hung longer on the vine were lower. That worked, but I never knew for sure. In the panel, it should contain a number called YAN, which stands for yeast assimilable nitrogen. Most musts need a total of about 250 mg of nitrogen per liter — often abbreviated as 250 mg N/L. Too little and this can lead to a stuck or sluggish fermentation and potential for hydrogen sulfide (the smell of rotten egg). Too much and the must can contain excess nutrients that can lead to feeding other spoilage compounds after the fermentation is complete. My UC-Davis colleagues used to refer to it as the yeast should have enough to get by, but not so much that any is left behind. I think of it like I treat my savings for retirement — I am going to die with just one dollar in my pocket! So, spend some of that money and get yourself a juice panel.
No, seriously, if you find yourself with a nitrogen-deficient must, there are many ways to supplement. Many of the major yeast producers have proprietary yeast nutrient additives in their portfolios. They all center around the same basic list of ingredients including a nitrogen source, either organic or inorganic, yeast hulls, and B vitamins as a micronutrient. I have used many brands and they all work very well. Each have variable levels of nitrogen in their formulation, so at a glance, adding the manufacturer’s recommended addition is best — typically 25 g/hL for an average must and up to 40–50 g/hL for a nutrient-deficient must (<100 mg N/L). One last factor to consider in your nutrient supplements is the yeast you choose to use. With today’s advanced yeast strains, they all come with varying degrees of nutrient requirements. The manufacturers often list this in their yeast literature as low, medium, and high. A must with high requirement would need the higher limit of their recommendation, and vice versa. This should also play into your conclusions of how much to add. I generally wait for the fermentation to start, and then after a day or so I’ll add one half of my calculated dose, and then at about 15 °Brix I’ll mix in the rest.
So in the end, can you do this without all the measuring equipment, calculations, and advanced winemaking products, and just go with your gut feeling? Probably, and many do, some with success and some without. But it is very helpful to know the numbers and base decisions on them as opposed to flying blind, so to speak. I like to think about all the parameters I work with, and I pretty much look at all of our lab results and use them as a guideline, but I also keep in mind that the grape did not read the book, we did!
It is important to keep up with evolving strategies and science from year to year to inform yourself of new trends. The best way to learn is to take careful notes and come back to them often. Recall what worked well in a previous vintage, or if you’ve made a mistake, then go back to those notes so it isn’t repeated. Keep up the continuing education and good luck this year. We all need it!
REFERENCES: