Handling Stuck Fermentations
Keep It Moving
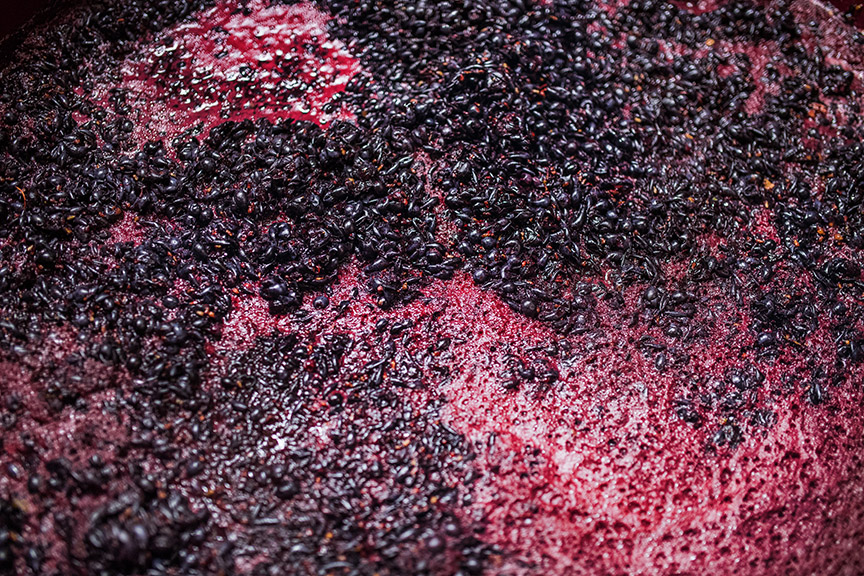
Isn’t it such a joy watching that little glass floatie sink further and further into your newly made masterpiece of a wine? I would check in earnest anticipation as the must bubbled away and the tick marks on the hydrometer counted down, approaching zero, as if it were my own little (and geeky) New Year’s Eve party. One of the worst feelings, however, was the odd time when the countdown came to a premature halt — the fermentation seemingly frozen in time.
Simply put, an alcoholic fermentation is considered to have stalled or become “stuck” when it stops before you want it to — or perhaps it doesn’t even begin. In more technical (yet still arbitrary) terms, you should raise your eyebrows in suspicion when the specific gravity measurements of the must have not declined for two days. How does this happen? Stuck fermentation is one potential result of the yeast being too stressed to multiply, thrive, and complete their task of consuming the sugars in the must. The difficulty is in determining the sources of that stress and how to address them.
Now, a sluggish or stuck fermentation isn’t by itself the be-all-end-all for the wine — it’s only an inconvenient pause. The real problem is that when the yeast are this far stressed, they can begin to produce undesirable components that smell rotten. Furthermore, if the desirable yeast aren’t multiplying and completing the main task, other microorganisms have ample opportunity to step in and ruin the party.
Hey, why so stressed?
Stressors predominantly include the hurdles of the rehydration phase and the incorporation into the bulk of the must. Whether you are working with yeast sachets or hydrating the natural grape flora during the crush, the yeast experience an abrupt change in their environment. They go from a relatively dormant state to one which contains plenty of water with a multitude of sugars and acids. More specifically, it’s a hyperosmotic solution and the yeast must adapt their cellular structure and engage various biological mechanisms to avoid being destroyed by it.

Temperature also plays a big role in yeast performance. It is well known that the cellular machinery (enzymes) will slow to near prohibitive levels when the must is cold, near 50 °F (10 °C) and below. On the other hand, the enzymes and cell walls can begin to denature when subjected to temperatures in excess of those recommended rehydration temperatures (typically 104 °F/40 °C). Less well known, but I think of equal importance, are the changes in temperature that the yeast could be subjected to. Cell membranes need to remain in enough of a gel-like state to allow critical machinery to operate, but also remain rigid enough to support their contents.
Yeast cells have an incredible “skill” whereby they can adapt the composition of their cell membranes to achieve this optimal fluidity and cellular function to sustain themselves, but this takes time and while they are busy adapting, they are going to be doing this at the expense of progressing through the fermentation that we are interested in. So it is important that we don’t temperature shock the yeast and only introduce them when the temperature of their immediate vicinity is very near the temperature of the must to which we are introducing them.
The real problem is that when the yeast are this far stressed, they can begin to produce undesirable components that smell rotten.
The phase in which the cells are concentrating their efforts toward multiplying their colony, known as lag phase, is also very oxygen- and nutrient-dependent. As the cells multiply, they need adequate oxygen to create the building blocks for their cell membranes and they require (most notably) nitrogen sources to support replication, metabolism, and the biosynthesis of the cellular machinery to enable these processes. A lack of oxygen or readily available (assimilable) nutrition can make life difficult for the yeast.
Another stressor is competition. There is a multitude of other microorganisms growing on the grape bunches or floating in the air. These include other yeasts, more complex fungi, and bacteria, and all of them are competing for resources. Even if you consider a sterile wine kit, one slip in your equipment cleaning regimen could put your carefully selected yeast strain at risk of failure as the contaminating microorganisms may already have a head start.

Prevention is key
I could end the article here by stating that the best way to handle a stuck fermentation is to prevent it from happening in the first place, but it would be cruel of me to stall out on you! Funny enough, arguably, the best method and tool you have to prevent a stuck fermentation is . . . your notebook. With your copious notetaking skill that I’m sure you use with every step in your craft, you can go a long way to ensuring that the environment is ideal for the yeast to perform and, if things go awry, you can check back on your notes to determine what could have gone wrong. Beyond a well-written set of notes there are a few considerations to help you prepare the yeast to get off on the right path.
Hydration, acclimation, and yeast starter
Very, very few of you would enjoy waking up in the morning by being tossed into a cold bath. Yeast cultures, especially those in the dehydrated form, need a nice, calm wake-up routine and they need to warm up both literally and functionally. Prior to the pitch, it is imperative that the temperature of the starter be in close proximity to the must. Those creating wines from previously refrigerated musts need to ensure that it warms to the temperature of the starter so as not to shock the yeast. If creating a white wine where the style benefits from a cooler fermentation temperature (e.g., 60–70 °F/16–21 °C) then the cooled must needs to be added to the starter in smaller increments, so take your time.
Enological measurements and adjustments
A quality wine kit should already be balanced for sugar, acidity, and nutrients from the get-go, so temperature differentials should be your only concern when you first pitch your yeast starter. Those crafting wine from grapes have nature’s glorious inconsistencies to make your life interesting. The starting point is specific gravity. If the density of the must is beyond 25 °Brix (greater than 15% potential alcohol) consider your stylistic objectives for the finished wine because the yeast will struggle to ferment to dryness. If you are planning for a dry wine then you will need to choose a yeast that will be tolerant to the potential alcohol level (preferably 1–2% better, for reassurance). Overall, musts that are this concentrated can benefit with some water addition or could be blended with musts containing relatively less sugar. For wine kits, holding back some of the water in the recipe, in the hopes of making a bolder wine, could be detrimental.
Those that are creating sweeter wines with late harvest or icewine musts need to anticipate a slower pace of fermentation that can take a couple weeks or more to complete. These musts regularly exceed 30 °Brix and the high sugar content is a big hurdle for the yeast.
Beyond the sugar measurements, it is wise to also check pH at this stage to make sure it isn’t at the extremities, for example, outside the typical pH of 3.2–3.7. If the pH is beyond this range, either adjust it appropriately or just be mindful that it may present a hurdle for the yeast. While high-acidity (low-pH) environments can protect against spoilage organisms, there does come a point where pH will inhibit yeast cell machinery. Low pH also increases the effectiveness of SO2, and free SO2 can sometimes become excessive and therefore detrimental to yeast performance. It does not take a lot of free SO2 (30–50 ppm) to be effective. A yeast assimilable nitrogen (YAN) test is recommended if you are unsure of the nutrition available in the must. If the levels are found to be low, then you can take appropriate precautions to supplement with a yeast nutrient.
Lastly, but very important, the quality of the grapes should be known and, if you have the opportunity, discard any diseased bunches to lessen the amount of “competition” from opportunistic spoilage microbes.
Oxygen as a fermentation invigorator
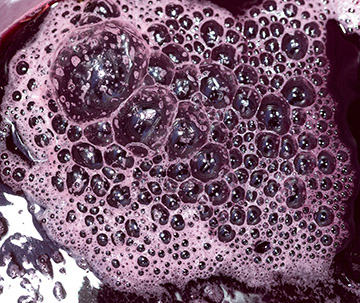
Early on in the fermentation, especially when the yeast cells are actively dividing, they require adequate quantities of oxygen. Oxygen is used in the creation of many of the fatty acids and sterols that form their cell membranes. It is therefore a great idea to give the must a good paddle stirring, vigorous punch down, or rack-and-return to incorporate the much needed oxygen. I have had great success in building yeast starters with the help of a large beaker and a magnetic stirrer. I ran the stirrer intermittently as I poured in the warmed water, dried yeast, and small portions of must. Running the stirrer on the high setting easily incorporated air into the starter.
Techniques to get “un-stuck”
Once you detect that fermentation has become stuck, the quicker you act, the better. While there are a number of protocols shared in textbooks, at your local winemaking club, and plenty of tips in WineMaker magazine, there seems to be an overall common strategy: Treating the stuck wine to address the environmental stressors, while at the same time preparing a fresh yeast starter so it is ready to get to work once it is reintroduced. Referring to your prior notes will hopefully give you some clues to help troubleshoot and prioritize your efforts — there’s no time to waste! The first question you ought to ask is how far along in the process did the fermentation stall? If it got stuck in the early-to-middle phase the yeast may need just a slight encouragement. If the fermentation stalled later on (think, a few degrees Brix of sugar remaining and alcohol in excess of 12%) then the yeast may be exhausted and need to be replaced. Perhaps it never began at all — in this scenario you might need to explore a bit further the constitution of the must or the steps you took during the inoculation stage.
Treating the stuck wine
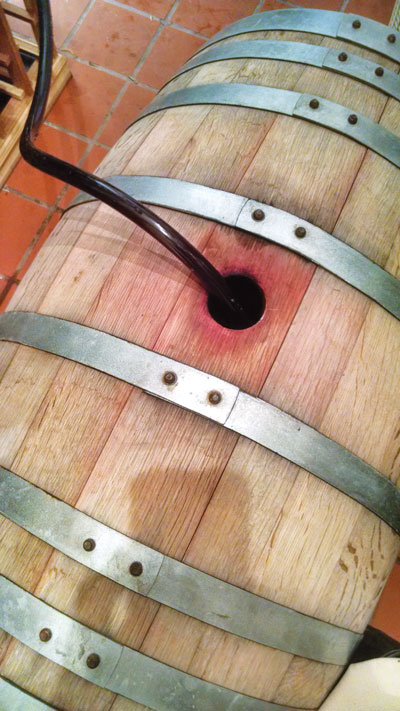
One of the simplest things you could do in the immediate term is to physically get the wine moving with some racking. The benefits are twofold. First, introducing oxygen to the wine, especially during the earlier stages of fermentation, is beneficial. Equally important is that you are separating the wine from any gross lees that may have settled to the bottom of the vessel. Be careful when you rack as the gross lees are often a source of rotten smelling, sulfurous compounds. To introduce even more oxygen you can perform a rack-and-return once the original vessel is thoroughly cleaned and sanitized. Any remaining viable yeast that are struggling will have a better chance of restarting with a dose of oxygen and no longer having to live among the rotting debris — sometimes this is all it takes — but it is best to prepare further measures.
If you suspect some spoilage, it may be necessary to guard against the opportunistic bacteria and yeasts. The addition of lysozyme (an enzyme that digests bacterial cell walls) will kill or at least inhibit bacteria from further damaging the wine. Alternatives include special preparations containing chitin-
glucan and chitosan (Bactiless™). These ingredients work like a fining agent because they are attracted to bacterial cell walls by electrostatic force. A dose of SO2 should enhance the inhibitory effects on these microbes, especially if the original must was deficient in the first place. After racking the wine, some of the SO2 would have dissipated and this is another reason for replenishment. A word of caution though, stay on the conservative side with an SO2 addition as adding too much can inhibit the re-pitched yeast starter.
Potentially detrimental compounds could have been present in the must, so there are treatments that can be used to help absorb these compounds and then replenish the yeast with some building blocks to multiply and thrive. Preparations containing yeast hulls are beneficial. These hulls (also referred to as “ghosts”) are yeast cell wall fragments that supply sterols and lipids to treat the offending compounds and also help the dividing yeast cells build or repair themselves. Combine this treatment with nutritional supplementation to incorporate organic nitrogen and other essential minerals to give the yeast the best chance to thrive.
From here, following a relatively brief period to allow additional gross sediment to settle, typically a couple days, the treated must can be racked once more. Now with the wine reinvigorated, you could simply wait for visible signs of fermentation to show. However, you might want to take further measures, which means preparing a replacement starter.
Preparing a new yeast starter
With very little wiggle room to have things fail again, the choice of yeast is important. The yeast must be competitive enough to handle any remaining opportunistic spoilage microorganisms as well as have a relatively short lag phase.
Trusty strains to have on standby include S. cerevisiae (ex-bayanus) EC-1118 as it tolerates sulfites as well as high alcohol. Uvaferm-43 is another S. cerevisiae (ex-bayanus) strain that favors fructose metabolism in the event the fermentation became stuck partway through and a portion of the glucose was already consumed by the original, fledgling yeast. The idea is that this fructophilic yeast can begin acclimatizing by consuming the fructose and then consume the remaining sugars to finish the fermentation.
In general, the yeast strain of choice can be initially rehydrated to the manufacturer’s instructions with warmed (104 °F/40 °C) water. Most of the time it would be perfectly fine to just pitch the yeast slurry into the bulk wine, but remember that it’s not as fresh as when you first began. Most notably, there could now be a sizeable portion of alcohol from the fermentation that may have already taken place. Therefore, it is best to further acclimate the yeast with an equal volume of the stuck wine supplemented with yeast nutrient, just enough for the small starter volume.
For a greater likelihood of success, consider how much residual sugar is in the stuck wine. If the fermentation became stuck in the later stage, such that the specific gravity is less than 3 °Brix, for example, then topping up the sugar level of this starter solution will give the yeast some sustenance — topping up to 5 °Brix is typically recommended and sources include cane sugar water or fresh grape juice or must (that you may have reserved in the freezer for times like these).
As the yeast begin to establish themselves you successively build the volume of the starter with the addition of more portions of the stuck wine. How do you know whether the starter is ready to pitch? By visually seeing signs of fermentation and by checking the specific gravity of the starter over time, you should begin to see the readings approach zero °Brix. With this momentum, the starter is ready to be fully incorporated back into the rest of the stuck wine. Be sure to check the temperatures of the starter and the must and aim for them to match when you incorporate.
An alternative approach — blending
One very clever way you can prepare ahead of time to treat a potentially stuck fermentation is to create two different wines concurrently. Typically, when creating a blend each varietal is fermented separately and then the finished wines are blended together. But what if one of the musts becomes stuck and needs a hand? Hopefully, if the other fermentation is progressing well, it represents a yeast starter that is ready to use. While it may not have been the initial plan to blend the wines, the small portion that would be added will be rather imperceptible by smell or taste. It’s better to use the vigorously fermenting must than to risk the struggling portion spoiling, especially if you don’t have the aforementioned ingredients at the ready.