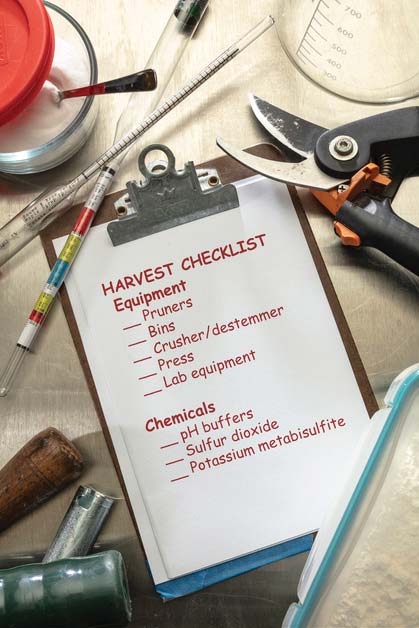
Harvest Checklist: Pre-planning for success
As harvest approaches, have a checklist on hand to make sure the details will all be covered. Today’s column explains each point of one such list as we go along. Throughout wine growing and winemaking, there are periods of concentrated activity and other times of relative quiet. For harvest, I have divided the time into three blocks: Two to four months before harvest, two to four weeks pre-harvest, and finally the last seven days.
Two to four months before harvest
Establish your project goals
You need to decide if you will make red, white, orange, or rosé wine. Each style requires different equipment and supply decisions. An early estimate is also needed for how much wine you intend to make. The volume affects every stage of your winemaking. Also, as well as you can at this point, estimate your timing. If you are purchasing grapes from a distributor or winemaking shop, they should have some prior harvest history to help you. If you are growing grapes, ask other growers in your area how the current season appears relative to “normal” harvest dates.
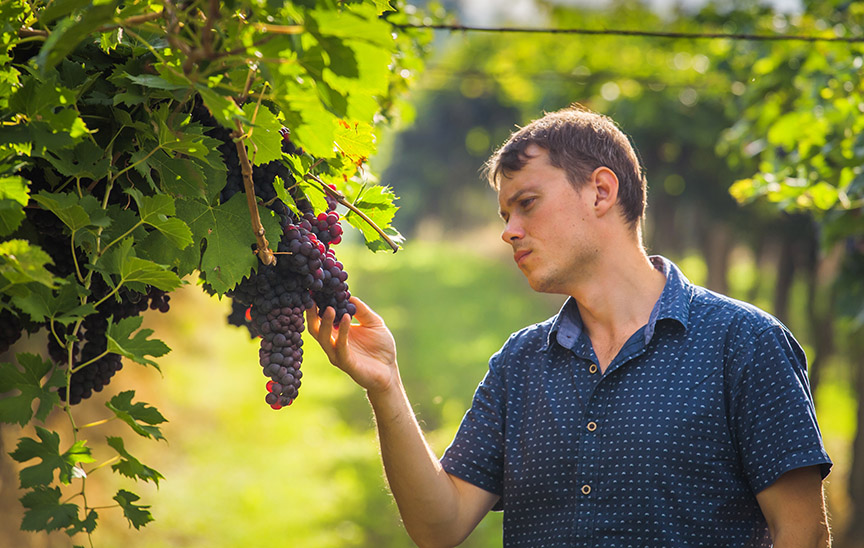
Check on your grapes
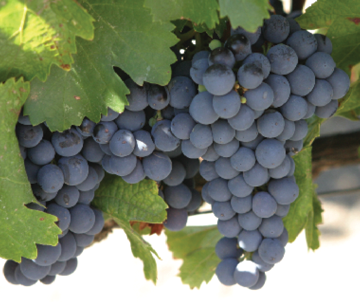
If you have your own vineyard, get out among the vines frequently as harvest closes in. One industry estimate is that harvest will be about 35 days following the completion of veraison. During the final months of the growing season you should be treating for pests and mildew, removing suckers, keeping weeds under control, and monitoring uniformity of the crop. After veraison is mostly complete, remove green or underdeveloped clusters. As soon as you are done with the green harvest, cover the fruit with bird netting.
If instead you are purchasing local grapes, ask if you can visit the vineyard during this time. Look for a reasonable crop load—there should be around 14 or 15 leaves for each cluster. Also check for factors like those for growing your own fruit. Are weeds being managed? Are suckers kept clear? If you have any concerns, talk to the grower. Record anything you noticed. Depending on how your wine turns out, those observations can improve your success with that grower or with others in future vintages.

Purchased grapes from a remote location are more difficult to check on. To do so, you will need to depend more on the reputation and statements of the supplier. Talk to other people who have purchased from the same source and whether they have gone back for repeat harvests. If buying directly from a remote grower, you may be able to ask for photos of the vines and fruit as it develops. Often you can ask the grape supplier for examples of wines made from those grapes or commercial bottles that may be comparable from that particular vineyard or region.
Arrange your space
After you have decided the scope and size of your fermentation project, you need to make sure your “winery” is ready for it. Get any construction or remodeling done well before harvest. If you are using the same space as last year, go through it and give it a deep cleaning. Sodium percarbonate or soda ash are suitable cleaning materials, but avoid chlorine bleach. If winery spaces have filled up with other objects, put everything back in its place and clear room for harvest and crush activities.
Plan your fermentation
This task goes hand-in-hand with planning your space. You need sufficient food-grade bin capacity for the amount of grapes you will be processing. I haul purchased grapes home in 32-gallon (145-L), food-grade square polyethylene trash cans. Each bin will hold about 125 lbs. (57 kg) of grape clusters or as much as 200 lbs. (91 kg) of crushed must. For cold-soaking white grapes on the skins or fermenting red grapes, I only need to assure that I have one more bin than used for grape transport. That extra bin is the first one I crush into, then I wash a transport bin and continue. If making white or rosé wine, you will then need closed vessels for your juice volume, counting on filling the tanks, carboys, or demijohns only ¾ full while fermenting to allow for foaming. Once again, you need one extra vessel to rack into when fermentation is over and you can wash and reuse the others.
Throughout wine growing and winemaking, there are periods of concentrated activity and other times of relative quiet.
Plan for temperature control. This is especially important if you will be making white wines, which are most often fermented at 55 to 65 °F (13 to 18 °C). If a red must needs cooling, you can add sanitized jugs of frozen water to the open fermenter and change them out from time to time. White wines, though, should remain untouched in closed, fermentation-lock-equipped containers and protected from air exposure. That means cooling cannot involve putting in ice jugs.

For carboys or demijohns, you can place the fermenter in a wash tub and fill the tub with water. Use ice jugs in the water to maintain temperature. If your production is small enough, you can take the shelves out of a refrigerator to put in a carboy. You may need an override controller, as refrigerators do not usually adjust up to the temperatures needed for fermentation. You can also use a wine cellar cooling unit to cool an entire room to fermentation temperature. The most advanced temperature control is through use of a glycol chiller. A reservoir of thermostat-controlled glycol cooling fluid is housed in a refrigeration unit and circulated with a pump to the fermenters and back. Various cold fingers and jackets can be used with multiple fermenters.
Line up help
It’s never too early in the harvest year to start on this project. You can probably find friends and family members who will be happy to help with harvest and crush. Since the exact date may be unknown until it is at hand, your helpers need to be flexible (or you need to have more lined up than you absolutely need on harvest day). Keep a list of people who express interest in helping and begin an email update program a few weeks before harvest. Let your helpers know of your preparations and plans. If you want to avoid using volunteers, consider hiring some helpers for the day. Once again, make these arrangements early as casual harvest labor is in high demand in the more popular wine grape growing regions.
Two to four weeks before harvest
Set up your facility and equipment
If you have stored anything in the basement, garage, or rafters, get it out now. Check again that space that you cleared a month or so earlier. Clean and organize the area. Get it all ready just like harvest is tomorrow so there will be no surprises when grapes arrive.
Clean and operate your crusher or crusher/destemmer. When I was a partner in a home winemaking shop, every year we had a couple of customers come in and say the electric crusher/destemmer would only hum, it wouldn’t turn. The problem was almost always grape sugar that had not been adequately washed off the gears and rollers at the end of last year’s harvest. If your pre-harvest check reveals this problem, pour a bucket of hot water over the gears and rollers, being careful to keep the motor dry. Try again and it will probably run. Use food-grade silicone grease to lubricate gears and bearings.
Check your press. If it has a wood slat basket, replace any missing bolts or nuts. Make sure you have the four or six rods that fasten the basket halves together. Also make sure you have the pawls that ride in the press head to make the ratcheting function work. If you have a bladder press, remove the cage and closely inspect the rubber bladder. Put the cage back on and partially inflate the bladder with a garden hose to check for leaks. Do not completely fill the bladder as that will cause more stress on it than when the cage is full of grapes or must. Lubricate moving parts of any press with the same food-grade grease as you used on your crusher.
Buy chemicals and fermentation supplies
Get out, clean, and organize your laboratory equipment. The most important tests will be Brix, pH, and titratable acidity (TA). If you grow grapes, you probably have a refractometer. In any case, you will also need a hydrometer during fermentation. Make sure you can find yours since last year and that it did not get broken. Buy new pH buffers and calibrate your pH meter. Calibrate again on harvest day.
Most important will be yeast, choosing strains that suit your grape varieties and fermentation goals.
In addition to the pH buffers just mentioned, replace your SO2 solution. If you have powdered potassium metabisulfite on hand that has been kept sealed in a cool, dry environment you can make a new 10% solution with that. If not, buy new sulfite. Also buy new titrant for your TA test kit or titration setup. If using a refractometer, buy fresh 20 °Brix standard solution. This sugar-water solution is perishable, but using it will give you a more useful calibration than calibrating at 0 °Brix with distilled water.
Buy your fermentation supplies. Check your crop estimates one more time and buy accordingly. Most important will be yeast, choosing strains that suit your grape varieties and fermentation goals. Also buy new malolactic bacteria if there is any possibility you will be using some. Store yeast refrigerated or in a cool cellar space, store freeze-dried bacteria in the freezer. Check the freshness and quantity on hand for nutrients, enzymes, oak additives, and so forth. Buy any that need to be replaced.
Last seven days
Get the grapes
You are at the final steps. Depending on your source, you may need to coordinate with a hauler to deliver your grapes. If buying locally, double check with the grower and outfit your truck, van, or SUV with necessary bins or tubs.
If instead the grower is letting you borrow a half-ton (500-kg) bin, make sure you are set up to get the grapes out of it back home. This may involve pitchforking out of your truck into smaller bins or directly into the crusher. If your grapes are arriving in crates, they can be dumped directly into the crusher’s hopper. Depending on what materials your crates are made from, plan to recycle or reuse them responsibly.
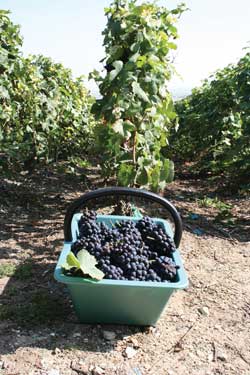
If harvesting your own grapes, start early in the day so the fruit is cool. Give your pickers a safety lesson — those shears are very sharp. Provide water, picking bins or buckets, and transport for the grapes to your crush pad.
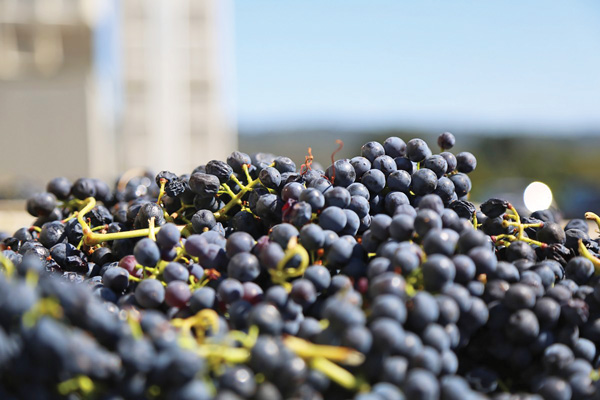
Process the grapes
In line with your objectives, crush, destem, and press the grapes as they arrive at the crush pad. To keep fruit cool, process promptly and put containers indoors or in the shade. Sulfite as needed and cold soak as desired. Take samples of must or juice and keep cool or put in the refrigerator for later testing.
Test the must
As soon as feasible, run your Brix, pH, and TA tests. Calculate and make adjustments. Your harvest checklist is done! Now make wine.