Bibliographies are traditionally presented at the end of an article, but there is a book that proved so central to the production of this article that it must be given a leading role, a beauty shot and a recommendation for purchase. This seminal work of viticultural research is called Sunlight Into Wine by Dr. Richard Smart. I honestly believe that Dr. Smart’s research is as important to viticulture as Louis Pasteur’s inquiry was to winemaking (Pasteur is credited with early descriptions of primary and malolactic microbial fermentation in a laboratory). So to save you some time and to get you growing good grapes, may I suggest ordering a copy from the UC-Davis bookstore (http://ucdavisstores.com) before going any further into this article? It’s $51 at UC-Davis, and $100 at Amazon, so I saved you $50 to buy some nice wine!
The legacy of Dr. Smart is nothing less than the metamorphosis of viticulture from a largely anecdotal production system to a method of farming based on actual data and hard science. There were certainly huge advancers supported by UC-Davis (Winkler), Cal State Fresno and Cornell (Nelson Shaulis, Smart’s personal vine guru), but as far as the practical application of new methods for quality winegrape production, Sunlight Into Wine was a game changer. Within ten years of its initial publication (1991), the book had crept into the popular imagination and practices in North and South America, Australia and the surrounding islands, and even challenged the mighty anecdotal powers of multi-generational French, Italian and Spanish ‘crus.’
A major factor in the success of Sunlight Into Wine was the elegance of its arguments: • Low yield does not guarantee quality, in fact larger yields can be achieved with higher quality in some climates and soils.
• Measurements in the vineyard, with and without specialized equipment, can help us use real data to improve balance and fruit quality.
• Canopy management and using an appropriate trellising system are the foundations for quality in any vineyard.
• Sunlight on the fruit, without allowing sunburn, is the single most important factor for improving wine quality as well as reducing pest, mildew and rot pressure. An open canopy makes better wine!
Now, let’s get caught up with a basic understanding of how to set up, record and understand small-scale vineyard experiments, and suggest a few that will measurably increase wine quality.
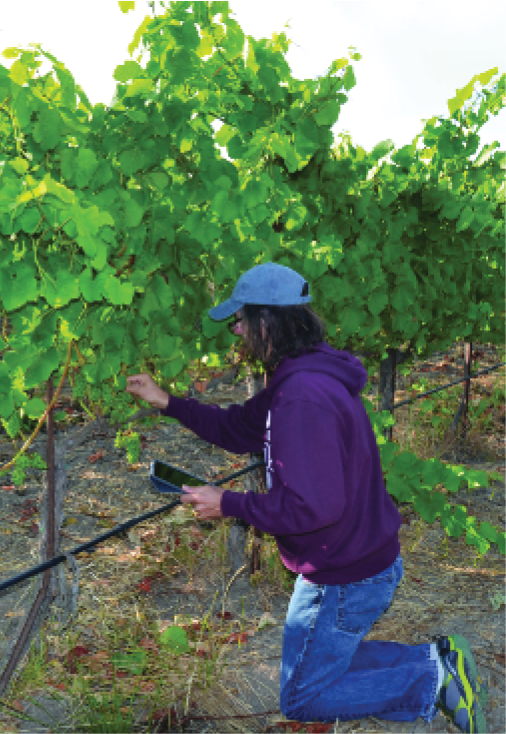
Tools for vineyard experiments: Notebooks, smart phones and iPads/tablet computers
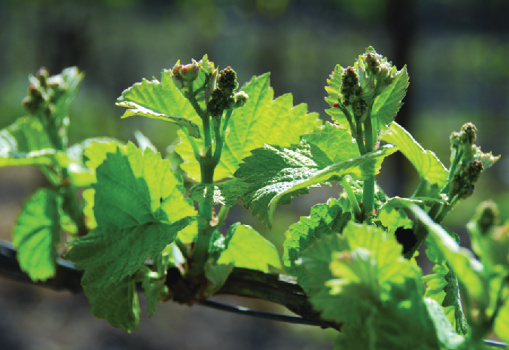
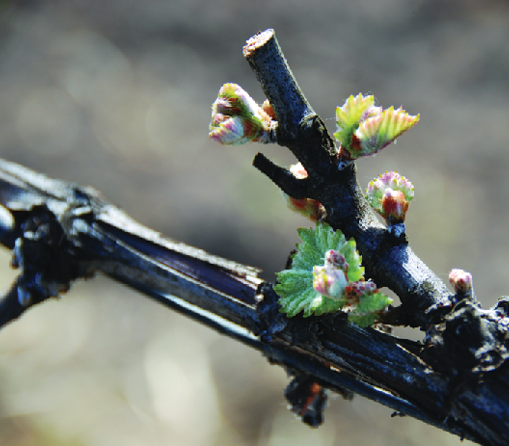
When I first started my pro vineyard management career, we didn’t have any of those fancy smartphones and iPads or tablets, or GPS/GIS and all that fancy stuff. (I’m feeling a bit old right now.) Our tools back then were a notebook and pencil, and once in a while a camera to document a vintage. The humble notebook is still a very important tool for me. I try to get into the vineyard with my vintage notebook (one small book per year), to note the dates of dormancy, pruning, budbreak, cluster emergence, frosts, flowering, bunch closure, veraison initiation and completion, fruit drops, netting, bird damage, ripeness tests and finally harvest chemistry and wine quality.
I also record tasting notes on my juice in this book — noting that references in the juice (e.g. kiwi becomes apple, pomegranate becomes ripe cherry) often are excellent milestones to note how the resulting wines will exhibit various styles of ripeness. For example, at Clos Pepe, as long as I taste kiwi in the Chardonnay juice (freshly pressed), the resulting wines are shrill and highly acidic. When the kiwi disappears, I know I can consider picking Chardonnay to make a balanced wine. Every vineyard will teach similar lessons with different fruit references. Cardinal rule: if the juice isn’t absolutely delicious, the wine will most certainly follow suit.
Besides tasting notes and taking written notes in the field and in the lab, I have found that using cell phones and iPads is increasingly important to my craft of winegrowing. Whether it’s a picture I send to Instagram or Facebook to keep my customers and fans interested and engaged, or whether it’s documenting the vintage in annotated photos or videos, integrating technology has never been easier or cheaper. I recommend a photo annotating application like PhotoPen or A+ Signature/Annotator so you can take photos, annotate them, and have them automatically organized and defined. Use the date, the area of the vineyard and describe in a few words why you took the picture. For example: “8.1.13, weird bug I’ve never seen — look it up!” or “60% canopy gaps on Norton, Row 7 north. Check at end of season for evidence of sunburn.”
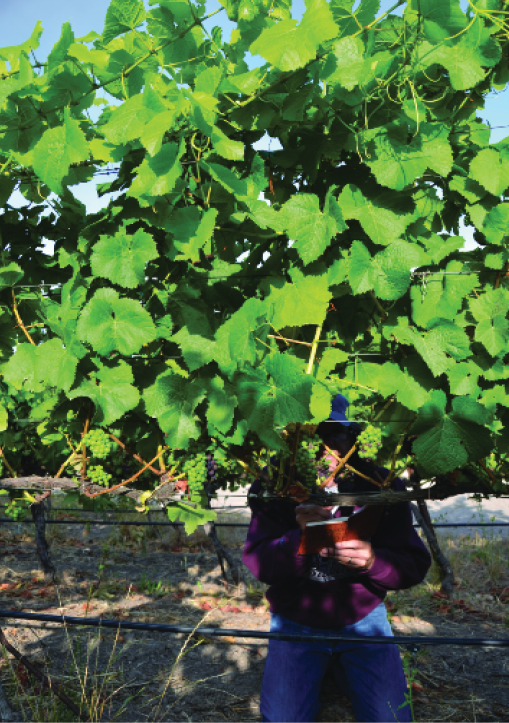
Harvest pictures are important too. Having pictures of the vines as the nets come off to harvest will allow you to remember what your fruit load, berry size and color, fruit health, canopy management looked like at harvest. If you make a great wine, you have a model; if the wine is lacking, you can try to make the vines look a bit different in subsequent years. Try to use props in all pictures you take to give you and idea of scale. I like using a quarter lodged gently in a cluster, but you can use a dollar bill, a post-it note — whatever you have at hand. Note the row numbers and section of the vineyard for reference on the photos, or the visual information.
When you begin to choose and set up your field trials/vineyard experiments these annotated pictures are even more important, as it’s easy to let a trial sputter out and fail, or worse, lose the data that can guide you to improved practices. Experiments are only as good as the information you collect.
Technology is not necessary for meaningful field trials if it’s not your thing, but to ignore its benefit is unwise in an era of affordable hand-held devices that are perfectly suited for home vineyard use.
Experiment One: Shoot positioning and leaf-plucking trials (canopy management)
Expected outcome: Better balance of sunlight penetration into the canopy in an appropriate manner for the climate (no burn). Improvement of wine quality by the destruction of vegetal components (pyrazines) by sunlight on the fruit, and the promotion of high-toned fruit (red) and floral aromatics (white) as a result of terpene production. Less veggy in the wine, better balance and aroma.
Criteria: Identify five shorter rows of your backyard vineyard and engage in this experiment. The middle row will be leaf-plucked, hedged and lateral-shoots removed in the way you are used to always doing it, using your “norm” practices as a control. The rows adjacent should have 20% more leaves removed (one row, say, north of the middle row) and 20% less leaves removed (other row, south side of control row). Then the first and fifth rows are done by doing +40% (north) leaves removed and -40% leaves removed (south).
Measuring: Stoop down to fruit height and measure leaf layers and canopy gaps visually. There are also instructions in Sunlight Into Wine for making a tool for inserting into the canopy and scientifically measuring leaf-layer if you prefer. Simply put, leaf layer is how many leaves, on average on one vine, are in between the sun and the fruit. I like about .3-.5 leaf-layers here in the chilly hyper-coastal Santa Rita Hills of Santa Barbara County, California. We can expose our fruit almost 100% with minimal chance of burn. The same leaf-plucking in an area like Amador County, California, or anywhere in Arizona (or any similar hot climate) would produce severely burned (and therefore useless) fruit. Using the visual method, make an accurate, mental percentage of how much area in the fruiting zone (not counting the clusters) are taken up by leaves. For instance, if you look through the canopy and there is not one leaf that’s 100% canopy gaps. If 50% of the area is clear of leaves, that’s 50% canopy gaps.
Fine tuning and evaluation: Test the five rows separately for Brix and pH to see if ripening is impacted, and then (this is very important!) taste the juice and make notes on the flavors to see if you can distinguish an improvement or deficit in flavor and balance. Is one sample more tart? One more sweet? One with deeper flavor? One with more complexity? Does the more shaded fruit have a pyrazine/green edge? In a perfect world you would make a carboy of each wine, with the same winemaking/yeast/SO2 regime and the same day of pick, and the wines would be evaluated and tasted by a panel (blind) at three months, six months, one year and three years. Which canopy management regime produces the best wine? If there is a clear winner, adjust your canopy gaps in the entire vineyard to that level. If you’ve got the time next year, do it again and see how tweaking the ‘new standard’ impacts the final wine(s).
Experiment Two: Leaf to cluster ratio
Expected outcome: Increased consistency of brix/pH from cluster to cluster, vine to vine. Better balance on every vine.
Criteria: At the onset of veraison, count (or pay someone to count) every leaf and every cluster on a representative sample of your vineyard.
Measuring: After counting leaves and clusters on 10, 20, 50, or 100 vines, depending on the size of your vineyard, make a ratio of leaves to clusters. For example, if there were 300 leaves and 30 clusters, your ratio is 300:30, and if my liberal arts math is correct, that’s 10:1 leaf/cluster ratio.
Fine tuning and evaluation: Twelve to 15 leaves per cluster equals balance on virtually every wine-producing grapevine on the planet. Check your vineyard notes and find a few vines in your vineyard that have the perfect ratio (13–14:1) and photograph that vine in the same time frame as the ratio was achieved. That vine is now your “model vine.” Going forward, try to make every vine in your vineyard resemble the balance evident on that model vine. Pay attention to how it was pruned and see how it was managed and leaf-plucked. Were laterals needed to achieve that ratio? If there are too many leaves, leave a few more buds/vine at pruning for higher fruitfulness, or remove any extra leaves to achieve that perfect balance. If there are too many clusters, try pruning off more buds next year, or try dropping some fruit at or just before veraison.
Experiment Three: Water status
Expected outcome: Learn how water status influences vine physiology, ripening, flavor and wine quality.
Criteria: This may be difficult, because you have to have dry conditions to practice deficit irrigation. If your vines are watered by spring and summer rains, this may not be an experiment you can complete. The idea is similar to the leaf-plucking/canopy gap trials, and also requires you to be able to control irrigation to specific rows in your vineyard, or if you water your vines individually. If you have the right conditions, choose the largest sample of vines, in five areas. In a perfect world for this experiment, the trial sections would be large enough to produce micro-lots (0.5 gallons/1.8 L to 5 gallons/19 L) of wine for evaluation.
Measuring: The middle ‘row’ is given normal watering. One row out is given +20% irrigation and the second row out is given +40%. One row behind is given -20% (deficit irrigation) and the last row (behind) is given -40%. Document and photograph the fruit and if there are changes in ripeness.
Fine tuning and evaluation: In a perfect world, there would be enough fruit from each irrigation set to make 5 gallons (19 L) of wine to evaluate. In small samples, check pH and Brix for sure, and if you can get a lab test for TA that will also be helpful. You can crush a small sample in a zipper-type sandwich bag, set it in the fridge overnight and see how the sample “colors up.” Deficit irrigation can help produce smaller berries with more skin to juice ratio, which often leads to darker, bigger wines. The row that makes your favorite wine, or the row that produces the best lab numbers should set your new irrigation standard. Also experiment with deficit or increases irrigation at various times of the year. Separate into categories like budbreak to bloom, bloom to veraison, veraison to harvest. Also remember that dehydrated fruit on vines that are shutting down due to water stress do not produce riper flavors. I believe superior wine is made by vines that are still working (photosynthesizing) until harvest.
Experiment Four: Harvest chemistry, ripeness and timing
Expected outcome: Learn how ripeness and timing of picking influences your wine style.
Criteria: Measure Brix and pH carefully on three different pick dates in your vineyard, taking notes. Pull one section of the vineyard a little earlier than normal, push your regular harvest a few days to a week later, and do the last pick as ripe as you can manage.
Measuring: Vinify the sections/picks separately, but use the same vessels, yeast, additions, oak and process. Try to make equal volume for each of the three lots, 5 gallons (19 L) is what I recommend at the minimum.
Fine tuning and evaluation: Taste the samples from each of the picks and take photos and notes on how the wines color up (if red), how the juice tastes, how the ferments go. Then, evaluate and take notes on the wine at the end of primary, the end of malolactic fermentation, at six months and again at a year in the bottle (longer if you make wine that can age).
Is the early pick green or balanced? Which of the three wines wine do you prefer? How about your spouse, friends or members of your winemaking club? How about a sommelier? Have fun and learn from the process, and above all, trust your own palate!
Experiment Five: Minimal/heavy pruning (pruning weight to yield ratio)
Expected outcome: Improve wine quality by understanding how pruning severity influences crop load, leaf/cluster ratio and wine quality.
Criteria: Use the 5-row method we discussed in experiment one again. The middle row will be pruned normally, according to your usual practice. Here’s where you can play with the field trial. You could change the pruning method from spur to cane on another row, but that’s a big change. An even bigger change would be the trellising style, say doing one row Vertical Shoot Position (VSP), one row head-trained, one row quadrilateral, etc. That kind of change really should be done when the vineyard is first planted though, as retrofitting vines like this can be tricky.
Measuring: What I recommend is pruning the middle row normally, and then do +5 buds/vine (cane) or an extra bud per spur. The next row gets +10 buds per vine (or a kicker cane) or +2 buds/spur. Then the rows on the other side get the inverse: -5/one less bud per spur, and the last row gets -10/two less buds per spur. Don’t go under a whorl and 1 bud per spur, however, as we need do need to get some fruit out of the season for winemaking!
Fine tuning and evaluation: Make sure to take into account your level of vigor. If your vines grow 6-feet+ (~2 m) of canes on almost every vine, you can certainly leave more buds at pruning. If the vines are more stunted, say less than 3 to 4 feet (~1–1.5 m) on average of cane growth per position, increasing buds retained at pruning will likely stress the vine further. Be reasonable and customize the field trial to be meaningful with your vines, in your climate and soil. The evaluation is the same as all the tests. Weigh your fruit off each vine and also weigh your prunings in the winter after harvest. Make an average ratio for each row/pruning style. The proper fruit yield to pruning weight ratio is between 5:1 and 10:1. Outside of those ratios, the vineyard is out of balance. The row that is closest to 7:1 is likely the fine-tuned level of pruning you should favor. Of course you can (and should) make wine from each row and evaluate the finished wine for flavor, balance and deliciousness. Err on the side of delicious, and you’ll never be disappointed.
Conclusion
Remember to limit yourself to one field trial per vintage, and absolutely one field trial in each section of your vineyard. Do not combine any of the trials to save time; take one at a time, even over five vintages to fine tune each element of your cultural practices. Take notes, take pictures and encourage other local home grape growers to do the same and share their data. Form a local grape growing club if there isn’t one already, and work together as a group to walk each other’s vines, take measurements, pull leaves, turn on/off the water, and the most important and enjoyable part of the process: blind tasting the wines to determine which practices are paying off and which makes the wine taste worse. Both findings can be equally important! Also remember that making wine in small batches can be less than standardized, so there will be times you will have to taste through winemaking defects to recognize varietal aroma and flavor, intensity, presence or absence of vegetal aroma/flavor and of course which glass empties first!