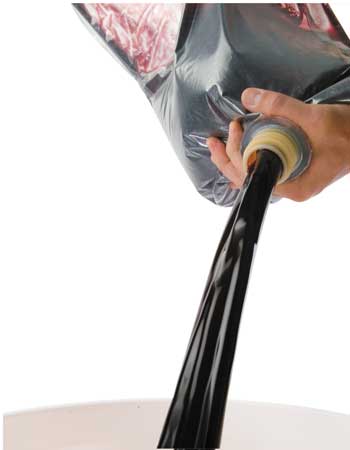
Modifying Wine Kits
Making truly great wine from a kit takes a winemaker of thoughtfulness, one who knows what he wants to achieve and will take the steps to achieve it.
This article deals with interventions you make before the start of alcohol fermentation; the initial starting conditions that will shape the wine into its basic elements before you go to polishing each of the facets of its character, along with aging and other post-fermentation techniques known as élevage.
The two changes we are going to discuss in this article are alcohol levels and tannin. It’s important to remember before we start that any change you make is completely interconnected to the character of the wine in what can be very subtle ways. Just making a bunch of changes or additions to the kits could knock it out of balance in ways that can be difficult to recover from.
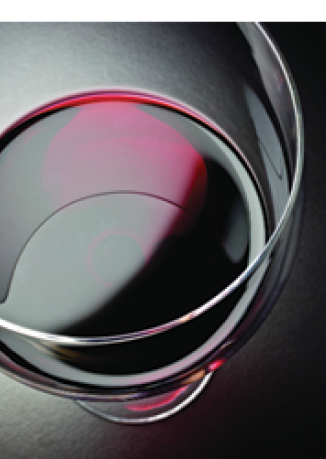
Red or white?
Either is fine, as suits your cellar needs and your palate, and working with dry table wines will be the most rewarding projects, but the approach for red and white is going to be slightly different. White wines respond to changes in alcohol levels, but have very little tannin, so any addition to the must is either going to be bonded to whatever colloidal fining agent you use in clearing, or it’s going to leave a weird pucker finish that won’t mesh with the acids and fruit very well.

Red wine can stand up to any of the changes you make, but be cautious. Yes, you can crank the alcohol level up to 17%, triple the tannins (and put in enough oak to build a ship in every bottle) but that really does toss balance and drinkability out the window. Small steps are the way to start, and learning as you go is part (lots) of the fun.
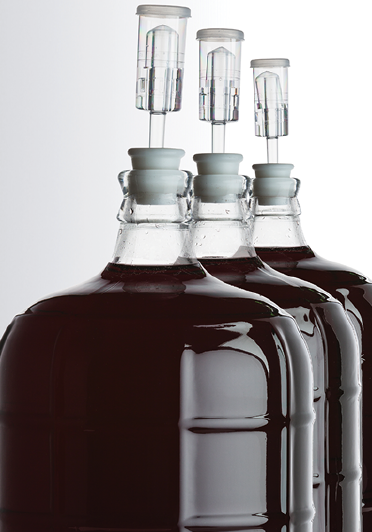
By doing a raft of test batches (split the batch up into, say, 1-gal/3.7-L fractions) all at the same time you can hedge your bets on which wine you’ll like best. The really good thing about that is you can blend the outliers together — they may not be precisely perfect, but you’ll be able to salvage the entire volume of the wine for useful drinking.
Alcohol level and taste
Very fully flavored whites and heavy reds can easily stand a boost in alcohol levels of one, two or sometimes even three percent. But before we do any math on sugar additions and alcohol levels, it’s important to understand what alcohol tastes like.
Alcohol, contrary to all popular depictions, does not taste “hot” in lower concentrations. Above 18% the trigeminal sense kicks in and you perceive the alcohol as a “heat” or irritating burning sensation. Below that, alcohol merely tastes sweet. You can confirm this yourself with a simple test: pour a quarter-cup of cool water and add a couple of teaspoons of vodka (any plain brand will do). Taste it against plain water (you may need to add a little more vodka, depending on your flavor perception). All you’ll notice is a very faint sweetness. This sweetness will make the fruit character of the finished wine much more prominent, like the difference between raw cranberries and cranberry sauce. With a boost of extra alcohol to drive it, your Cabernet can emulate the big, bold California cult-wine styles, and your Chardonnay can take on a lush-ness of fruit that stands up to any Aussie version.
Boosting alcohol
Higher alcohol wines can require longer periods before all of their flavors completely integrate. This is because alcohol acts as a flavor potentiator. Higher alcohol levels drive aromatic vapors and enhance flavors, and even make your taste buds a bit friskier. That’s why cream sauce gets a shot of brandy, to boost all the flavors.

Great, right? Except that tannin and oak can get lost in the alco-shuffle. This is less of a problem if you’re boosting them as well, because high alcohol levels can render the wine “one dimensional” or “bland,” adjectives that don’t really put their finger on it, but you get the idea — it’s like leaving the oregano out of the marinara. Increasing the alcohol will alter all flavors across the board, and if those flavors include tannin and oak, then you are going to need balance those at the same time.
The best way to boost alcohol with the least extraneous impact is to add sugar to the must. You can use dextrose (corn sugar) as it does dissolve very easily and thoroughly, but if you don’t have access to it good old table sugar will work fine, just be sure to completely dissolve it.
Why not just add less water to the kit wine must, to make 5 gallons instead of 6 gallons (19 instead of 23 L)? Because it would drive the acidity levels and pH all goofy and make the wine sour and quite nasty. So don’t do it, because you’ll void your warranty before you start. Of course, if you’re actually doing any of the alterations discussed in this article, the warranty is off, but it’s really super-double-secret-probation-off if you don’t make it to the full volume. So there.
One pound of sugar dissolved in 1 US gallon (3.78 L) of liquid will yield an increase in specific gravity of 0.042. A little bit of (carefully technically edited) math and that yields 7% alcohol by volume. Divide that into a full-volume kit and you get just over 1% ABV in total. If you’re measuring in metric (much easier to think in) use the value of 17 grams of sugar in one liter of volume creating 1% ABV — we’ll bring that number into play later in this story.
Your alco-plan
First you’ll need to prepare your kit as per the instructions, making sure to include all of the bentonite, grapeskins and other good stuff. Measure and test the specific gravity and calculate the potential alcohol. A good way to get a reasonable potential alcohol value is to calculate the difference between the expected finishing gravity from the starting gravity and multiply that number by 131. If your instructions don’t include a predicted final gravity, you can usually count on it being slightly below 1.000-0.995, which is close enough for our purposes.
Let’s say the starting SG of the must is 1.085, and your finishing gravity is 0.995. The difference between the two is 0.090. 0.090 x 131 = 11.8% ABV. Not bad, but if you’re looking for a big ol’ wine, then you can boost it by as much as 2.5% before it will start getting too overdone. Doing that in 1⁄2 percent stages will allow you to figure out that perfect sweet spot. Line up your test jugs, leave the first one for a control, add a half-pound of sugar to the second, a pound to the third and keep going up by a half pound, until you get to the last jug, which should have 2.5 pounds for a total increase of 2.5%.
When your alcohol adjusted wines are clear, stable and ready for the bottle, do some bench tasting to determine which ones hit that sweet spot of alcohol content that suits your goal for the wine best. Don’t be afraid to do a little blending as well — if an increase of 1.5% is perfect, then you can blend the 2.5% increase wine with the control and get pretty close.
Getting that perfect tan in
For reds we can boost tannins, which can not only increase astringency and add mouthfeel, as well as a sense of structure to a wine.
Modern tannin compounds are much more sophisticated than they once were. Some are derived from grape material, either skins or seeds, or a combination, while others are proanthocyanidic (exotic wood) or ellagic (oak) tannins. Speciality tannins are now so finely tuned that you can choose between different oak sources — French for a hint of toast and coconut in the wine, or American for more sweetness and vanilla, and specific types of grape tannins that are smooth enough to be used on even the most delicate Pinot Noir. Two good sources of tannins are Scott Laboratories (www.scottlab.com) and Laffort (www.laffort.com), both of which have excellent product information available on their websites.
As for specific tannin compounds I would recommend with my kits, that’s going to be up to your taste and goals. If you want to fill out the flavor profile of the wine with more mouthfeel and grip, a pretty straightforward addition of grape/oak tannins, will do. If you’re trying to make a lush, coconut and vanilla fruit-bomb that clings to your tongue with a finish that goes on for days, then you need some of the specialty wood tannins available. Set your goal, check the literature, and choose your tannin or tannins. Nobody says you have to start off by dosing an entire six-gallon (23 L) kit with a single tannin product, or even that you have to use only a single tannin on the wine. If you’re going to modify your kits, you might as well see how far you can push it.
Easy “dose” it
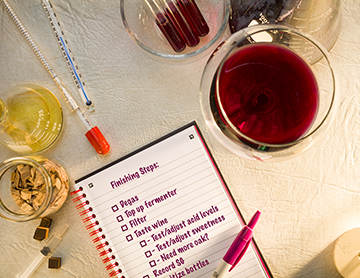
As with the alcohol content, it’s a great idea to split your wine into individual one-gallon (3.78 L) batches and treat each one separately, with different tannin dosages and types. Again, if things don’t work out, you can back blend and save at least some of the batch, or (worst case scenario) you can blend a moderately unsuccessful gallon away into another full batch, and file your notes (you did keep good notes, right?) for the next batch you want to mess about with.
Some of the tannin products will indicate that they are intended for pre-fermentation use. That’s because tannin has some desirable effects specific to winemaking from fresh grapes — stabilizing color, fighting botrytis effects, anti-oxidative properties, etc. For use with wine kits, however, it’s best to add them after the wine is completely finished – stable, fined, clear and ready for bottling or bulk aging. That will ensure that the tannin compounds don’t get removed by the fining agents in the kits, and deliver full flavor — there’s no risk of botrytis issues or color instability in kits anyway!
Be very light on the recommended dosage rates. Most tannin compounds recommend something on the order of 10-20 grams of tannin per hectoliter (100 L, about 24. 5 gallons) or about 0.4 to 0.8 grams per gallon, a total of 2.4-4.8 grams per 6-gallon kit. In higher doses than this they can push the wine way out of balance. Wines overdosed with added tannin either require very long aging to recover, or they wind up tasting manipulated, no matter how long you age them. I find I can pinpoint excess or clumsy tannin use in poorly made commercial wines, to the point where I get very little pleasure from them — easy does it!
It goes without saying that you’re going to need a very accurate scale to measure your tannin additions, one that works down to the 1⁄10th gram range. Such scales are available from scientific supply houses quite cheaply these days – check the Internet for good sources.
Once you’ve made your doses, whether to a series on one-gallon (3.78-L) trials or to the full kit, it’s time for the most important step: waiting. Tannin additions need time to integrate fully into the flavor profile of the kit. Most wines will need six months before they stop tasting like a fresh tannin addition (although some of the new modern tannins are astonishing in how fast they integrate) so it’s best to bulk-age the wines before doing your bench tasting and blending.
Next steps
The next level for tannin and alcohol manipulation is truly up to you, the winemaker. Wine kit manufacturers will always try to make the best kits they can, but their idea of a perfect wine may not always suit your palate precisely. As a wise man once said, “Wine is a playground, not a prison,” and you should play with your wine to your heart’s content. The one thing to keep up with if you’re going to experiment, however, is good record keeping. Make sure you make tasting notes every time you open one of your modified bottles, especially if you have the ability to taste it against a control sample, so you can evaluate the true impact of your modifications as the wine ages. After that, it’s all up to you.