Cleaning and Sanitizing Your Way to Better Wine Kits
I had a very interesting conversation with a couple of veteran winemakers at a guided wine tasting I conducted this fall. Together, they had made dozens of batches of wine, were using advanced techniques and had won medals; most recently two gold, one silver and three bronze medals between them in the WineMaker International Amateur Wine Competition.
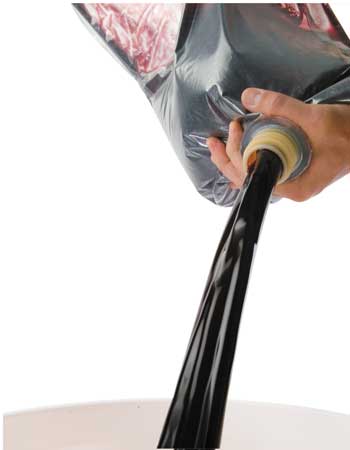
But their accomplishments aside, the interesting part was a casual question from one of them. He mentioned that they had a few bottles from a premium, single-vineyard kit that had turned out quite poorly — not only was the wine not completely clear, it had developed very slight carbonation and the flavor and aroma was off.

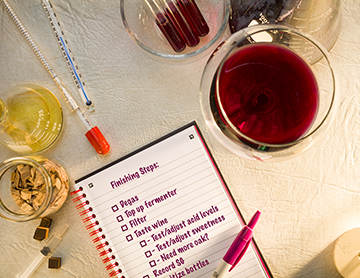
I went through my usual troubleshooting routine: temperature, stirring, timing, kit age, wine age, starting volumes, etc. Nothing really stood out as a probable issue, since the majority of the bottles were very good — indeed, this was a silver medal wine. When we got to sanitation, however, it became clear what had happened. Their cleaning product of choice was a chlorine-based winemaking detergent that they rinse all of their equipment and bottles with immediately before and after use.
I asked, “And what kind of scrubbing brushes do you use?” but I already had a sinking feeling.

“Scrubbing? Doesn’t the detergent take care of that?” he replied, looking a little unsure. A few more questions about how and when they scrubbed and soaked bottles (never), whether they sulfited bottles immediately before use (no), and how often they discarded and replaced their vinyl tubing and difficult-to-scrub items like racking canes (hadn’t in years) and that ended the troubleshooting.
Their wine had spoiled because of an infection present in some of their bottles that was a result of their cleaning protocols.
Without the mechanical action of scrubbing, all of their equipment, carboys and bottles are likely coated with a kind of colloidal material, a biofilm able to shrug off short exposures to detergent. Because they weren’t soaking and scrubbing their equipment, and worse, they had kept on using partially permeable material like hoses for many years without soaking or scrubbing them, their winemaking equipment was eventually going to be a source of contamination for all of their wine.
Fortunately, the solution is pretty simple: soaking, scrubbing, and replacing vulnerable equipment on a regular basis. Simple though it is, it’s important to understand biofilms, the difference between cleaning and sanitizing, the different chemicals available to the home winemaker, and the role simple mechanical scrubbing plays in getting your equipment sparkling and ready for your wine.
Biofilms
Biofilms are a matrix of extracellular polymeric substance (EPS), a sticky material exuded by various single-cell organisms. Yeast exudes them, as do bacteria, but until an enormous amount of EPS accumulates, it’s pretty much invisible. However, there is an excellent example of a biofilm right under your nose. In fact, it’s in your mouth.

Human dental plaque is the sticky film coating your teeth after you eat carbohydrates or sugary food. The bacterial ecosystem in your mouth breeds a lot of cells eating these sugars (remember to brush and floss!) and while many of them are washed away by saliva, more still stick to your teeth, gums and tongue, held in place by EPS — the biofilm. As an unfortunate side effect of their activity, they produce acids, and these attack the enamel on your teeth, exposing the softer dentin underneath and eventually producing caries — tooth decay.
Lucky for us, we can remove these bacteria and the biofilm that sticks them to our teeth with a good brushing, and some floss to get between the teeth where brushes can’t reach.
It’s important to understand that toothpaste and mouthwash don’t have much of a beneficial effect compared to brushing and flossing — toothpaste contains polishing compounds that help get rid of stains and may contain antibiotics to kill germs, and mouthwash contains alcohol or other bactericidal compounds, but neither of them help get rid of the biofilm. Without scrubbing, the film will remain and accumulate.
After a while, no matter how much mouthwash you use, the bacteria will hide underneath the film and do its evil work, necessitating a trip to the dentist where the hygienist will chide you most reprovingly.
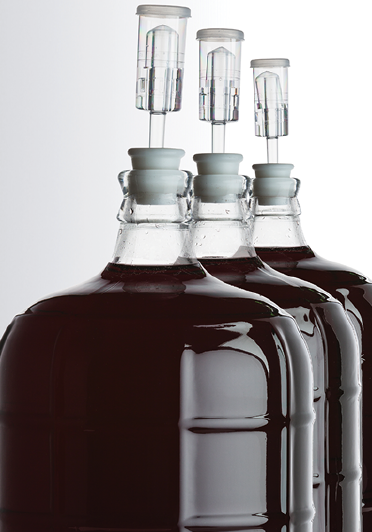
Carboys: like teeth
Which brings us to your winemaking equipment: yeast produces EPS, and even with fining and filtering, some of this film makes it all the way into the bottle. Unlike dental plaque, which can appear with amazing speed (brush three times a day!), biofilms from wine accumulate slowly. It’s possible to get away with just rinsing your equipment with sanitizers for an extended period of time before an opportunistic organism colonizes your equipment or bottles, but eventually one will, spoiling and changing your wine.
Even if you don’t get a specific spoilage organism, eventually your bottles and equipment will develop a stain as wine pigments incorporated into the biofilm make your glass and plastic look dingy and unclean. The mechanical action of scrubbing is required to get it off.
Scrubba-dubba
Before we dive in with a scrub brush, however, it’s important to follow a good sanitation protocol for maximum effectiveness, a simple five steps:
1. Rinse with clean water.
2. Soak for at least 20 minutes in warm water with a winemaking detergent/cleanser.
3. Scrub with an appropriate brush/cloth.
4. Rinse completely.
5. Sanitize before use.
The rinse is self-explanatory: your detergent will be more effective if it’s not fighting through a bunch of visible soil and goo, so blast it away with your tap-mounted bottle washer.
Your local winemaking supply store can recommend a good winemaking detergent. They come in a wide variety, but they all have one thing in common: they use cleaning chemicals that lift soils, penetrate biofilms, and are safe for use with winemaking equipment. Be sure to follow the package instructions for precise measurements — too little and you won’t get the cleaning action you need, too much and you’re throwing away money.
It’s important that you never substitute home cleaners or detergents: the majority of those products contain perfumes. These will sink into plastic equipment and taint your wine (lemon fresh Pinot Noir anyone?).
Likewise, avoid professional-grade winery cleaning products like caustic soda or some of the high-acid agents. While these work like the dickens, it’s all fun and games until you’re watching your flesh peel from your bones like the last scene of Raiders of the Lost Ark: leave pro cleaners for the pros.
Whatever product you get, it’s necessary to give it time to work. It will loosen and lift the biofilm, but the minimum soak is around 20 minutes, and if you’ve got time to spare, go ahead and soak your stuff overnight — that will make your scrub a lot easier.
Elbow grease
Cleaning things like hydrometers and spoons is straightforward: wash them exactly like you would the dishes in your sink: scrub them with a clean cloth and your detergent, rinse them well, let them drip dry and put them away in your cupboard.
Scrubbing glass carboys will require a large-headed brush with a flexible 3-foot long handle. Pour out all but a few cups of your soaking detergent and get in there, working the brush around the walls and the bottom. It’s also possible to get the inside, upper shoulder of a glass carboy by bending the head of the brush to about a 70-degree angle. Don’t forget to work the head of the brush through the neck several times to make sure you’ve got a good clean contact surface for your bung as well.
Plastic carboys should be cleaned with a soft cloth. They can be traumatized by stiff-bristled brushes, which can leave scratches that will fill with biofilms and bacteria (ew!). There are two approaches to cleaning plastic carboys. The first is to pour out most of the soaking liquid again, and then insert a clean washcloth or dishcloth. Place the carboy on a rubber mat or carpeted floor and swirl it upright to let the detergent soaked cloth rub up against the bottom. Tilt the carboy on its side and roll it back and forth to allow the cloth to slide over all of the interior surfaces. Finally, insert a solid bung in the carboy neck, or cover it tightly with your hand and shimmy it around to get the inside of the upper shoulder. This can be a bit tricky at first: leave too much detergent solution in the carboy and the cloth will float around on it without making good contact with the carboy. Too little and it will roll around in a wad, missing sections. But when you get the hang of it, it’s actually a very effective scrub.
The other way to power off the biofilm is to get a drill-mounted carboy cleaner. In short, it consists of a stainless steel rod and fabric flaps de-signed to be inserted into the carboy with a small amount of detergent solution. When you turn the drill on, the centrifugal force caused by the shaft rotation flings the fabric flaps out, almost rigid, and the soft cloth very quickly (in only a few seconds!) gets all of the surfaces sparkling clean. This unit also works well on glass carboys and primary fermenters.
Scrubbing bottles offers fewer options, but it’s also simple as can be. It’s almost always convenient to soak bottles in a rub or a sink overnight, which not only loosens biofilms, but also loosens and lifts labels. After that, an appropriately sized brush and 20 or 30 seconds of vigorous scrubbing action and you’re good to go to the rinse cycle.
Scrubbing the inside of hoses and acrylic siphon rods is trickier. You can get good results from equipment re-purposed from other hobbies: a gun-cleaning rod with soft cotton patches, used carefully to keep from scratching the plastic, will work brilliantly. Hoses can be “snaked” with a length of flexible wire (such as a coat hanger) with a twist of soft cotton on the end. Again, be careful to keep from scratching them. When hoses become well-used and stained, go ahead and replace them — it’s cheap enough that the loss of a single bottle of wine due to contamination from an old hose more than covers the cost of a new one. Think of it the same way as you do your yearly dental check-up: an ounce of prevention is worth a pound of root canals.
Rinsing well is important for bottles and carboys. It gets rid of detergent residue and the soils you removed. Be generous with your rinsing time, and when you’re done, place your bottles upside-down on a bottle tree/draining rack or in a wine case until you’re ready to use them. If you have a carboy drainer (a nifty device for draining and storing carboys upside-down) you can use that.
Otherwise you can store carboys tightly sealed with a couple of cups of sulfite sanitizing solution (3 tablespoons of sulfite powder in one gallon of water/50 grams in 4 liters) in them. Change the solution once a month if you’re not using the carboy. Hoses, rods, and other equipment can simply be stored dry in a clean cupboard or on a rack.
Scrubbed clean and stored dry or with sulfite inside, your vessels will be in fine shape until you need them again. After that it’s a matter of a quick rinse with your sulfite solution, drain them well and they’ll be ready for service.