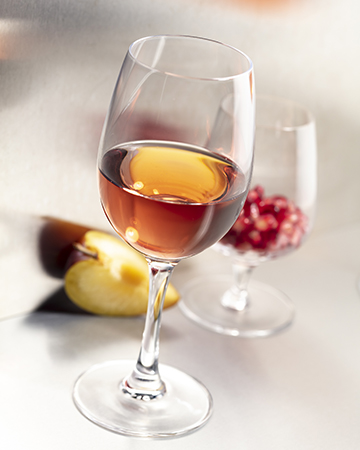
Fruit Wines from Puree
One of the greatest aspects of being a home winemaker is the variety of source materials that you can use to make your wines, including your own grapes, other fruits, vegetables, and so on. Once you start down the home winemaking path, it’s hard to imagine a grocery shopping trip without thoughts of making wines from the piles of seasonal fruits on display in the produce section interrupting your trip, not to mention increasing your grocery budget. Luckily, when you are ready to stray outside the box of grape wines, there is a lot of information available on how to approach this endeavor, and I hope that this guide will help nudge that process a little further since there is nothing quite like sipping a glass of a unique wine won through the fruits of your labor.
When making non-grape fruit wines (also called country wines), the natural inclination is to use fresh fruit for your wines. If you live in a place where you have the ability to access a sufficient quality and quantity of the fruit you want to use to make your wines, then using fresh fruit is a terrific option. However, what happens if you want to make strawberry wine in the middle of winter? What if you live in a place where you can’t grow blueberries, and using fresh blueberries would be extremely expensive? One possible answer to these issues is to use commercial fruit purees as a base for your winemaking.
Commercial fruit purees are available from a variety of vendors, although the Vintner’s Harvest brand is the most common line of purees available through home winemaking stores in North America. According to their website, Vintner’s Harvest produces their purees from ripened fruit that has been washed, sorted and, where needed, pitted and peeled. The fruit is then pureed and heat pasteurized before being packaged in sterile 49 fl. oz. (1.4 L) cans in the case of purees for small-batch home winemaking endeavors. One of the benefits of using commercial purees like these is that there is no need to take an additional sterilization step of the juice prior to fermentation since the puree has been pasteurized and aseptically packaged. No matter which brand of puree you use in your winemaking, ensure that it is sterilized or you will need to add that step to the process detailed in this story.
Overview of Making Fruit Wines from Commercial Fruit Puree
As with any winemaking endeavor, the first thing to do is make sure you have a fully thought out production plan and have assembled all of the ingredients and equipment that you will need. When making fruit wines from purees, here is a suggested list of equipment and supplies that you will need:
•Primary fermentation vessel
•Hydrometer and hydrometer test jar
•6.5-gallon (25-L) carboy for secondary fermentation
•Multiple 5-gallon (19-L) carboys for clarification and racking
•Airlocks for all vessels
•Automatic siphon
•25 wine bottles and corks
•Long-handled mixing spoon
•Measuring spoons
•Six 49 fl. oz. (1.4 L) cans of fruit puree
•Sufficient sugar, acid blend, pectic enzyme, yeast nutrient, and grape tannin for your recipe
•One packet of wine yeast
•Potassium metabisulfite, potassium sorbate, and isinglass packet
•Cleaning and sanitation chemicals
•Total acid and pH test kits (optional)

Preparing the fruit puree for fermentation involves combining the puree with water, sugar, and other ingredients prior to topping with yeast. This is best accomplished by warming ~2 gallons (8 L) of water and adding that water to the primary fermenter. Sugar, pectic enzyme, yeast nutrient, acid blend, and grape tannin (if needed) are then added to the water while stirring the mixture until everything is dissolved (see Table 1 for the amounts, based on the type of fruit being used). Fruit puree is added next, and finally more water is added to reach a total volume of 6 gallons (23 L). Once the juice is fully prepared, the pH, total acidity, and sugar content (Brix) can be measured and adjusted if desired. The juice can also be tasted, and bench trials conducted, to help guide any adjustments in acidity. Since the puree is sterilized as part of the packaging process, you do not need to add potassium metabisulfite at this point, rather, the yeast can be sprinkled directly on top of the juice in the primary fermenter.

Like making wine from a concentrated grape juice wine kit, it is extremely critical that the water used to fill the fermentation vessel be of very high quality. Tap water straight from the faucet should never be used here since there are typically residual amounts of chlorine in the water that can potentially cause off-flavors in the final product and interfere with the growth of the yeast. Using bottled water, preferably one that has been treated with ozone, is one option. Alternatively, you can use a small filter like a Brita filter to purify the tap water before use, just make sure to filter chlorinated tap water and use right away or boil the water if it is left standing for an extended period of time to ensure there is no bacterial contamination of your wine. You can also treat 5–6 gallons (19–23 L) of tap water with 1⁄16 teaspoon of potassium metabisulfite to drive out the chlorine.
While any number of wine yeasts can be used to ferment fruit purees, Vintner’s Harvest VR21 wine yeast is commonly recommended for this application and has been extremely successful in every batch I have made. That being said, yeasts are well known to impact the structure of a finished wine, so experimenting with different yeasts to optimize the flavor profile of your wine is a good idea.
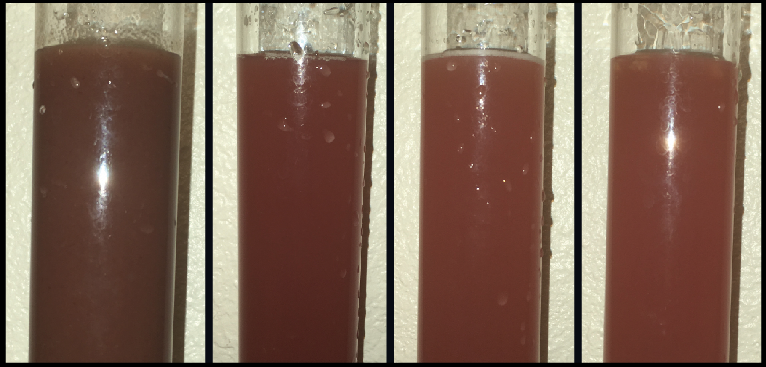
Physical changes in your wine will be most pronounced between 24 and 48 hours after adding yeast to the puree juice. Typically, it will take around 24 hours for the first signs of fermentation to occur, with full fermentation seen by 48 hours. Before the onset of full fermentation, your puree juice will resemble a highly pulpy fruit juice, except much sweeter with the added sugar. At this point in the process, the juice itself will not have much color, rather, the color of the fruit will still be contained within the shreds of the fruit itself and suspended. Typically, the appearance of the juice at this point will be darker than the final wine product.
Once fermentation starts, much of the suspended solid material coagulates to form large “fruit floaties,” while much of the pigments and other components of the pureed fruit will be extracted into the body of the fermenting juice. During this stage of fermentation, you will sometimes observe changes in the color of the juice as additional pigments are extracted from the puree.

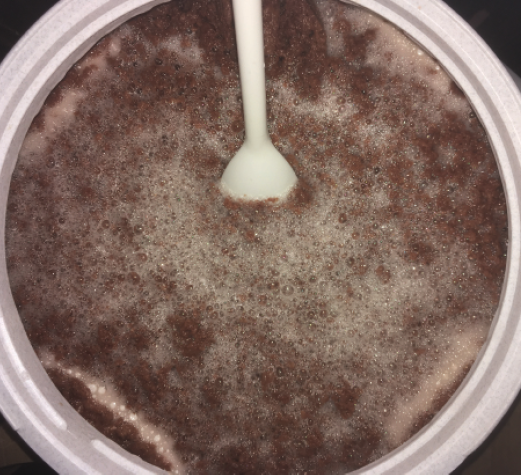
Fruit floaties (pictured below) were addressed in depth in a “Wine Wizard” article written by Alison Crowe in the June-July 2014 issue of WineMaker and are a result of pulp and pectin. While they look strange, there is nothing to be concerned about when you see them. In the context of your fermentation process, the main issue with fruit floaties is that they will form a dense cap on top of your fermenting juice. If this cap is not broken up on a daily basis, then the fermenting juice will become oxygen-starved and fermentation will slow to a stop. Luckily, there is a simple fix to this issue just by stirring the fermenting juice once daily for a minute or so. This will break up the cap and serve to oxygenate the juice so your yeast can keep fermentation going strong. Punching the cap is only needed during primary fermentation, and the cap, along with fermenting juice, can be left undisturbed during secondary fermentation. Fruit floaties will not always form during fermentation, and even when they do not it is still a good idea to stir the wine on a daily basis during primary fermentation to ensure that the fermenting juice is properly oxygenated.
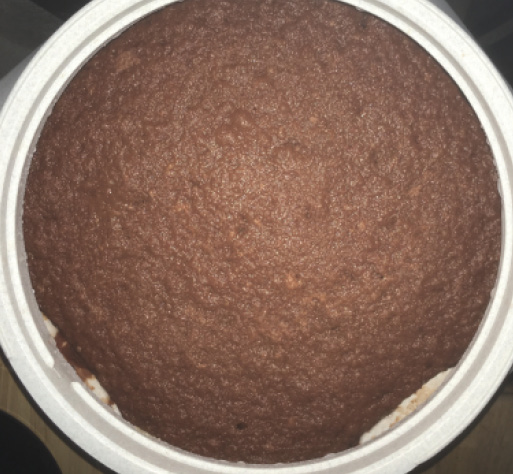
Photographs showing (top) the cap that will form during primary fermentation and (bottom) vigorous carbon dioxide evolution once the cap has been broken up.
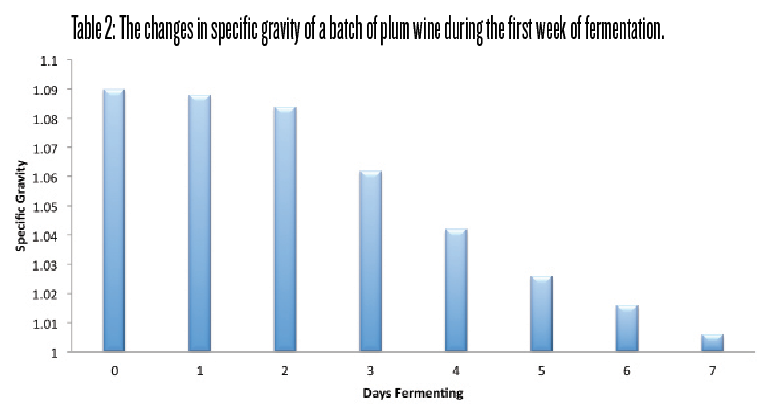
As with any fermentation process, the use of a hydrometer to track fermentation by measuring changes in specific gravity can provide very useful information about how the fermentation process is proceeding. Typically, the largest changes in specific gravity will occur during the first week of fermentation, with a characteristic initial lag time as the yeast begins to multiply, followed by a steep decline, and then finally a leveling off as the last of the sugar is consumed. Table 2 illustrates a real-life example of this. Evolution of carbon dioxide can also be used as a proxy measurement, with vigorous bubbling seen in the fermenting juice while fermentation is most active.
When I make wines from fruit purees, I typically like to ferment to dryness and then, when desired, back-sweeten after fermentation to balance out the final wine. Alternatively, if you know that you want a certain amount of sweetness in the final wine, it is also possible to stop fermentation prior to consuming all of the sugar. My recommendation is to ferment to dryness for your first couple of batches and then sweeten prior to bottling as this is the easier technique to get exact results. Tips for how to best sweeten your wine after fermentation can be found in Jim Drevescraft’s “Bottling, Start to Finish” in the Summer 1998 edition of WineMaker and Alison Crowe’s “Wine Wizard” column on alternative sweeteners in the August-September 2014 issue of WineMaker.
To start the secondary fermentation, the juice is siphoned off the sediment into a 6.5-gallon (25-L) carboy and sealed with an airlock. Secondary fermentation can be tracked using both a hydrometer as well as observation of the amount of carbon dioxide bubbling, although some gas evolution will still be observed even after the specific gravity falls below the lowest measurable number of 0.990 on most hydrometers. Typically, secondary fermentation takes about two additional weeks to finish completely.
Fruit floaties will be highly visible in the secondary fermentation process as well. Early in secondary fermentation, floaties will congregate both at the top and the bottom of the carboy, with the floaties at the top lifted up as a result of continued low level carbon dioxide evolution. As fermentation slows over time, the floaties will eventually congregate at the bottom of the fermentation vessel, leaving a cloudy wine filling the bulk of the carboy.
Clarification of the wine is carried out in the same way as with any other wine. Fermentation is completely stopped and all viable yeast are neutralized by adding 1⁄2 a teaspoon of potassium metabisulfite to the wine. Then stir vigorously twice daily for three days to degas the wine. Next, stirring in 1 teaspoon of potassium sorbate stabilizes the wine, a step that is especially important when making a sweet wine. Finally, the wine is clarified through the addition of a clarification agent. Addition of 11⁄2 ounces of isinglass under vigorous stirring is usually very effective at achieving clarification, although any clarifier could be tried if isinglass is not desirable or available. Allowing the wine to sit for one week is typically sufficient to remove the cloudiness and produce a thick layer of sediment at the bottom of the carboy. Sometimes the use of additional clarifiers, additional settling time, or even filtration are required to achieve a final wine with the desired clarity.
Finishing the wine involves racking to remove the wine from the sediment. Due to the very high volume of sediment commonly produced when using purees in this process, it is generally best to assume that some volume of wine will be lost in the racking process and the first racking should be into a 5-gallon (19-L) carboy, although it is a good idea to have a half-gallon (2-L) jug standing by to fill with as much of the remaining wine as possible. While the contents of the half-gallon (2-L) jug will include a high percentage of fruit floaties, this wine can be used to top off the bulk wine in subsequent rackings. Usually two or three rackings are required to fully remove the sediment from the wine.
Once the wine has reached the desired clarity it can be bottled as usual using whatever bottle types, closures, seals, and labels you prefer. Darker wines should be bottled in green glass to preserve the color, while lighter wines can be bottled in clear glass. Give the bottled wine a couple of weeks to settle into the bottle, and if properly bottled, these wines can last a year or two with notable improvements in taste likely to occur over the first year of aging. Many of these wines, and especially ones made from lighter fruits, are best served slightly chilled.
Now that your wine has been bottled and stabilized in the bottle, the only thing left to do is enjoy!
Recipe Details
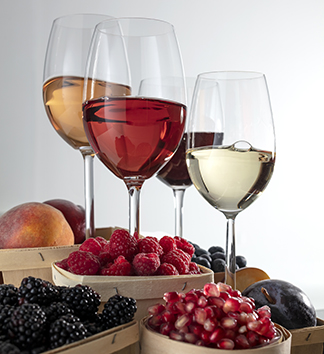
As of the writing of this article, Vintner’s Harvest offers 16 different fruit purees in the 49 oz. cans, including a variety of berries, stone fruits, and citrus options. These are listed in Table 1, along with recommended starting points for how much other ingredients you should add per gallon (4 L) when making wine from these purees. In all cases, I recommend starting with adding one 49 oz. can of puree per gallon (4 L) of juice, which will produce a deeply flavored wine. If you are new to winemaking from fruits other than grapes, I would recommend additional reading on this topic as well to get a better feel for customizing your recipe.
Note that, as with any home winemaking endeavor, these guidelines should only be seen as a place to start. Once you have made a few batches of your own, you will be able to determine whether factors such as alcohol content, sweetness, and acidity match what you are looking for in your fruit wines. I hope you find these guidelines helpful as you explore the world of making wines from fruit purees.
Step-by-Step Procedure
Here is a quick step-by-step procedure that I follow when making 5 gallons (19 L) of wine from fruit purees.
•Clean and sanitize the primary fermenter.
•Add sugar to the primary fermenter followed by 2 gallons (8 L) of warm water.
•Stir to dissolve the sugar using a sanitized mixing spoon (should take 5 to 10 minutes of periodic stirring).
•Add acid blend, yeast nutrient, pectic enzyme, and grape tannin, and stir to dissolve.
•Add six cans of 49 fl. oz. (1.4 L) fruit puree.
•Top fermenter off with water to a total puree juice volume of 6 gallons (23 L).
•Stir puree juice thoroughly.
•Measure specific gravity of the juice along with pH and acidity (if desired).
•Sprinkle one packet of yeast on top of the juice.
•Measure the specific gravity of the fermenting juice and stir the juice to break the cap and keep the fermenting juice well-oxygenated once daily during primary fermentation.
•Once the specific gravity reads less than 1.000, transfer the wine to a cleaned and sanitized 6.5-gallon (25 L) carboy and cap with an airlock. This will typically take 6 to 7 days after initializing fermentation.
•Once the visible evolution of carbon dioxide has stopped, typically 7 to 14 days after transferring the wine, add 1/2 teaspoons of potassium metabisulfite.
•Stir wine vigorously twice daily for at least one minute each time to degas the wine.
•Add 1 teaspoon of potassium sorbate and stir wine vigorously.
•Add 1 1/2 oz. (43 g) packet of isinglass and stir wine vigorously for one minute.
•Allow wine to settle until clear and rack into a clean and sanitized 5-gallon (19-L) carboy.
•Repeat settling and racking until wine is completely clear. Use additional fining agents or filtration as needed to produce a wine with the desired clarity.
• Add another 1/2 teaspoon of potassium metabisulfite to the wine, right before bottling.
•Bottle the wine and cork or cap as usual.
•If carefully bottled and stored properly, these wines will hold up for at least 2 years, with noticeable improvements over the first year of aging.