The Willamette Way to World-Class Wine
Did you ever notice that California is hot? You know, that exasperating kind of hot that feels like it might actually singe your lungs? Well, that same heart-stopping heat is the foundation for California’s successful wine industry. Hot days and cool nights provide the perfect climate for most varietals, be it Cabernet Sauvignon or Chardonnay. But if climate is the key to California’s success, it is also the source of some limitations.
Enter Oregon. Several decades ago, other winemakers had a far different vision: To replicate the classic wines of Burgundy. With a few exceptions, California was not up to the task. The soil didn’t fill the bill and the climate was wrong for Burgundian grapes.
Among these visionaries were David and Ginny Adelsheim, who in June of 1971 visited Oregon’s Willamette Valley. Located about 60 miles inland from the Pacific Ocean, the valley boasts volcanic soils with high acid levels, a cool climate and a coastal mountain range that holds summer rainfall to a minimum. The Adelsheims fell in love with the area and bought land on the southern face of Chehelam Mountain.
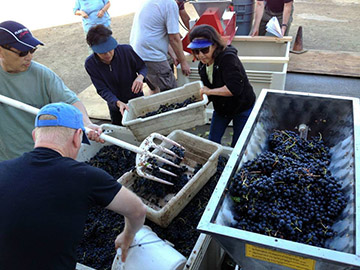
Starting with 15 acres of vineyards, they planted a selection of Pinot Noir, Chardonnay, Riesling and Pinot Gris. As production grew, the Adelsheims met demand by buying additional grapes from their neighbors. By 1989, they had planted an additional 19 acres — mostly with Pinot Noir — and continued to lease and purchase more land throughout the 1990s. All told, the winery grew from 1,300 cases in 1978 to well over 15,000 by the end of the 1990s.

Adelsheim is now a renowned producer of Pinot Noir with several labels that include Ridgecrest Vineyards, Oregon, Seven Springs Vineyard and Elisabeth’s Reserve. The latter, named after Ginny and David’s daughter, is made of grapes from the estate vineyard. Its spicy characteristics have earned it kudos in the wine world and it often falls into the top tier of Pinot Noir wines produced in America.
David’s brother, Michael Adelsheim, has been with the winery 16 years. He started off, in his own words, “as a cellar rat and, due to the wonders of nepotism, worked my way up the ladder.” He claims no formal winemaking training. “No one here is a university-trained winemaker,” he adds. “But we’re thrilled by the quality of our wines, especially the Pinots. We consider them the most finely etched.” Here are his tips for home winemakers.
Stay in Touch with Your Wine
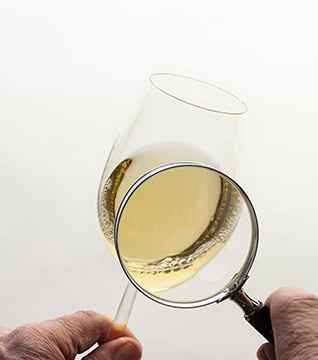
Turning philosophical for a moment, Michael says that Adelsheim Vineyard explores the “soul of winemaking.” On this note, he says the most important tip he can give home winemakers is to keep in touch with your wines throughout the entire fermentation process. “I can’t stress it enough,” he says. “You should know where your wines are at all times and check in on them regularly. I’d say two times a day at the minimum.”
If you can’t visit your wine thrice daily, here’s a compromise: Take a small sample several times each week. Taste it. Smell it. Get a sense of where your wine is throughout fermentation and aging. This will teach you how your wine is progressing and will help you improve your skills over time. Monitor the fermentation temperature, too. Adelsheim’s Pinot Noir, for example, ferments between 85° and 88° F, while its Chardonnay hovers around 65° F.
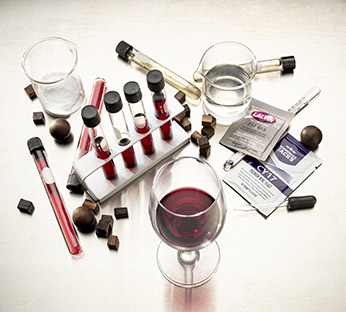
Testing, Testing
But the touchy-feely approach to winemaking will not be enough. You will also need to employ some old-fashioned science to really refine your skills. Michael says “learning how to run tests is key.” One important test is measuring the wine’s sugar level with a hydrometer. As the wine ferments to dryness, the sugar is converted to alcohol and the sugar level will drop accordingly. Watch the batch carefully as it approaches its finishing level, which should be around 0° to –1° Brix.

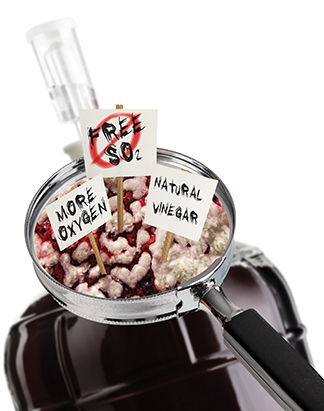
Michael puts particular emphasis on measuring acidity levels and checking sulfur dioxide, an anti-oxidant that will protect your wine if it comes in contact with the air. Knowing your acidity levels will help you determine your SO2 levels. Typically, a low-acid wine (titratable acidity of 0.60 or below) means you will need more SO2, while less SO2 is usually necessary in high acid wines (0.75 or above). “It’s best to learn how to find a balance between acid and SO2 levels and adjust your technique from there,” he says.
Acid content is measured with a simple kit; you take a sample of juice and mix it with an alkaline solution until it neutralizes. Your titratable acidity should stay between 0.60 and 0.80 as a rough guide. A basic SO2 kit is a simple litmus- set-up — you put a drop of wine on litmus paper to determine the SO2 level. You can find these kits at any home winemaking shop.
SO2 is available in powder or tablet form. The powder gives home winemakers more control, because you can measure exact amounts. A good rule of thumb is to add one level teaspoon of SO2 every time you rack a five-gallon batch. Be careful: If you add too much SO2, it could harm your batch. If you do add too much, you can save your wine by regularly racking it back and forth. The SO2 will eventually dissipate, but it takes time and lots of racking. For this reason, it’s best to add SO2 slowly and sample your wine for off-flavors.
Clean and Clean Some More
Winemaking, as we all know, is 99 percent cleaning. That’s the bad news. The good news is that it’s easy to do the process right. Michael recommends a blend of citric acid and SO2, calling it the “perfect all-purpose cleaner.” For home winemakers, this is a simple concoction that consists of 8 ounces of sodium metabisulfate, one ounce of citric acid and one gallon of warm water. Both chemicals come in powdered form. The SO2 costs about $3 for 8 ounces, and citric acid costs only 99 cents for the same amount. Put the mixture in a spray bottle or plastic jug and you’re all set to clean. Be careful: The citric acid causes the S02 to release a strong gas. Michael’s blend can be extremely tough on your olfactory senses — even dangerous, if you have asthma.
Of course, regular bleach and water is another tried-and-true cleaning solution. Be aware, though, that bleach only disinfects. It does not clean the dirt and grime away. You could also clean with bleach and soda ash (also known as 20-Mule Borax). Either way, rinse clean until you taste nothing but water.
Master the Art of Aging
For flavor during aging, turn to oak barrels or oak chips. Barrels are the best choice, Michael says, since they breathe during aging and impart additional characteristics to the wine. If you want to devote that kind of money and time to your homemade wine, ask about barrels at your home winemaking shop or favorite mail-order business. A new 15-gallon French oak barrel might cost as much as $300; some stores offer reconditioned barrels for less (The Barrel Shop in Napa Valley, for example, sells a five-gallon barrel for $155, not including shipping).
“But oak chips are a decent alternative,” Michael adds. “The final effect isn’t the same, but they work really well for the home winemaker.” And chips are easy to use. Add them to your aging vessel and rack the wine onto the chips after fermentation. The instructions on the package will tell you how much to use (usually about 1/2 pound of chips for every 100 gallons of wine). For a smaller batch, this equates to .03125 pounds of chips (less than an ounce) for 6.25 gallons of wine. Remember the winemaking mantra: You can always add more chips if you need more oak, but you can never take the oak away once it has worked its way into your wine.
How long you should leave your wine on the oak is a matter of taste. A week might be too little; a month might be too long. Sample your aging wine often, and rack it as soon as you reach your desired flavor. When in question, rack and let it sit. After several days and various tastings, if you think you need more oak, add it immediately.
Avoid Exploding Bottles
Finally, Michael shares an excellent safety tip for people who make sparkling wine: Never use an old bottle, especially if it has been under pressure before. “The fact is,” he explains, “that you’re courting danger whenever you reuse bottles that already have been pressurized. Pressure makes them more fragile and extremely dangerous. Carbonation could cause an old bottle to simply explode.”
Having shared his practical home-winemaking tips, Michael reverts to a bit of Zen-like advice. “Remember that you’re trying to make the best wine possible with the materials that you have,” he says. “Be happy making the best you can make, but don’t be sad if it isn’t the greatest wine on earth.” Could there be a better tip? Probably not. Now pass the wine.