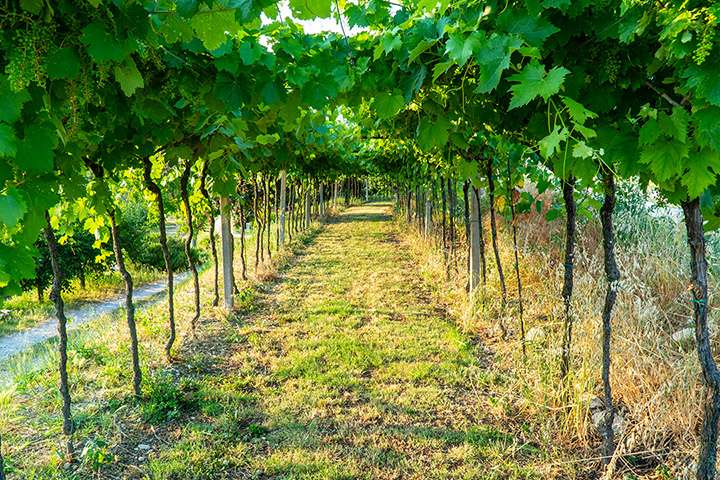
Annual Vineyard Growing Calendar
In college I had a good friend from New Jersey who was convinced that Californians lacked depth of character because we didn’t have to live through harsh winters. Even though I disagree that you have to shovel snow or ice fish to reach your potential as a human being, I do agree that awareness of the passing seasons coordinates our lives in mysterious ways. There is a right time of the year for everything, including certain vineyard practices.
There is a rhythm to the way the winegrowing season advances and I would like to provide aspiring new vineyardists with a simple viticultural metronome that they can adjust to their own vineyard and climate.
Farming winegrapes is a challenge, and developing a plan for the upcoming year will help your backyard vineyard live up to its potential. We will also define backyard grape growing strategies and offer suggestions concerning the seasonal timing of pruning, watering, fertilization, disease control, pest control, canopy management, weed abatement and harvest.
POST-HARVEST (October through February)
One common misconception of backyard vineyard ownership is that your work stops once the fruit has been harvested. The tendency is to spend every spare minute with the wine in fermenters, carboys and barrels. Spending a little time in the vineyard after harvest will guarantee that the vines are in tip-top shape before their long winter’s nap.

Put the vines to bed in a state of cleanliness. Go back through the vineyard after harvest and remove all the small clusters (second crop) that might have been left behind. Also remove all fruit stems (rachis) that were picked clean by birds and other pests. Powdery mildew and other sporulating diseases need a place to go dormant in the vineyard and errant fruit clusters are some of their favorite haunts. Leaving nothing but hardened canes in the vineyard stops disease cycles.
Grapevines have two major bursts of root growth during the growing season. The first (and most important) is between May and August, but there is also a significant period of root growth after harvest. This is why it’s vital that you give your vines a deep drink of water — up to 10–15 gallons (38–57 L)/vine — after the fruit comes off. If significant rainfall occurs at harvest time (enough water to soak deep into the soil profile) this practice may prove unnecessary.
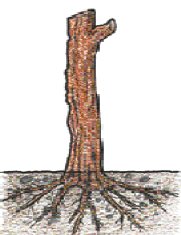
After the fruit is removed from the vines, the vine starts to store its leftover nutrients in the trunk and root system to keep the vine alive during the cold and harsh conditions of winter. If your vines show very low vigor, you can toss a few tablespoons of a 15-0-0 fertilizer under each vine to give it some nitrogen to chew on over the winter. Do not fertilize if your vines have adequate vigor during the growing season, as excess nitrogen can impede the vine’s ability to go into dormancy.
If you are in a climate where grasses can grow through the winter, consider growing a cover crop between your rows. For low-vigor sites, plant legumes, clovers and some rye grass for erosion control and to add nutrients when the crop is turned over into the soil in spring. For high vigor sites, planting some fescue grass can soak up some of the excess water and nutrients. Providing competition for high vigor vines can check excess (rank) growth. Allow the fescue grasses to continue growth during the spring, as they will continue competing for water and nutrients as the (high vigor) vines start growing again.
Prune the vines in the dead of winter. Most vineyards are pruned in January and February, although some vineyards can be pruned earlier or a bit later. Note in your journal when your vines drop their last leaves (in the winter) and when the vines experience bud swell and budbreak (in the spring).

Pruning focuses the vines’ energy to produce fruit from specific areas of the vine and keeps the vine from taking over more trellis space than is intended. Fruitfulness is highest on wood that grew the previous year. This means that when you prune, you always want to leave a selected number of canes (cane-pruned) or spurs (spur or cordon-trained) from the previous season’s growth. I suggest retaining between 12 (for low vigor) to 30 (for high vigor) buds per vine during pruning. The rest of the growth is pruned off and, if possible, shredded or burned and put back into the vineyard soil. Canes left whole on the ground can also aid mildew and rot, perpetuating their yearly cycle.
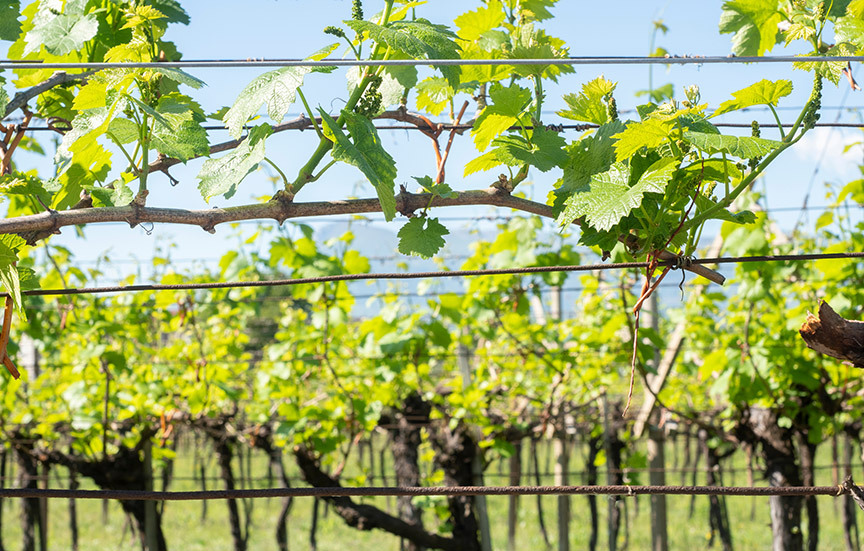
BUDBREAK through BLOOM (March through June)
As the vines begin to wake and burst forth with new green growth, it becomes obvious that we need to get back into the vineyard and begin our early spring labor. Grapevines are meant to grow in areas that have their soil profile fully recharged with rainfall each year. Most soils will be considered “recharged” with 15–20 inches (38–51 cm) of winter rainfall. Applying 10–15 gallons (38–57 L) per plant is appropriate at or just before budbreak to leach salts from the soil and to give the vines the moisture they need to start the new year’s growth. Continue to irrigate in dry conditions. Plan on giving the vines 4–6 gallons (15–23 L) of supplemental water in any given week when rainfall is less than a half inch. Rainfall of an inch or more in any given week should be all the water the vines will need.
Remember to watch for frost! Sustained temperatures under 32 °F (0 °C) will fry your shoot tips and young fruit clusters. Overhead sprinklers, or simply spending some time with a hose spraying down the vines by hand for an hour or so, should coat the delicate tissues with water, which will freeze overnight and insulate the tender tissues like an Eskimo in an igloo.
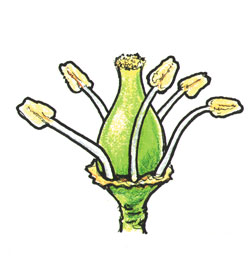
You should then fertilize in March and again in late May. If your vines need an extra boost of vigor, give them some nitrogen fertilizer or a fertilizer with a bit of potassium and phosphorous. You may want to give them a small amount of zinc before bloom, as it can improve fruit set if applied judiciously. Vines that grow in balance without added nutrients do not need to be fertilized.
Always remember to spray! You should be applying sulfur to your vines every 7–14 days depending on mildew pressure, starting when the shoots are a few inches long. Do not apply sprays during flowering, as it can impede the process of pollination. Mildew loves moist weather and temperatures between 65–75 °F (18–24 °C). You should reapply after measurable rainfall, as the sulfur will wash off and the rain can spread the bursting spores of mildew. Make sure to stop spraying sulfur after the fruit softens, as it can stay on the clusters and cause hydrogen sulfide stink in your wine.
Remember that mildew cannot grow on fruit once it hits about 16–18 °Brix. For most home vineyards, a backpack-style sprayer will work fine, while larger vineyards may require a gasoline-powered sprayer that is towed behind an ATV. The key is to run a tank cleaner through your sprayer regularly and to clean the screens and nozzles after each application.
Hoe out the weeds from under your vines. Keep the vine row clean from weeds and grasses. Also, remove noxious weeds from between the rows while they are small and before they go to seed. Careful hoeing will allow you to decide what grows in your vineyard. You also want to “sucker” your vines, which means removing all growing shoots below the head of the vine (and out of the trunk or the dirt). The earlier you “sucker,” the easier it will be. This helps direct the vine’s nutrients to correctly positioned and fruitful shoots.
Begin managing the canopy of your grapevines. The key to a balanced canopy that produces top-notch wine is to have an uncrowded fruit zone with enough sun and wind penetration to keep the fruit from being attacked by mildew or rot. It should also provide enough shade that the fruit does not burn. Go through the vines every week or two and remove shoots that are not supporting fruit. Each fruitful shoot should have its own space and should not be crowded by adjacent shoots.
In general, clusters should not be touching each other. You may also notice that lateral shoots may spring from main shoots. These “laterals” cause crowding and can be removed as well. If you are using shoot-positioning wires, you can start tucking the growing shoots between the wires to direct the growth upward. Directing the growth vertically will help position the fruit above the cordons and canes so that you can remove leaves and have all the fruit at the same height. This is important for sun exposure and uniformity of ripening.
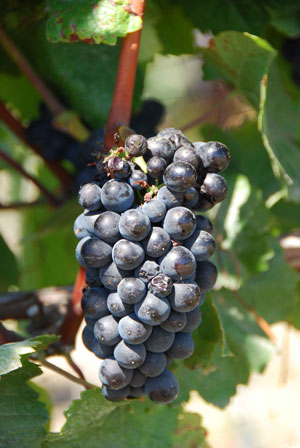
BERRY-SOFTENING (Early ripening through harvest)
Think of this period of vine growth and fruit maturity as the fourth quarter of a big game. You’ve trained, practiced, put in the work and now you need to finish strong to win. Do whatever is necessary to keep the fruit clean and the critters at bay. Don’t allow your vines to shut down too quickly.
Mature, evolved fruit is more flavorful and balanced than grapes that dehydrate to get sweet. As the vines continue to grow, you may need to go through them each week to remove new lateral shoots, pluck a few more leaves to keep the canopy open and healthy. You may need to hedge the top of the vines if they are flopping down and shading the fruit. If the vines still have actively growing shoot tips after the fruit has softened, cut back watering to slow down vegetative growth and promote ripening. If you need a little more ripeness at the end of the season, you can turn the water off to give the fruit a bump of sugar — however, as previously stated, it’s better to have healthy leaves making sugar than to have the fruit ripen as the result of dehydration.
Keep the critters away! Ants, bees, wasps, yellow jackets and other insects can exploit weak spots in the grape skins and make a mess of your clusters. Compromised grape skins can start a rot problem, so you need to be vigilant early in the season in controlling insect populations. Once the insects are eating the fruit it’s too late for any control strategy. Search out and destroy wasp and yellow jacket hives near the vineyard before the fruit is sweet. You should also put out baits for ants to keep populations down before the heat of summer.
Bird netting is a good way to keep your fruit from “flying away.” Erect a fence or rescue a few greyhounds to keep the deer and other mammal pests off your fruit.
Be aware of the weather, but don’t freak out. Be wise when deciding when to pick your fruit. Remember that delicious fruit makes delicious wine, so use your own sense of taste (along with Brix and pH testing) to decide on a picking date. A pH meter won’t be drinking your wine, so learn to trust your own palate. If a huge storm is coming and your fruit is tasting really good, you may want to pick before the big rains hit. A little rain won’t destroy your crop but it may lower the sugar content and push harvest back a week or so. You need to weigh your decision to pick carefully and try to be as patient as possible. A wise vineyardist feels the right day to pick. Trust your instincts and your palate and keep a grape-growing journal!
It is not unusual for vineyardists to make the same mistakes every year as a result of forgetting the challenges they faced the previous vintage. If you jot down a few notes each season, you have a better chance of tweaking your practices and improving your wine quality with each year.
Invite an expert over for dinner and good wine. Having another vineyard owner walk through your backyard vines may result in some fresh suggestions and improvements.
Taking the time and effort to grow your own wine grapes requires perseverance and character. There is something extraordinary about creating wine from water, elbow-grease and a piece of earth. In a world that seems so rushed and prepackaged, there is a slow, honest authenticity about continuing the tradition of home winegrowing. It reminds me of that old aphorism, “tickle the earth with a hoe, and she laughs with a harvest.”
SUMMARY
As the articles in this section indicate, establishing a vineyard can be a costly and time-consuming endeavor. For the committed home winemaker, however, the extra effort may bring a whole new level of enjoyment to the hobby. Any effort you make to research your options and learn what has worked locally before you start installing your vineyard will pay large dividends in the long run.
In the next section, we’ll discuss choosing a rootstock for your vines, how to plant dormant grapevines and how to manage the early part of your growing season, especially around budbreak.