Irrigation systems and strategies
Putting down roots
When it comes to vineyard installation, we discussed in the June-July 2023 issue ways to determine irrigation demands. And when it comes to whether irrigation is needed in the first place, it should be answered with a simple query: Can vineyards in your locale produce good fruit year-in and year-out with normal rainfall patterns (i.e. no irrigation)? You don’t need to plant a vineyard before answering this question, but you may need to get in your car or truck and go do some research and reach out to local viticulturalists.
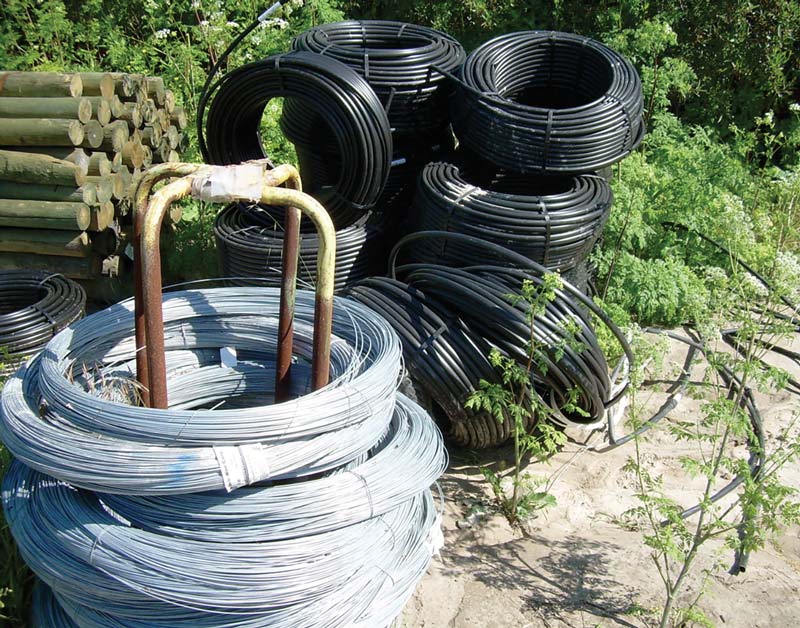
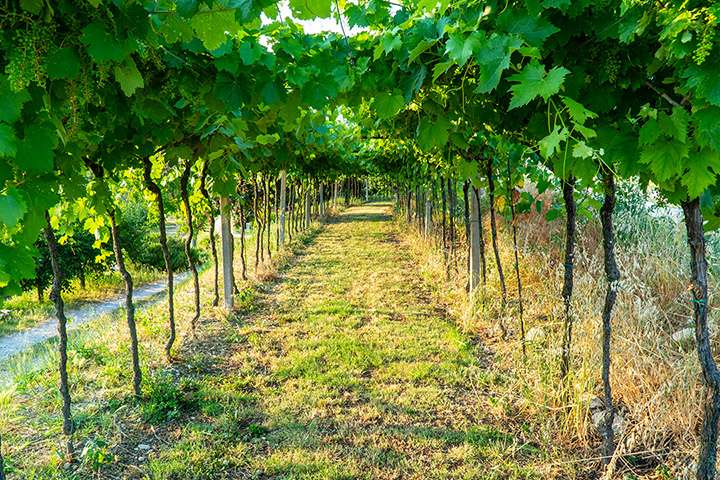
Establishing a vineyard is a daunting task. Determining what type of irrigation best suits your needs should be near the top of the list. Drip systems allow for exact amounts to be delivered. Photo by Wes Hagen
If you determine that locals do NOT use irrigation, your vineyard establishment costs will be drastically reduced. If it appears that irrigating vines is the standard, ask questions like: How did you set up your irrigation system? Do you use furrow, sprinklers, or drip irrigation? How much water do you apply at various times of the year? How much did the system cost and where did you order the parts? Try to visit at least three different vineyards, ask a lot of questions, take notes, taste their wines as a reference, and for goodness’ sake bring your host some nice wine or cheeses, or better yet, take them out to dinner. It will pay for itself in time.
Keep in mind that the original habitat of the Eurasian grapevine, Vitis vinifera, receives around 35 in. (90 cm) of annual rainfall, so I like to suggest areas that receive at least 25 in. (65 cm) of rain per year are good candidates for dry farming.
Determining Your Needs and Budget
Here are the three basic irrigation systems for vineyards. They are listed from least expensive to most costly.

Surface irrigation or furrow irrigation: This is simple stuff. Using a hoe, a shovel, or other tool, cut a furrow down the vine row, right next to the trunks of the vine. With a hose, run water from the top of the furrow (elevated side if there is one) until the whole furrow is flooded, and the water begins to move through the soil and is usable by the vines. Pros: Low cost of installation, no sprinkler water on vines and fruit (leads to disease), good control of soil salinity, some frost protection, and the application is not sensitive to wind. Cons: Not effective on hillsides above 2–5% slope, low irrigation efficiency (a lot of water is used), berms and furrows must be maintained, which can be labor intensive.
Sprinklers: Permanent sprinklers are installed on risers that are at least a few feet above the vines. Sprinklers rain down water on the whole vineyard. Generally, the sprinklers will be affixed to existing trellis stakes, and will extend above where you anticipate the canopy to grow. Pros: Frost and heat suppression, better on shallow soils, keeps dust and dust mites under control, and can be automated. Cons: High initial cost, will increase bunch rot and mildew pressure significantly, and maintenance of sprinkler heads and system.
Drip irrigation: There’s a reason why 90%+ of commercial vineyard installations choose drip irrigation. During installation a ditch is cut perpendicular to the vine rows and PVC pipe is installed down the center of the vineyard and is buried. Stubs are created for every vine row, and T- sections are attached to ½-in. (1-cm) irrigation tubing that is suspended from a low trellis wire. Drip emitters are “punched” into the system, the ends of the tubing are crimped and secured, the system is charged with pressure, and the drippers begin to apply water very accurately and efficiently. Pros: Efficient and easy to control vine water status, useful on steep slopes (steep slopes should use ½-gal./1.9-L an hour emitters, while gentle and flat vineyards can use 1-gal./3.8-L), can irrigate late in season, can be automated, applies the same amount of water at the top and bottom of a hill. Cons:
Drip irrigation is expensive to install, has no frost control, and the emitters and system need to be cleaned to prevent clogging.
Drip Irrigation Hardware
Here’s some information to get you started on what kind of hardware to use and information on how to get it installed:
Drip hose and emitters: Standard is 0.62-in. (16-mm) drip hose and 1-gal./3.8-L (or ½-gal./2-L for hillside) pressure compensating (PC) emitters from Netafim. Check out www.netafim.com for full details and ordering, or www.pcdrippers.com for a very basic view of how they look and function.

Trellis wire: For creating a wine grape trellis and for supporting a drip-line above the ground: Make sure your lowest wire is high enough to allow you to hoe under, 18 in. to 24 in. (450 to 600 cm) is the standard. This allows some equipment and the family dog to squeeze under, but not too much so that wind will greatly hamper the irrigation efficacy. I prefer 14-gauge wire.
Pumps and irrigation planning: There are lots of options for pumps if you need extra water pressure. Matching a pump to a specific agricultural application is best left to professionals, as the math needed to integrate slope, pressure, and flow is a fairly complicated process. For smaller projects, contact a reputable landscape installer in your area. Most backyard vineyards will be able to get away with using the existing pressure from their municipal water systems.
Irrigation Protocols
OK, so the irrigation system has been planned, purchased, and installed, and now you can get water into your vineyard. Now how much water should you apply and when should it be turned on? Of course the answer is site specific and the answer will vary according to the following factors:
Soil type: Clay retains more water than sand. Clay soils hold water a long time and will require less irrigation and you may be able to wait until late spring or early summer to start putting water down. Sandy soils drain quickly and will require more water and frequent applications. When I worked in the Santa Barbara region of California, we had very sandy soils and we usually started applying 4–7 gallons (15–26 L) per week per vine in April or May, and continued to apply a similar amount until after fruit softening.
Furrow irrigation: When the ground is dry and the vines need irrigation, a deep weekly or twice monthly furrow irrigation may give the vines all the water they need.
Sprinkler irrigation: When vines need supplemental irrigation, start with a three- or four-hour sprinkle once a week and see how the vines react. Increase in warm weather and decrease in cool weather. Pay special attention to mildew and rot, and realize that weed growth will also increase between vine rows. Sprinklers are also a great way to start your cover crop growing after harvest.
Drip irrigation: During times when soil is dry, apply 2–7 gallons (8–26 L) of water via drip emitters per week. Watch the growth of the vines carefully to make sure the vines are not stunted (too little water/nutrients) or overly vigorous (too much water/nutrients). Reduce water after bloom until set, and also reduce water just before harvest, but keep the vine viable with some green leaves through picking.
Post-harvest irrigation: Vines need a deep drink after harvest. There’s nothing wrong with putting 10–20 gal. (40–80 L) per vine after harvest to help the vine root deeply (a period of rapid root growth follows harvest).
More water in the heat, less in cool weather: Growing grapevines are constantly taking up water and nutrients and respiring water vapor from their leaves. In hot weather they are using much more water and you need to increase irrigation. In cool, foggy weather, water use is drastically reduced and a corresponding reduction of irrigation is appropriate.
Summary
- Irrigation is only necessary in locales where rainfall is insufficient to keep the vines healthy and growing from budbreak to harvest.
- Grapevines in dry soil need a few gallons of clean water per week to do their job.
- Choosing an irrigation system should take into account: Your budget, the level of automation you desire, the amount of water and pressure necessary to apply irrigation water efficiently, the slope of the land to be irrigated, soil type, size of the vineyard, what works for your neighbors, and how much help local companies and consultants can offer you.
- Know your limitations; if you have intimate knowledge of pumps, PVC pipe, pressure, etc. there’s a good chance you can install an irrigation system without professional help. But it’s always wise to admit your shortcomings and hire a professional to make sure the installation is done correctly and has been sized appropriately. Never install trellising or plant vines before installing and testing an irrigation system (unless natural water status precludes the need for a system). It is standard operating procedure in vineyard development to test every dripper, sprinkler, hose, furrow, etc. before putting a single vine in the ground.
- Your irrigation “sets” (when you turn the system on and off) will change as you become more familiar with your vineyard and how your vines react to irrigation. Within 5 to 10 growing seasons irrigation will become intuitive if you have been paying attention and you will be able to tweak your application each year to improve wine quality and vine health. Take notes on how much water is applied and when, and consult these notes regularly.
It doesn’t matter whether you give each vine water with a garden hose, a furrow, a sprinkler, or a drip emitter. The idea is to give the vines a drink when they need one and if you are careful and attentive, they will return the favor.