Let’s Start Making Wine
Buy a kit or plant a vineyard? Those are a couple of extreme examples of decisions you will make when you set out to become a home winemaker. The scope is broad, but many steps along the way overlap or echo one another. Going from the most basic and simple start-up through growing your own fruit, we will look at the major activities of home winemaking and how you can take baby steps — or a giant leap — into fermenting your own delicious wine.
Choosing & Sourcing Ingredients
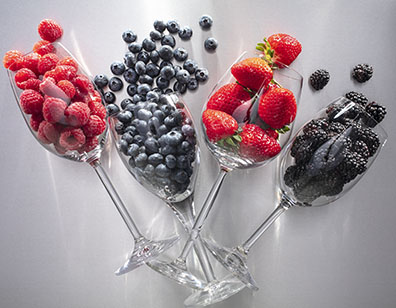
First you need juice or grapes. Other fruit can be used to make very tasty wines, but the wine grape is uniquely suited to the purpose with an appealing aroma, fresh flavor, crisp acid balance, and enough sugar to produce a product that is shelf-stable due to its alcohol content. Within the scope of grape winemaking, there is an early process distinction between white (or rosé) wine and red wine. To make white wine from grapes, the fundamental sequence is crush, press, ferment. For red wine, the order is instead crush, ferment, press. A home winemaker can employ common equipment in both branches and most supplies are similar, too. The main reason for the difference comes down to grape skins. Red wine gets its color from natural organic dyes called anthocyanins that are leached out of the dark grape skins while the wine is fermenting for a week or two. Tannins are also extracted, contributing pleasant levels of bitterness and astringency. As those characteristics are less valued in most white wines, the skins are removed early, the juice is fermented, and neither color nor tannin is extracted.
If you buy a kit, you will receive juice or a juice concentrate to which you will add water. For white wine, you will proceed just as with raw grapes beginning after pressing — you are fermenting juice. For red wine kits, the producer needs to be a bit more clever and get some color and tannin extracted into the juice before packaging it for your kit. Red wine kits may use a process called vacuum maceration to burst skin cells or enzyme maceration to achieve the same result, without fermentation. Either way, the object is to release the red pigment into the juice. After that, grapes are pressed just as for white wine juice. Juice in kits may be vacuum concentrated to reduce shipping weight and bulk. It may also be pasteurized, autoclaved, or frozen for stability. Wine kits are generally packaged to make 6 gallons (23 L) of wine (smaller for dessert-styles) and include yeast and any other materials needed. Sourcing a wine kit is as easy as an Internet search or visit to your local home winemaking supply store (which you will want to become familiar with in any case). Find a reputable vendor that sells a lot of kits or observe the dates on the kit as freshness is important, especially in regards to yeast health.
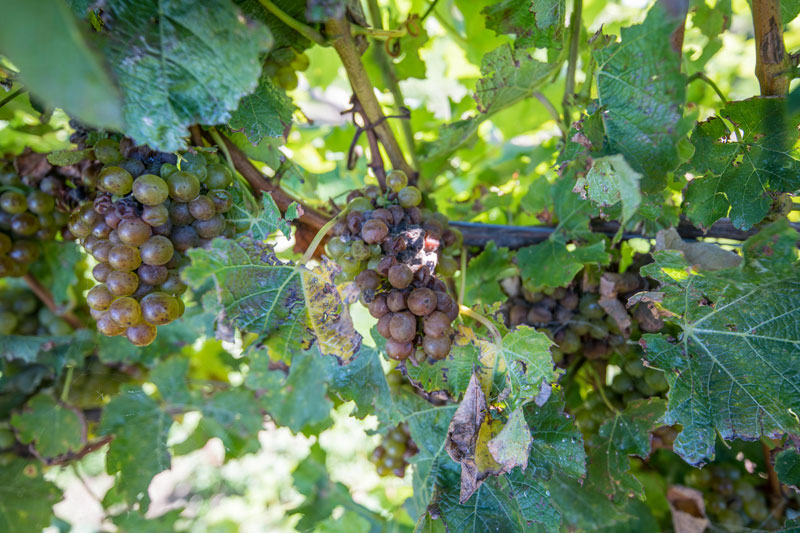
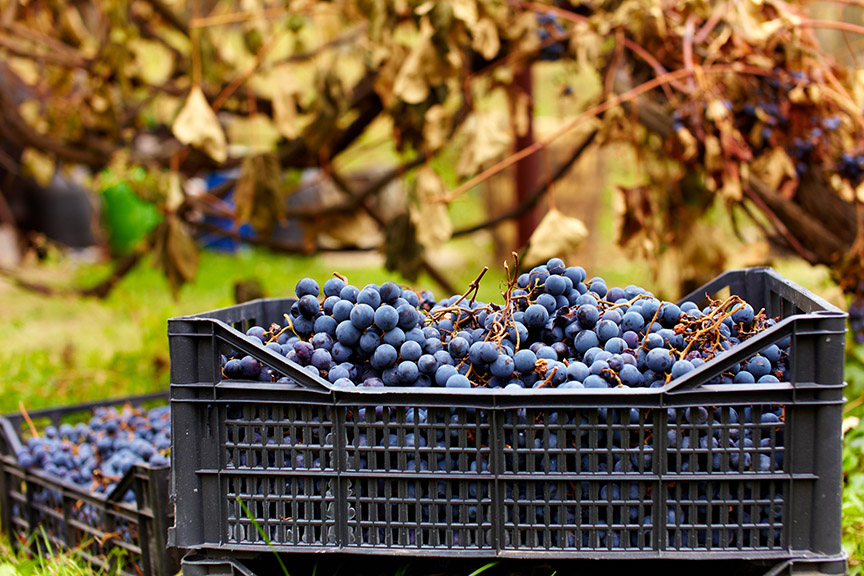
If you want to make wine from grapes or fresh juice, it is easiest if you live in or near a winegrowing region. Since every state now has at least one bonded winery, that may not be as difficult as it sounds. Look for grapes grown in your area and make your variety selection from those. Some growers pack wine grapes in 18- or 36-lb. (8- or 16-kg) plastic or cardboard crates that you can pick up at the vineyard or from a wine supply store that distributes for the vineyard. With so many wine grapes originating on the West Coast, vendors elsewhere in North America have made arrangements to receive and distribute fresh grapes from the West during harvest time. Some also import South American or South African grapes during North American springtime. Once again, your local home winemaking shop is a good place to start. They may sell fresh grapes, they may be aware of local growers who sell in small quantities, or they may maintain listings of local grapes for sale. Home winemakers typically pay about a dollar a pound ($2/kg) for locally grown grapes. Local wineries that make white wine will sometimes sell pressed and chilled white wine juice to home winemakers. If you find one of those, verify what sort of containers you should supply or if the juice is already packed in sealed plastic buckets for you to take away.

Ultimately, you have the other extreme example: Grow your own. Whatever your source, plan on about 100 lbs. (45 kg) of fresh grapes for 5 gallons (19 L) of finished wine; that’s about two cases of standard 750-mL bottles. In planning your vineyard, a rough idea of your eventual yield is about 10 lbs. (4.5 kg) per vine at maturity. Most areas of North America can grow some kind of wine grapes. Far northern areas with very cold winters may prove impossible due to winter damage to dormant vines, but there are techniques available that can minimize the damage. Very hot areas also offer challenges, but commercial wineries are doing well in places such as Arizona, Colorado, New Mexico, and Texas. If anyone is growing grapes in your region, try to meet them and ask about their process and success. One of my viticulture professors exaggerated just a bit by saying, “if weeds grow there, so will grapes.”
Equipment
Now you have your grapes lined up for harvest time. What equipment will you need to have when you get home with the fruit? The basic tasks you need to complete are crushing (possibly with destemming), pressing, fermenting in bulk, aging (in a barrel, or not), and bottling. As with other aspects of home winemaking, your choices can range from small basic equipment through sophisticated machinery that mimics that of a commercial winery. For a kit or fresh or frozen juice, you will skip crushing and pressing and go right to bulk fermentation. For grapes, you will need a crusher or a crusher/destemmer. The crusher has a hopper and two rollers mounted with a hand crank. You place the crusher over a bin or bucket, put grapes in the hopper, turn the crank, and crushed fruit — with the stems — comes out the bottom. A crusher/destemmer is similar at the top but has another sheet metal box below the hopper with another shaft fitted with helical-mounted paddles. As the crushed fruit, called must at this stage, falls into the lower box, the paddles beat the stems toward an opening at the end of the box. Stems fall out that end and destemmed must falls straight through. For larger production, you can get a crusher/destemmer with an electric motor instead of a hand crank. Your local store may rent equipment for harvest. If not, purchase prices range from a couple hundred dollars to a couple thousand dollars.
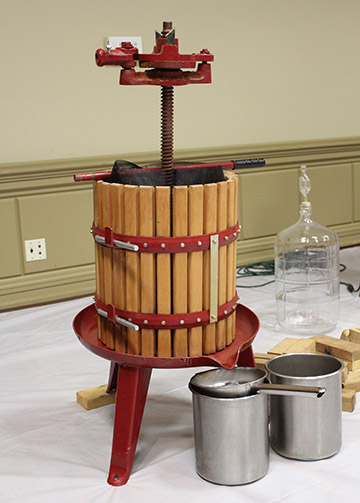
For white wine, the next step is pressing. For red, it is bulk fermentation and then the pressing. Basket presses are most common for home use. Vertical hardwood slats are held together by metal bands to make two halves of the press basket. The basket rests on a metal base and the two halves come apart to empty the basket after pressing. You assemble the unit, place a bucket under the spout, and pour in the crushed white must or fermented red wine and must. Wine or juice runs into the bucket (have two on hand) and is then poured into the next container. A cast iron ratcheting head is hand-cranked down a threaded shaft to apply pressure to the must. Common press sizes are numbered by the centimeters of diameter of the basket, ranging from 20 to 55. The smaller ones work well for a few gallons (liters) of wine and the larger ones can work in the ton (tonne) range. Prices range from a couple hundred dollars to over one thousand. At the larger sizes, additional press types are available. Hydraulic presses use an electric pump or a hand pump to push a piston plate down on the must, with a basket similar to ratcheting presses. Bladder presses include a heavy rubber bladder mounted vertically inside a stainless-steel cage. You use a garden hose to inflate the bladder and the water pressure does the work, squeezing the juice or wine out of the cage. Bladder presses require the bladder to be filled completely, so they are only intended for bigger batches.
Fermentation
Transfer your white juice into a narrow-mouth container like a glass or PET plastic carboy, leaving at least a few inches (6–10 cm) below the shoulder of headspace to allow for yeast foaming. Fit the neck with an airlock, a small device that will allow carbon dioxide to escape during fermentation but will prevent air from entering. For red wine, transfer the crushed and destemmed must into an open-top container like a food-grade bin or polyethylene food-grade trash can. Now you are in the stage of adding supplies. Immediately after crushing, add about 50 ppm (parts-per-million, mg/L) of sulfur dioxide to retard spoilage organisms and minimize premature oxidation. Powdered potassium metabisulfite or premeasured tablets of it are the most common methods at home. Once juice is in a carboy or must is in a bin, you will add yeast. A range of active dry yeasts and some liquid cultures are available for different grape varieties and desired wine styles. Dry yeast should be rehydrated with warm water following package directions before adding it to the must. For a kit, use the included yeast and follow directions.

You will see gas bubbles rising through the airlock for juice fermentations. For red must fermentations, a “cap” forms within a day or two as carbon dioxide inflates grape skins and pushes them to the top of the bin. Those events will lead to the next likely product addition: Nutrients. Grapes do not always naturally contain enough amino acids of the right kinds to support the healthy growth of yeast through a complete fermentation. To assure that the wine goes completely “dry” (no significant remaining sugar), we add nitrogen-containing products to the wine. Many products are available, ranging from the simple mineral diammonium phosphate to organic blends of yeast-derived extractives. I like to use one of the complex products like Fermaid O or Superfood, adding usually about one gram per gallon (4 L) after about three days of fermentation. For a more precise nutrient program, you can send a juice sample to a wine testing laboratory and ask them to test for yeast assimilable nitrogen (YAN). With that number and information regarding the nitrogen demand of your chosen yeast from your supplier, you can tailor nutrient additions exactly. You will not need any added nutrients for a kit wine as the juice has already been adjusted by the manufacturer.

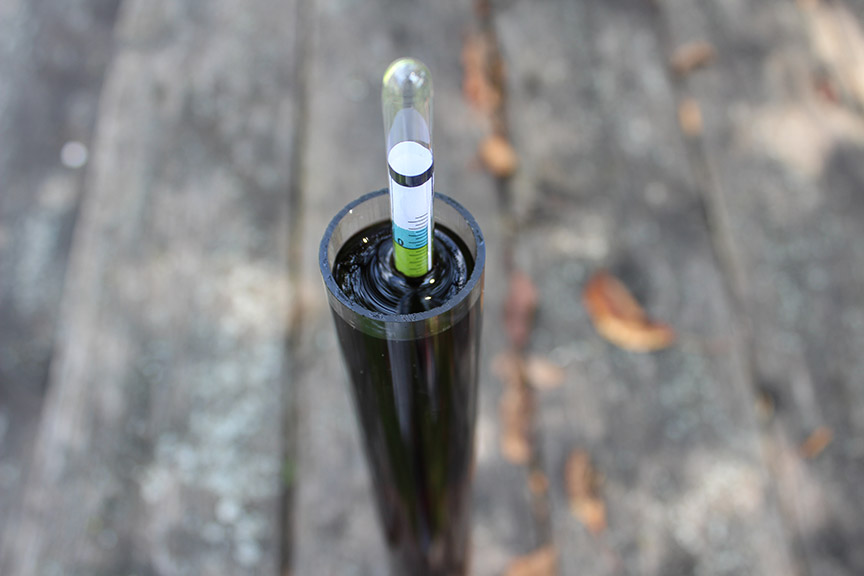
During active fermentation, you need to “punch down” the red-wine cap twice a day. In that process, you break up and sink the floating skins back into the wine. That allows the extraction of color and tannins and also keeps the skins wet with wine, so fruit flies don’t make a home among them. For punching down, you can use a special-purpose punchdown tool, a large potato masher, or even your well-washed bare hands. After several days, when gas bubbles stop rising in white wine or the cap begins to sink in your red, confirm dryness with a hydrometer reading before moving on to the next phase. Press the red wine just as described earlier for white juice and pour it into narrow-mouth containers like carboys or barrels. To avoid excessive oxidation, make sure carboys are topped up to at least the bottom of the neck or barrels are filled to the bunghole. Since white wine has already been pressed, just rack (siphon or pump) the relatively clear wine off of the sediment in the primary fermenter into a topped-up container. For either red or white, it is prudent to fit either an airlock or a silicone breather bung, which is a stopper with a flap that seals against letting air in but lets gas out. Transferring or pressing may kick up a bit more fermentation and if you use a solid bung, it may get ejected from the carboy or barrel, leaving your wine exposed to air.
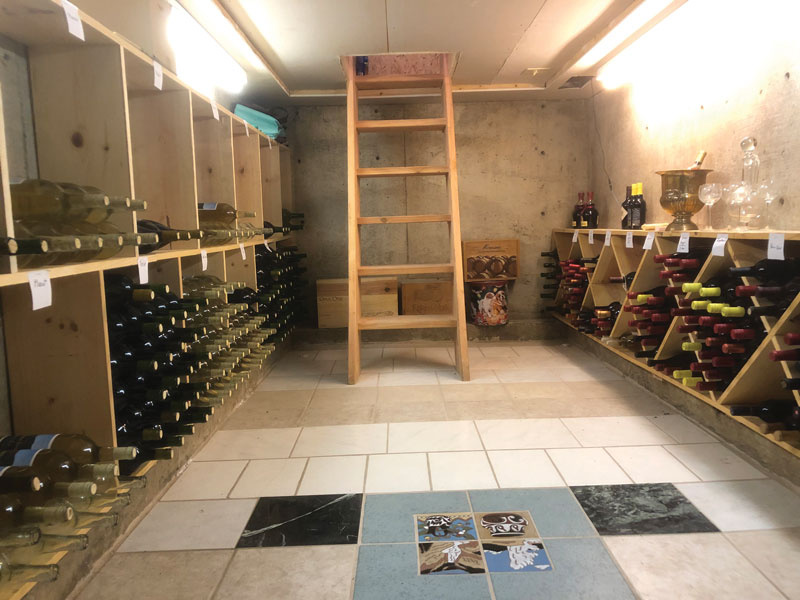
A brief aside here about barrels. When I was co-owner of a home winemaking shop, new customers would often say, “I want to make wine, so I need a barrel.” My answer was invariably, “No, you don’t.” Barrels are wonderful containers for storing and aging fine wine but owning and using one is another entire hobby of its own. Even in commercial wineries, there is a winemaker and a cellar master. The winemaker makes the wine, and the cellar master babysits the barrels. I suggest starting the hobby without a barrel program and adding one when you feel ready. Meanwhile, read about barrel use and oak alternatives in back issues of the magazine.
Whatever container you are using, you are now in the bulk aging phase of your wine. If you are making red wine or selected varieties of white, primarily Chardonnay, you might want to undertake malolactic fermentation. The major acid of wine grapes is tartaric acid and it goes through winemaking mostly unaltered. The second acid is malic. Most commercial red wines undergo a bacterial fermentation that converts the sharp-tasting malic acid into rounder, mellower lactic acid: The malolactic fermentation, or MLF. You can do this at home, too. While some winemakers like to inoculate with MLF bacteria while the wine is still in primary fermentation, I prefer to do it right after the transfer described earlier — racking of white or pressing of red. Consumer-size packages of liquid or freeze-dried bacteria are readily available online or from your home winemaking store. Follow package instructions and pay careful attention to the temperature. The process will go very slowly or not at all at levels below about 65° F (18° C). If you do MLF, you must fit an airlock or breather bung because a small amount of carbon dioxide is produced. It may take from two to six weeks to complete. A paper chromatography kit is available that will allow you to test for completion at home, or you can send a sample to a lab.
When MLF is complete (or if you are not doing MLF on this wine) you need to begin your sulfite program. There is a calculator for sulfite additions at winemakermag.com and in various wine textbooks. The common basis is that you need 0.5 mg/L of molecular sulfur dioxide (SO2) to protect red wine against oxidation and spoilage, or 0.8 mg/L in white wine. At normal wine pH levels, this will translate into about 30 mg/L of free SO2, which is the form we commonly test for at home. Maintain the required level by making monthly or bimonthly additions and testing from time to time. White wines are usually ready to bottle in five or six months, after perhaps one more racking into another topped-up container. Red wines may age in bulk for a year or more, although many of us bottle just before the end of a year so we get the bulk storage containers emptied in time for the next harvest.
Bottling
Glass bottles with corks — synthetic or natural — are usually used for homemade wine. The popular screw caps you see on commercial wine are applied by a special machine that crimps the cap to the glass bottle threads, but there is a home screwcap option called Novatwist. Hand corkers are common and easy to use. A two-hand, wing-type portable corker is suitable for a few bottles, but in the long run you will be much happier with a floor corker. That device has iris-type jaws that squeeze a cork down to a diameter that will fit in the bottleneck as you pull down on a lever handle. A rod attached to the handle pushes the cork into the bottleneck. The most common bottles are standard 750-mL size and come in a variety of shapes and colors — all of which relate to marketing and have no effect on storage of your wine. You can use 375-mL half bottles as well, although you may need to place a wooden block on the platform of your floor corker to adjust for the shorter bottle height. For filling the bottles, you can use an electric filler, a gravity-fed multi-spout filler, or a single bottle filler attached to the end of a siphon hose. The last is the most basic. Siphon your clear, stable wine out of the carboy into a bottling bucket. Add a final 10 mg/L of sulfite to ameliorate the oxygen exposure during bottling. Cork each bottle (using new corks from a sealed package) immediately after the bottle is filled. Store bottles upright for a day or two to allow the cork to expand in the neck of the bottle and produce a tight seal. After that, label if you like and apply decorative capsules. The most common capsule type is heat-shrink, applied by slipping it on the bottle and dipping the neck in simmering water. There is also an electric heat-tunnel device for shrinking capsules if you are bottling in larger quantities. The capsule is purely for appearance, like the label, and has no storage function.
Keep your bottled wine in the dark. Either in a rack or returned to the cases, turn the bottles upside down or lay them on their sides to keep the cork moist. The cardboard case provides sufficient protection from light, but if you put bottles on a rack be sure the space is kept dark most of the time. Many wines experience a condition called “bottle shock” after bottling day. Not fully understood, it is thought that exposure to air and some agitation is responsible for transient chemical reactions that mute aromas and suppress flavors for a few weeks after bottling. Hold your wine for four to six weeks after bottling to be clear of bottle shock. Most white wines will not improve greatly with bottle age and are best consumed within a year or two. Some reds will become better with age, sometimes much better. Tannins will mellow out, sharpness will drop away, and mature wine characteristics will become prominent. Of course, that doesn’t mean you can’t drink it young, also. It’s your very own homemade wine: Do what you like!