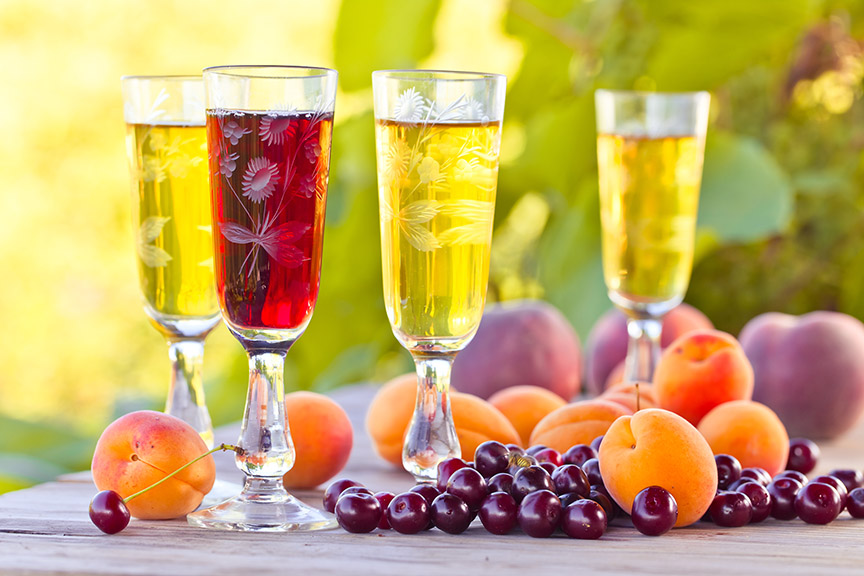
Making Dessert Fruit Wines
Wine, by definition, is made from grapes. So wine made from other fruits isn’t technically wine (it is fruit wine). Like most winemakers over the past thousand-plus years, I used to believe that to make the best quality wines you needed to use grapes. That changed when I moved to Finland and began working with berries and other native fruits.
It turns out that if you think about your ingredients the way winemakers typically think about grapes, it is possible to make fruit wines of a quality that can compare to the best traditional wines.
After 20 years of making wines, I’ve realized there are two key rules you need to follow if you want to make the best quality wines, and these rules apply equally well to wines made from grapes or from any other type of fruit:
1. Use the best quality fruit you can find for the type of wine you want to make.

2. Don’t ruin it.
Typically, rule #1 is the harder one to follow, as the best quality fruit is really difficult to source, but it is absolutely critical if you want your wines to achieve greatness. And while the process of finding the best fruit is beyond the scope of this article, I strongly urge you to make an extra effort. I am still amazed at how often I hear people disparage fruit wines after they tried to make it using excess garden harvest because it “wasn’t eating quality.” If the fruit was inferior, wine made from it will be too.
Also, please note the “for the type of wine you want to make” part of the first rule. Don’t try to make a claret from Chenin Blanc — it won’t work. I am the winemaker at Ainoa Winery in Finland, which is best known for berry dessert wines. Why? Because the intense flavors and high acid in Finnish berries are ideal for creating incredible dessert wines but can fall short when made in other styles.
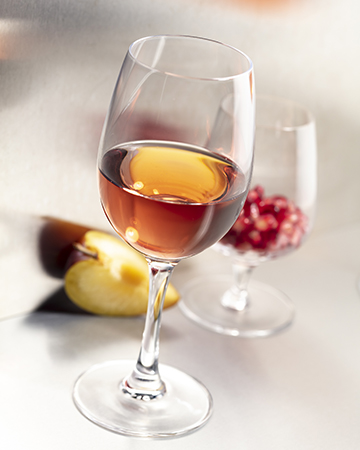
Rule #2 is the focus of this article, and for obvious reasons I will mainly talk about dessert wines.
Ingredients
Typically, fruit wine recipes I’ve seen start by listing how much fruit to use per gallon or liter of wine, plus how much water, sugar, yeast, yeast nutrients, acid blend, and other ingredients you need to mix in a bucket. To my surprise, I’ve often seen the exact same recipe and method recommended for different fruits, with only minor adjustments. That never made sense to me. Every wine I make — both recipe and exact method — is built from the ground up to create a balanced and delicious wine. The way I go about that boils down to a particular way of looking at things. However, it also means the advice I am giving might not be precise for any particular wine, and I apologize for that in advance.

My usual starting point is fruit concentration. How many pounds of fruit to use per gallon of finished wine? How that is handled has a huge impact on the wine. With grapes, the answer is generally 2.2 lbs. (1 kg) per 750-mL bottle. With berries, I’ve found it can vary tremendously, ranging from under a pound to over two (0.5–1 kg) per 750 mL, as some berries are a lot less juicy than grapes. Other fruits can vary even more. A lot of fruit winemakers will use lower levels of fruit, but there are negative consequences in doing so. As you use a higher percentage of water, the body, taste intensity, and length of finish will decrease. The wine will also tend to be less complex. For these reasons, I usually try to minimize the water used. There are a few valid reasons though to add water to fruit wines. Sometimes the flavor intensity of the pure fruit is too much for the type of wine you are trying to make, and using some water will result in an easier drinking wine. Adding some water is also the easiest way to decrease high acid levels, and if you are going to chaptalize (add extra sugar) before fermentation to bring up the potential alcohol content, it is generally easier to mix in if you dissolve the sugar in hot water first.
Target acid level is next once you have your fruit concentration. How much acid should you add? My answer is almost always “none,” but I tend to work with berries that naturally have moderately high acid levels. The typical titratable acidity (TA) target range for red grape wines is 6-8 g/L, and white grape wines are 7–9 g/L. For berry dessert wines, the range expands in both directions, depending on how the acid plays in the profile. Usually they end up a bit higher than for grapes; sometimes a lot higher. I’ve had wines with TA levels up to 14 g/L that have nevertheless been balanced due to the final alcohol and residual sugar levels. But sometimes you will need to moderate things. Blending with a second ingredient to push the total acidity in the direction you want is the best way to proceed. Neutralizing a portion of the acid with calcium carbonate or some other deacidifying treatment can also work. And lastly, further dilution can be considered, but be aware of the negatives that brings.
If you are working with a fruit or vegetable that doesn’t have enough natural acidity then you will need to add some. Rather than just using acid blend, try to use acids that match the fruit’s profile. Tartaric is the main acid in grapes but is present in few other fruits. Malic acid works well for apples and a few other fruits, but citric is the main acid in most fruits and berries, so adding some lemon juice can provide that.
Alcohol and sugar are next. The “sweet” spot for fruit wine alcohol levels tend to be at or slightly lower than for grape wines, usually from 9–13% ABV, meaning starting Brix between 16–23. No fruit I work with naturally has enough sugar to get to that, so I always chaptalize. For home winemaking, I would add just enough sugar to ferment dry to the alcohol level you want (see the sidebar to the right for how this is determined). If your target style is sweet, it is easier to backsweeten the finished wine than to arrest fermentation at a target level without the right equipment.
Finally, you need to consider yeast, yeast nutrients, and additives. Some fruits are quite difficult to ferment and have compounds that naturally inhibit yeast activity. If you are working with something like that, pick a very robust yeast strain like one used for Champagne, and use high levels of nutrients. Otherwise, you can pick a strain that brings out the kind of characteristics you are looking for and use normal recommended levels of nutrients. Nutrients should be blends, not simply diammonium phosphate (DAP), as fruits may lack essential amino acids or vitamins that grapes usually have in abundance. Not all fruit have pectin, but many do and adding some pectolytic enzyme will clear out the pectin haze that would result without it.
How Much Sugar Does My Wine Need Before Fermentation?
To calculate how much sugar to add for chaptalization, you need to first determine three things:
1. How much sugar is naturally present in your fruit.
2. What is the volume of wine you wish to make?
3. What is your target alcohol level?
Note that it is MUCH easier if you use the metric system (liters of wine and kg of sugar) to make this calculation.
To determine the amount of sugar in the fruit, use a refractometer and measure Brix. As Brix is a measure of the percent sugar in the fruit juice, simply multiply the weight of the fruit (in kg) by the measured Brix divided by 100. That gives you the kg of sugar present.1
Example: 10 lbs. fruit (4.55 kg) with a Brix of 6.0 has 4.55 x 0.06 = 0.27 kg (0.6 lbs.) sugar in it.
Next, calculate how much sugar in total should be present before fermentation. The first time I make a wine, I assume it will ferment to a specific gravity of 0.998, which is almost never right, but also isn’t usually very far off as many fruit wines will finish fermentation at a higher specific gravity than most grape wines achieve.1 I then calculate total sugar content needed based on a table such as detailed below:
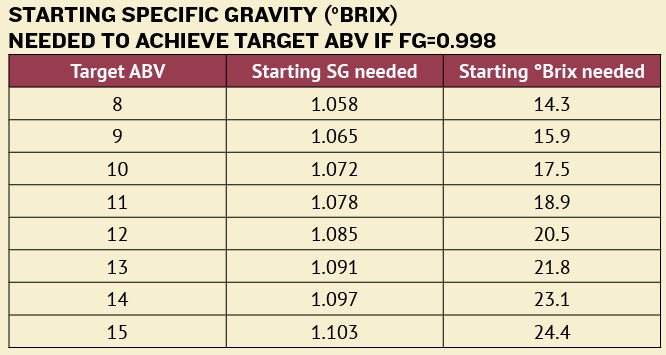
I then calculate how much sugar total should be present before fermentation. For example:
Target volume is 5 gallons (18.9 L). Target ABV = 12, so starting Brix should be 20.5. Total sugar needed = target volume multiplied by starting Brix divided by 100. So, 18.9 x 20.5 / 100 = 3.87 kg sugar.
The amount of sugar to add is equal to the amount already in the fruit subtracted from the total amount needed. So in the example above, 3.87 kg – 0.27 kg = 3.6 kg to add (7.9 lbs.).
1 Note that these calculations ignore some minor factors and make some assumptions that may not be correct in all cases, but usually result in a value that is “close enough” for a first try. Keep detailed notes as you make a wine for the first time and it is easy to tweak things to hit your targets more precisely the next time you make the wine.
Process
Most of the wines I make are done using maceration of the whole fruit during fermentation. This red wine method is usually thought of as a way to extract color and tannins into the wine, but for berries there is an even more important reason. Most of the flavor is in the skins, not in the juice, and the maceration process works to better extract those flavors. It also can extract some tannins, which will give the wine structure and prevent it from feeling like you are drinking alcoholic fruit juice. Be aware that the process details I’m about to lay out may need to be modified depending on your fruit, but to follow is a basic process I often use (adjusted for small batches):
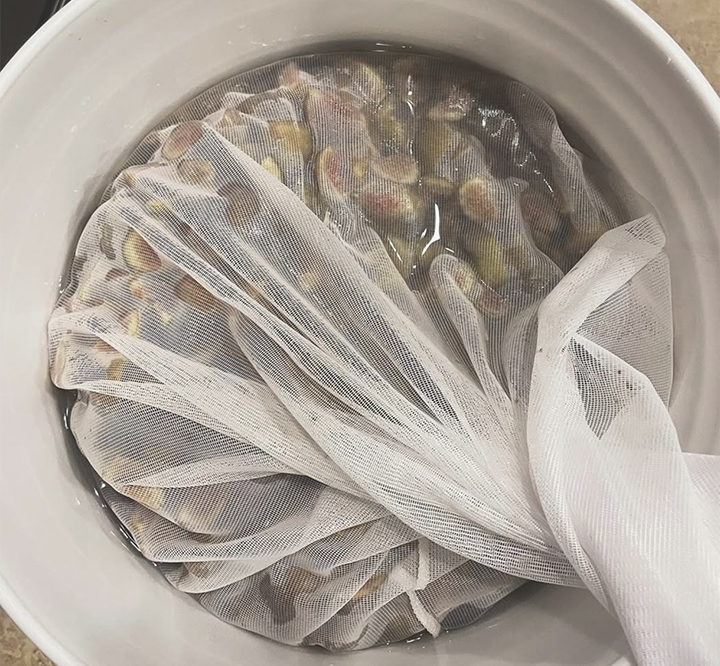
- Prepare fruit (chop, crush, remove pits, or anything else needed) and place in loosely filled sanitized mesh bags in a sanitized bucket. Tightly fit a lid with an airlock.
- Dissolve sugar, nutrients, and pectinase in water, then pour this solution over the fruit.
- Mix well, measure Brix, TA, and pH. Make adjustments if needed.
- Pitch yeast, and make sure the temperature stays in the yeast’s recommended range throughout your fermentation.
- When fermentation nears completion, but is not yet finished, separate the liquids from the solids. You can do this by pulling the mesh bags out of the bucket and allowing the liquid to drip out. Depending on the fruit, you might also be able to press more out by squeezing the bags with your hands. Note that “pressing” generally introduces some oxygen to the wine. If you press when the yeast is still active, the yeast will consume much of that oxygen, which will help the yeast finish more strongly and possibly reduce the chance of the wine oxidizing early.
- Allow the fermentation to finish, then rack off the gross lees into a sanitized bucket, jug, or carboy of a size that matches the wine. Minimize headspace to prevent oxidation. Stir in 1 crushed, dissolved Campden tablet per gallon (3.8 L).
- Allow to rest for a month or two and then rack the juice off of the fine lees.
- Allow to rest an additional one or two months. Usually another racking is needed at this point, but it is also a good time to taste a sample and determine if the wine is mature enough for bottling. If not, then rack, add another Campden tablet per gallon (3.8 L), and leave a month or two more. When you think it is ready, proceed to the next step.
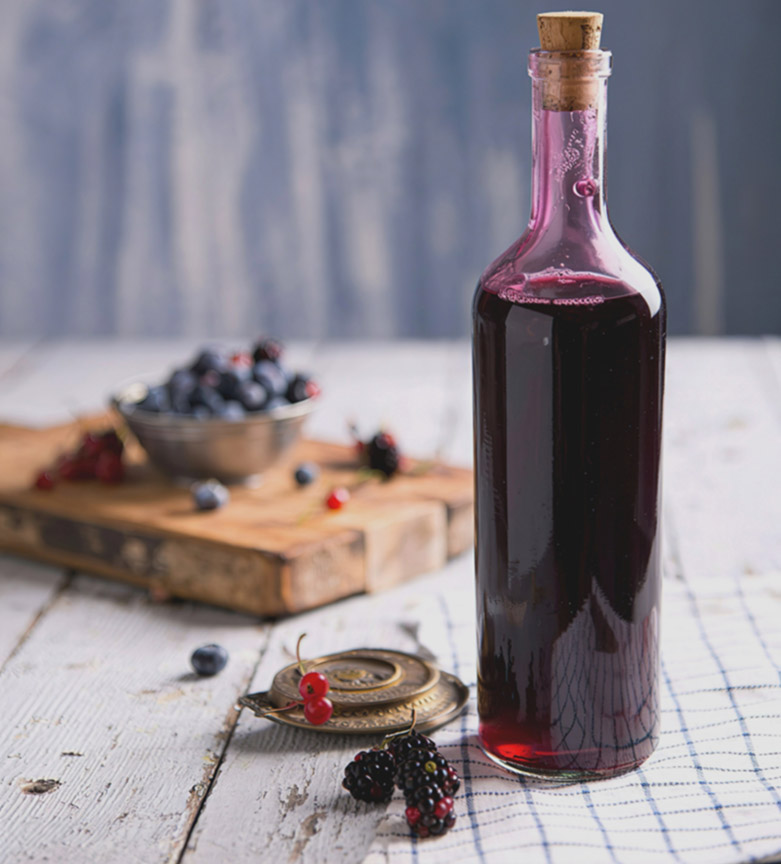
- Backsweeten if desired. It is strongly recommended that you conduct bench trials to ensure you add the right amount of sugar. Not enough and the wine won’t be balanced, but too much is even worse. Usually wines with higher acid need more sugar. As an example, Ainoa’s dessert wines mostly range from 110–140 g/L of residual sugar.
- Rack to a sanitized container, then fine and filter if desired. These steps are entirely optional, and typically contribute to the aesthetics of the wine more than the taste profile, but there are some wines that can benefit tremendously on the palate by filtration. It can give them a cleaner, more intense character that goes well with lighter wine styles, especially blush wines such as Ainoa’s spiced lingonberry wines or most wine cooler styles of wines.
Putting it All Together: Example Recipe for Kriikuna Viini
Including a recipe for this article turned out to be difficult, as most of the fruits we use at Ainoa do not grow in North America. Cloudberries and lingonberries can be found in arctic regions, but that doesn’t help most WineMaker readers. Bilberries (a relative of blueberries) are only found in Europe, and even the raspberries and strawberries we use are varieties that are significantly different than what is found in North America. But Damson Plums (locally known as “kriikuna”) are the same.
We only make small amounts of this wine, as the fruit for it is provided to us by neighbors in our village of Miekkiö who have too much and want to see the surplus put to good use. When picked at peak ripeness, these plums make a magnificent sweet wine of about 15% ABV that is perfect to serve in the holiday season.
Plum Dessert Wine
(1 gallon/ 3.8 L)
Ingredients
8 lbs. (3.6 kg) Damson plums, fully ripe but with no rot
2.5 lbs. (1.1 kg) sugar for chaptalization (fructose or granulated white sugar will work)
5 pints water to dissolve sugar
5 g Red Star Côte des Blancs yeast (a 5 g packet is enough for up to 6 gallons of wine)
10% sulfite solution. Dissolve 10 g Campden powder in enough water to make 100 mL. Store in a tightly sealed container.
Go-Ferm (or equivalent yeast starter) Use 1 g Go-Ferm per 1 g yeast.
2.5 g Fermaid K (or equivalent yeast nutrient)
1 g diammonium phosphate (DAP)
1 g bentonite
0.5 g gelatin
1 g potassium sorbate
~14 oz. sugar for backsweetening
Other equipment or needs
Bucket that is at least twice as large asthe recipe volume, with a gasketed hole in the lid for an airlock
Glass jug or carboy that matches the recipe volume size, plus smaller jars to hold extra during process
Bung and airlock for the carboy
Nylon mesh fruit bag(s)
Hydrometer and measuring cylinder
Racking hoses
Ability to maintain a fermentation temperature of 60–65 °F (16–18 °C)
Scale able to measure 0.5 g increments
Pipettes with the ability to add in increments of 1 mL
pH strips or meter, sulfite measuring system
Step by step
1. Clean and sanitize all your winemaking tools, supplies, and equipment.
2. Slice plums and discard pits. Pits of stone fruits contain trace amounts of cyanide, and while it is unlikely to concentrate to dangerous levels in your wine, don’t take chances.
3. Place flesh (including skins) of plums in mesh bags. Fill loosely (maximum half full) as many bags as needed, tie closed and place in your fermentation bucket along with any juice.
4. Dissolve sugar in water, then mix in the Fermaid K and 3 mL 10% sulfite solution. Pour over fruit in bucket, then stir to make sure sugar water and juice are mixed.
5. Prepare the yeast. Heat 50 mL water to 108 °F (42 °C) and mix in the Go-Ferm. When temperature is approximately 104 °F (40 °C), sprinkle the yeast on the surface and then mix so no lumps remain. Wait 15 minutes, then add 15 mL of juice from the bucket. This will acclimate the yeast to the temperature of your must. Wait another 15 minutes and measure the temperature of the yeast and the temperature of the must. If the difference is more than 15 °F (8 °C), repeat with 15 mL more juice. Once the temperature difference is within 15 °F (8 °C), add the yeast to the fermenter.
6. Seal the lid on the bucket and affix airlock.
7. Monitor to determine when fermentation starts. When it does, punch down the must at least once per day, but preferably two times
8. Two or three days after fermentation starts, dissolve the DAP in a little water and mix into the fermentation bucket.
9. Monitor fermentation. When SG = 1.010 or less, “press.” This means removing the mesh bags of fruit from the bucket, allowing as much of the liquid to drip out into the bucket as possible, and then gently squeezing to get more juice but as little solids as possible. Reseal bucket and continue to monitor the fermentation.
10. When fermentation finishes (SG = 0.998 or less, and stays the same for at least two days), rack wine to a sanitized jug. Use extra jars if needed to handle more volume. Measure pH and sulfite levels, then add an appropriate amount of 10% sulfite solution using the sulfite calculator at www.winemakermag.com/sulfitecalculator (this is usually about 55 ppm/1 Campden tablet per gallon/4 L). Allow to rest undisturbed for 4–6 weeks.
11. Rack again to remove wine off fine lees. Allow to rest for another 4-6 weeks.
12. Rack wine off any sediment, then dissolve bentonite in five times its weight of water. Mix bentonite into wine, then allow to settle for 1 week.
13. Rack off bentonite. Prepare gelatin and mix into wine. Allow to settle one week.
14. Rack off gelatin.
15. Stabilize. Dissolve potassium sorbate in 10 times its weigh of water. Add equal amounts of dissolved potassium sorbate solution and 10% sulfite solution to the wine and gently mix. Allow to rest undisturbed for at least two days.
16. Do bench test trials to determine the proper level of backsweetening sugar to add. An addition of 14 oz. per gallon (about 100 g/L) seems to work well in my experience with the fruit I use, but depending on exactly how ripe the fruit is, the perfect amount for your wine could vary.
17. Gently mix backsweetening sugar into the wine until it is fully dissolved.
18. Filter if desired, then wine is ready to bottle.
19. Enjoy! The wine will be good to drink as soon as it is bottled, but it will improve if allowed to cellar for 4–6 months. Provided it was sulfited properly, a good quality cork was used, and it is stored in a cool place, it should remain at peak condition for at least 3–5 years before it starts to show signs of decline.