Méthode Champenoise
I realized early on that as a sparkling producer I would have to embrace the cold. To produce méthode Champenoise sparkling wine one must accept that it is going to be a very cold endeavor. Temperature is a crucial factor at nearly every step of the way to producing delicious, elegant sparkling wines. From the initial grape sourcing (location and picking) through each individual processing step of the fruit and the base wine, working at low temperatures is ideal. Harvesting, pressing, fermenting, aging, bottling, riddling, disgorging, and of course, drinking, all require specific, cool temperature ranges. Mother Nature makes our external thermostat a little more challenging at times, therefore the locations of vineyard sites for sparkling wine are confined to areas in the world that support cool-climate grape varieties, such as Champagne, France.
Champagne is a very cool-climate region in the Northeast of France, which focuses almost solely on sparkling wine production. To protect their region, Champagne as a term can only be used for sparkling wines that are produced by méthode Champenoise in the Champagne region. As of 2005 in the United States, all wine labels must denote the sparkling process, so American wines made this way will say “méthode Champenoise,” “méthode traditionelle,” or simply the “traditional method.” Around the world, you will see the traditional method under other names such as: Crémant in France (regions outside of Champagne, such as Burgundy, Loire, Limoux, etc.) metodo classico in Italy, cava in Spain, cap classique in South Africa, espumante in Portugal, and sekt in Germany and Austria.
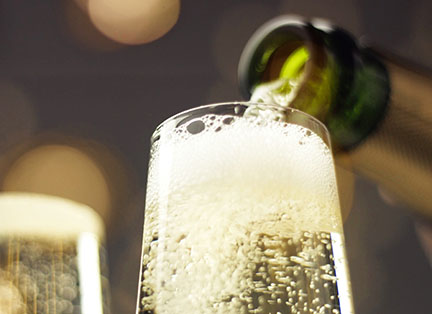
While referred to by many different names, all méthode Champenoise sparklings importantly feature a second fermentation in the bottle. This process develops those highly sought after bubbles in the very bottle you purchase. By re-fermenting a low alcohol base wine of <11.5% in the bottle, producers capture the desired byproducts of fermentation — carbonation, lees (expired yeast cells), and an additional 1–1.5% alcohol. This method not only preserves the wine under favorable conditions with little to no oxygen, but also allows for extended aging on the lees, which ultimately yields sparkling wines of great complexity and depth. While the fermentation typically completes in the first four weeks after tirage bottling, during aging subsidiary reactions occur that fill out the aromas and mouthfeel, taming the shrill acidity; Alcohol reacts with the acids to form esters, favorably increasing the aromatics, and the mannoproteins of the yeast break down to round out the texture.
There are other forms of sparkling wine production, but méthode Champenoise is unequivocally the highest regarded, most labor-intensive, and consequently the most expensive on the market. The other sparkling wines that you will commonly come across are méthode ancestral (referred to also as pét-nat), and the Charmat method, or tank method. Pét-nats capture their sparkling by crown cap during the final stages of primary fermentation, from juice to wine, resulting in lower pressure and maintaining primary aromas. The Charmat method, in contrast, completes the second fermentation in tank, hence its name, and is filtered and transferred to bottle without aging. This is the typical method used for the most affordable sparklings on the market, but these bubbles are no rival to the yeasty, toasty palates of méthode Champenoise sparkling wines.

In the paragraphs to follow, I will provide an explanatory guide on how to produce your own méthode Champenoise sparkling wines at home. As I am a small producer myself, my volumes are based on the production of one wine barrel (59 gallons/223 L). It is possible to make smaller and larger volumes following similar directions, but other tools may be needed, and the quality may be slightly different. I will note the important reasons for each step and why certain equipment aids the process or quality, but ultimately, I will ensure that you get delicious, sparkling wine, fermented in the bottle!
It starts with the grapes
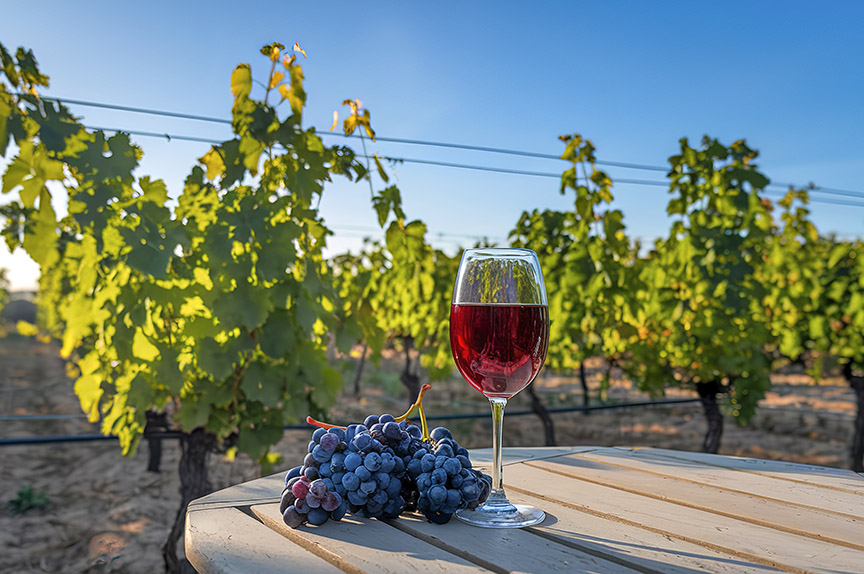
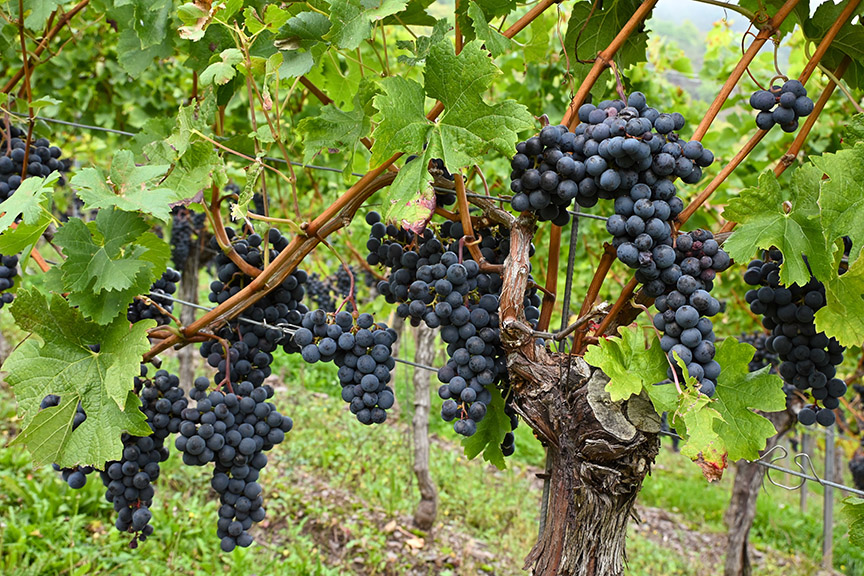
For crafting méthode Champenoise wines, the traditional Vitis vinifera varieties come to mind first — Pinot Noir, Chardonnay and Pinot Meunier — but there’s no reason not to explore other varieties or even hybrids in your area, such as Vidal Blanc or Seyval Blanc. The main factor in selecting fruit for sparkling is the ripeness of the fruit at the time of the pick and selecting a variety that won’t impart extreme “green” qualities or pyrazines (bell pepper flavors) to the juice like Bordeaux varieties can. The winemaker must pay close attention to the timing of the pick as the resultant alcohol of the base wine needs to be lower than 11.5% so as not to hinder the secondary ferment. At around 18–19 °Brix it is common to see a chemistry of pH in the range of 2.90–3.10 and titratable acidity (TA) of 10–12 g/L.
Juice collection
The temperature as well as how the grapes are handled on picking day is very important. Fruit is harvested by hand overnight or in the early morning to keep the fruit intact and cold (<50 °F/10 °C). To limit oxidation of the juice and unwanted enzymatic activity, sparkling fruit is typically harvested in small bins and goes directly to press to squeeze out the juice. Unlike red wine and rosé production, you want little-to-no skin and seed contact with sparkling wine to limit the tannin and phenolic profile of the juice. For this reason, bladder presses are primarily used in sparkling production, however basket presses can work well too. The key factor is pressing with cold fruit as quickly as possible to limit the tannin and color extraction.
From the press, collect the juice in a well-gassed settling tank at 50 °F (10 °C) ambient cellar temperature or colder to drop out solids before moving the collected juice to your vessel for fermentation. You decrease your chances of juice oxidation with the use of CO2 or nitrogen gas during this stage. Also, a small amount of sulfur dioxide can be used, at ~20 ppm (mg/L), as an antioxidant and antimicrobial. The simplest form of SO2 is potassium metabisulfate (KMBS), which is easy to use with this formula:
Grams KMBS needed for 20 ppm = (total gal. of juice x 3.785 L/gal. x 20 ppm)/(1000 mg/L x 0.57)

The use of neutral gas and SO2 are not 100% necessary at the juice stage, but if you are working at higher temperatures with fruit that might have mold, it is highly recommended!
Primary fermentation
After settling for 24 hours, rack off the juice into your fermentation vessels, filling only 75–80% full, and begin your first fermentation. I use barrels for my fermentations, such as a neutral Chardonnay French oak barrel and a stainless steel barrel, but any vessel of your choice works. It is possible to do a native, or spontaneous, fermentation, but to ensure a smooth and complete fermentation I recommend using a strong strain of Saccharomyces cerevisiae. EC1118 or DV10 strains ferment well at lower temperatures and higher acidities and only need to be added at 20 g/hl. Following the rehydration protocol on the yeast packet, the build-up at this stage is the same as any other wine fermentation.
To retain the delicate aromas of the fruit in the wine (apple, citrus, rose petals, etc.), a long, cool fermentation is recommended at ~58 °F (14 °C). Warmer, faster ferments blow off their aromatics and can lead to more hydrogen sulfide aromas if the yeast becomes too stressed. If you have a cold room accessible, this helps to control the temperature of the ferment and slow the rate. During the fermentation, adding a small amount of nutrients to the must will ensure happy yeast as well. I recommend adding an organic nutrient, such as Fermaid O, at two points; first at about 2–3 °Brix drop and a second time when 1⁄3 of the Brix is consumed, both at doses of 15–20 g/hl. If your YANs (yeast assimilable nitrogens) are <150 mg/L, then DAP (diammonium phosphate) may be needed as well. However, from my experience, healthy vineyards at sparkling harvest produce fruit with YANs upwards of 250–300 mg/L.
Upon completion of fermentation, aging of the base wine can be as short as a few months or as long as several years. In some Champagne houses, base wines are preserved in bottles for many years before blending for tirage bottling, but for most, they are either kept back in barrel or used within the next year. The important factor to aging beautiful base wines is to top up all wine vessels once primary fermentation completes and continue to maintain full vessels. Once CO2 is no longer produced by the yeast oxidation can start to occur if there is a lot of headspace. To combat that, top up the wines every 2–3 weeks and break down partial vessels into smaller vessels.
Malolactic fermentation (MLF) can be carried out after alcohol fermentation but it will most likely not occur naturally as the acidity is quite high. To encourage completion of MLF a culture must be built-up, but it requires constant tracking of the malic consumption. An outside laboratory should be consulted to do this. For base wines with moderate chemistry (pH 3.10 and TA ~8.0 g/L), it definitely doesn’t hurt to halt MLF and retain the freshness. To do so, add a low dose of SO2 at 20 mg/L but always keep the free SO2 less than 10 mg/L to aid in the success of the secondary fermentation.
Secondary fermentation
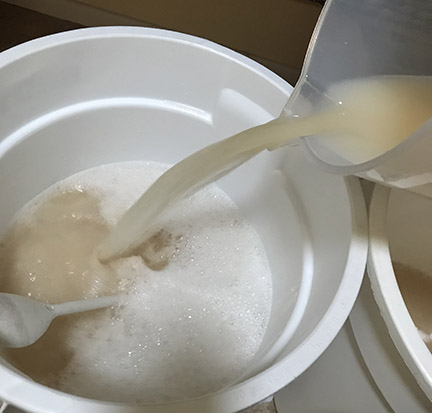
Before beginning the secondary fermentation, it is advised to stabilize and filter the base wine. By cold stabilizing the wine all tartrate crystals are dropped out of solution before bottling, which if left in the bottle can cause extreme gushing upon opening the bottle. The heat stability ensures clarity and brilliance of the wine, and filtration inhibits spoilage later on. To complete these steps, rack the base wine into a container two weeks before bottling. For vessels without cooling jackets, a cold stabilizing product such as Cellogum LV20 can be used. This cellulose product inhibits tartrate crystals from forming almost instantly and eliminates the need to cold stabilize at less than 32 °F (0 °C) for 2–3 weeks. This is added 24 hours before bottling at 25–50 mL/hl, depending on stability with trials. However, if stabilizing the traditional way, ensure that your wines have enough time in tank before bottling (~3–4 weeks). If using Cellogum, the first essential step after racking will be to add bentonite to heat stabilize the wine. Depending on the protein and colloid instabilities of the wine, a dose of 2–6 lbs./1,000 gallons may be necessary, but do bench top trials or consult an outside laboratory for assistance. After a week of settling with bentonite, sterile filter the wine with coarse and sterile pads. Upon completion, the base wine is ready for the secondary fermentation and it’s time to prepare the yeast culture!
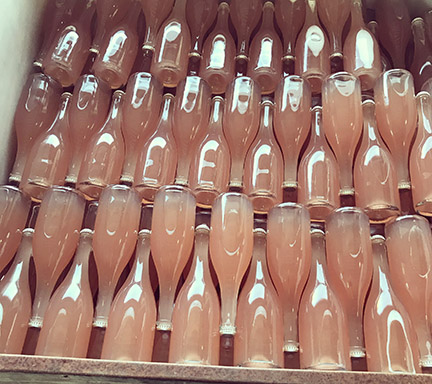
The Pied de Cuve (yeast culture) for the tirage bottling takes ~72 hours to build up and will be 5% of the total base wine volume. There are longer and slower build-up procedures with a 3% culture, but this one is for 3 days. For bottling on Saturday morning, begin the culture on Wednesday morning and follow the step-by-step instructions at the end of this article. For measuring the rate of yeast growth, track the sugar consumption by checking the specific gravity (density) every 12 hours with a hydrometer. The important factors are healthy yeast, low alcohol base wine (<11.5%) with a low free SO2 (<15ppm), target temperatures (68 °F/20 °C for build up and 59 °F/15 °C for bottling), and a low CO2 at bottling. For any successful run, plan ahead and order the necessary materials, along with sparkling bottles (ordinary wine bottles cannot withstand the pressure of sparkling wine), bidules, and crown caps. For bottling day, gather an air pump or mixing spoon, bottle filler, and crown capper (inviting some willing friends to participate is a big help on any but the smallest batches as well).
At bottling, store the bottles on their sides in tirage bins, placing in three rows of 16–18 bottles per layer, facing opposite directions every other bottle, with eight layers/bin (as pictured above). Aging requires no less than three months as the fermentation will take about one month to complete and another few months to settle. The ideal aging en tirage, however, is two years minimum and upward of seven or more years. Through extended bottle aging the aromas and flavors gain complexity and mouthfeel fills out.
The final stages of méthode Champenoise may be the most dangerous and costly, but they are essential for completing the sparkling wine: Riddling, disgorging and corking. Wear protective glasses and gloves at all times when handling these bottles as they are under 6 atmospheres of pressure. Use precaution with movements after tirage bottling in case of glass impurities and breakage.
The first step in preparing your wines for release is riddling. This is the process in which the yeast is collected at the tip of the bottle inside the bidule. This can be done by hand in a riddling rack over 3 weeks (or by an automated riddling machine (gyropalette) in 5 days as some commercial wineries do). By hand or by machine, the bottles are turned 1⁄8 or 1⁄4 turn at a time, either to the left or the right, and slowly bringing the bottle from horizontal to vertical with each turn, and compacting the lees in the bidule, leaving the wine crystal clear. If time is of the essence, it is also possible to just put the bottles down on their crown caps, vertical for a few days or weeks, settling out most but not all of the yeast.
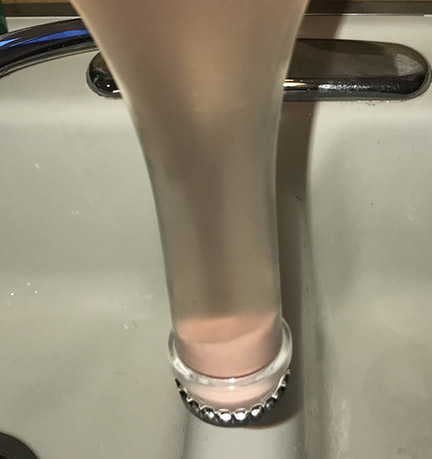
Once the lees are compacted in the bidule, bring the temperature of the wine down to ~45 °F (7 °C). The lower temperature dissolves more CO2 into the wine and will decrease the loss at disgorging. Before removing the crown cap, freeze the necks of the bottles in crushed ice and table salt for 10 minutes. Once frozen, carefully pop the crown cap off with a disgorging tool into a collection location. By the pressure of the CO2, the solid bit of yeast will shoot out of the bottle immediately. In this step you will lose 10–15 mL of wine, so each bottle needs to be topped up with more wine. You can purchase a disgorging tool at an Enological store like Laffort (https://laffort.com/en/ranges/sparkling), or you can even use a normal beer bottle opener. If you cannot get the yeast 100% frozen, you can alternatively remove as much of the sediment as possible by releasing the crown cap into a bucket of water and placing your thumb over the top as quickly as possible. This decreases the mess and potential loss, but you will tend to lose ~200 mL.
At this point, it is common for Champagne houses and domestic sparkling producers to add a dosage (a syrup/wine mixture) of special reserve wines, or even Brandy, to add complexity to the palate. Whichever concoction you chose, it is fun to know that with a small amount of dosage you are encouraging a Maillard reaction in the wine. The sugar reacts with amino acids in the wine, creating those highly sought-after aromas of baking bread, toast, and caramel. While this reaction also occurs during en tirage, the sugar remaining in the wine continues to expand the aromatics.
There is no hurrying quality and méthode Champenoise sparkling wine requires great attention to detail every step of the way. The final touches to sparkling — corking, caging and resting — are no exception. In corking each bottle, an ideal depth of insertion is 21–23 mm and with the use of a Champagne corker there is more control. For caging, a Champagne wire cage tool works well and can be sourced affordably. A small mix of each bottle by hand incorporates the dosage into the wine and then a final rest period of one month allows the wine to harmonize and the cork to compress.
5% Pied de Cuve (11.2 L) for Tirage Bottling
Calculations based on 1 barrel of base wine (59 gallons or 223 L)
Tuesday
Weigh out yeast, nutrients, sugar, and base wine needed for Wednesday morning. Clean containers needed for fermentation.
• 45 g Enartis Ferm Perlage (20 g/hl) (yeast)
• 45 g Nutriferm PdC (20 g/hl) (nutrients)
• 1350 mL base wine
• 405 g sugar (180 g/L based on total acclimation volume)
• (2) 1.25-gallon (5-L) plastic containers
• (2) 5-gallon (19-L) bucket
• Long plastic spoon
Wednesday
1. 6:30AM: In a 1.25-gallon (5-L) container, dissolve 45 g Nutriferm PdC in 900 mL water at 105 °F (41 °C). Dissolve 45 g Enartis Ferm Perlage yeast in this solution and let sit for 20 minutes.
2. While the yeast rehydrates, dissolve 405 g sugar into 1,350 mL base wine in a 0.75- or 1.25-gallon (3- or 5-L) container.
3. After 20 minutes, slowly add in the sugar/wine mixture to the yeast culture, dropping the temperature of the yeast no more than 10 °F (5 °C) with each addition. Acclimate the yeast over 20–30 minutes. The target final temperature is 68 °F (20 °C), and the final volume will be 2,250 mL.
4. Weigh out materials needed for Wednesday night:
• 893 g sugar (4 g/L based on total volume of base wine)
• 2.2 g Nutriferm Tirage (20 g/hl based on Pied de Cuve volume)
• 6.6 L base wine (Volume based on target PdC volume of 11.2 L)
• 1.8 L water (2 x weight of sugar)
5. After 6–12 hours, dissolve 893 g sugar and 2.2 g Nutriferm Tirage into 6.6 L of base wine and 1.8 L water in a 5-gallon (19-L) bucket. Pour the 2,250 mL yeast culture into a 5-gallon (19-L) bucket and slowly add in the sugar/nutrient/wine/water solution into the yeast, stirring well the entire time! Target temperature is 68 °F (20 °C).
6. Check density and temperature and record, along with time/date.
Thursday & Friday
• Do 2 aerations per day, ideally 12 hours apart, morning and night. Aerate yeast culture by stirring yeast culture (to suspend all yeast) and then pouring entire culture into another clean bucket.
• Check density and temperature after aerations.
• Maintain temperature at 68 °F (20 °C).
Friday
Set up for bottling and weigh out materials needed:
• 5.4 kg sugar (24 g/L, based on a target of 6 atm in bottle post-fermentation)
• 23 g Nutriferm Tirage (10 g/hl)
• 179 mL Clarifiant XL (Riddling aid at 8 cl/hl)
Saturday
• At bottling, you want 1.010 g/mL density and 60 to 70×106 live yeast with less than 15% dead cells (80–90% viability).
• Pull out ~5 gallons (19 L) base wine to fully dissolve 5.4 kg sugar. Add to the tank while continually mixing.
• Dissolve 23 g Nutriferm tirage in ~200 mL wine and add to the tank.
• Dissolve 179 mL Clarifiant XL into ~1 L wine as well and add to the tank.
• Mix for ~5 minutes and then add in the yeast culture.
• Mix the tank for 30 minutes and then start bottling.
• Fill each bottle ~750mL, place bidule inside and then add crown cap.
* Keep mixing tank throughout the entire bottling process.
Other bubbly resources
• https://vinepair.com/wine-blog/loophole-california-champagne-legal/
• https://winefolly.com/tutorial/4-tips-on-finding-awesome-sparkling-wine/