Red Wine Sediment and What To Consider When Selecting A Yeast
Q
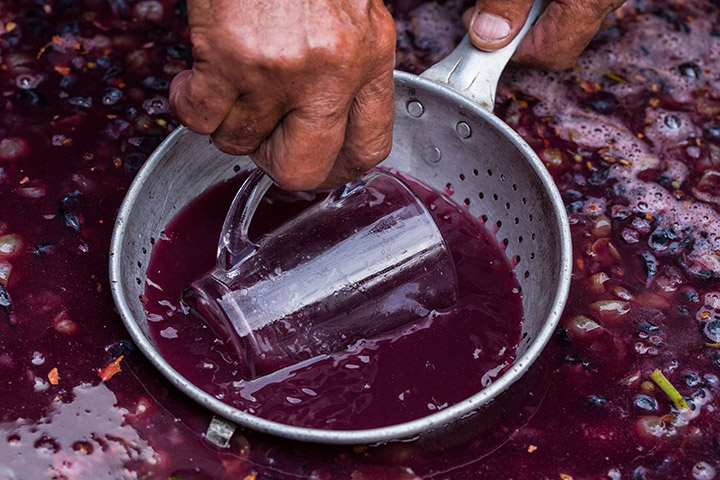
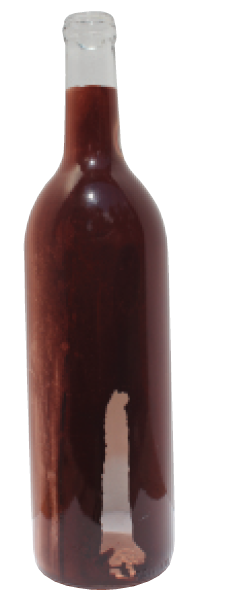
Some of my red wines leave a coating on the entire inside of the bottle after a period of aging — it looks like somebody painted the entire inside of the bottle with an even coat of dark, wine-colored paint all the way around and right up to the cork! The coating does not typically come off as sediment in the glass and does not seem to have an effect on clarity or taste. I make my red wine from whole grapes, sometimes with a pre-fermentation cold soak and often with extended skin contact before pressing. I do not add egg whites and usually do not fine or filter my reds. Sometimes I barrel age, but I have not noticed any pattern as to the grape variety or how my wines are treated in regards to this condition. I typically age my reds at least five years from the vintage date (I am still drinking a few from the 90s) and I cellar them in a temperature- and humidity-controlled environment. What is this stuff, and is there a simple fix that will not affect the aroma, taste, or age-ability?
Michael Scheerer
Hunt Valley, Maryland
A
I applaud you for your patience in aging your bottled wines that long! Would you be surprised to know that in the US most bottles of wine are consumed within 72 hours of purchase? Well, perhaps they just don’t have the love and appreciation for a finely-aged wine that you do. I would also add it’s probably a little different when it’s your own. I always tend to curate my own library a little differently than something I pick up at the grocery store on the way home from work.
What you’re experiencing is the precipitation over time of all sorts of complex tannins and colored compounds. They came from the grape skins and seeds and have ended up in your nice bottles instead of at the bottom of a barrel where they should be. Sure, most red wines will throw some sediment over time. Red wines just have so many “guts” (tannins, anthocyanins, tartrate crystals) that naturally form larger molecules and will settle at the bottom of or against the sides of our containers.
So how to get away from having that thick coating on the inside of the bottle? Take it out before it gets in there. To follow are the top Wiz-approved ways to reduce post-bottling fall out (and the dismay that comes with it):

• Try using a fermentation enzyme during your red fermentations: By using a fermentation enzyme you’ll liberate a lot of colored compounds without having to do as much physical maceration. I find reds made with enzymes fall brighter and cleaner much faster.
• Make sure you’re racking enough: After pressing my skins and separating the liquid wine from the solids, I let the wine settle out for about 48 hours. Then I do my first rack off of the “peanut butter” (my technical term for the heaviest lees at the bottom), taking a small amount of the light fluffy lees with me into the vessel where I’ll do my malolactic fermentation. Then, after malolactic fermentation is done, I make sure to rack at least twice more during a wine’s lifetime before bottling in order to ensure proper settling. If you can see cloudiness in your wine before bottling, those little particles will eventually deposit themselves on your bottles during long-term aging.
• Age for longer in barrel before bottling: Is it possible you’re bottling too early? You want your wine to be brilliantly clear before you bottle it. I know that you aren’t filtering it, but you want to make sure you’re giving your wine enough time for the tiny particles to settle of course but also to allow a lot of the precipitate formation to happen and settle out before you rack and bottle. I like to see 18 months minimum for a barrel-aged red.
• Try protein fining of some kind: I know that you say you don’t fine or filter your wine but if this is a constant problem you’d like to fix I do recommend using casein, albumen, or some similar product. An easy “recipe” is to dissolve 1–3 egg whites (add a pinch of salt) in about 1⁄2 cup of water and gently stir into your barrel. In 2–3 weeks it should be settled enough to rack off. You would do this after any fermentation is complete. I like to do it around 9–10 months of age. By that time the wine has had enough time to settle out, get rid of its primary carbon dioxide gassiness, and has already dropped quite a bit of sediment.
Q
What is your decision-making process when choosing which strain of yeast to use?
Joe Diaz
Windsor, California
A
Ah that is a wonderful and complex question. When a winemaker chooses to inoculate for fermentation (which I generally recommend) there are many factors to take into account when making that choice. To follow is a list in order of what I believe the importance of each factor to be. A complete article (or more) could be written on each of these parameters as each carries its own subtle effects. Many yeast suppliers have charts addressing many or most of these factors to help guide you, or visit winemakermag.com/yeast-strains-chart.
• Suitability for varietal and application: Zinfandel yeasts typically need to be able to ferment higher potential alcohols under adverse nutrient conditions whereas a yeast to ferment a 21 °Brix delicate Riesling could be a completely different animal. To make high-Brix, high-residual sugar dessert wines, you’ll need a strong strain that produces low VA (volatile acidity). Always match your goals with your yeast.
• Alcohol tolerance: This is my second most important criteria. As alcohol levels increase in a fermentation, the yeast cell walls become increasingly permeable and grow unable to perform their basic metabolic functions, eventually dying off. Because of this, it’s critical to take a guess at what your final alcohol level will be and choose the right yeast strain for the job. The actual sugar to alcohol conversion rate can be different from one year to the next and from one variety to the next but my general rule of thumb is to multiply your initial Brix reading by 0.56. For example, a 25 °Brix must will yield around 14% alcohol.
• Temperature range: Like to ferment your whites cold? Then be sure to choose a yeast strain that can operate well at 55 °F (13 °C). Some strains have very specific operational ranges, so be sure to check with your supplier.
• Nutrient needs: Some yeast strains are what I call nutrient hogs. They just need more nitrogen, amino acids, and micronutrients than others. For example, RC 212, which is a strain I like for rosé wine and Pinot Noir, has a high nutrient requirement whereas Prise de Mousse is classified as “normal.” For nutrient hogs, they just won’t perform as well unless fed adequately.
• Flavor/mouthfeel/aroma contribution: For example, in Syrah production, D254 is known for producing more fruit-forward, balanced wines whereas D80, another excellent choice for Syrah, is known for its licorice spice notes. It’s important to give these effects at least a passing glance when making a yeast choice. You might be surprised that I list flavor and taste as less important than all the criteria earlier. It turns out that making sure your yeast can accomplish the job is more critical than worrying about flavor impact. The sensory contribution of one yeast strain vs another is minor and often undetectable in wines.
• Malolactic compatibility: Some yeast strains enable malolactic fermentation (MLF) better than others. For example, Prise de Mousse isn’t the best choice if you know you’ll have difficult conditions for MLF (low temperature, low residual nutrients, high alcohol, high acidity) whereas a strain like RC212 is considered highly compatible with enabling a later ML fermentation. I never let the ML compatibility overrule any of the above criteria; I just treat it as something to be aware of and to give my subsequent ML fermentation (if I’m doing one) as many favorable environmental conditions as I can.
The below yeast characteristics are those that I consider much less important than any of the previous. They remain factors that you should simply be aware of as they are minor and in no way are “deal breakers.”
• Rate of fermentation: This is simply one parameter to keep in mind; adjust your daily Brix testing accordingly and as needed.
• H2S Production: I would shy away from known hydrogen sulfide (H2S) producers if I were making a variety that is a natural “stinker” like Syrah.
• VA production: You may want to go with a low VA producer if you know that you’ll make your yeast perform in challenging conditions like high Brix where they’ll be liable to produce elevated VA levels already.
• Foam production: In white winemaking or when tank space is at a premium, a low-foam producer is preferred. Most of us can deal with higher levels of foaming just fine.
• SO2 sensitivity: All yeast will be sensitive to SO2 to some degree, but some are less so than others. Give this factor more weight if you intend to leave residual sugar in your wine and are relying on sulfur dioxide to help ward off a re-ferment.
• Application format: Live culture on a slant? Dried cells to hydrate? It’s your choice. All give great results.
• Cost: In the grand scheme of things, yeast is cheap. This is one of the reasons I almost always inoculate with a known culture. Call me old-fashioned, but I love reliable and predictable results, especially if I’ve paid over $2,000 for a ton of grapes and over $1,000 for a French oak barrel. Spending $20 on yeast (and much less than that on smaller home wine batches) is a no-brainer. Take these factors into consideration with your next wine and you’ll be on the right track . . . making sure your yeast can accomplish the job is more critical than worrying about
flavor impact.